Linux dual boot efi
Dual boot for Linux Mint 20.X(*) with EFI STUB loader + Windows 10
Linux configured with Full System Encryption (directory /boot included)
PC with UEFI firmware & HDD with GPT partitioning scheme
UEFI Boot Manager ‘systemd-boot’ equipped with Linux Extended Boot Partition (a.k.a. XBOOTLDR)
Author: Naldi Stefano (linux22 at Mint Forum)
First Release: October 2015
Last update: 15 November 2020
(*) Works also with Ubuntu 20.04.X
Hits since 22/10/2016
Other tutorials concerning Linux Mint with Full Disk Encryption, directory /boot included:
Table of contents
GNU LICENSES
Disclaimer and acknowledgments
Useful links
Preface
INSTALLATION FOR PC WITH UEFI AND HDD WITH GPT, EFI STUB LOADER
Step 1 — Check your HDD and build a Linux Extended Boot Partition (a.k.a. XBOOTLDR)
Step 2 — Set up for Ubiquity configuration file ’07crypto_check_mountpoints’
Step 3 — Set up of HDD and partitions
Step 4 — Set up of the Linux FDE installation
Step 5 — Configuring the EFI STUB loader for the Linux FDE installation
Step 6 — Installing and configuring the ‘systemd-boot’ boot manager
Appendix A — Emergency tools — How to access your encrypted partition with your Live Linux
Appendix B — Emergency tools — How to reinstall EFI STUB loader after …
Appendix C — Enabling Secure Boot for both Linux FDE and Windows 10
Method α — Using the original Microsoft UEFI Secure Boot certificates of your PC UEFI platform
Method β — Using the original Microsoft UEFI Secure Boot certificates, downloaded from Microsoft repositories
Secure Boot check
Appendix D — Dual boot Linux Mint 20.X FDE + Windows 10 without XBOOTLDR partition
GNU Free Documentation License
Version 1.3, 3 November 2008
Dual boot for Linux Mint 20.X with EFI STUB loader + Windows 10
Linux Full System Encryption (directory /boot included)
PC with UEFI & HDD with GPT and ‘systemd-boot’ UEFI Boot Manager
Copyright (C) 2015 2016 2017 2018 2019 2020 2021 Naldi Stefano.
Permission is granted to copy, distribute and/or modify this document under the terms of the GNU Free Documentation License, Version 1.3 or any later version published by the Free Software Foundation; with no Invariant Sections, no Front-Cover Texts, and no Back-Cover Texts.
You should have received a copy of the «GNU Free Documentation License» along with this document.
If not, see < https://www.gnu.org/licenses/fdl.html >.
GNU GENERAL PUBLIC LICENSE
Version 3, 29 June 2007
Dual boot for Linux Mint 20.X with EFI STUB loader + Windows 10
Linux Full System Encryption (directory /boot included)
PC with UEFI & HDD with GPT and ‘systemd-boot’ UEFI Boot Manager
Copyright (C) 2015 2016 2017 2018 2019 2020 2021 Naldi Stefano.
This program is free software: you can redistribute it and/or modify it under the terms of the GNU General Public License as published by the Free Software Foundation, either version 3 of the License, or (at your option) any later version.
This program is distributed in the hope that it will be useful, but WITHOUT ANY WARRANTY; without even the implied warranty of MERCHANTABILITY or FITNESS FOR A PARTICULAR PURPOSE. See the GNU General Public License for more details.
You should have received a copy of the «GNU General Public License» along with this program.
If not, see < https://www.gnu.org/licenses/gpl.html >.
Disclaimer and acknowledgments
I wrote this guide/tutorial with the hope that it will be useful for everyone who need a dual boot Linux FDE (Full Disk Encryption) + Windows 10 installation. The solution here reported is EXPERIMENTAL and need a good experience with Linux and its installation. At the moment I have successfully experimented this solution with Linux Mint 20.X Cinnamon and Mate and Ubuntu 20.04, all 64 bit version.
This guide/tutorial comes with ABSOLUTELY NO WARRANTY.
Prior of all I must thank Matthew Bentley (https://bentley.link/secureboot), because his publications show very well the whole process of building and configuring a reliable EFI STUB loader for Linux systems. You can see that his solution was published on 12 May 2016, more than 4 year ago.
Another thanks go to Michal Krenek (Mikos) for its ‘cryptboot’ software package (https://github.com/xmikos/cryptboot). In a few pages he has condensed all we need to BUILD and RUN a working UEFI Secure Boot Linux installation.
Altought these two software solutions seem both developed for ArchLinux distros we can find within them the rights commands and advices for almost every Linux distribution.
Useful links
• https://bentley.link/secureboot
• https://wiki.archlinux.org/index.php/EFISTUB
• https://wiki.debian.org/EFIStub
• https://kernel-team.pages.debian.net/kernel-handbook/ch-update-hooks.html
• http://www.rodsbooks.com/efi-bootloaders/efistub.html
• https://wiki.archlinux.org/index.php/Dm-crypt/Encrypting_an_entire_system
• https://wiki.archlinux.org/index.php/Dm-crypt/Device_encryption#Keyfiles
• https://wiki.archlinux.org/index.php/Dm-crypt/System_configuration
• https://wiki.archlinux.org/index.php/Systemd-boot
• https://bbs.archlinux.org/viewtopic.php?id=158003
• http://blog.uncooperative.org/blog/2014/02/06/the-efi-system-partition/
• https://systemd.io/BOOT_LOADER_SPECIFICATION/
• https://systemd.io/BOOT_LOADER_INTERFACE/
• https://www.freedesktop.org/wiki/Software/systemd/systemd-boot/
• https://www.freedesktop.org/wiki/Specifications/BootLoaderSpec/
• https://wiki.gentoo.org/wiki/User:Sakaki/Sakaki’s_EFI_Install_Guide/Configuring_Secure_Boot
The 4 major difficulties dealing with Dual Boot Linux Full Disk Encryption + Windows 10 are:
— the correct configuration of the boot loader, normally GRUB, for stand alone Linux Full Disk Encryption, especially when also directory ‘/boot’ is encrypted
— the correct configuration of the GRUB Boot Loader for dual booting with Linux Full Disk Encryption + Windows 10, especially when also directory ‘/boot’ is encrypted
— the correct configuration of the GRUB Boot Loader when used on PCs with UEFI platform and Secure Boot enabled
— the current GRUB package, used in most Linux Distro’s, DO NOT support LUKS2 on Linux Full Disk Encryption when also directory ‘/boot’ is encrypted. Recently the GRUB package has been updated for LUKS2 support and some Distro’s are working for updating their latest builds but the update is still problematic and the LUKS2 support is guaranteed only if the —pbkdf option (Password-Based Key Derivation Function algorithm) is set to pbkdf2.
My previous solutions were developed using GRUB Boot Loader but every time I got a Linux Kernel update, a GRUB update, an initrd update or the most weird update I was forced to reinvent the wheel and search for a new correct configuration of GRUB, if possible.
Finally I have found 2 new tools, very spartan, very simple and very light that solved almost every major problem that I encountered dealing with GRUB and Dual Boot with Linux Full Disk Encryption + Windows 10.
The 2 tools are EFISTUB Boot Loader and ‘systemd-boot’ UEFI Boot Manager.
The first tool is EFISTUB Boot Loader, a very simple tool that turns a Linux kernel image into an EFI executable file which can be directly launched from the PC UEFI firmware. This tool, combined with the Linux command ‘objcopy’, can build a single composite EFI file containing the Linux kernel, a text file containing the Linux kernel’s command-line parameters and the initrd.img file.
This configuration can manage and boot up also LUKS2 encrypted partition, without any limitation.
This single efi file can be re-built automatically every time we get a Linux Kernel update and/or a initrd update.
The major disadvantage of EFISTUB+objcopy efi files is its size (almost 100 MB).
In dual boot systems with Linux Full Disk Encryption + Windows 10 this problem can be overcomed using a Linux Extended Boot Partition (a.k.a. XBOOTLDR) as a container for the composite EFI files produced by EFISTUB+objcopy tools.
The second tool is the ‘systemd-boot’ UEFI Boot Manager. Also this tool is a spartan, simple and extremely light executable efi file. Its configuration is done with simple text configuration files.
The major disadvantage of ‘systemd-boot’ UEFI Boot Manager is the lack of adequate documentation.
Lastly we can also sign these efi executable files with our own Custom Secure Boot keys and run them on PCs UEFI platforms with Secure Boot enabled.
I have used these tools for a while and I have never got the annoying problems encountered using GRUB.
If instead is possible installing Windows 10 with an ESP partition size ≥ 1GB you can choose the very simpler solution depicted in Appendix D (tutorial not yet ready).
The topic for this tutorial at the Mint Forum is:
You can download the latest version of this tutorial from my cloud storage. The zip file contains the tutorial in pdf format and a text file with all the Terminal commands listed inside it (for more reliable ‘Copy and Paste’ operations). The link to the zip file is:
Dual boot ArchLinux и Windows 8 на UEFI без GRUB c помощью rEFInd
Инструкция для новичков, о том, как сделать красивый dualboot windows и archlinux (и других ОС) через efi без grub и лишних заморочек.
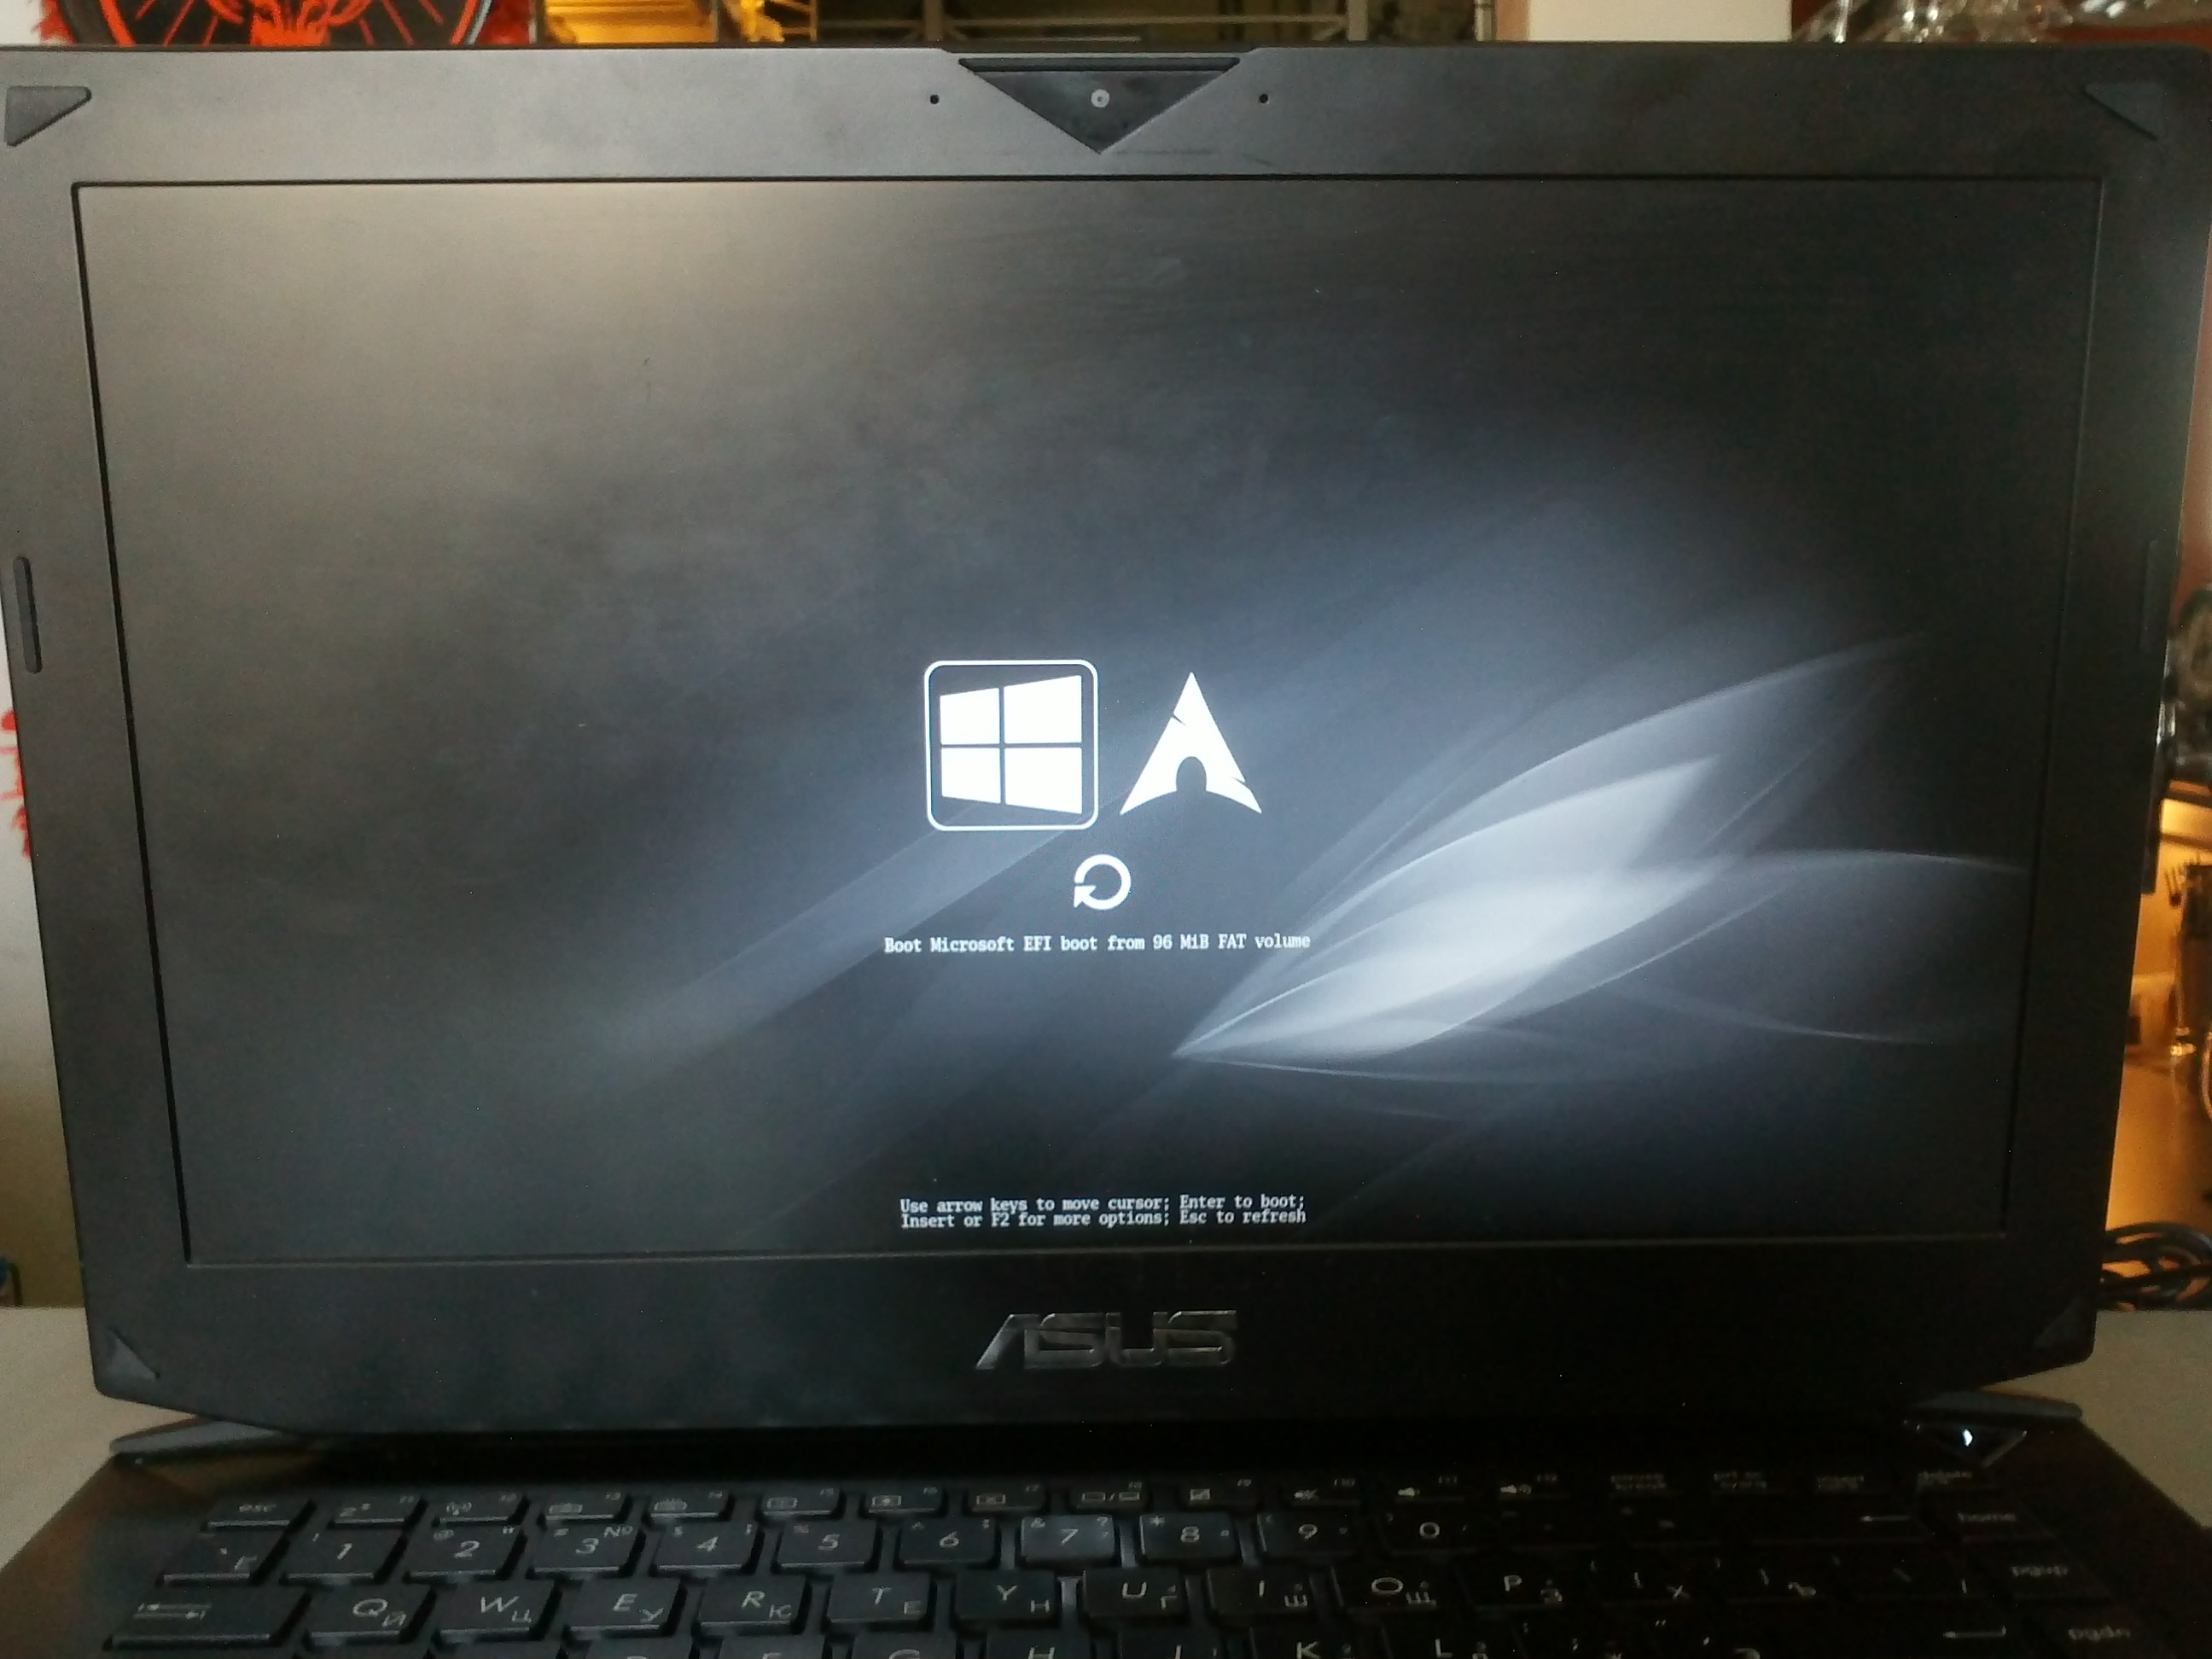
Фото для привлечения внимания:
Можете посмотерть в google как это ещё может выглядеть.
Сразу оговорюсь.
Предполагается, что вы уже поставили windows и archlinux, понимаете как размечать диски и что куда монтировать и осталось вам только разобраться с загрузчиком. Если нет, то рекомендую посмотреть для начала вот это видео.
Я пробовал различные варианты, как описано тут, тут и тут и прочие выкрутасы с efibootmgr. Пытался добавлять опции прямо в «BIOSе» — ничего хорошего у меня не получилось, то рут раздел не находит то ещё что-то. Да и сам подход к переключению систем (жать Esc при включении ПК для выбора системы) меня не очень радовал.
Провозившись весь выходной, нашёл для себя простое и элегантное решение — пакет refind-efi (ArchWiki).
Если коротко, — достаточно установить этот пакет (pacman -S refind-efi) и выполнить refind-install, — всё.
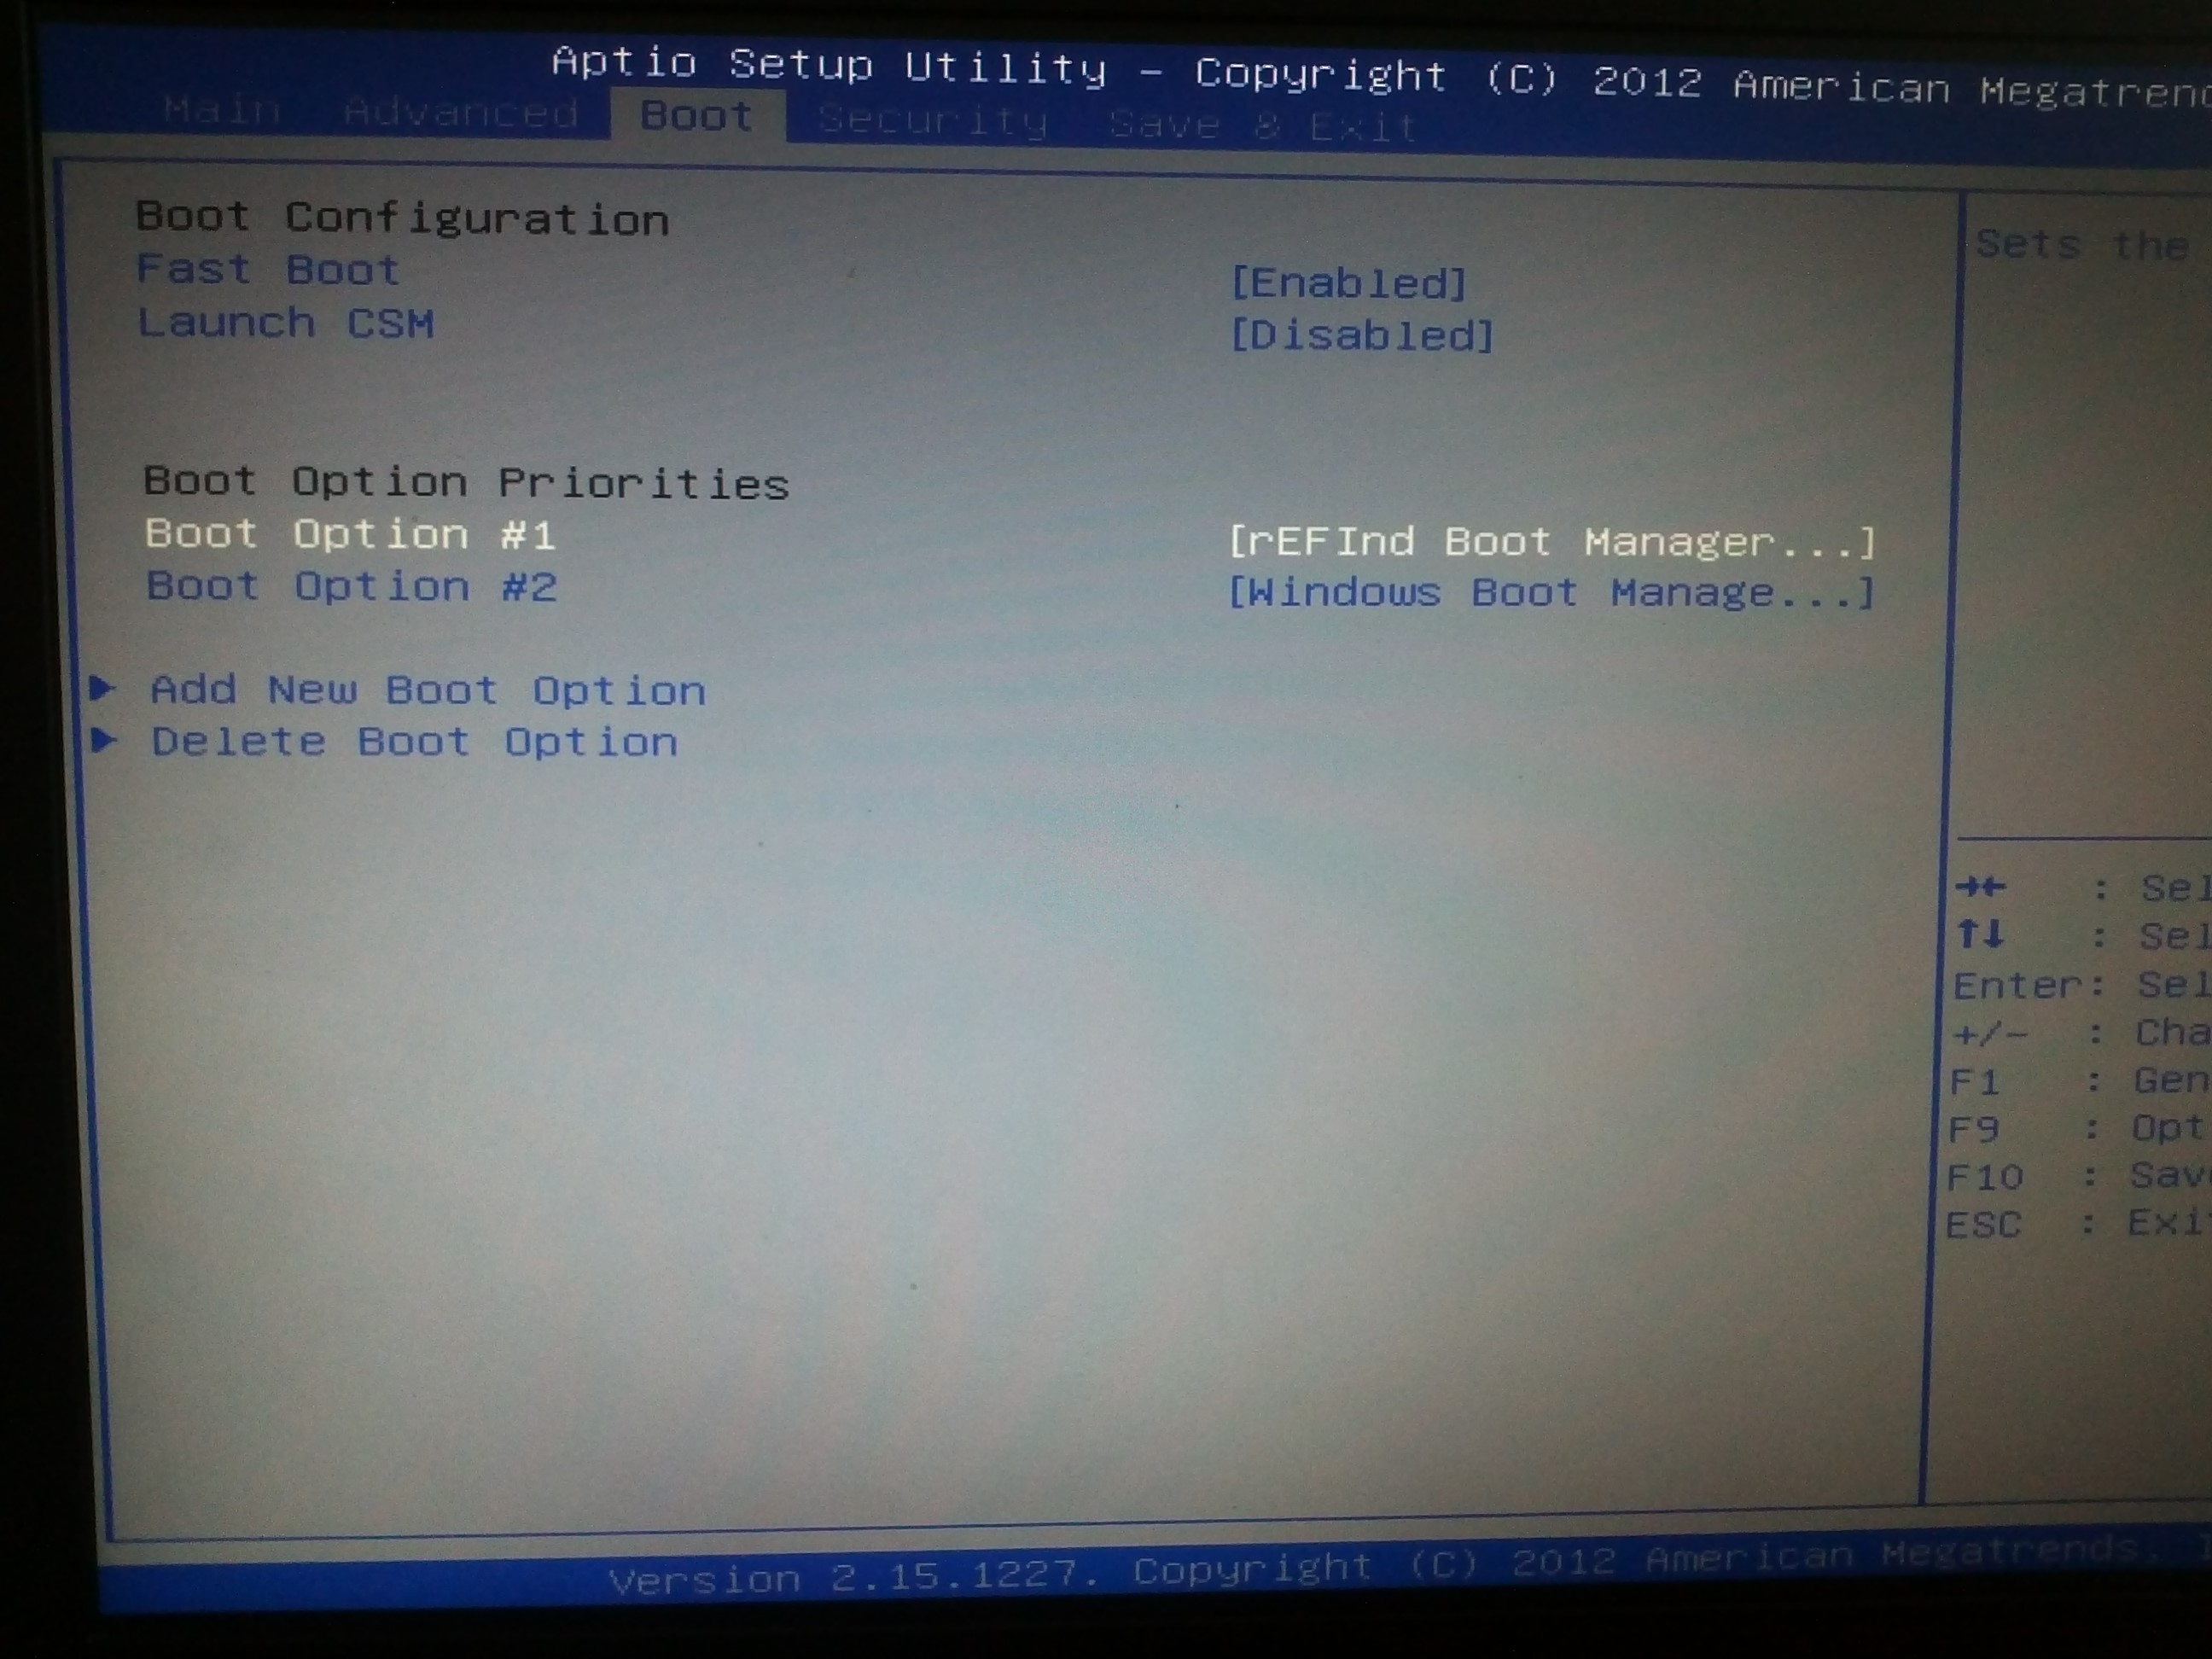
В /boot/efi/EFI/ будет создан каталог refind и в опции загрузки добавлен новый пунк «rEFInd boot manager ».
Предупреждение
Добавлю к этой статье предупреждение: запись в NVRAM из ОС — достаточно опасная операция, которая может приводить к «кирпичу» на некоторых моделях ноутбуков с BIOSами на платформе Phoenix SCT. У автора BIOS на платформе AMI Aptio, с ним таких проблем нет.
Именно поэтому я настоятельно не рекомендую использовать на ноутбуках как саму efibootmgr, так и все, что ее вызывает, и устанавливать любые загрузчики вручную, либо заменяя имеющийся загрузчик по умолчанию (fs0:/EFI/BOOT/bootx64.efi), либо прописывая новый загрузчик из UEFI Shell командой bсfg boot add 0 fs0:/path/to/bootloader.efi «My Fancy Bootloader» — это намного безопаснее.
Всё что вы делаете, вы делаете на свой страх и риск!
Теперь подробнее об установке и конфигурировании
NAME MAJ:MIN RM SIZE RO TYPE MOUNTPOINT sda 8:0 0 119.2G 0 disk ├─sda1 8:1 0 300M 0 part ├─sda2 8:2 0 100M 0 part /boot/efi ├─sda3 8:3 0 128M 0 part ├─sda4 8:4 0 59.1G 0 part ├─sda5 8:5 0 9G 0 part / └─sda6 8:6 0 50G 0 part /home Device Start End Size Type /dev/sda1 2048 616447 300M Windows recovery environment /dev/sda2 616448 821247 100M EFI System /dev/sda3 821248 1083391 128M Microsoft reserved /dev/sda4 1083392 125036543 59.1G Microsoft basic data /dev/sda5 125036544 143910911 9G Linux filesystem /dev/sda6 143910912 248768511 50G Linux filesystem Раздел с типом «EFI System» созданный инсталятором windows, монтируем в /boot/efi/ ( /mnt/boot/efi/ ведь мы загрузились с liveiso верно?)
mkdir -p /mnt/boot/efi mount /dev/sdaX /mnt/boot/efi где X это номер вашего EFI раздела ( например mount /dev/sda2 /mnt/boot/efi ).
Далее перейдя в уже установленный arch ( arch-chroot /mnt/ ) устанавливаем сам refind:
Если вдруг такой пакет не найден, поищите в yaourt:
yaourt refind 1 extra/refind-efi 0.7.9-1 [installed] Rod Smith's fork of rEFIt UEFI Boot Manager - built with Tianocore UDK libs После перезагрузки можно поставить в «биосе» в настройках приоритета загрузки «rEFInd boot manager » на первое место.
И не забудьте отключить «Secure Boot».
В каталоге /boot/efi/EFI создана дирректория refind. В ней есть refind.conf в котором можно установить время отображения списка ОС и настроить внешний вид.
Refind сам находит установленные ОС и определяет параметры их загрузки. Так же мне очень понравилось что если вставлена загрузочная флешка или диск они тоже появляются в списке.
Мне понравилась тема Next-Theme (вы можете подобрать что-то на свой вкус), положил её в /boot/efi/EFI/refind/next-theme и прописал в конфиге:
icons_dir next-theme/icons banner next-theme/background_1200.pngКонфиг хорошо документирован и вопросов вызывать не должен.
Буду благодарен за замечания и дополнения.

