- install eclipse via terminal
- 6 Answers 6
- command is :
- Установка Eclipse в Ubuntu
- Установка Eclipse на Ubuntu
- 1. Установка из официального сайта
- 2. Установка Eclipse с помощью snap
- Выводы
- How to Install Eclipse on Ubuntu 20.04 from tar.gz or snap
- Prerequisites
- Install Default Java Runtime Environment (JRE)
- Methods to Install Eclipse
- Method 1. Install Eclipse from snap
- Step 1 :- Check snap available
- Step 2 :- Download & Install Eclipse using snap
- Step 3 :- Run Eclipse
- Uninstall Snap Packages
- Method 2. Install Eclipse using Official tar Packages
- Step 1.A) Download tar package
- Step 2.B Extract & Install eclipse package
- Step 3.C) Run Eclipse
- Wrapping Up
- How to open tar.gz files in eclipse
- 2 Answers 2
install eclipse via terminal
Instead it should be — eclipse-jee-luna-SR2-linux-gtk-x86_64.tar.gz What’s wrong? I renamed the file to correct name and tried untarring it but I get an error as shown below:
tar -xvzf eclipse-jee-luna-SR2-linux-gtk-x86_64.tar.gz gzip: stdin: not in gzip format tar: Child returned status 1 tar: Error is not recoverable: exiting now If you click that link, you’ll see that it’s a webpage (which happens to redirect to a download), not a tar file.
6 Answers 6
Using wget for eclipse Java
command is :
You can change the release of eclipse in the URI. See this link for more information. I hope that’s useful for you.
Take a look at my response below — there is a screenshot and instructions on how to browse all releases to get directly links.
Any URL which includes download.php will have this problem with wget , even the so called «Direct Link».
With more recent download pages however, there is a way to find the actual URLs, and that’s to look inside the xml file that download.php uses for mirror selection.
For example, if we go to the Eclipse IDE 2020-03 page, most of the URLs are download.php links, but in the «Other options for this file» side bar, we can see an xml link.
If we navigate there with our web browser and then look at the page source, we can see the actual file URL used by every mirror. Depending on the Web Browser used, the page may be blank, in which case we need to look at the Page Source to see the raw xml and thus the URLs.
For me, in the UK, the UK mirror service site would be my best option:
These (actually) direct URLs do work with wget .
Установка Eclipse в Ubuntu
Eclipse — это очень популярная среда разработки с открытым исходным кодом, которая поддерживает огромное количество разных языков программирования. Первая версия среды вышла в 2004 году и изначально она поддерживала только Java. На данный момент же поддерживаются такие языки, как C++, Ada, PHP, Cobol, Fortran, X10, JavaScript, Perl, Python, Ruby и многие другие.
Среда разработки Eclipse может использоваться как в Linux так и в Windows. Не так давно состоялся релиз новой версии среды — Eclipse. В этой статье мы рассмотрим как выполняется установка Eclipse Ubuntu 20.04, и нас будет интересовать именно последняя версия.
Установка Eclipse на Ubuntu
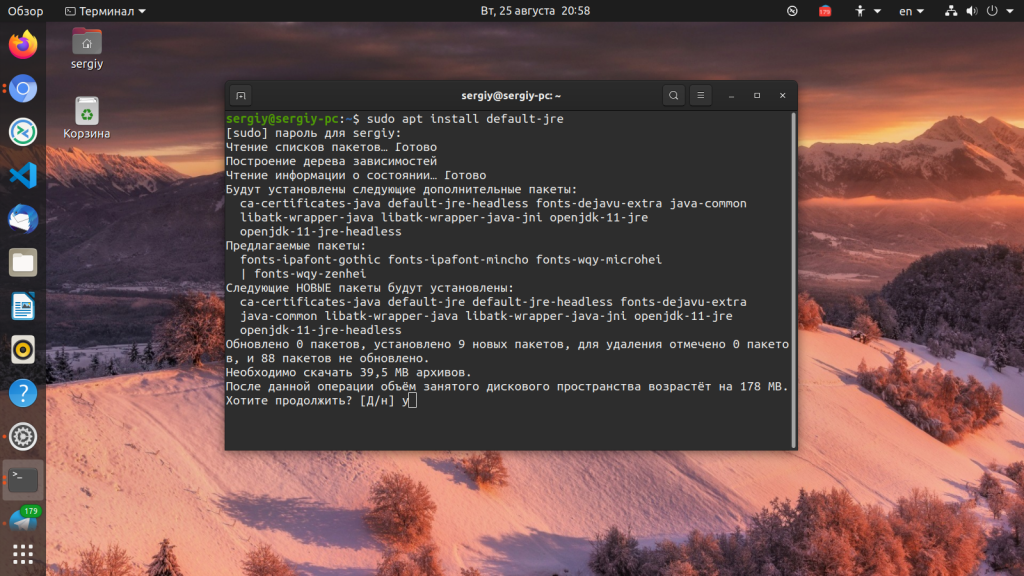
Для работы Eclipse в вашей системе должна быть установлена Java машина. Вы можете ее установить с помощью такой команды:
sudo apt install default-jre
1. Установка из официального сайта
Чтобы получить последнюю версию Eclipse вам необходимо скачать установщик программы из официального сайта.
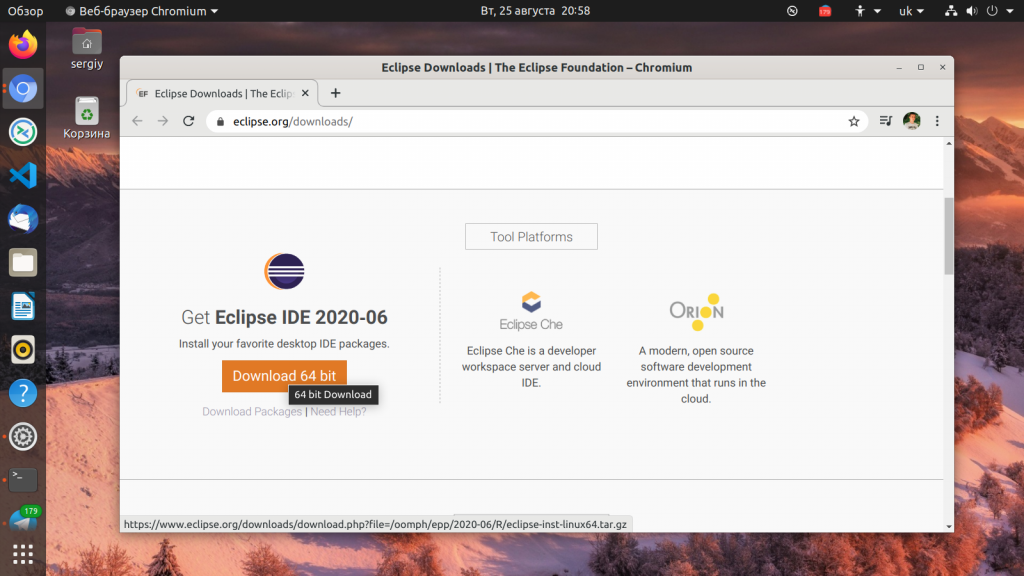
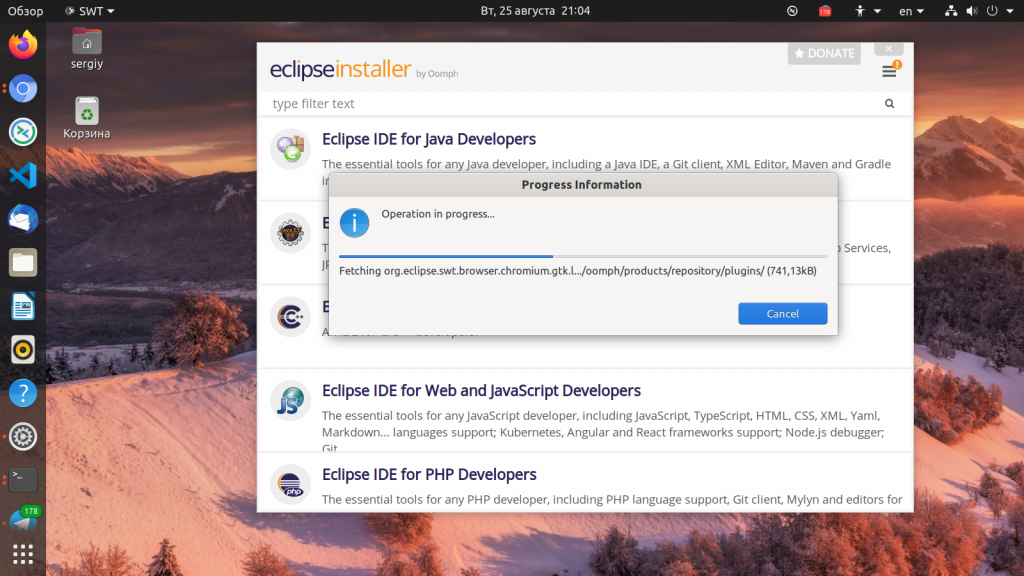
Тут вы можете загрузить не только сам установщик, но и пакеты для поддержки разных языков программирования. Для загрузки установщика нажмите несколько раз кнопку Download. После того, как установщик будет загружен, перейдите в папку с файлом и распакуйте его, например, для 64 битной версии команда будет выглядеть вот так:
tar xf eclipse-inst-linux64.tar.gz
Перейдите в папку установщика:
Запустите установщик без прав суперпользователя. Первым делом его надо обновить до самой последней версии:
Обратите внимание на кнопку бутерброда в верхнем правом углу и на желтый треугольник на ней. Это значит, что для программы доступно обновление. Для того чтобы установить обновление кликните по этой кнопке, а затем по кнопке Update:
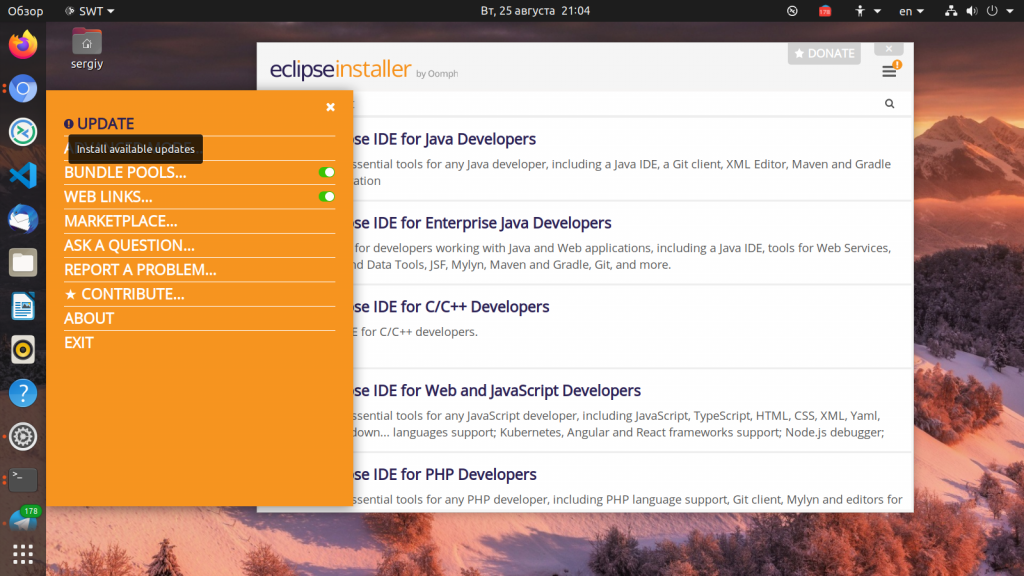
Дождитесь завершения обновления и закройте установщик:
Дальше установка. Вы можете устанавливать ее с правами суперпользователя куда-нибудь в корневой каталог или без них, в домашнюю папку. Если хотите установить среду в домашнюю папку выполните:
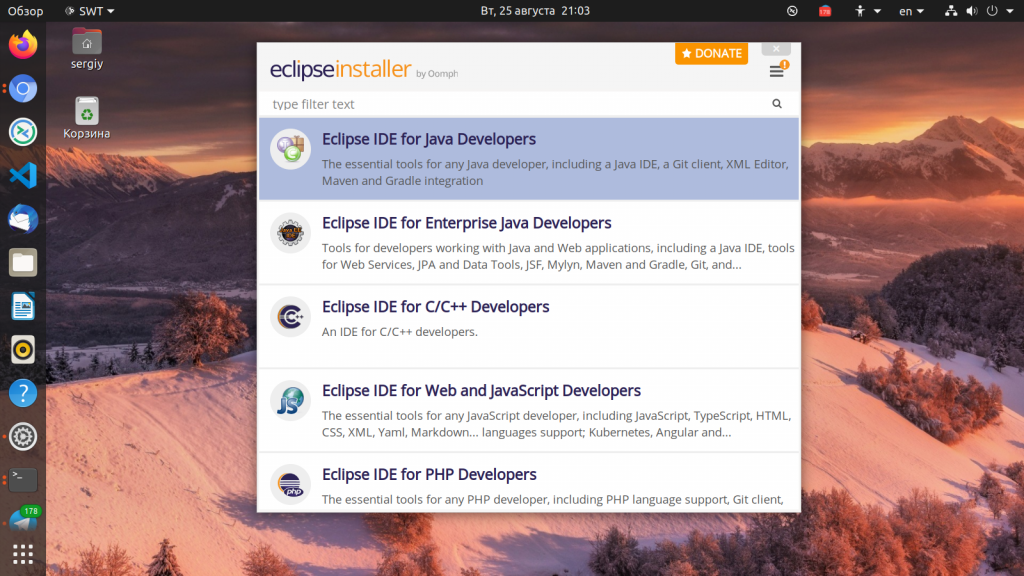
Затем выберите версию IDE для вашего языка:
И выберите путь в вашей домашней папке для установки:
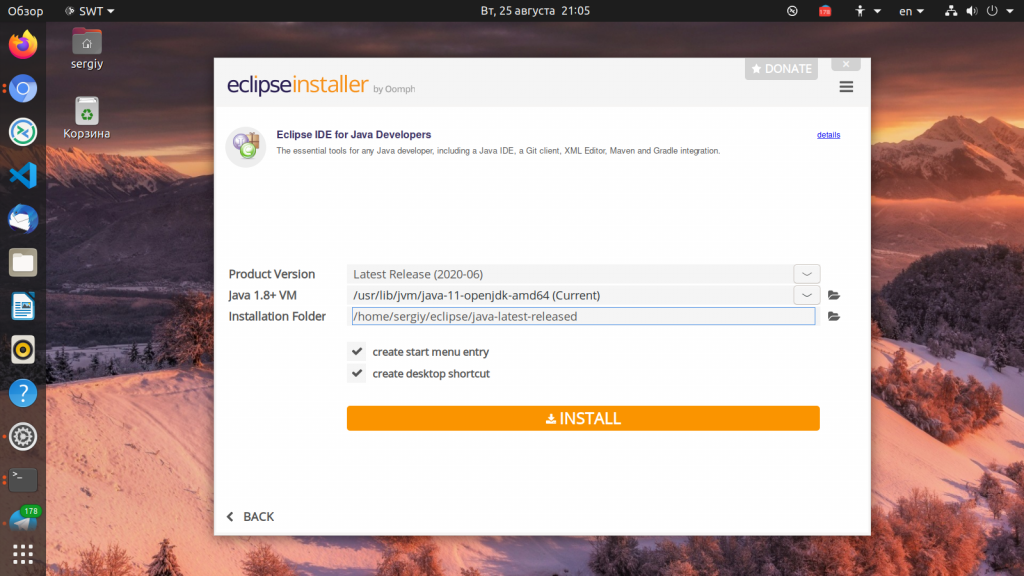
Также можно использовать sudo, тогда программа будет установлена в папку /opt:
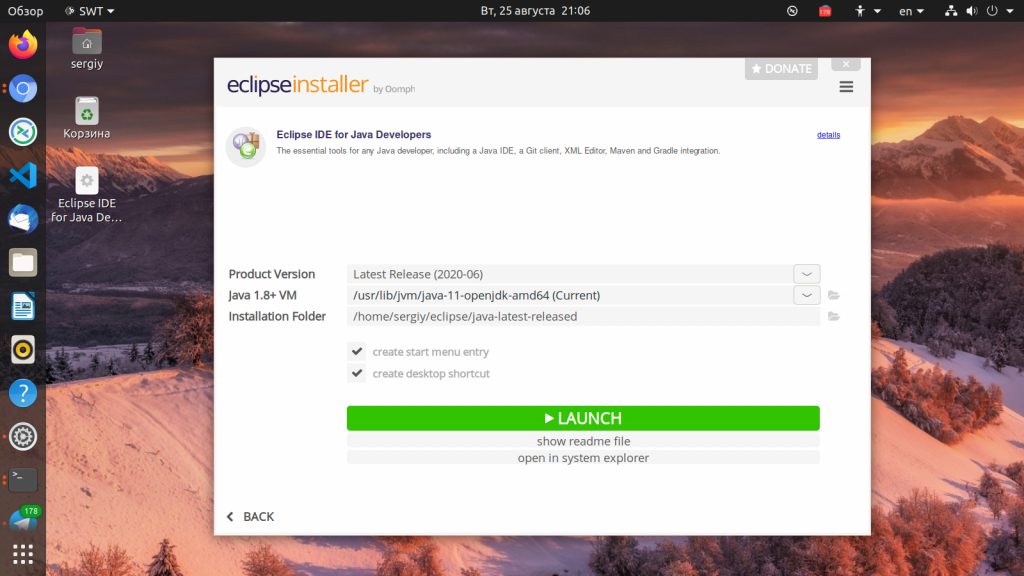
Во время установки надо будет несколько раз принять лицензионное соглашение. После завершения установки вы можете запустить программу:
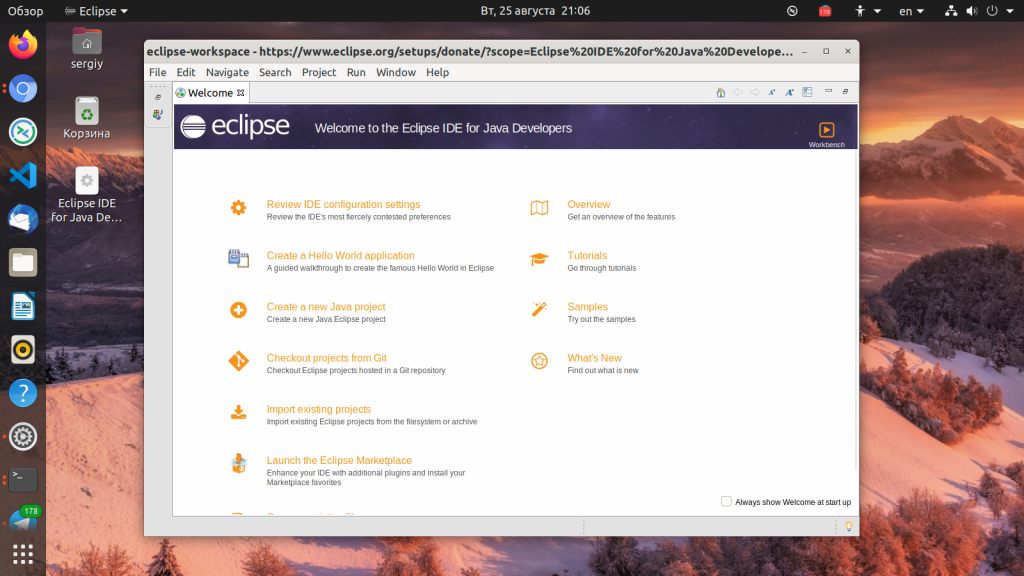
Главное окно программы выглядит вот так:
2. Установка Eclipse с помощью snap
Если вам не нужна версия из официального сайта, то вы можете установить Eclipse в Ubuntu 20.04 с помощью snap пакета. Это намного проще чем в предыдущем варианте. Достаточно выполнить:
sudo snap install —classic eclipse
Пакетный менеджер загрузит около 300 мегабайт данных и дальше вы сможете использовать Eclipse ничего не настраивая. Для удаления Eclipse, установленной таким образом надо выполнить:
Выводы
Вот и все, теперь вы знаете как установить Eclipse Ubuntu 20.04. Если у вас остались вопросы, спрашивайте в комментариях!
Обнаружили ошибку в тексте? Сообщите мне об этом. Выделите текст с ошибкой и нажмите Ctrl+Enter.
How to Install Eclipse on Ubuntu 20.04 from tar.gz or snap
Eclipse is an Integrated Development Environment (IDE). It is widely used to develop Java Based Applications. If you think what use for me, I’m not Java Developer? Yes, your right Eclipse is not only limited to Java. It supports several programming languages using a plugin that you can download from Market Plus.
In this guided article, we will see how to install eclipse on Ubuntu 20.04 and Other major Linux Distributions from a (tar.gz)source file and snap.
Prerequisites
Not much we will ask from you; some of the basic utility like tar is already available in most of Linux Distributions just make sure that you have sudo privilege to install JRE and eclipse.
Install Default Java Runtime Environment (JRE)
As you know, Eclipse is a Java-based application, and it requires a JRE to run. To install default-jre, pass the below command:
$ sudo apt install default-jreOnce it’s get completed, you can follow the below instructions.
Methods to Install Eclipse
In this article, we have discussed two ways to Install Eclipse on Ubuntu and Other Linux Distributions.
For latest release choose Method 2.
Method 1. Install Eclipse from snap
This method should only proceed if you are new to Linux (not comfortable with command) and don’t want to indulge yourself with a number of commands.
Step 1 :- Check snap available
In Ubuntu, snap is preinstalled. If you are not sure whether it is installed, just pass the version command:
$ snap --version Output snap 2.50.1 snapd 2.50.1 series 16 ubuntu 20.04 kernel 5.8.0-53-genericIt will print the snap version with snapd, series, ubuntu, and kernel version. In case your system doesn’t print the following line output.
Step 2 :- Download & Install Eclipse using snap
To install eclipse snap packages pass the below command and wait for a while:
$ sudo snap install --classic eclipse Output eclipse 2019-12 from Snapcrafters installedStep 3 :- Run Eclipse
From the above output, you’re sure that eclipse is installed on your Ubuntu system. Now we will run an eclipse press Super key or Click on Activities and type “eclipse”.

For the first start, it will ask you “Select a directory as workspace”, If you want to change the working directory, click on Browse, and once you are done, click on Launch.
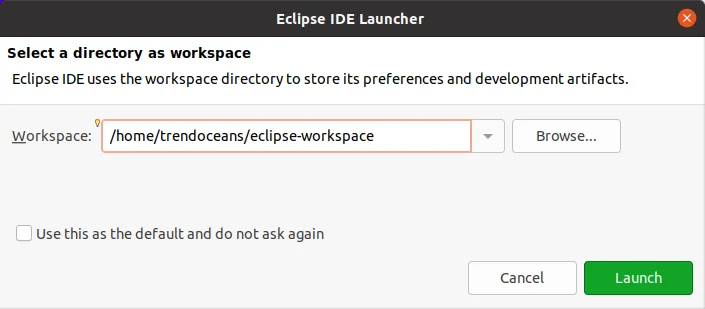

You are done with a snappy eclipse package.
Uninstall Snap Packages
To uninstall snap eclipse packages it’s a piece of cake type the below command into your terminal window:
$ sudo snap remove eclipse Output [sudo] password for trendoceans: eclipse removedMethod 2. Install Eclipse using Official tar Packages
This process is a bit complicated from Method 1, and trusts me. This will be a different experience if you have never installed any application from a source file.
We have a separate article for Building Programs from Source on any Linux Distribution in a simple way. Make sure to read once you are done with Installation.
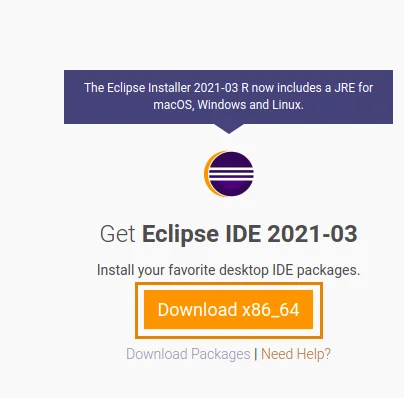
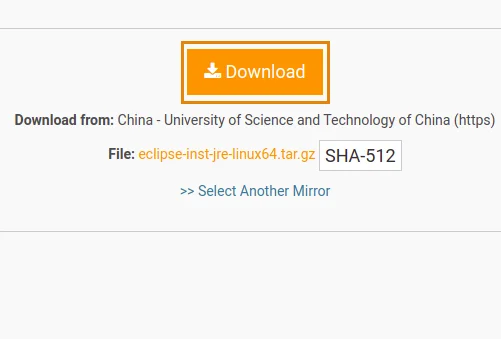
Step 1.A) Download tar package
The first step is to download the tar package. To download the package, click on the below button and wait for a page to load.
A scroll down and click on Download x86_64. After that page redirects you to choose mirror again, click on Download. If you are facing any issues while downloading, feel free to click on Select Another Mirror.
Step 2.B Extract & Install eclipse package
Once you have downloaded the file, open a terminal and pass the following command to the terminal and make sure to replace the location where you have stored the file.
$ sudo tar -xvzf ~/Downloads/eclipse-inst-jre-linux64.tar.gz -C /opt/Now change your current directory to /opt using cd command.
$ cd /opt/eclipse-installer/A last step is to execute eclipse-inst by typing:
$ ./eclipse-instIf any odd reason, you are not able to execute this file. Please change the file permission by typing:
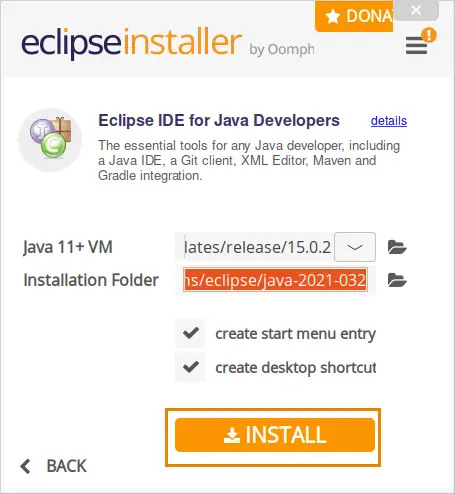
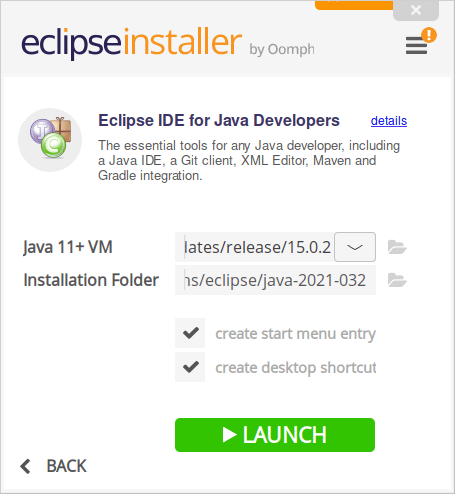
$ sudo chmod +x eclipse-instThat’s all, You have executed the Installer file, and it will show a series of screens to configure Eclipse follow the screen guide.

Step 3.C) Run Eclipse
From the above output, you’re sure that eclipse is installed on your Ubuntu system. Now we will run an eclipse press Super key or Click on Activities and type “eclipse”.
Wrapping Up
In this guided article, you have learned how to install Eclipse on your Ubuntu 20.04 machine or any other Linux Distributions. To find more information about how to get started with Eclipse, visit the Eclipse documentation page.
If you are stuck somewhere, please feel free to comment down and If you like the article, or somewhere I missed something, please let me know to make this article more amazing.
A man with a tech effusive who has explored some of the amazing technology stuff and is exploring more. While moving towards, I had a chance to work on Android development, Linux, AWS, and DevOps with several open-source tools.
How to open tar.gz files in eclipse
If I downloaded a tar.gz file on my computer and extracted it with code in it, how do I run it in eclipse in Linux (for C). The downloaded files contains .c files and .o files.
2 Answers 2
I can’t help with Eclipse, but I can help you compile and run the code. Ok, to extract:
tar -xvzf name_of_your_archive_file.tar.gz In the above, ‘x’ means extract, while ‘v’ means verbose, ‘z’ means .tar.gz compression, and ‘f’ stands for file (because you specify the name of the .tar.gz file immediately after the invocation).
Now that you have extracted the archive, you can navigate into it with:
cd name_of_your_archive_file After which you can list the directory contents:
The ‘.o’ files you mentioned aren’t really helpful, unless they were compiled for your architecture (‘.o’ files are build products that typically need to be generated for each different type of OS and CPU type).
Any well-made project will contain a file name ‘README’ that explains how to build the project. You can use the ‘cat’ command (which stands for ‘concatenate’. it will eventually make sense) to display the content of the ‘README’ file like so:
If the README is very long, you can make it show you only a portion by using the less command:
Now, if there is no README or it doesn’t tell you how to build the project, but there is a file named ‘Makefile’, then you would ordinarily build the project by invoking the following command: