- How to securely erase disk and partition in Linux
- Steps to completely wipe disk and partition in Linux:
- How do I Completely Wipe My Hard Drive in Ubuntu?
- The Wipe Command
- Wiping the Hard Drive Using SRM
- How to Wipe the Hard Drive With the dd Command
- The shred Command to Overwrite Files in Linux
- Overwriting a Hard Drive With the Scrub Command
- Conclusion
- About the author
- David Adams
- 4 Linux tools to erase your data
- Responsible caretaker
- GNU Shred
- ShredOS
- The dd command
- Nvme-cli
- Information management
- Use this Linux command-line tool to learn more about your NVMe drives
- 7 steps to securing your Linux server
- Encrypt your files with this open source software
How to securely erase disk and partition in Linux
When you perform data deletion actions such as removing files and folders, formatting partitions, or partitioning disks, the actual data is not deleted. Rather, only the pointers to the data are removed. For instance, deleting a partition simply removes the partition’s entry in the partition table, leaving the actual partition data intact. This can pose a problem when you need to securely erase data, like when disposing of a disk containing sensitive files or when selling your hard drive.

To securely erase all files and data on a disk, you can overwrite the existing data with empty or random data. In Linux, you can achieve this using the dd command by providing either zeros or random characters as input.
Steps to completely wipe disk and partition in Linux:
$ lsblk NAME MAJ:MIN RM SIZE RO TYPE MOUNTPOINT loop0 7:0 0 55.4M 1 loop /snap/core18/19 loop1 7:1 0 55.4M 1 loop /snap/core18/19 loop2 7:2 0 51M 1 loop /snap/snap-stor loop3 7:3 0 219M 1 loop /snap/gnome-3-3 loop4 7:4 0 217.9M 1 loop /snap/gnome-3-3 loop5 7:5 0 31.1M 1 loop /snap/snapd/104 loop6 7:6 0 62.1M 1 loop /snap/gtk-commo loop7 7:7 0 64.8M 1 loop /snap/gtk-commo loop8 7:8 0 51M 1 loop /snap/snap-stor loop9 7:9 0 31.1M 1 loop /snap/snapd/107 sda 8:0 0 20G 0 disk ├─sda1 8:1 0 1M 0 part ├─sda2 8:2 0 513M 0 part /boot/efi └─sda3 8:3 0 19.5G 0 part / sdb 8:16 0 20G 0 disk └─sdb1 8:17 0 20G 0 part sr0 11:0 1 1024M 0 rom
$ sudo umount /dev/sdb1 [sudo] password for user: umount: /dev/sdb1: not mounted.
Launch live cd such as from Ubuntu installer if the disk can’t be unmounted such as the root filesystem.
$ sudo dd if=/dev/zero of=/dev/sdb status=progress 21471859200 bytes (21 GB, 20 GiB) copied, 269 s, 79.8 MB/s dd: writing to '/dev/sdb': No space left on device 41943041+0 records in 41943040+0 records out 21474836480 bytes (21 GB, 20 GiB) copied, 269.451 s, 79.7 MB/s
This will take a while as dd will need to write every single bit of data within the disk. Time taken depends on the disk size and disk speed.
It is recomended to use /dev/random or /dev/urandom and to repeat this step multiple times (multi-pass) for SSD devices as some built-in function in SSD‘s controller might still leave some data intact with the common disk-zeroing method.
$ lsblk NAME MAJ:MIN RM SIZE RO TYPE MOUNTPOINT loop0 7:0 0 55.4M 1 loop /snap/core18/19 loop1 7:1 0 55.4M 1 loop /snap/core18/19 loop2 7:2 0 51M 1 loop /snap/snap-stor loop3 7:3 0 219M 1 loop /snap/gnome-3-3 loop4 7:4 0 217.9M 1 loop /snap/gnome-3-3 loop5 7:5 0 31.1M 1 loop /snap/snapd/104 loop6 7:6 0 62.1M 1 loop /snap/gtk-commo loop7 7:7 0 64.8M 1 loop /snap/gtk-commo loop8 7:8 0 51M 1 loop /snap/snap-stor loop9 7:9 0 31.1M 1 loop /snap/snapd/107 sda 8:0 0 20G 0 disk ├─sda1 8:1 0 1M 0 part ├─sda2 8:2 0 513M 0 part /boot/efi └─sda3 8:3 0 19.5G 0 part / sdb 8:16 0 20G 0 disk sr0 11:0 1 1024M 0 rom
A timeout needs to be set to the command since the disk is now empty, or else the command will need to scan the whole disk before it quits.
How do I Completely Wipe My Hard Drive in Ubuntu?
![]()
“This tutorial explains how to fully wipe the hard drive in Ubuntu and Debian-based Linux distributions.
Usually, Linux users use the rm command to remove files and directories.
When we remove a file using the command rm, what we are really doing is labeling the removed file or directory as “rewritable space” on the disk.
Therefore the removed data can be restored if it wasn’t overwritten by another piece of data, as explained in previous articles on computer forensics and data recovery.
In this tutorial, 5 tools to carry out a full removal of data are explained: wipe, srm, dd, shred and scrub. All of them can be executed from live distributions to wipe a hard drive.
All instructions below include screenshots, making it easy for every Linux user to understand them.”
The Wipe Command
The wipe command allows us to fully erase data from our disk; it rewrites the sector and flushes the cache making it impossible or very difficult to retrieve the data.
To install wipe on Debian/Ubuntu, run:

The wipe command is useful for removing files, directories, partitions, or disks.
To remove a single file using wipe execute:
For example, to remove the file opera_autoupdate.log I run:

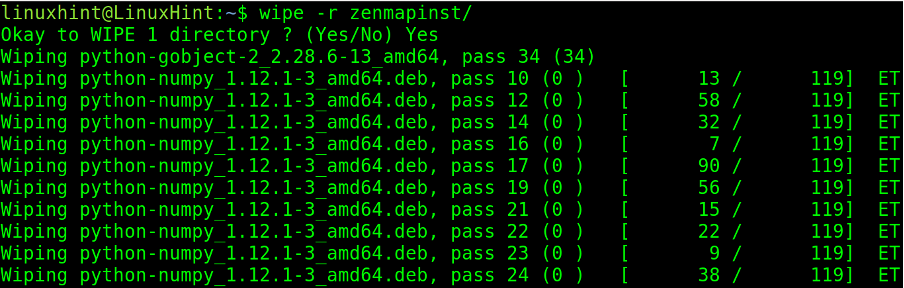
To remove a directory named zenmapinst/ I run:
To wipe a partition or disk, speeding up the process, add the parameter -q, execute:
In the following example, I will wipe the partition /dev/sdc2.

Wiping the Hard Drive Using SRM
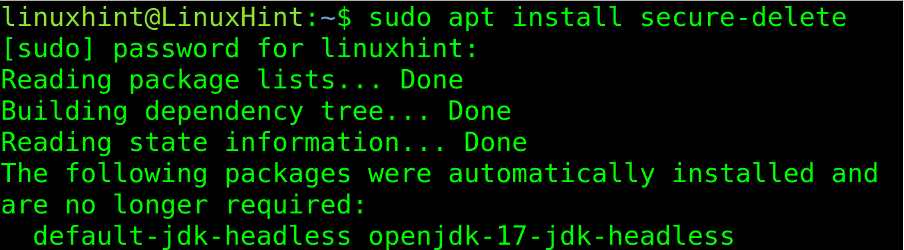
The srm tool overwrites the data before deleting it; it is a similar option to wipe. To install srm on Debian or Ubuntu, run:
Similarly to rm, you can run:
For example, to remove a file named “ssl”, run the following command:

To remove a directory, add the flag –r using the following syntax.
To remove a directory named “ytfzf”, use the following:

How to Wipe the Hard Drive With the dd Command
The dd command can be used to overwrite a disk. If you formatted a disk, you could run this command to fill the disk with random data, making it impossible to restore.
It overwrites the disk with zero and allows us to format the device in different formats. It comes by default on Debian and Ubuntu-based distributions.
In the following example, the dd command is used to fill the /dev/sdc device with random data.

The shred Command to Overwrite Files in Linux
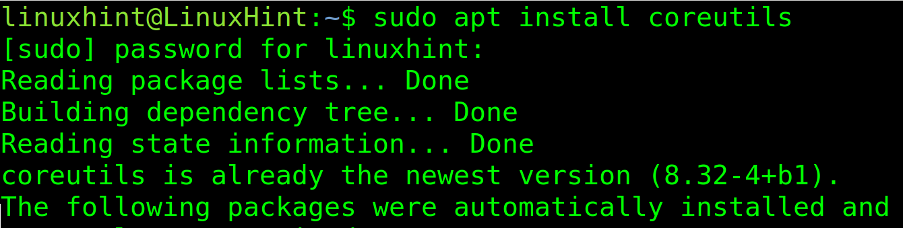
Shred is another alternative to safely remove data; it comes by default on Debian/Ubuntu if it doesn’t type:
Shred is simple to use too. To overwrite a file, just type:
To overwrite a zip file named ytfzf-master.zip I run:

After an ls, we can see the file or directory is still there, but it was overwritten. To remove it after writing, add the –u parameter, as shown below.

Overwriting a Hard Drive With the Scrub Command
The scrub is another tool to overwrite data on hard disks. Scrub writes patterns on files or devices, making data retrieval more difficult. Scrub works in 3 modes detailed on the man page; the default mode is the most effective one.

You can wipe a disk with scrub by running the following command, where X must be replaced with your device.
To create a directory and fill it with files until the system is full run:
Conclusion
As you can see, wiping hard drives and filesystems is an easy task any Linux user can achieve independently of the knowledge level by just implementing some of the commands previously explained. Linux offers a variety of methods to do the same task, making it easier for users to learn the best for them. Deleting files properly is a basic security measure in shared environments. It is also a good preemptive measure for certain professions like journalists protecting sources, etc. As you can see, using any of the previously described commands is not harder than executing the rm command.
Thank you for reading this tutorial explaining how to completely wipe a hard drive in Ubuntu. Keep following us for additional Linux professional content.
About the author
David Adams
David Adams is a System Admin and writer that is focused on open source technologies, security software, and computer systems.
4 Linux tools to erase your data

One of the best ways to keep your data secure is by only writing data to an encrypted hard drive. On a standard drive, it’s possible to view data just by mounting the drive as if it were a thumb drive, and it’s even possible to display and recover even deleted data with tools like Scalpel and Testdisk. But on an encrypted drive, data is unreadable without a decryption key (usually a passphrase you enter when mounting the drive.)
Encryption can be established when you install your OS, and some operating systems even make it possible to activate encryption any time after installation.
What do you do when you’re selling a computer or replacing a drive that never got encrypted in the first place, though?
The next best thing to encrypting your data from the start is by erasing the data when you’re finished with the drive.
Responsible caretaker
I’m frequently called on to help clients upgrade an old computer. Invariably, they’re more than willing to help me recycle them so that they can be used by someone else. I’m happy to refurbish these older computers and refit them with a newer solid-state drive, dramatically improving performance.
However, it’s not a good idea to just throw an old drive in the trash. It needs to be erased and then disposed of properly. Rather than leave the drives in the original computer, I remove them, place them in a drive enclosure, and connect them to my Linux computer. Several Linux utilities can easily accomplish this. One of them is the Gnu Shred tool.
GNU Shred
- n — the number of overwrites. The default is three.
- u — overwrite and delete.
- s — the number of bytes to shred.
- v — show extended information.
- f — force the change of permissions to allow writing if necessary.
- z — add a final overwrite with zeros to hide shredding.
Use shred —help for more information
ShredOS
ShredOS is a live Linux distribution with the sole purpose of erasing the entire contents of a drive. It was developed after a similar distribution, called DBAN, was discontinued. It uses the nwipe application, which is a fork of DBAN’s dwipe . You can make a bootable USB drive by downloading the 32 bit or 64 bit image and writing it to a drive with the dd command on Linux and macOS:
$ sudo dd if=shredos.img of=/dev/sdX bs=4M status=progressAlternately, you can use the Etcher tool on Linux, macOS, and Windows.
The dd command
A common method for erasing drives is with the Linux dd command. Nearly every Linux installation comes with the dd utility installed. Make sure that the drive is not mounted.
If you want to write zeros over your entire target disk, issue the following command. It will probably be an overnight job.
$ sudo dd if=/dev/urandom of=/dev/sdX bs=10MWarning: Be sure that you know where you are on your system and target the correct drive so that you don’t accidentally erase your own data.
Nvme-cli
If your computer contains one of the newer NVMe drives, you can install the nvme-cli utilities and use the sanitize option to erase your drive.
The command nvme sanitize help command provides you with a list of sanitize options, which include the following:
- —no-dealloc, -d — No deallocate after sanitize.
- —oipbp, -i — Overwrite invert pattern between passes.
- —owpass=, -n — Overwrite pass count.
- —ause, -u — Allow unrestricted sanitize exit.
- —sanact=, -a — Sanitize action.
- —ovrpat=, -p — Overwrite pattern.
Here is the command I use:
$ sudo nvme sanitize /dev/nvme0nXThe same warnings apply here as with the format process: back up important data first because this command erases it!
Information management
The information you keep on your computer is important. It belongs to you and to know one else. When you’re selling off a computer or disposing of a hard drive, make sure you’ve cleared it of your data with one of these great tools.

Use this Linux command-line tool to learn more about your NVMe drives
The nvme-cli command has lots of useful options, and it’s a great way to take control of how you manage your data.

7 steps to securing your Linux server
Harden your Linux server in seven easy steps.

Encrypt your files with this open source software
VeraCrypt offers open source file-encryption with cross-platform capabilities.