Classic SysAdmin: How to Search for Files from the Linux Command Line
This is a classic article written by Jack Wallen from the Linux.com archives. For more great SysAdmin tips and techniques check out our free intro to Linux course.
It goes without saying that every good Linux desktop environment offers the ability to search your file system for files and folders. If your default desktop doesn’t — because this is Linux — you can always install an app to make searching your directory hierarchy a breeze.
But what about the command line? If you happen to frequently work in the command line or you administer GUI-less Linux servers, where do you turn when you need to locate a file? Fortunately, Linux has exactly what you need to locate the files in question, built right into the system.
The command in question is find. To make the understanding of this command even more enticing, once you know it, you can start working it into your Bash scripts. That’s not only convenience, that’s power.
Let’s get up to speed with the find command so you can take control of locating files on your Linux servers and desktops, without the need of a GUI.
How to use the find command
When I first glimpsed Linux, back in 1997, I didn’t quite understand how the find command worked; therefore, it never seemed to function as I expected. It seemed simple; issue the command find FILENAME (where FILENAME is the name of the file) and the command was supposed to locate the file and report back. Little did I know there was more to the command than that. Much more.
If you issue the command man find, you’ll see the syntax of the find command is:
find [-H] [-L] [-P] [-D debugopts] [-Olevel] [starting-point. ] [expression]
Naturally, if you’re unfamiliar with how man works, you might be confused about or overwhelmed by that syntax. For ease of understanding, let’s simplify that. The most basic syntax of a basic find command would look like this:
find /path option filename
Find by name
Let’s break down that basic command to make it as clear as possible. The most simplistic structure of the find command should include a path for the file, an option, and the filename itself. You may be thinking, “If I know the path to the file, I’d already know where to find it!”. Well, the path for the file could be the root of your drive; so / would be a legitimate path. Entering that as your path would take find longer to process — because it has to start from scratch — but if you have no idea where the file is, you can start from there. In the name of efficiency, it is always best to have at least an idea where to start searching.
The next bit of the command is the option. As with most Linux commands, you have a number of available options. However, we are starting from the beginning, so let’s make it easy. Because we are attempting to find a file by name, we’ll use one of two options:
Remember, Linux is very particular about case, so if you’re looking for a file named Linux.odt, the following command will return no results.
If, however, you were to alter the command by using the -iname option, the find command would locate your file, regardless of case. So the new command looks like:
Find by type
What if you’re not so concerned with locating a file by name but would rather locate all files of a certain type? Some of the more common file descriptors are:
- f – regular file
- d – directory
- l – symbolic link
- c – character devices
- b – block devices
Now, suppose you want to locate all block devices (a file that refers to a device) on your system. With the help of the -type option, we can do that like so:
The above command would result in quite a lot of output (much of it indicating permission denied), but would include output similar to:
/dev/hidraw6 /dev/hidraw5 /dev/vboxnetctl /dev/vboxdrvu /dev/vboxdrv /dev/dmmidi2 /dev/midi2 /dev/kvm
We can use the same option to help us look for configuration files. Say, for instance, you want to locate all regular files that end in the .conf extension. This command would look something like:
The above command would traverse the entire directory structure to locate all regular files ending in .conf. If you know most of your configuration files are housed in /etc, you could specify that like so:
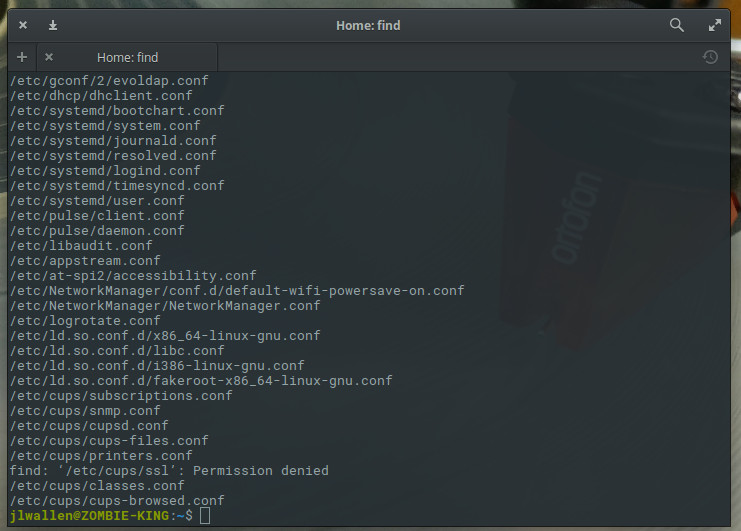
find /etc -type f -name “*.conf”
The above command would list all of your .conf files from /etc (Figure 1).
Outputting results to a file
One really handy trick is to output the results of the search into a file. When you know the output might be extensive, or if you want to comb through the results later, this can be incredibly helpful. For this, we’ll use the same example as above and pipe the results into a file called conf_search. This new command would look like:
find /etc -type f -name “*.conf” > conf_search
You will now have a file (conf_search) that contains all of the results from the find command issued.
Finding files by size
Now we get to a moment where the find command becomes incredibly helpful. I’ve had instances where desktops or servers have found their drives mysteriously filled. To quickly make space (or help locate the problem), you can use the find command to locate files of a certain size. Say, for instance, you want to go large and locate files that are over 1000MB. The find command can be issued, with the help of the -size option, like so:
You might be surprised at how many files turn up. With the output from the command, you can comb through the directory structure and free up space or troubleshoot to find out what is mysteriously filling up your drive.
You can search with the following size descriptions:
- c – bytes
- k – Kilobytes
- M – Megabytes
- G – Gigabytes
- b – 512-byte blocks
Keep learning
We’ve only scratched the surface of the find command, but you now have a fundamental understanding of how to locate files on your Linux systems. Make sure to issue the command man find to get a deeper, more complete, knowledge of how to make this powerful tool work for you.
How to use FIND in Linux
With the right arguments, the FIND command is a powerful and flexible way to locate data on your system.

In a recent Opensource.com article, Lewis Cowles introduced the find command.
find is one of the more powerful and flexible command-line programs in the daily toolbox, so it’s worth spending a little more time on it.
At a minimum, find takes a path to find things. For example:
will find (and print) every file on the system. And since everything is a file, you will get a lot of output to sort through. This probably doesn’t help you find what you’re looking for. You can change the path argument to narrow things down a bit, but it’s still not really any more helpful than using the ls command. So you need to think about what you’re trying to locate.
Perhaps you want to find all the JPEG files in your home directory. The -name argument allows you to restrict your results to files that match the given pattern.
But wait! What if some of them have an uppercase extension? -iname is like -name , but it is case-insensitive.
Great! But the 8.3 name scheme is so 1985. Some of the pictures might have a .jpeg extension. Fortunately, we can combine patterns with an «or,» represented by -o .
find ~ ( -iname 'jpeg' -o -iname 'jpg' )We’re getting closer. But what if you have some directories that end in jpg? (Why you named a directory bucketofjpg instead of pictures is beyond me.) We can modify our command with the -type argument to look only for files.
find ~ \( -iname '*jpeg' -o -iname '*jpg' \) -type f Or maybe you’d like to find those oddly named directories so you can rename them later:
find ~ \( -iname '*jpeg' -o -iname '*jpg' \) -type d It turns out you’ve been taking a lot of pictures lately, so let’s narrow this down to files that have changed in the last week.
find ~ \( -iname '*jpeg' -o -iname '*jpg' \) -type f -mtime -7 You can do time filters based on file status change time ( ctime ), modification time ( mtime ), or access time ( atime ). These are in days, so if you want finer-grained control, you can express it in minutes instead ( cmin , mmin , and amin , respectively). Unless you know exactly the time you want, you’ll probably prefix the number with + (more than) or – (less than).
But maybe you don’t care about your pictures. Maybe you’re running out of disk space, so you want to find all the gigantic (let’s define that as «greater than 1 gigabyte») files in the log directory:
Or maybe you want to find all the files owned by bcotton in /data :
You can also look for files based on permissions. Perhaps you want to find all the world-readable files in your home directory to make sure you’re not oversharing.
This post only scratches the surface of what find can do. Combining tests with Boolean logic can give you incredible flexibility to find exactly the files you’re looking for. And with arguments like -exec or -delete , you can have find take action on what it. finds. Have any favorite find expressions? Share them in the comments!