- Classic SysAdmin: How to Check Disk Space on Linux from the Command Line
- df
- du
- Not as hard as you thought
- How to Check Free Disk Space on Linux [Terminal and GUI Methods]
- Method 1: Checking free disk space in Linux with df command (and understanding its output)
- Missing disk space? Check if you have mounted all disks and partitions
- Method 2: Using du, ls, and Other Commands
- Method 3: Check free disk usage graphically
- Checking free disk space with GNOME Disks utility
- Conclusion
Classic SysAdmin: How to Check Disk Space on Linux from the Command Line
This is a classic article written by Jack Wallen from the Linux.com archives. For more great SysAdmin tips and techniques check out our free intro to Linux course.
Quick question: How much space do you have left on your drives? A little or a lot? Follow up question: Do you know how to find out? If you happen to use a GUI desktop (e.g., GNOME, KDE, Mate, Pantheon, etc.), the task is probably pretty simple. But what if you’re looking at a headless server, with no GUI? Do you need to install tools for the task? The answer is a resounding no. All the necessary bits are already in place to help you find out exactly how much space remains on your drives. In fact, you have two very easy-to-use options at the ready.
In this article, I’ll demonstrate these tools. I’ll be using Elementary OS, which also includes a GUI option, but we’re going to limit ourselves to the command line. The good news is these command-line tools are readily available for every Linux distribution. On my testing system, there are a number of attached drives (both internal and external). The commands used are agnostic to where a drive is plugged in; they only care that the drive is mounted and visible to the operating system.
With that said, let’s take a look at the tools.
df
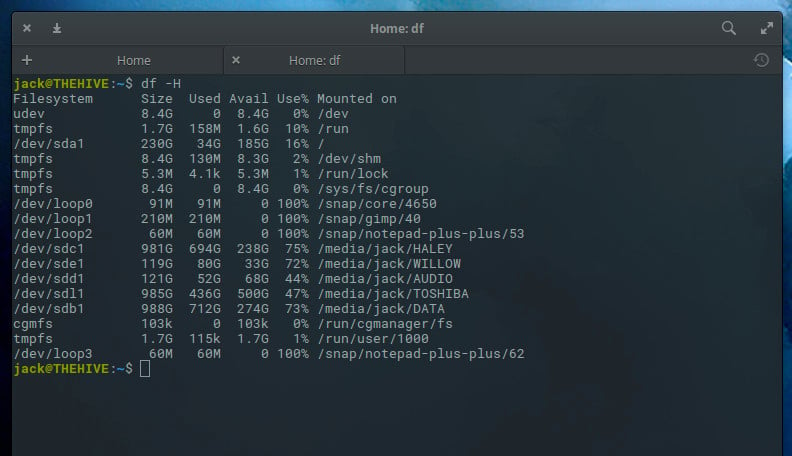
The df command is the tool I first used to discover drive space on Linux, way back in the 1990s. It’s very simple in both usage and reporting. To this day, df is my go-to command for this task. This command has a few switches but, for basic reporting, you really only need one. That command is df -H. The -H switch is for human-readable format. The output of df -H will report how much space is used, available, percentage used, and the mount point of every disk attached to your system (Figure 1).
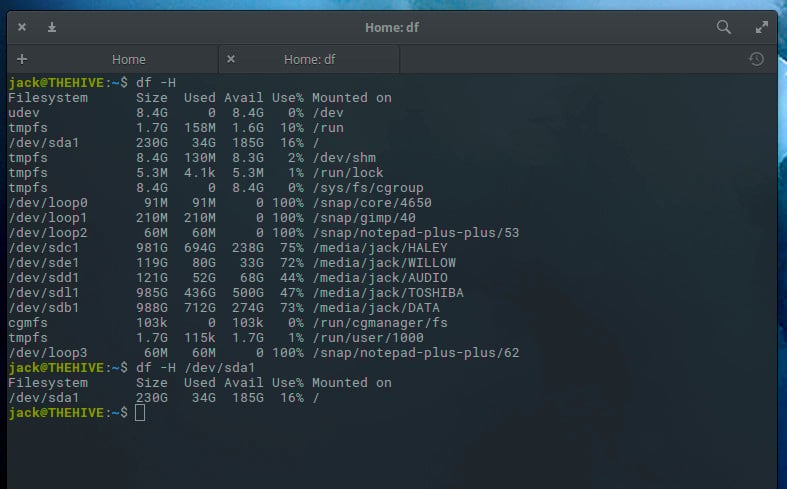
What if your list of drives is exceedingly long and you just want to view the space used on a single drive? With df, that is possible. Let’s take a look at how much space has been used up on our primary drive, located at /dev/sda1. To do that, issue the command:
The output will be limited to that one drive (Figure 2).
You can also limit the reported fields shown in the df output. Available fields are:
- source — the file system source
- size — total number of blocks
- used — spaced used on a drive
- avail — space available on a drive
- pcent — percent of used space, divided by total size
- target — mount point of a drive
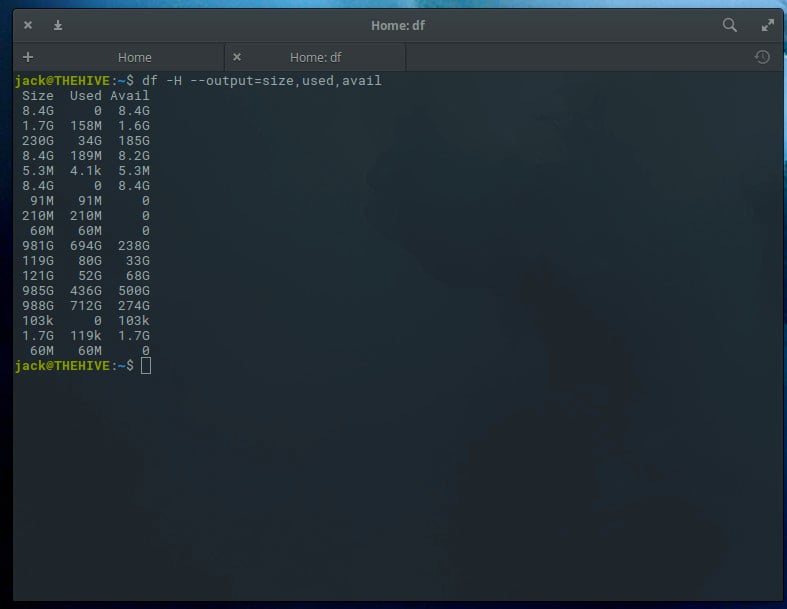
Let’s display the output of all our drives, showing only the size, used, and avail (or availability) fields. The command for this would be:
The output of this command is quite easy to read (Figure 3).
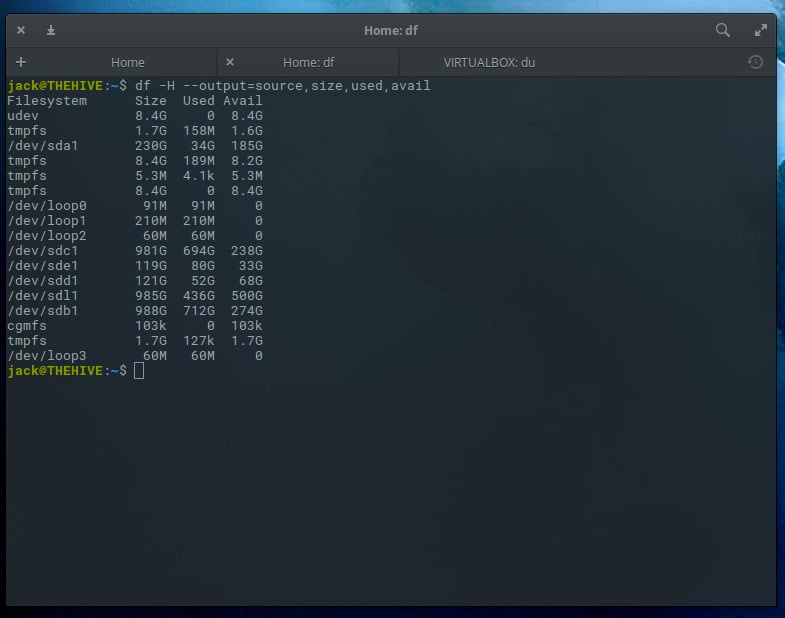
The only caveat here is that we don’t know the source of the output, so we’d want to include source like so:
df -H --output=source,size,used,avail
Now the output makes more sense (Figure 4).
du
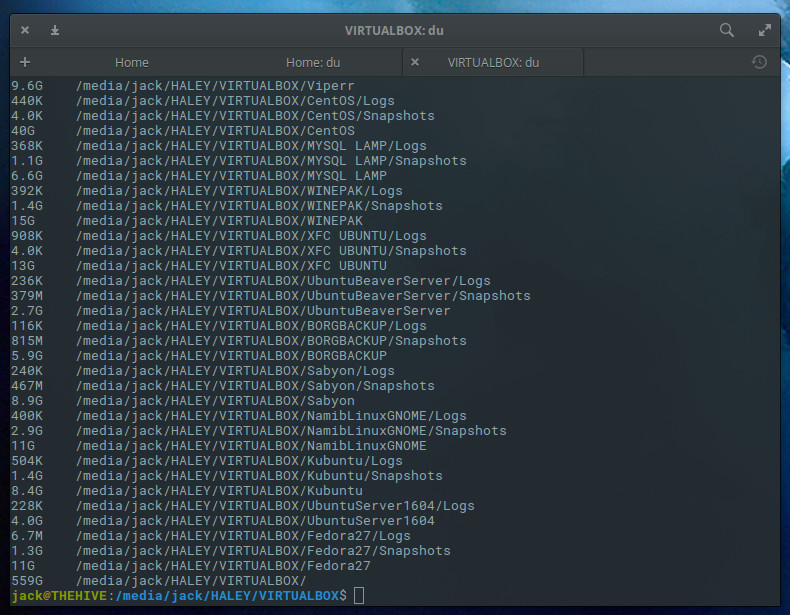
Our next command is du. As you might expect, that stands for disk usage. The du command is quite different to the df command, in that it reports on directories and not drives. Because of this, you’ll want to know the names of directories to be checked. Let’s say I have a directory containing virtual machine files on my machine. That directory is /media/jack/HALEY/VIRTUALBOX. If I want to find out how much space is used by that particular directory, I’d issue the command:
du -h /media/jack/HALEY/VIRTUALBOX
The output of the above command will display the size of every file in the directory (Figure 5).
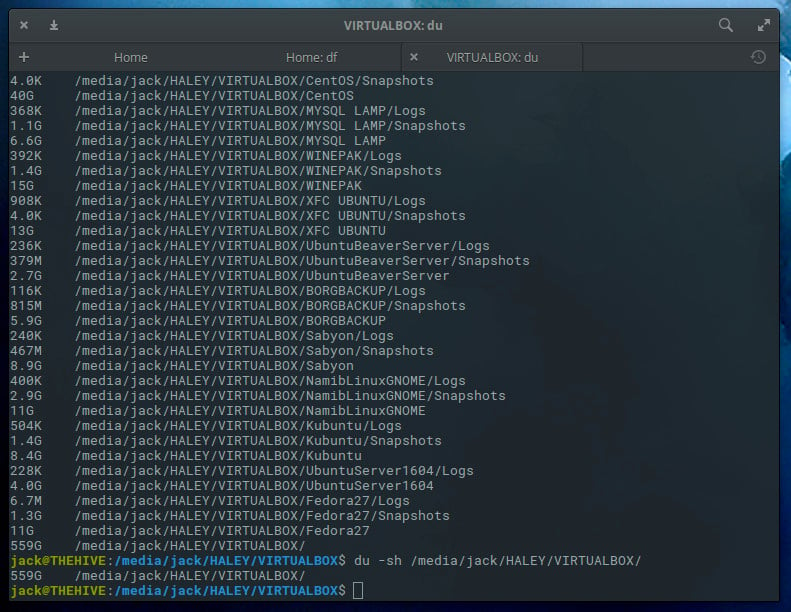
So far, this command isn’t all that helpful. What if we want to know the total usage of a particular directory? Fortunately, du can handle that task. On the same directory, the command would be:
du -sh /media/jack/HALEY/VIRTUALBOX/
Now we know how much total space the files are using up in that directory (Figure 6).
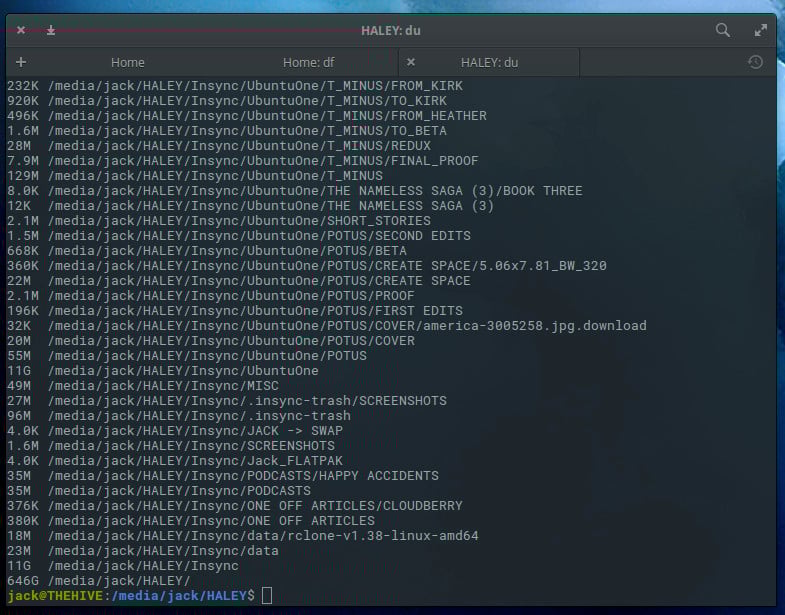
You can also use this command to see how much space is being used on all child directories of a parent, like so:
The output of this command (Figure 7) is a good way to find out what subdirectories are hogging up space on a drive.
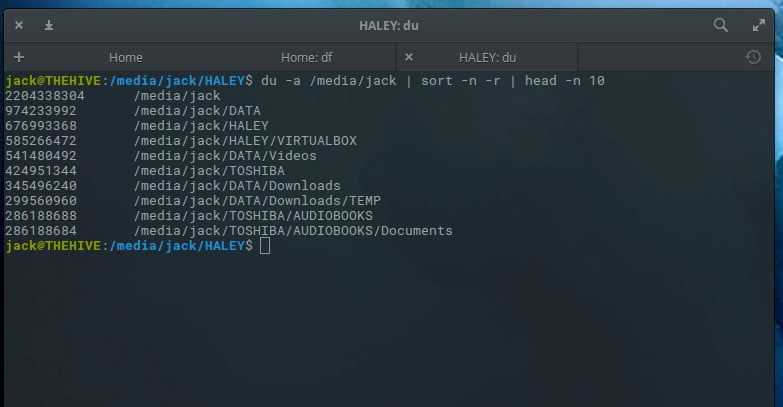
The du command is also a great tool to use in order to see a list of directories that are using the most disk space on your system. The way to do this is by piping the output of du to two other commands: sort and head. The command to find out the top 10 directories eating space on a drive would look something like this:
du -a /media/jack | sort -n -r | head -n 10
The output would list out those directories, from largest to least offender (Figure 8).
Not as hard as you thought
Finding out how much space is being used on your Linux-attached drives is quite simple. As long as your drives are mounted to the Linux system, both df and du will do an outstanding job of reporting the necessary information. With df you can quickly see an overview of how much space is used on a disk and with du you can discover how much space is being used by specific directories. These two tools in combination should be considered must-know for every Linux administrator.
And, in case you missed it, I recently showed how to determine your memory usage on Linux. Together, these tips will go a long way toward helping you successfully manage your Linux servers.
How to Check Free Disk Space on Linux [Terminal and GUI Methods]
Wondering how much free space you are left with? Here are terminal and GUI methods for checking the free disk space and disk usage on Linux.
How much disk space have I utilized? The simplest way to find the free disk space on Linux is to use df command. The df command stands for disk-free and quite obviously, it shows you the free and available disk space on Linux systems.
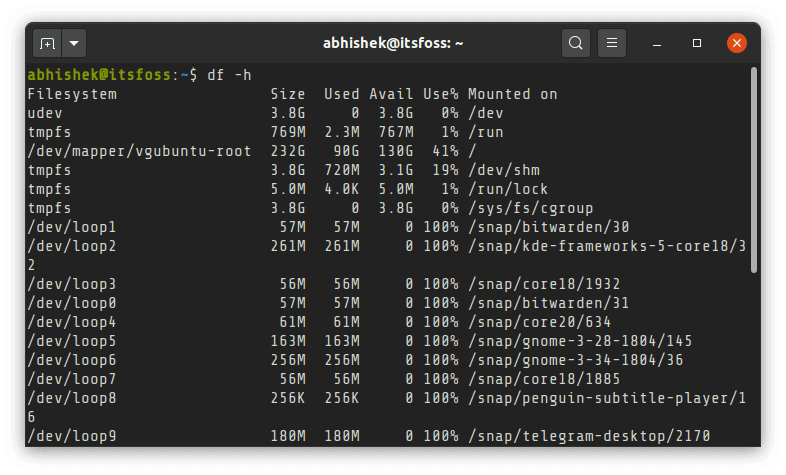
With -h option, it shows the disk space in human-readable format (MB and GB). Here’s the output of the df command for my Dell XPS system that has only Linux installed with encrypted disk: If the above output is confusing for you, don’t worry. I’ll explain a few things about checking available disk space on Linux. I’ll also show the GUI method for desktop Linux users. Overall, I’ll mention three methods:
- Using df command
- Using alternative commands like du and dust
- Using a graphical user interface
With the information you gather, you can go about making some free space on Ubuntu.
Method 1: Checking free disk space in Linux with df command (and understanding its output)
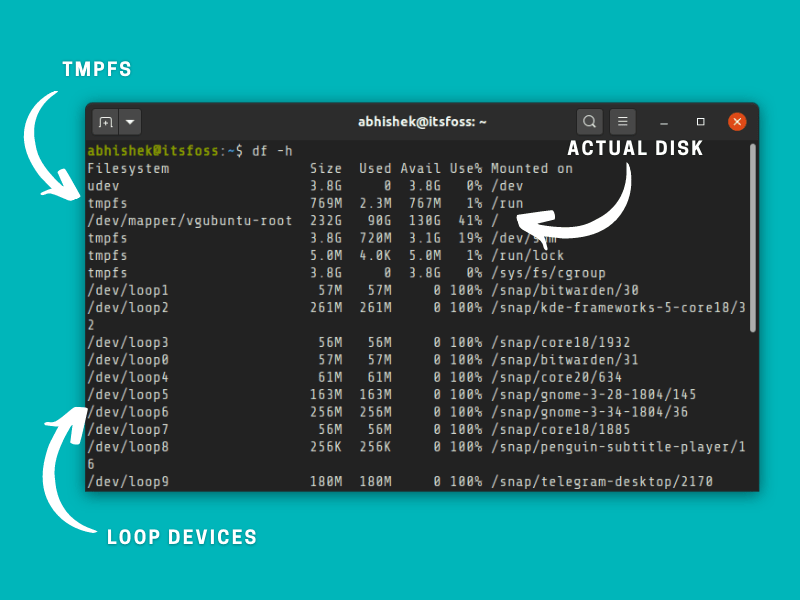
When you use the df command to check disk space, it will show a bunch of ‘file systems’ with their size, used space and free space. Your actual disks should normally be listed as one of the following:
This is not a hard and fast rule but it gives you an indication to easily recognize the actual disk from the crowd.
Your Linux system might have several partitions on your disk for boot, EFI, root, swap, home etc. In such cases, these partitions are reflected with a number at the end of the ‘disk name’, like /dev/sda1, /dev/nvme0n1p2 etc.
You could identify which partition is used for what purpose from its mount point. Root is mounted on /, EFI in /boot/EFI etc.
In my case, I have used 41% of the 232 GB of disk space under root. If you have 2-3 big partitions (like root, home etc), you’ll have to make a calculation here.
- tmpfs: The tmpfs (temporary filesystem) used for keeping files in virtual memory. You can ignore this virtual filesystem comfortably.
- udev: The udev filesystem is used for storing information related to devices (like USB, network card, CD ROM etc) plugged to your system. You may ignore it as well.
- /dev/loop: These are loop devices. You’ll see plenty of them while checking disk space in Ubuntu because of snap applications. Loops are virtual devices that allow normal files to be accessed as block devices. With the loop devices, snap applications are sandboxed in their own virtual disk. Since they are under root, you don’t need to count their used disk space separately.
And, if you want to view the disk usage with more details like filesystem type and blocks, you can use the command:
Missing disk space? Check if you have mounted all disks and partitions
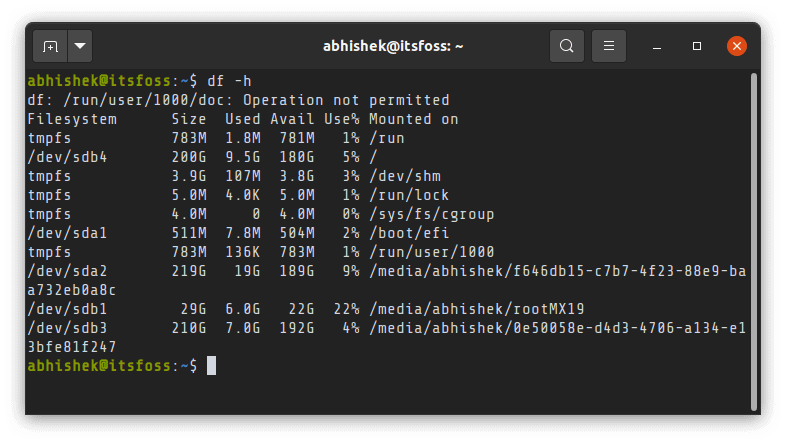
Keep in mind that the df command only shows disk space for mounted filesystems. If you are using more than one Linux distribution (or operating systems) on the same disk or you have multiple disks on your system, you need to mount them first in order to see the free space available on those partitions and disks.
For example, my Intel NUC has two SSDs and 4 or 5 Linux distributions installed on them. It shows additional disks only when I mount them explicitly.
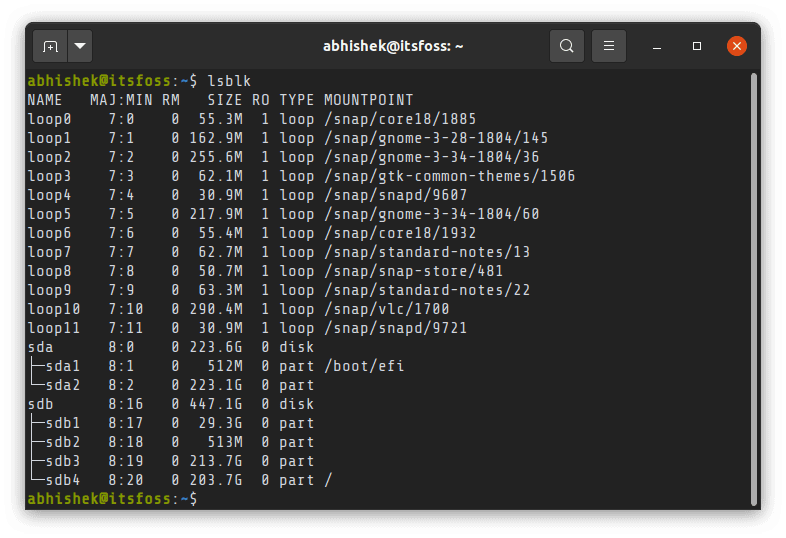
You can use the lsblk command to see all the disks and partitions on your system.
Once you have the disk partition name, you can mount it in this fashion:
I hope this gives you a pretty good idea about checking hard drive space on Linux. Let’s see how to do it graphically.
Method 2: Using du, ls, and Other Commands
While df command is quite popular and should be enough for the use case, there are other alternatives that you can try including:
- du -h → Shows disk usage in human-readable format for all directories and subdirectories.
- du -a →Shows disk usage for all files.
- du -s Provides the total disk space used by a particular file or directory.
- ls -al →Lists the entire contents, along with their size, of a particular directory.
- stat →Displays the size and other stats of a file/directory or a file system.
- fdisk -l →Shows disk size along with disk partitioning information (may require sudo privileges).
- dust → An interesting alternative to the du command written in Rust, available for Arch Linux in the repositories. For other Linux distros, you can refer to its GitHub releases section.
Method 3: Check free disk usage graphically
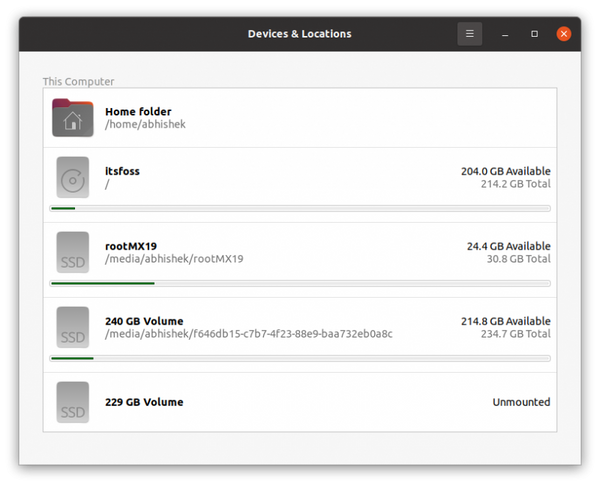
Checking free disk space graphically is much easier in Ubuntu with the Disk Usage Analyzer tool.
You’ll see all the actual disks and partitions here. You may have to mount some partitions by clicking on them. It displays the disk usage for all the mounted partitions.
Checking free disk space with GNOME Disks utility
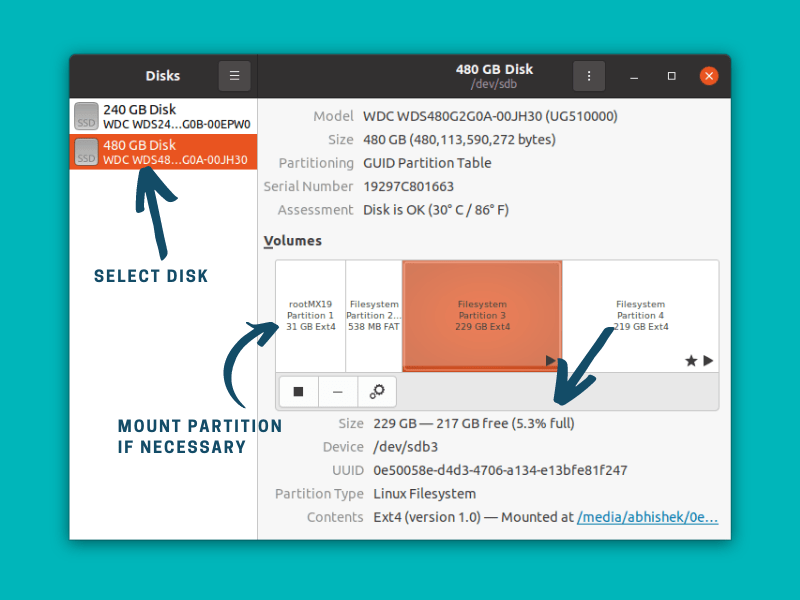
Otherwise, the GNOME Disks utility is also a pretty handy tool.
Start the tool and select the disk. Select a partition to see the free disk space. If a partition is not mounted, mount it first by clicking the ‘play’ icon.
I think all major desktop environments have some sort of graphical tool to check the disk usage on Linux. You can search for it in the menu of your desktop Linux system.
Conclusion
Of course, there can be more ways and tools to check disk space. I showed you the most common command line and GUI methods for this purpose.
I also explained a few things that might trouble you in understanding disk usage. I hope you like it.
Running out of disk space? How about cleaning it up and get it back?
Please let me know in the comment section if you have questions or suggestions.
