- About This Guide
- Procedures
- Source
- How to Share Folder / Transfer Files over LAN in Ubuntu 22.04
- Option 1: Share Folder Temporarily via Python scripts:
- Option 2: Use Dukto file transfer
- Option 3: Share Folder via Samba
- To access this samba share:
- Ji m
- Leave a Reply Cancel reply
- Как сделать общую сетевую папку в Linux (настройка SMB в Linux)
About This Guide
In this text, I teach how to create a network share via Samba using the CLI (Command-line interface/Linux Terminal) in an uncomplicated, simple and brief way targeting Windows users.
Procedures
sudo apt-get update sudo apt-get install samba
Note: Samba uses a separate set of passwords than the standard Linux system accounts (stored in /etc/samba/smbpasswd), so you'll need to create a Samba password for yourself. This tutorial implies that you will use your own user and it does not cover situations involving other users passwords, groups, etc.
Tip1: Use the password for your own user to facilitate.
Tip2: Remember that your user must have permission to write and edit the folder you want to share. Eg.: sudo chown /var/opt/blah/blahblah sudo chown : /var/opt/blah/blahblah
Tip3: If you're using another user than your own, it needs to exist in your system beforehand, you can create it without a shell access using the following command : sudo useradd USERNAME --shell /bin/false You can also hide the user on the login screen by adjusting lightdm's configuration, in /etc/lightdm/users.conf add the newly created user to the line : hidden-users=
sudo nano /etc/samba/smb.conf
Once "smb.conf" has loaded, add this to the very end of the file: [] path = /home// valid users = read only = no
Tip: There Should be in the spaces between the lines, and note que also there should be a single space both before and after each of the equal signs.
sudo service smbd restart
sudo apt-get install smbclient # List all shares: smbclient -L /// -U # connect: smbclient /// -U
Note: The default user group of samba is "WORKGROUP".
Source
How to Create a Network Share Via Samba Via CLI (Command-line interface/Linux Terminal) — Uncomplicated, Simple and Brief Way! (последним исправлял пользователь 97e64b0f 2015-10-06 20:46:34)
The material on this wiki is available under a free license, see Copyright / License for details
You can contribute to this wiki, see Wiki Guide for details
How to Share Folder / Transfer Files over LAN in Ubuntu 22.04
![]()
Want to share your files over local network or transfer file from one PC to another PC? Here are a few commonly used ways to do the job in Ubuntu 22.04 LTS.
Option 1: Share Folder Temporarily via Python scripts:
Without installing any package, user may run a built-in Python script at any time to create a http file server for temporary use. Any device (Windows, Mac, Linux PC, and mobile phones) can access or download the files via a web browser.
NOTE: This method seems to be not working good for transfer large files (1 GB+).
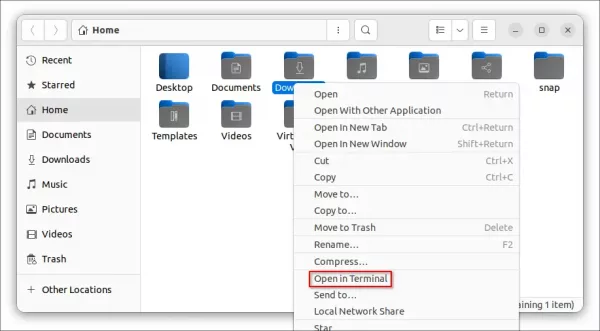
1. First, right-click on the folder you want to share. Then click on “Open in Terminal” option in the context menu to open terminal.
2. Next, run command to share this folder content over LAN via command:
In case the default listening port 8000 is already in use, you may specify another port (9001 for example) via command:
python3 -m http.server 9001
Now, in any device’s web browser, go to http://ubuntu-machine-ip:9001 (change the port accordingly, default is 8000). Click to open file directly or right-click and select “save as …” to download file.

To stop sharing the folder, either press Ctrl+C in terminal window or just close it.
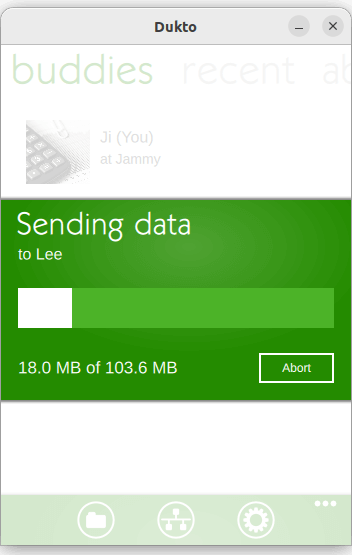
Option 2: Use Dukto file transfer
If you transfer files regularly from one PC to another, then the open-source “Dukto” app is a good choice that works on Linux, MacOS, and Windows machines.
Just open the app in both machines, it will detect each other automatically and offer options to transfer file/folder, and send text.
Though the app has not been updated for years, it’s still working very well! Mac and Windows users may download & install the app packages from:
For Ubuntu user, the package in previous link does not install due to dependency issue. However, the Qt6 port from this Ubuntu PPA is available for all current Ubuntu releases.
Simply open terminal by pressing Ctrl+Alt+T on keyboard, and run following commands one by one will add the PPA and install Dukto in Ubuntu:
sudo add-apt-repository ppa:xuzhen666/dukto
Option 3: Share Folder via Samba
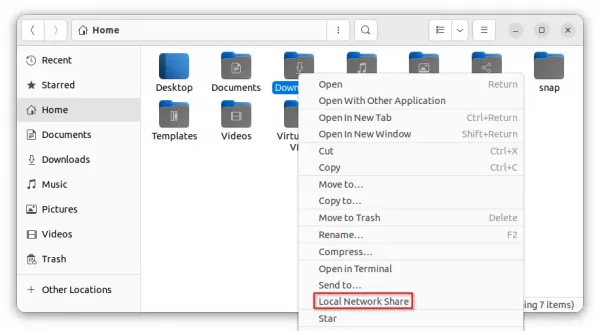
If you want to share a folder for long time use, it’s better to use the samba file sharing service. This can be done easily in Ubuntu, since “Files” (Nautilus file manager) provides a context menu option to do the job.
1.) Firstly, right-click on the folder you want to share. Then, click on the “Local Network Share” menu option.
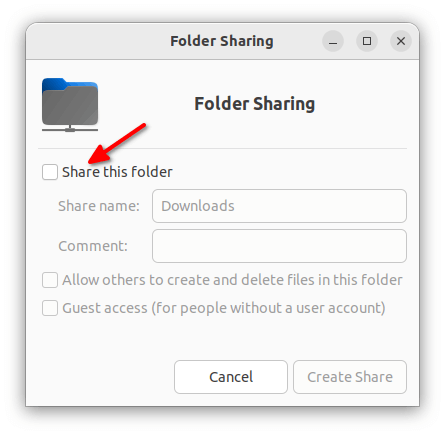
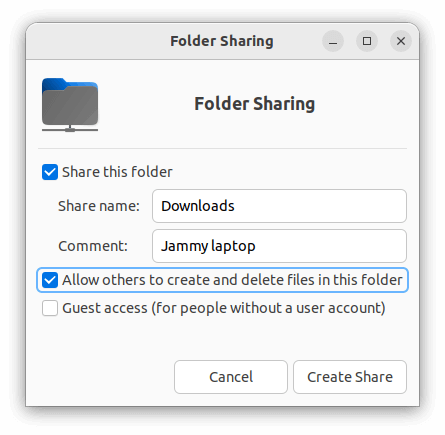
2.) In the pop-up dialog, enable the checkbox which says “Share this folder”.
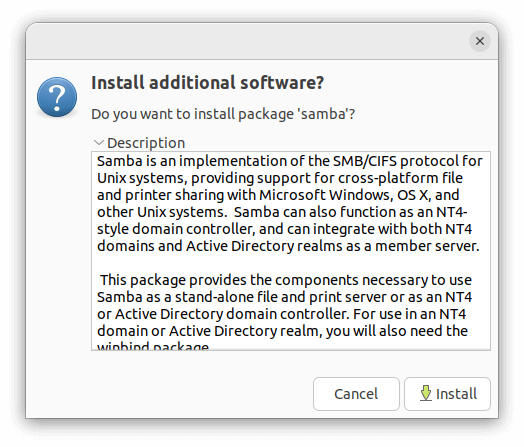
3.) If you’re doing this for the first time, it will prompt to install the samba sharing service.
Just click “Install service” and confirm in next dialog to install the required packages.
4.) After installing them, go back to the previous dialog in step 1.). Enable “Share this folder” and tick “Guest access” and “Allow others to create and delete …” accordingly.
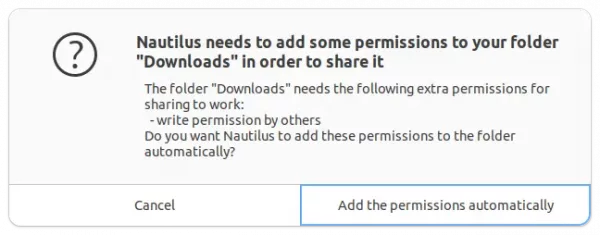
If you enabled the write permission (“Allow others to create and delete …”), it will prompt to change the folder permissions.
5.) If you got “‘network share’ return 255” error, open terminal (Ctrl+Alt+T) and run command to add current user to ‘sambashare’ group should fix the issue after logged out and back in.
sudo gpasswd --add $USER sambashare
And, if you didn’t enable guest access then a separated password has to be added for authentication:
To access this samba share:
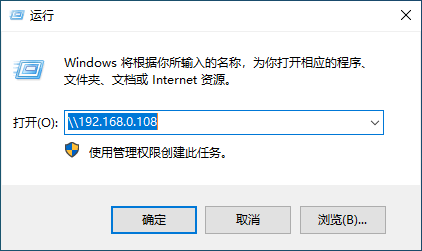
For Windows user, press Window key + R on keyboard to open “Run” box, and type \\ubuntu-machine-ip . Then type username and password you set in previous step to access this folder.
For Linux user (only tested in GNOME), open “Files -> Other Locations” and type smb://ubuntu-machine-ip in button to connect.
For MacOS, press command + K on keyboard to open Connect to Server dialog, type smb://ubuntu-machine-ip and hit Enter to access.

Ji m
I’m a freelance blogger who started using Ubuntu in 2007 and wishes to share my experiences and some useful tips with Ubuntu beginners and lovers. Please comment to remind me outdated tutorial! And, notify me if you find any typo/grammar/language mistakes. English is not my native language. Contact me via [email protected] Buy me a coffee: https://ko-fi.com/ubuntuhandbook1
Be the first to start the conversation.
Leave a Reply Cancel reply
This site uses Akismet to reduce spam. Learn how your comment data is processed.
Как сделать общую сетевую папку в Linux (настройка SMB в Linux)
Начните с установки пакетов samba и smbclient.
В Debian, Linux Mint, Ubuntu, Kali Linux и их производных для установки samba выполните команду:
sudo apt install samba smbclient
В Arch Linux, BlackArch и их производных выполните команду:
sudo pacman -S samba smbclient
Следующая команда не сработает, если отсутствует файл /etc/samba/smb.conf. Если у вас тоже нет этого файла, то создаёте его заглушку — к настройке самого файла smb.conf мы вернёмся позже:
sudo touch /etc/samba/smb.conf
Теперь нужно добавить пароль для пользователя Samba. Действует следующее правило: имя пользователя должно быть таким же, как у вашего текущего пользователя, а пароль можно установить иной, отличный от вашего системного пароля.
Для установки пароля Samba, выполните следующую команду:
Если вы хотите, чтобы у пользователя не было пароля, то укажите опцию -n.
Создайте папку, которая станет совместно используемой:
Узнаем абсолютный путь до папки ~/linuxshare:
Откройте для редактирования файл /etc/samba/smb.conf:
sudo gedit /etc/samba/smb.conf
Добавьте туда строки вида:
[ИМЯ_ПАПКИ] comment = Samba на Linux path = /home/ИМЯ_ПОЛЬЗОВАТЕЛЯ/ИМЯ_ПАПКИ valid users = ИМЯ_ПОЛЬЗОВАТЕЛЯ read only = no browsable = yes
Обратите внимание, что все пробелы в строках выше являются обязательными.
Для моих данных это строки:
[linuxshare] comment = Samba на Linux path = /home/mial/linuxshare valid users = mial read only = no browsable = yes
Теперь запустим службу SMB:
sudo systemctl start smb.service
Для добавления службы в автозагрузку выполните:
sudo systemctl enable smb.service
Для подключения к этой общей сетевой папке на Linux нужно использовать IP адреса компьютера Linux.
Создадим файл, чтобы сетевая папка не была пустой:
echo "Документ на Linux" > ~/linuxshare/document.txt
Посмотрите локальный IP адрес компьютера, на котором запущена Linux:
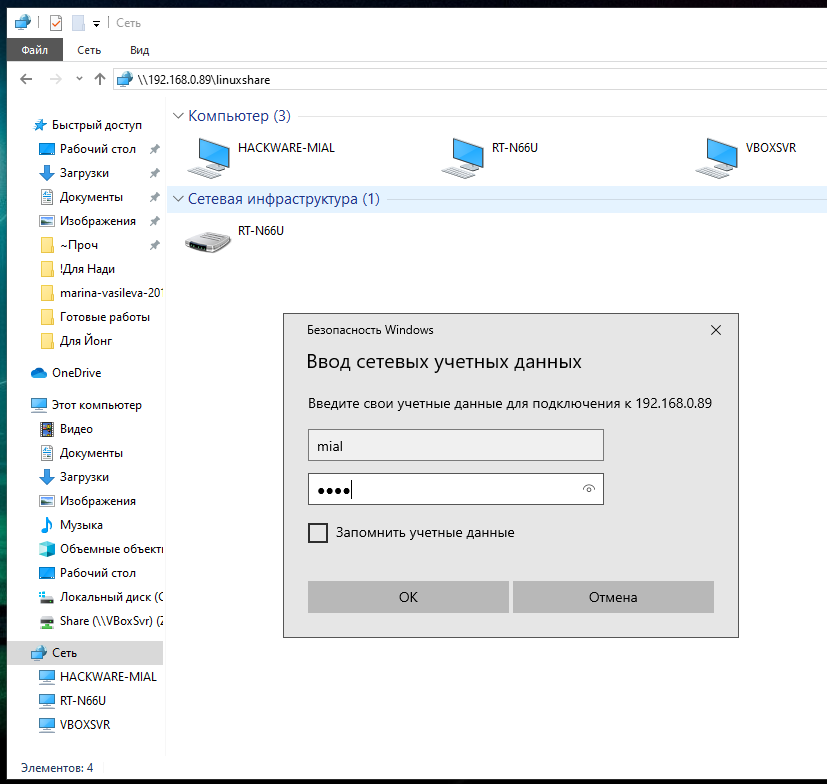
У меня этим IP является 192.168.0.89, а папку, как мы помним, я создал с именем linuxshare, тогда в Windows я перехожу в проводнике во вкладку «Сеть» и подключаюсь к этой папке следующим образом:
Вводим учётные данные (которые мы установили командой smbpasswd):
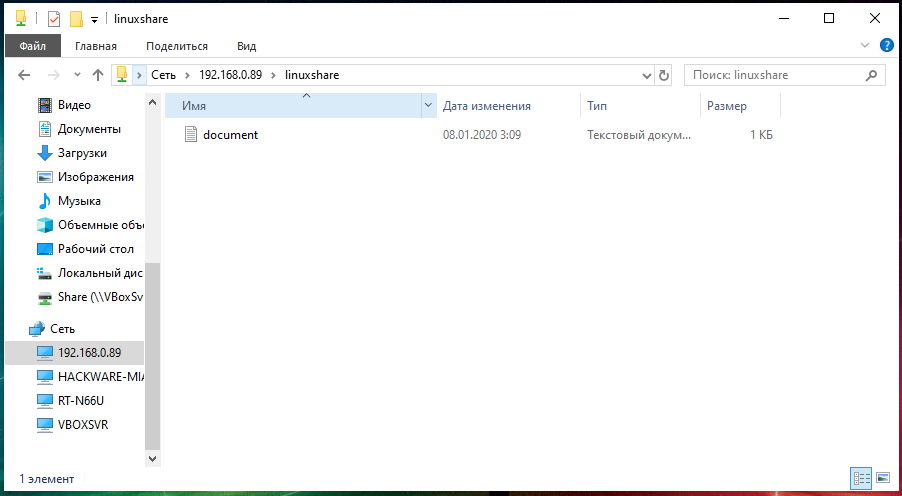
Видим содержимое совместно используемой папки, размещённой на Linux с помощью SMB:
Для подключения к сетевой папке из консоли Linux, запустите команду вида:
sudo smbclient //IP_АДРЕС/Папка -U ПОЛЬЗОВАТЕЛЬ
sudo smbclient //192.168.0.89/linuxshare -U mial
После ввода пароля нам становится доступным содержимое сетевой папки.