- 5 Linux commands to check free disk space
- Linux df command
- Linux du command
- Linux ls -al command
- Linux stat command
- Linux fdisk -l command
- Check used disk space on Linux with du
- Use df to check free disk space on Linux
- How to Free Up Space on Ubuntu Linux
- Empty The Trash
- Delete Temporary Files Using BleachBit
- Analyze Your Disk Usage Using Disk Usage Analyzer
- Find Heavy Applications Using Synaptic Package Manager
- Remove Old Kernels Using Synaptic Package Manager
- Essential Guide: 5 Simple Ways To Free Up Space on Ubuntu
- 1. Clean the APT Cache (And Do It Regularly)
- 2. Remove Old Kernels (If No Longer Required)
- 3. Uninstall Apps & Games You Never Use (And Be Honest!)
- 4. Use A System Cleaner like BleachBit
- 5. Stay up to date (seriously, do it!)
- Summary
5 Linux commands to check free disk space
Keeping track of disk utilization information is on system administrators’ (and others’) daily to-do list. Linux has a few built-in utilities that help provide that information.
Linux df command
The df command stands for «disk-free,» and shows available and used disk space on the Linux system.
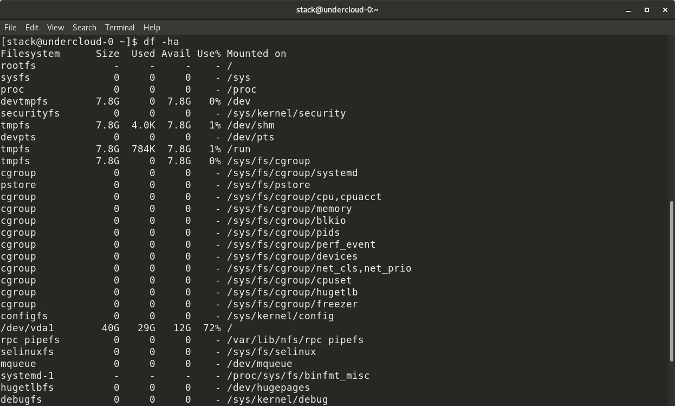
df -h shows disk space in human-readable format
df -a shows the file system’s complete disk usage even if the Available field is 0
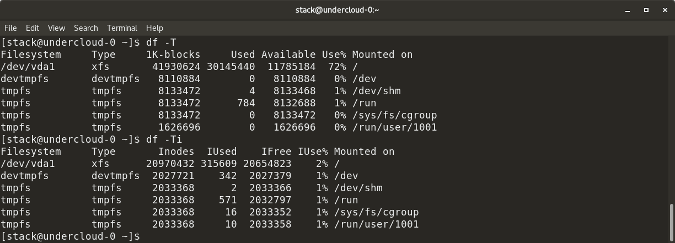
df -T shows the disk usage along with each block’s filesystem type (e.g., xfs, ext2, ext3, btrfs, etc.)
df -i shows used and free inodes
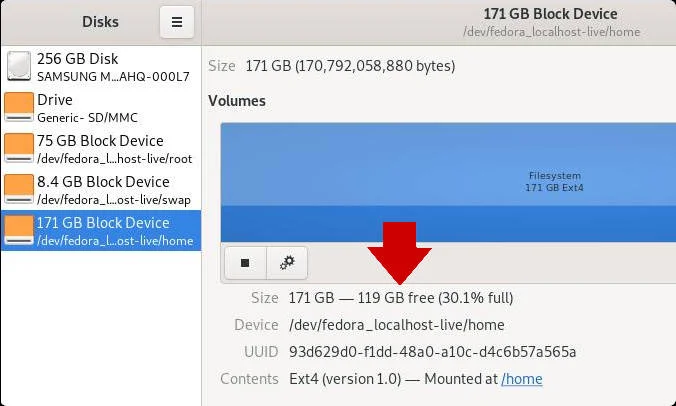
You can get this information in a graphical view using the Disks (gnome-disk-utility) in the GNOME desktop. Launch it to see all disks detected by your computer, and click a partition to see details about it, including space used and space remaining.
Linux du command
du shows the disk usage of files, folders, etc. in the default kilobyte size
du -h shows disk usage in human-readable format for all directories and subdirectories
du -a shows disk usage for all files
du -s provides total disk space used by a particular file or directory
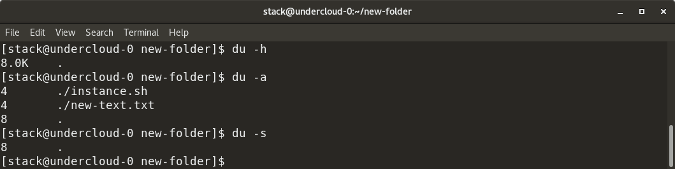
The following commands will check your total space and your utilized space.
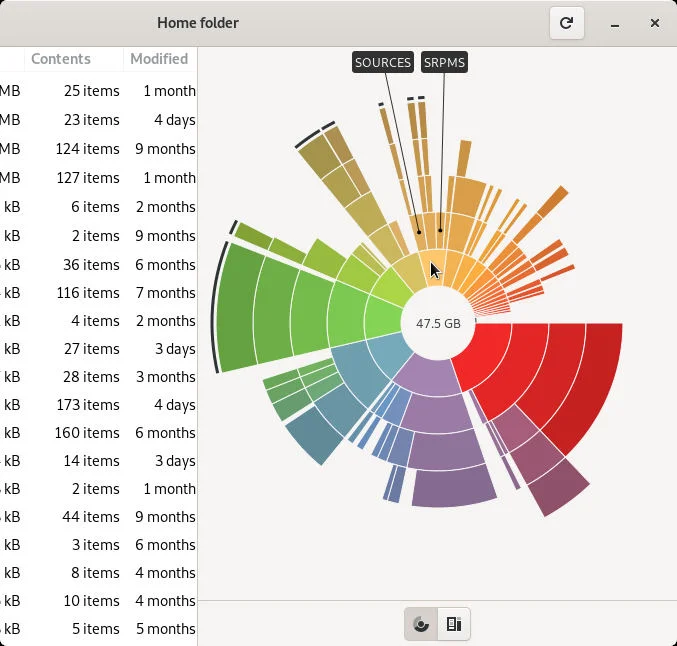
This information can be represented visually in GNOME with the Disk Usage application, or with Filelight in the KDE Plasma desktop. In both applications, disk usage is mapped to concentric circles, with the middle being the base folder (usually your /home directory, but it’s up to you) with each outer ring representing one directory level deeper. Roll your mouse over any segment for detailed information about what’s taking up space.
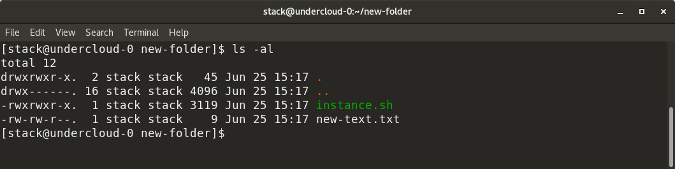
Linux ls -al command
ls -al lists the entire contents, along with their size, of a particular directory
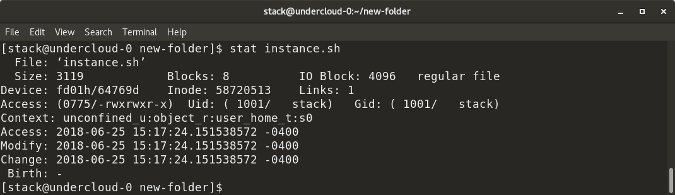
Linux stat command
stat displays the size and other stats of a file/directory or a filesystem.
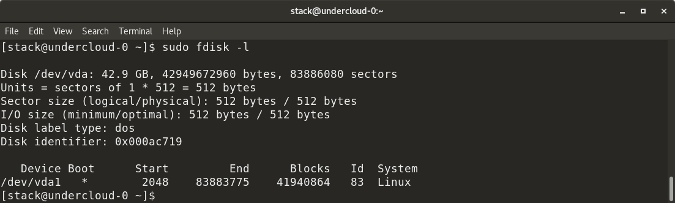
Linux fdisk -l command
fdisk -l shows disk size along with disk partitioning information
These are most of the built-in utilities for checking file space in Linux. There are many similar tools, like Disks (GUI), Ncdu, etc., that also show disk space utilization. Do you have a favorite tool that’s not on this list? Please share in the comments.
This article was originally published in July 2018 and has been updated to include additional information.

Check used disk space on Linux with du
Find out how much disk space you’re using with the Linux du command.
Use df to check free disk space on Linux
Find out how much Linux disk space you have left with the df command.
How to Free Up Space on Ubuntu Linux

From time to time, we need to clear up our system storage to make space for installing new programs and dealing with additional files. This is especially important when you have a low storage device or a limited storage capacity. Even if you have a large storage available but you are a person like me who likes to clear up clutter from time to time, this article will brief you about multiple ways to do so. Ubuntu might be a light operating system but it is not too friendly on the storage, especially because it does not delete the packages it downloads for installing software.
This article provides you with ways to clear up disk space on an Ubuntu 18.04 system, mostly through the graphical interface so that even a beginner can master this skill.
Empty The Trash
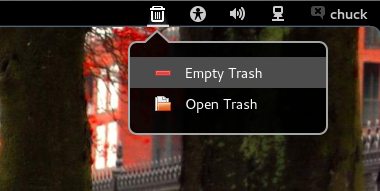
You might have a large amount of useless data residing in your trash can. This takes up equal system space as the most useful data on your system. It is the easiest and quickest solution to empty the trash in order to use that space for more important purposes. Simply open the File Manager and right-click the Trash icon from the left panel. Select the Empty Trash option to permanently delete all the files from the trash can.

Delete Temporary Files Using BleachBit
Certain files on your system like browser histories, caches and temporary files from various programs might be taking more space than you can imagine. BleachBit, available through the Software Centre, is an automatic clean up program that rids your system from all the unwanted temporary files. First, download the BleachBit software and then run it as an administrator through the following command, because this way you will be able to remove the unwanted apt packages and some more system data along with the usual temporary files.
The first time you open BleachBit, you will be able to set up some preferences for data cleaning.

Make your choices and then click the Close button. After that, you can select the file categories you want to clean and click the Clean button.

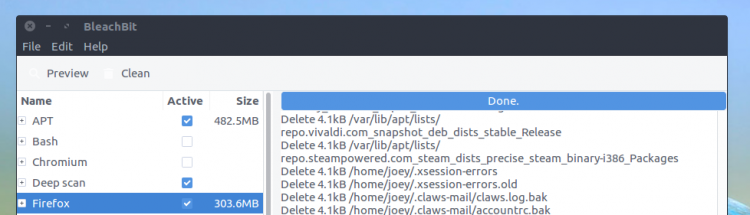
Click the Delete button to permanently get rid of the temporary files. The following image shows how some disk space was recovered from my system after cleaning it. For you, it might be a lot, depending on the kind of data you have in your system.

Analyze Your Disk Usage Using Disk Usage Analyzer
Our system may have large unwanted files without us knowing or remembering them. The Disk Usage Analyzer tool scans your file system and presents a graphical view of the directories taking a huge chunk of space on your system. You can reach those directories and locate and get rid of the files that are making your storage heavy. You can access this free tool through the Ubuntu Dash as follows:

By clicking the red zones of your graph, you can navigate exactly to where a heavy file resides.

Find Heavy Applications Using Synaptic Package Manager
Ubuntu 18 comes with a default application called the Synaptic Package Manager. This application can help you get rid of the packages that you might have used to install some programs on your system. These packages are only required if you need to uninstall and then re-install a software. Keeping these packages in your storage is not a very smart choice as fast internet connections these days can help you download them very quickly again when needed.
You can even download this package manager from Ubuntu Software if it does not come by default on your Linux system.
Open the Synaptic Package Manager, click the Status button from the left panel and then click Installed.

This will list all the installed packages on your system. The list in the right-panel might not show you the size column by default. In order to view this very important column, click the Settings menu and then the Preferences option. Here, make sure that the Size column is enabled. Please move this option up to the top so that it starts to appear in your list of packages. Now when you view the list, you can easily point out the packages taking a lot of space on your system, please make sure not to delete a heavy but important package, for example, the kernel package. You can select an item from this list and right-click and then select Mark for Complete Removal in order to delete the unwanted package from your system.
Remove Old Kernels Using Synaptic Package Manager
Whenever you install a new Kernel for Ubuntu, it keeps the old Kernel saved and you can even boot to an old one. Ubuntu does this so that you can access the system even if the new kernel is not working. When you are sure you can boot through the latest install and want to delete the previous versions, you can do so through the Synaptic Package Manager. Simply search for the keyword “linux-” and then select the packages you want to remove from the list. Mark them for removal from the right-menu and get rid of them for good.

Through the five ways described in this article, you can free up space on your computer or enjoy a de-cluttered environment even as an Ubuntu beginner.
Essential Guide: 5 Simple Ways To Free Up Space on Ubuntu
Unlike Windows, which comes with built-in defrag and disk clean-up tools, Ubuntu doesn’t make it immediately obvious how you go about trying to free up space.
So what do you do once you’ve emptied the trash and deleted those sizeable .ISO downloads? How do you recover more space?
Below, we show you 5 super simple (and in some cases blindingly obvious yet easily forgotten) steps you can take to get back GBs, materialise MBs, and clean out the KB cruft!
Next time you need more space — and heck: even if you don’t — here are 5 simple ways to free up disk space on Ubuntu.
1. Clean the APT Cache (And Do It Regularly)
It sounds so obvious yet chances are you haven’t done this for a while.
By default Ubuntu keeps every update it downloads and installs in a cache on your disk, just in case you need it again.
This is useful if you regularly add and remove apps, find yourself needing to reconfigure/reinstall a specific package, or simply have a poor connection.
But the flip side is that the apt package cache can quickly swell to several hundred MBs. This command tells you how big your apt cache is:
du -sh /var/cache/apt/archives
To clean the apt cache on Ubuntu simply run the following command.
The apt clean command removes ALL packages kept in the apt cache, regardless of age or need. If you’re on a slow, capped or intermittent connection you may want to consider skipping this step.
2. Remove Old Kernels (If No Longer Required)
Now, admittedly, this step is one you want to approach with caution.
Having a choice of kernels to boot up is, honestly, quite handy, especially if you notice something has gone awry while using the latest one.
Unless you’re in the throes of constant hardware woes there’s little need to hoard kernels.
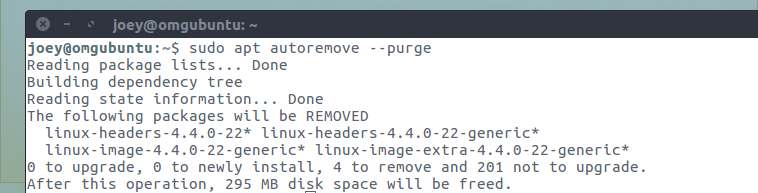
It’s easy to remove old kernels in Ubuntu. You can do it from the command line using the following command:
sudo apt-get autoremove --purge
Note that this command will only remove kernels that a) are no longer needed and b) were installed from the Ubuntu archive through system updates. If you install kernels manually or using a third-party PPA you’ll need to roll up your sleeves and remove those manually.
3. Uninstall Apps & Games You Never Use (And Be Honest!)
Chances are you have a number of apps installed that you never use. Maybe you installed them on the back of an awesome review, out of nosiness, or to tackle a specific task.
Whatever the excuse, if you no longer need an app, and it’s taking up space, don’t be afraid to uninstall it.
Typical apps you may wish to expunge include web browsers (are you ever going to use Opera, Epiphany, Midori and Min?), music players (heck knows there’s enough of ’em) and games that sounded good in the Steam Store blurb but were as much fun as a Windows 10 update combo!
And everyone has LibreOffce Draw knocking about doing nothing! 😅
Don’t lie to yourself about might-needs and could-dos, either. The beauty of most software is that it’s not going away anytime soon. This is never truer than on Linux, where apps remain an apt install command away.
To remove apps from the command line run:
sudo apt-get remove package-name1 package-name2
To remove excess packages and dependencies that are no longer required (because you’ve uninstalled other packages or newer versions have replaced them) run the following command:
4. Use A System Cleaner like BleachBit
Writing a “to-do” list on system cleaning would end up 10x longer if we listed every app, cache, log and system process hiding in every nook and cranny of your OS.
BleachBit saves us from doing that.
It’s like CCleaner for Linux; a byte scouring beast. The app can find and clean pretty much every fluff file there is and, as a result, should only ever be used with caution.
BleachBut can wipe the caches of more than 70 popular desktop applications (including most web browsers); hoover up old file, browser and bash histories; and makes light work of those crash logs you’ll never get around to reading.
No surprise that we recommend installing it as one of our top things to do after installing Ubuntu.
You can install BleachBit on Ubuntu 16.04 LTS (and above) straight from Ubuntu Software.
Run the app as root for maximum cleaning power. Check the boxes beside the things you’d like to clean. Click Preview to see an estimate of how much space they currently take up, and click Clean to remove them.
5. Stay up to date (seriously, do it!)
The most obvious step on this list is also the one few people would think to recommend. See, unlike Windows, where every new update adds more overhead and bloat, package updates on Linux often free space rather than use it.
So next time you put off that 156MB librandom-package102 update cos you’re running low on space, maybe think again!
Summary
That just about covers it. If you only remember two steps from this list make it the first and last.
Now go forth and free space!
Let us know how much space you manage to claw back or share your own top space-saving tips in the comments!
Home / How To / 5 Simple Ways To Free Up Space on Ubuntu