- Sysadminium
- Реализуемая схема
- Установка и настройка FTP сервера
- Создание FTP-пользователей
- Включение TLS
- Подключение к серверу (FTP-клиенты)
- Формат логов
- Итог
- How To Install an FTP Server On Ubuntu with vsftpd
- Step 1: Update System Packages
- Step 2: Install vsftpd Server on Ubuntu
- Step 3: Backup Configuration Files
- Step 4: Create FTP User
- Step 5: Configure Firewall to Allow FTP Traffic
- Step 6: Connect to Ubuntu FTP Server
- Configuring and Securing Ubuntu vsftpd Server
- Change Default Directory
- Authenticate FTP Users
- Securing FTP
- Limit User Access
- Create a User List File
- Encrypt Traffic With FTPS
Sysadminium
В этой статье я покажу как создать FTPS сервер на Linux (Debian 11) с отдельными каталогами для разных пользователей.
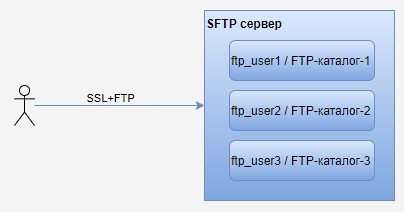
Реализуемая схема
В этой статье я покажу процесс подготовки FTPS сервера на Linux, при этом каждый пользователь будет видеть только свой каталог.
Установка и настройка FTP сервера
Я буду использовать Very Secure FTP Daemon (vsftpd), устанавливаем пакет:
После установки, у вас появится новая служба — vsftpd.service:
# systemctl status vsftpd.service ● vsftpd.service - vsftpd FTP server Loaded: loaded (/lib/systemd/system/vsftpd.service; enabled; vendor preset: enabled) Active: active (running) since Fri 2022-12-09 13:14:31 MSK; 26s ago Process: 1135 ExecStartPre=/bin/mkdir -p /var/run/vsftpd/empty (code=exited, status=0/SUCCESS) Main PID: 1136 (vsftpd) Tasks: 1 (limit: 4915) Memory: 1.0M CGroup: /system.slice/vsftpd.service └─1136 /usr/sbin/vsftpd /etc/vsftpd.conf
Перед настройками сервера, сделаем резервную копию конфига:
# cp /etc/vsftpd.conf /etc/vsftpd.conf.orig
# nano /etc/vsftpd.conf anonymous_enable=NO # запрещаем вход анонимных пользователей local_enable=YES # разрешаем вход по ftp для локальных пользователей write_enable=YES # разрешаем писать на ftp (загружать или удалять файлы) local_umask=077 # маска для вновь создаваемых файлов xferlog_enable=YES # записывать в лог файл все транзакции по передаче файлов xferlog_std_format=YES # использовать стандартный формат лога xferlog_file=/var/log/vsftpd.log # файл лога connect_from_port_20=YES # исходящие с сервера FTP-соединения по 20 порту вместо случайного listen=YES # ожидать входящие соединения listen_ipv6=NO # для ipv6 не ожидать входящие соединения pam_service_name=vsftpd # использовать PAM библиотеки userlist_enable=YES # разрешим вход только для перечисленных пользователей userlist_file=/etc/vsftpd.userlist # перечислим пользователей в этом файле userlist_deny=NO # пользователи, которые есть в списке не будут отбрасываться chroot_local_user=YES # пользователи ограничены только своей домашней папкой
Различные опции хорошо описаны здесь, на русском языке.
После настройки перезапустим службу:
# systemctl restart vsftpd.service
По желанию, проверим слушает ли наш ftp сервер входящие соединения:
# ss -ltupn | grep vsftpd tcp LISTEN 0 32 0.0.0.0:21 0.0.0.0:* users:(("vsftpd",pid=1273,fd=3)) Создание FTP-пользователей
Создадим первого и второго пользователя и запишем их в userlist. Все остальные, локальные пользователи, не смогут подключаться по протоколу FTP:
# adduser ftp_user1 # adduser ftp_user2 # nano /etc/vsftpd.userlist ftp_user1 ftp_user2
Включение TLS
Сейчас уже можно подключиться к нашему FTP-серверу, но логины и пароли, при этом, будут передаваться открытым текстом. Чтобы этого избежать включим поддержку TLS, превратив FTP-сервер в FTPS-сервер.
Создадим самоподписанный ssl сертификат на 10 лет:
# openssl req -x509 -nodes -days 3650 -newkey rsa:2048 -keyout /etc/ssl/private/vsftpd.pem -out /etc/ssl/private/vsftpd.pem
# nano /etc/vsftpd.conf ssl_enable=YES # включим ssl rsa_cert_file=/etc/ssl/private/vsftpd.pem # путь к файлу ключа rsa_private_key_file=/etc/ssl/private/vsftpd.pem # путь к файлу сертификата allow_anon_ssl=NO # запретим анонимные подключения по ssl force_local_data_ssl=YES # разрешим передачу данных только по ssl force_local_logins_ssl=YES # разрешим подключаться только по ssl ssl_tlsv1=YES # разрешим алгоритм tlsv1 ssl_sslv2=NO # запретим устаревший sslv2 ssl_sslv3=NO # запретим устаревший sslv3
Затем перезапустим службу:
# systemctl restart vsftpd.service
Подключение к серверу (FTP-клиенты)
Для подключения можно использовать FileZilla, WinSCP, или обычный Windows Проводник.
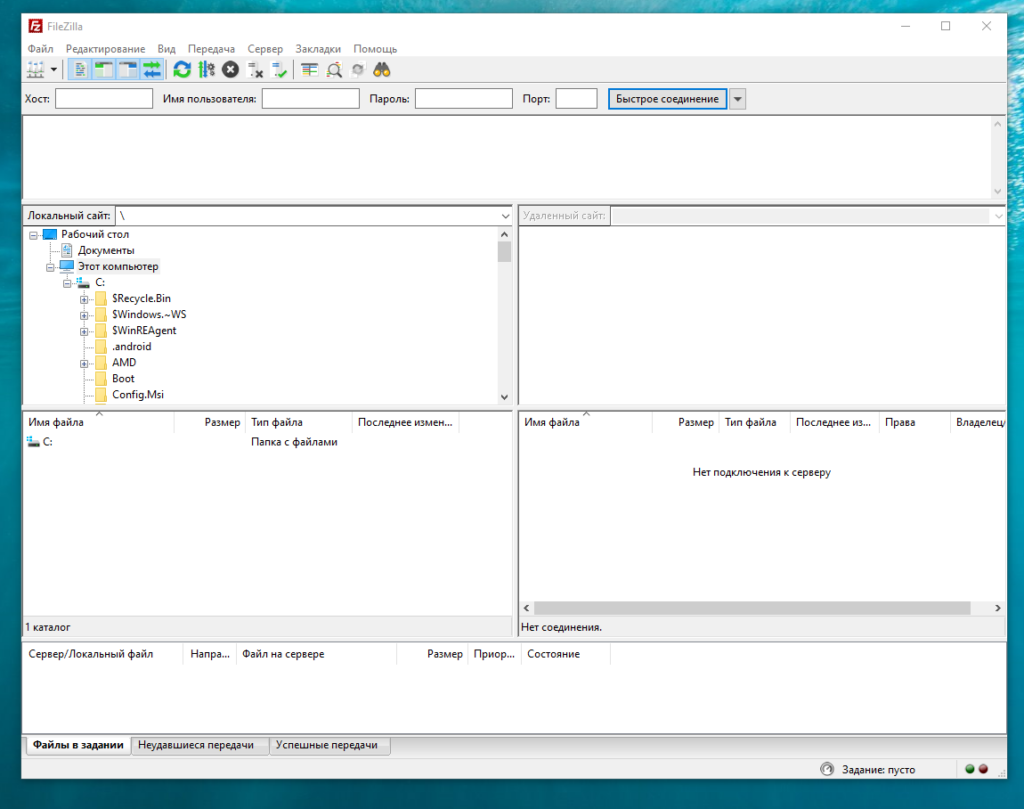
Я покажу как подключиться к FTP серверу с помощью приложения FileZilla. После запуска приложения вы увидите такое окно:
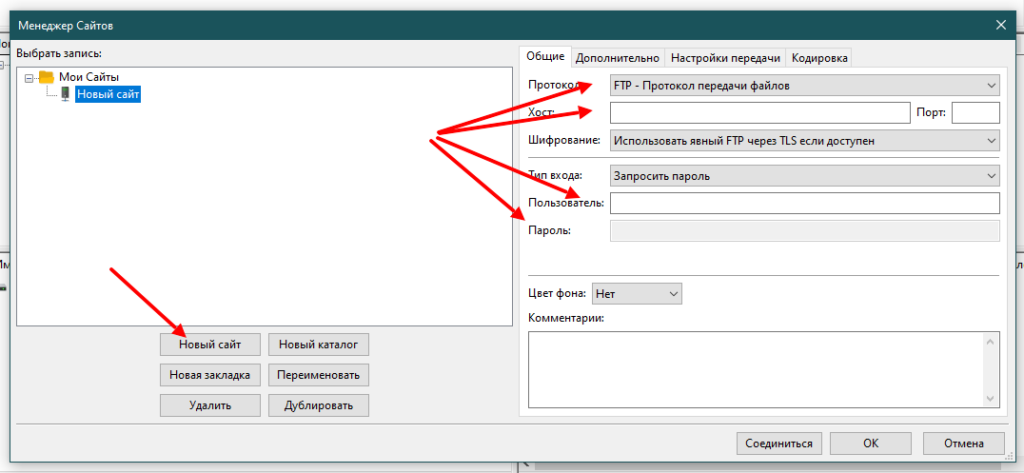
Слева будет локальная файловая система, а справа удалённая. Вы можете совершить быстрое подключение, указав: хост, имя пользователя, пароль и порт. Или можете сохранить подключение, чтобы использовать его в последующем несколько раз. Для того, чтобы сохранить подключение, откройте менеджер сайтов, выбрав в меню «Файл / Менеджер сайтов«. Каждый сайт — это сохранённое подключение. Создавая новый сайт вы можете указать ip-адрес, порт, логин и пароль и другое:
Дальше, используя созданные сайты, вы сможете подключаться к различным FTP серверам.
Формат логов
Далее я подключился с помощью FileZilla к своему FTP серверу. И выполнил некоторые действия:
В журнале (/var/log/vsftpd.log) появились следующие записи:
Mon Dec 12 15:06:29 2022 1 192.168.0.5 6 /user2/test.txt a _ o r ftp_user2 ftp 0 * c Mon Dec 12 15:25:39 2022 1 192.168.0.5 7254 /user2/report.json b _ i r ftp_user2 ftp 0 * c Mon Dec 12 15:27:53 2022 1 192.168.0.5 6 /user2/test.txt a _ i r ftp_user2 ftp 0 * c
Здесь видна следующая информация:
- дата и время транзакции, а также ip-адрес клиента ( Mon Dec 12 15:06:29 2022 1 192.168.0.5 );
- размер файла в байтах и сам файл ( 7254 /user2/report.json );
- режим передачи: (a — ASCII, b — двоичный), символ (_) — означает, что не было произведено никаких специальных операций, и направление передачи (o — файл скачали, i — файл загрузили) — ( a _ o ) или ( b _ i );
- символ (r) — означает что пользователь был зарегистрирован в системе, дальше идёт имя пользователя ( r ftp_user2 ).
Логирование желательно включать, чтобы в случае чего знать, кто и что делал с файлами по FTP.
Итог
Из статьи вы узнали как подготовить FTPS сервер на Linux. Я все действия выполнял на системе Debian 11, но на Ubuntu 22.04 всё делается аналогично. Показал как защитить сервер с помощью TLS протокола, как использовать userlist, для создания списка разрешённых пользователей.
В этой статье я покажу как создать ftps сервер на Linux (Debian 11) с отдельными каталогами для разных пользователей
How To Install an FTP Server On Ubuntu with vsftpd
FTP stands for File Transfer Protocol. It is similar to HTTP (HyperText Transfer Protocol), in that it specifies a language for transferring data over a network. FTP is unencrypted by default, so by itself, it is not a good choice for secure transmission of data.
This guide will help you install and configure an FTP server with vsftpd on Ubuntu.
- Access to a user account with sudo privileges
- Access to a terminal window/command line (Ctrl-Alt-T)
- The apt package manager, included by default
Step 1: Update System Packages
Start by updating your repositories – enter the following in a terminal window:
The system proceeds to update the repositories.
Step 2: Install vsftpd Server on Ubuntu
A common open-source FTP utility used in Ubuntu is vsftpd. It is recommended for its ease of use.
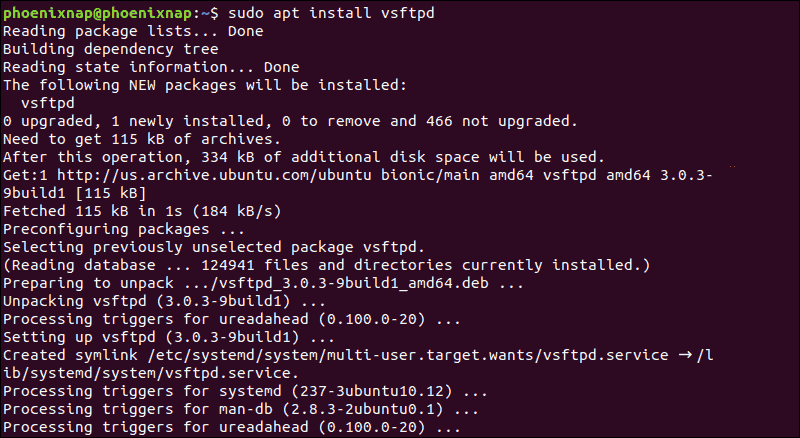
1. To install vsftpd, enter the command:
This is an example of the output in Ubuntu.
2. To launch the service and enable it at startup, run the commands:
sudo systemctl start vsftpd sudo systemctl enable vsftpdNote: Instruction for setting up and configuring FTP server with vsftpd is also available for CentOS 7 and Rasberry Pi.
Step 3: Backup Configuration Files
Before making any changes, make sure to back up your configuration files.
1. Create a backup copy of the default configuration file by entering the following:
sudo cp /etc/vsftpd.conf /etc/vsftpd.conf_defaultStep 4: Create FTP User
Create a new FTP user with the following commands:
sudo useradd -m testuser sudo passwd testuserThe system should ask you to create a password for the new testuser account.
Step 5: Configure Firewall to Allow FTP Traffic
If you are using UFW that comes standard with Ubuntu, it will block FTP traffic by default. Enter the following commands to open Ports 20 and 21 for FTP traffic:
sudo ufw allow 20/tcp sudo ufw allow 21/tcpNote: If you are using a different firewall, refer to the instructions to allow access on Port 20 and Port 21. These are the listening ports for the FTP service.
Step 6: Connect to Ubuntu FTP Server
Connect to the FTP server with the following command:
Replace ubuntu-ftp with the name of your system (taken from the command line).
Log in using the testuser account and password you just set. You should now be successfully logged in to your FTP server.
Configuring and Securing Ubuntu vsftpd Server
Change Default Directory
By default, the FTP server uses the /srv/ftp directory as the default directory. You can change this by creating a new directory and changing the FTP user home directory.
To change the FTP home directory, enter the following:
sudo mkdir /srv/ftp/new_location sudo usermod -d /srv/ftp/new_location ftpRestart the vsftpd service to apply the changes:
sudo systemctl restart vsftpd.serviceNow, you can put any files you want to share via FTP into the /srv/ftp folder (if you left it as the default), or the /srv/ftp/new_location/ directory (if you changed it).
Authenticate FTP Users
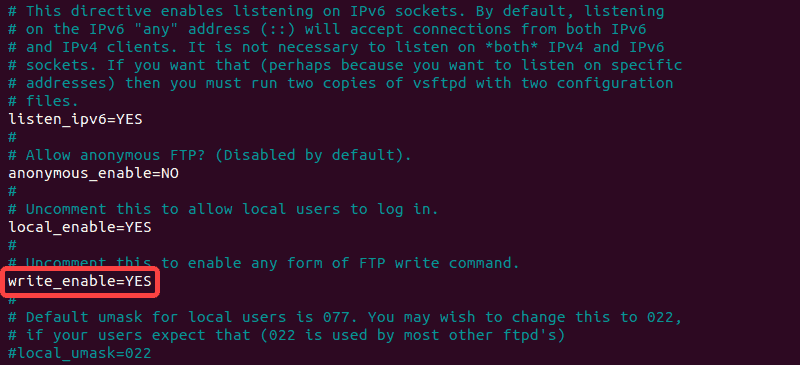
If you want to let authenticated users upload files, edit the vsftpd.conf file by entering the following:
Find the entry labeled write_enable=NO, and change the value to “YES.”
Save the file, exit, then restart the FTP service with the following:
sudo systemctl restart vsftpd.serviceThis allows the user to make changes inside their home directory.
Note: To learn more about using FTP, refer to our in-depth guide on Linux ftp command.
Securing FTP
Numerous exploits take advantage of unsecured FTP servers. In response, there are several configuration options in vsftpd.conf that can help secure your FTP server.
Limit User Access
One method is to limit users to their home directory. Open vsftpd.conf in an editor and uncomment the following command:
This is an example of the file in nano:
Create a User List File
To create a list file, edit /etc/vsftpd.chroot_list, and add one user per line.
Instruct your FTP server to limit this list of users to their own home directories by editing vsftpd.conf:
chroot_local_user=YES chroot_list_file=/etc/vsftpd.chroot_listThe image ilustrates the edits that were made:
Restart the vsftpd service:
sudo systemctl restart vsftpd.serviceBy default, the list of blocked users from FTP access is stored in /etc/ftpusers. To add blocked users, edit this file and add one user per line.
Encrypt Traffic With FTPS
Another method to secure your FTP server is to encrypt the traffic. This is done by using FTPS – File Transfer Protocol over SSL (Secure Socket Layer).
For this to work, users need to be set up with a shell account on the FTP server. This will add a layer of secure encryption to your FTP traffic.
1. Start by creating a new certificate with openssl. To do so, run the command:
sudo openssl req -x509 -nodes -days 365 -newkey rsa:2048 -keyout /etc/ssl/private/vsftpd.pem -out /etc/ssl/private/vsftpd.pem 2. Provide the required information when prompted or keep the default configuration by pressing Enter.
3. Next, open your vsftpd.conf file in an editor and change the line ssl_enable=NO to ssl_enable=YES :
4. Then, add the following lines:
rsa_cert_file=/etc/ssl/private/vsftpd.pem rsa_private_key_file=/etc/ssl/private/vsftpd.pem allow_anon_ssl=NO force_local_data_ssl=YES force_local_logins_ssl=YES ssl_tlsv1=YES ssl_sslv2=NO ssl_sslv3=NO require_ssl_reuse=NO ssl_ciphers=HIGH pasv_min_port=40000 pasv_max_port=500005. Save the changes and exit the file.
6. Finally, restart the service to apply the changes:
sudo systemctl restart vsftpd.serviceNote: For more information on SSL configurations and certificates, please see the Ubuntu FTP server documentation. Also, it’s worth noting that FTPS is a different protocol that SFTP. SFTP stands for Secure File Transfer Protocol, and it’s an entirely different protocol.
Now, you should have installed an FTP server on Ubuntu with vsftpd.
You should now be able to configure your user lists and accounts, and connect to your new FTP server. We also detailed the risks of the FTP protocol, and how to mitigate them.
