What is the correct way to view your CPU speed on Linux?
I found two commands to output information about my CPU: cat /proc/cpuinfo and lscpu . /proc/cpuinfo shows that my CPU speed is 2.1 Ghz, whereas lspcu says it is 3167 Mhz. Which one is correct? This is my exact output from cat /proc/cpuinfo about my processor speed:
model name : Intel(R) Core(TM) i7-4600U CPU @ 2.10GHz Your /proc/cpuinfo should also have a line that says cpu MHZ: . which is the current speed. The 2.1 after the @ is the base speed (without turbo boost).
It’s Intel’s way of «hitting the gas» when needed. I guess your actual speed at the time was indeed around 3.2 GHz, you could also try e.g. for cpu0 with cat /sys/devices/system/cpu/cpu0/cpufreq/cpuinfo_cur_freq (as root).
Turbo Boost is a technology that changes the frequency of the processor depending of the number of cores you are using. If you use few cores, the frequency is increased to boost the performance and maintain a low temperature. You may check the Turbo Boost frequency tables to check how it increases.
6 Answers 6
To see the current speed of each core I do this:
watch -n.1 "grep \"^[c]pu MHz\" /proc/cpuinfo" This does not work on server CPUs such as the Intel Xeon series. On such machines it will show the base frequency only. To show the turbo frequency, you’ll need cpupower or turbostat. See @Maxim Egorushkin’s answer.
If your watch command does not work with intervals smaller than one second, modify the interval like so:
watch -n1 "grep \"^[c]pu MHz\" /proc/cpuinfo" This displays the cpu speed of each core in real time.
By running the following command, one or more times, from another terminal one can see the speed change with the above watch command, assuming SpeedStep is enabled ( Cool’n’Quiet for AMD ).
echo "scale=10000; 4*a(1)" | bc -l & (This command uses bc to calculate pi to 10000 places.)
I had to remove the . in your first command to make it work: watch -n1 «cat /proc/cpuinfo | grep \»^[c]pu MHz\»»
this is a nifty way to do it, but I’d caution against running any command every .1 seconds, that is itself going to impact the cpu speed report. 1 second is plenty.
@Lizardx Ordinarily I agree but in this case the CPU speed can increase and decrease faster than a 1 second interval, resulting in a lack of visible speed changes. Since modern processors are so fast, I initially thought my SpeedStep was not working when using 1 second as the interval. At a minimum, .5 should be used if one doesn’t want to go as fast as .1 second (although I have still missed seeing many of the speed changes at that rate.
Try running top with the timers set to less than 1 second, you can see the cpu usage visibly. My guess is that what you may actually be seeing is the system generating your cpu speed info, that is, the generation of the cpu speed output is causing the cpu movement. I find that anything less than a second starts to directly cause the cpu speeds you are watching. For example, top at -d5 is 1% of cpu. At -d2 it’s about 5%. You might find you’re actually fooling yourself into thinking the cpu is doing something that you’re making it do, heh. Output to shell is expensive too.
Could try watch -n0.1 , might work. Failing that, while true; do cat /proc/cpuinfo | grep MHz; sleep 0.1; clear; done , it flickers more than watch though.
For intel i3, i5 and i7 based cpus there is a dedicated tool called i7z that shows current speed for all cpu cores.
From man page (description):
i7z runs the i7z, ncurses based, program without any options. i7z will print out the C-states and temperature for i3, i5 and i7 based Core processors from Intel (including Nehalems, Sandy Bridge and Ivy Bridge).
For ubuntu-based distributions you can install it by issuing this command:
then just run it (tool needs to be run with sudo):
This is the best solution if you have an Intel CPU. Cat’ing the cpuinfo gives you incorrect clock speeds. Just a note, you forgot to put the dash in «apt-get».
Well. it works with my Xeon processor only the output is garbled, maybe because I have two CPUs (I have a dual Xeon motherboard).
Unfortunately, i7z doesn’t seem to work properly on my Core i7-1165G7 – it says «unknown processor» (among other things) and aborts.
Another good tool from Intel itself is turbostat (from the linux-cpupower package). But this one has nicer output.
The Intel Core i7-4600U Processor supports Turbo Boost technology. It has a base frequency of 2.10GHz and a Max Turbo Frequency of 3.30GHz. That means that,
- If you disable the Turbo Boost (in the BIOS setup menu), the CPU will work at 2.10GHz all the time.
- When Turbo Boost is enabled and only one of the cores is working, the CPU will work at a maximum of 3.30GHz.
- If Turbo Boost is enabled and all the cores are working, the CPU will work at 2.10GHz.
Obtaining current frequency
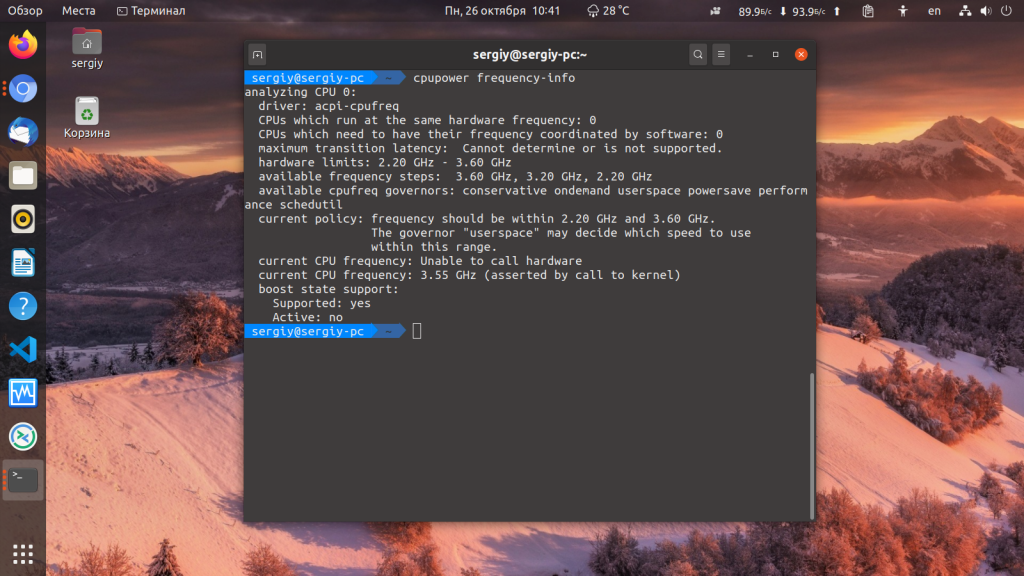
To determine if the Turbo Boost is activated and which is the current frequency, you can use cpupower frequency-info . For instance, for an old Intel Core i5-660 with Turbo Boost enabled, you will get the following.
$ cpupower frequency-info analyzing CPU 0: driver: acpi-cpufreq CPUs which run at the same hardware frequency: 0 CPUs which need to have their frequency coordinated by software: 0 maximum transition latency: 10.0 us. hardware limits: 1.20 GHz - 3.47 GHz available frequency steps: 3.47 GHz, 3.33 GHz, 2.53 GHz, 1.87 GHz, 1.20 GHz available cpufreq governors: conservative, ondemand, userspace, powersave, performance current policy: frequency should be within 1.20 GHz and 3.47 GHz. The governor "ondemand" may decide which speed to use within this range. current CPU frequency is 1.87 GHz. cpufreq stats: 3.47 GHz:82,67%, 3.33 GHz:0,00%, 2.53 GHz:0,00%, 1.87 GHz:0,06%, 1.20 GHz:17,28% (3) boost state support: Supported: yes Active: yes 25500 MHz max turbo 4 active cores 25500 MHz max turbo 3 active cores 25500 MHz max turbo 2 active cores 25500 MHz max turbo 1 active cores Note that the information states the hardware limits ( 1.20 GHz — 3.47 GHz ), the possible frequencies ( 3.47 GHz, 3.33 GHz, 2.53 GHz, 1.87 GHz, 1.20 GHz ) and the current frequency ( 1.87 GHz ). You may find the technical information of these frequencies at the Intel website.
Frequency when TurboBoost is disabled
Note the difference when you run the same command with Turbo Boost disabled: In the boost state support section, the values for Supported and Active are no . Here, the CPU will be at the nominal/minimal value (1.20Ghz) all the time.
$ cpupower frequency-info analyzing CPU 0: driver: acpi-cpufreq CPUs which run at the same hardware frequency: 0 CPUs which need to have their frequency coordinated by software: 0 maximum transition latency: 10.0 us. hardware limits: 1.20 GHz - 3.47 GHz available frequency steps: 3.47 GHz, 3.33 GHz, 2.53 GHz, 1.87 GHz, 1.20 GHz available cpufreq governors: conservative, ondemand, userspace, powersave, performance current policy: frequency should be within 1.20 GHz and 3.47 GHz. The governor "ondemand" may decide which speed to use within this range. current CPU frequency is 1.20 GHz. cpufreq stats: 3.47 GHz:40,86%, 3.33 GHz:0,01%, 2.53 GHz:0,06%, 1.87 GHz:0,22%, 1.20 GHz:58,85% (493) boost state support: Supported: no Active: no 25500 MHz max turbo 4 active cores 25500 MHz max turbo 3 active cores 25500 MHz max turbo 2 active cores 25500 MHz max turbo 1 active cores You can disable the Turbo Boost using the BIOS or some Linux options/commands. The kernel support can be enabled/disabled using the /sys/devices/system/cpu/cpufreq/boost file.
Частота процессора в Linux
Если вы уже пытались настраивать частоту Linux, то, наверное уже заметили, что частота процессора сама меняется в зависимости от нагрузки на систему. Операционная система устанавливает лимит минимальной и максимальной частоты, и когда нагрузки нет частота автоматически опускается до минимальной, а при появлении нагрузки подымается назад.
Конечно, в интерфейсе BIOS можно зафиксировать частоту на одном уровне, но в этом нет смысла. С точки зрения баланса производительности и энергопотребления лучше оставить всё как есть. Но правила изменения частоты можно настроить. Для этого используются политики CPU Governor. В этой статье мы рассмотрим как узнать частоту процессора Linux, а также как настроить её изменение.
Как узнать частоту процессора Linux
Узнать текущую частоту процессора можно вместе с другой информацией о нём с помощью утилиты lscpu:
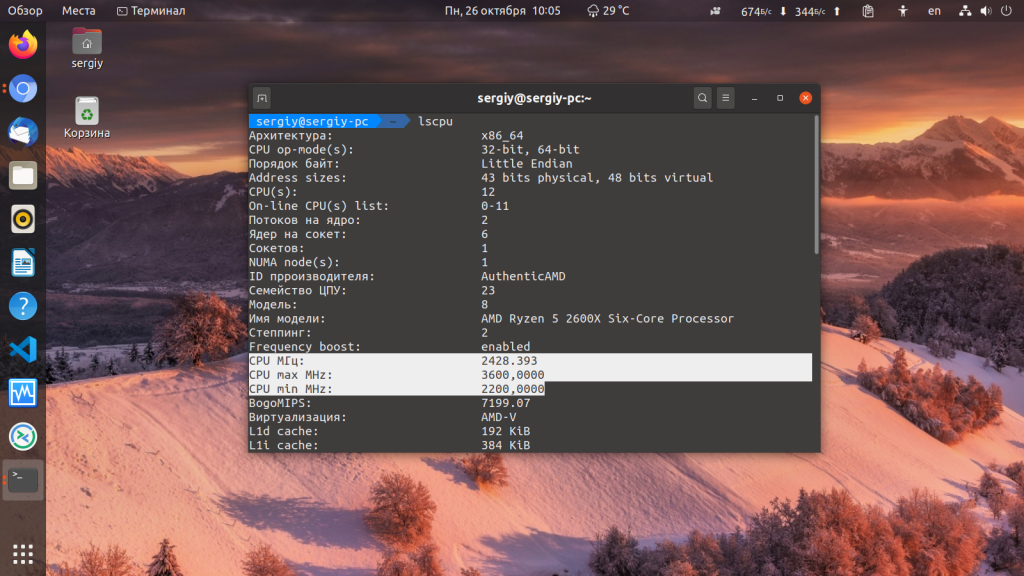
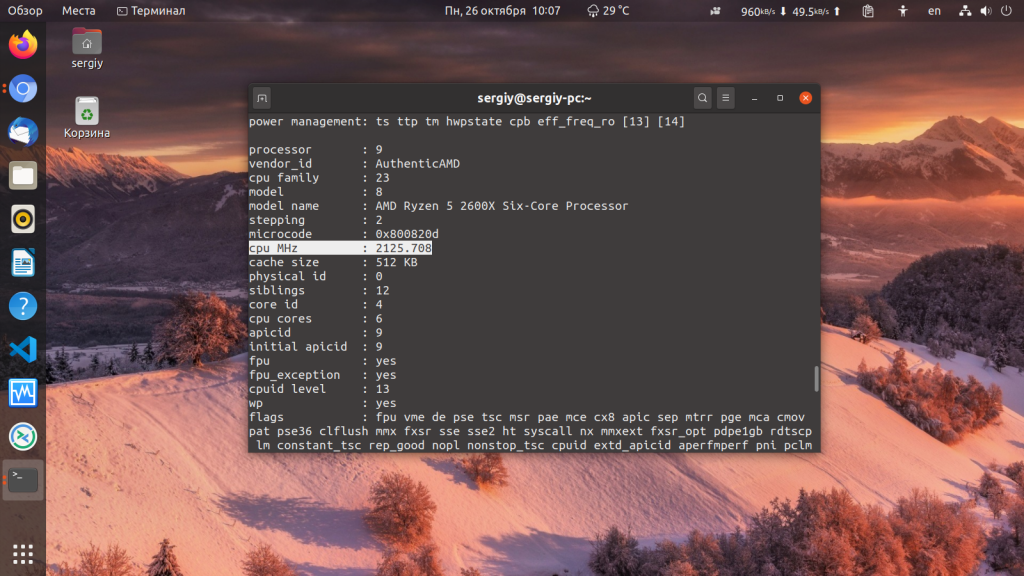
Здесь же выводится максимальная и минимальная частота. Текущую частоту для каждого ядра по отдельности вы можете посмотреть в файле /proc/cpuinfo:
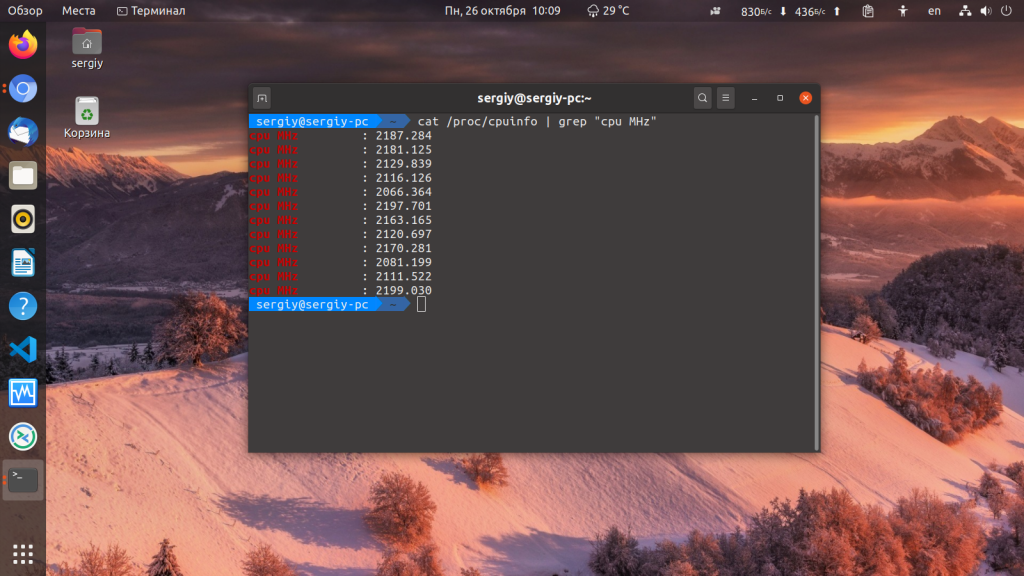
Так можно вывести информацию обо всех ядрах на одном экране:
cat /proc/cpuinfo | grep «cpu MHz»
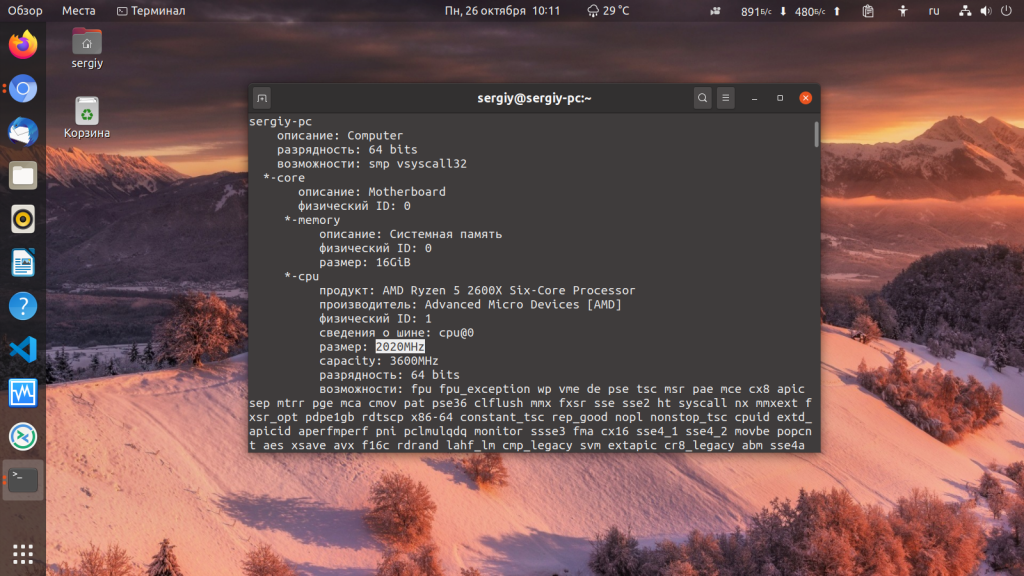
Утилита lshw тоже выводит текущую и максимальную частоту в секции cpu:
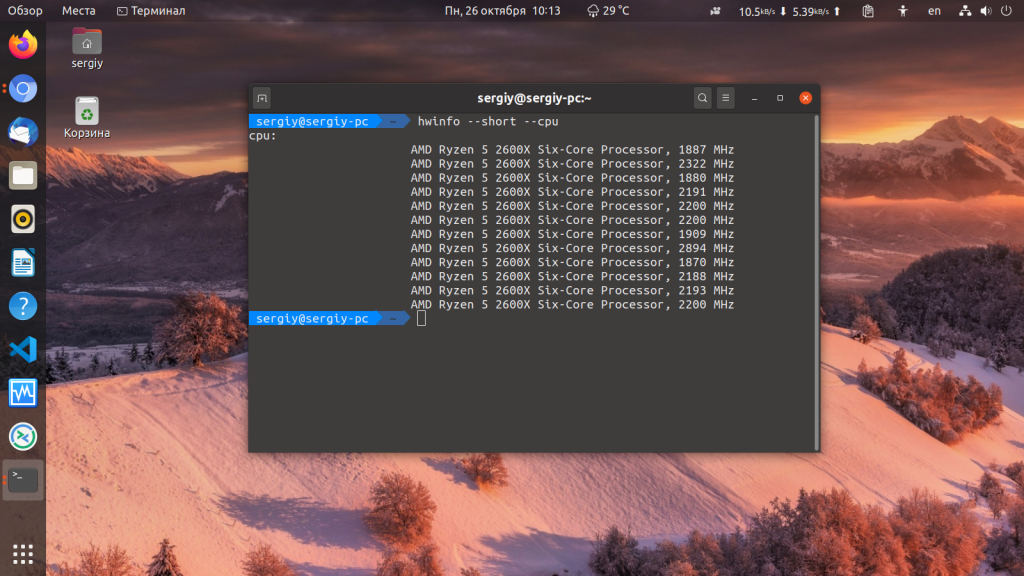
Ну и hwinfo выводит нужную нам информацию. Правда, прежде надо её установить:
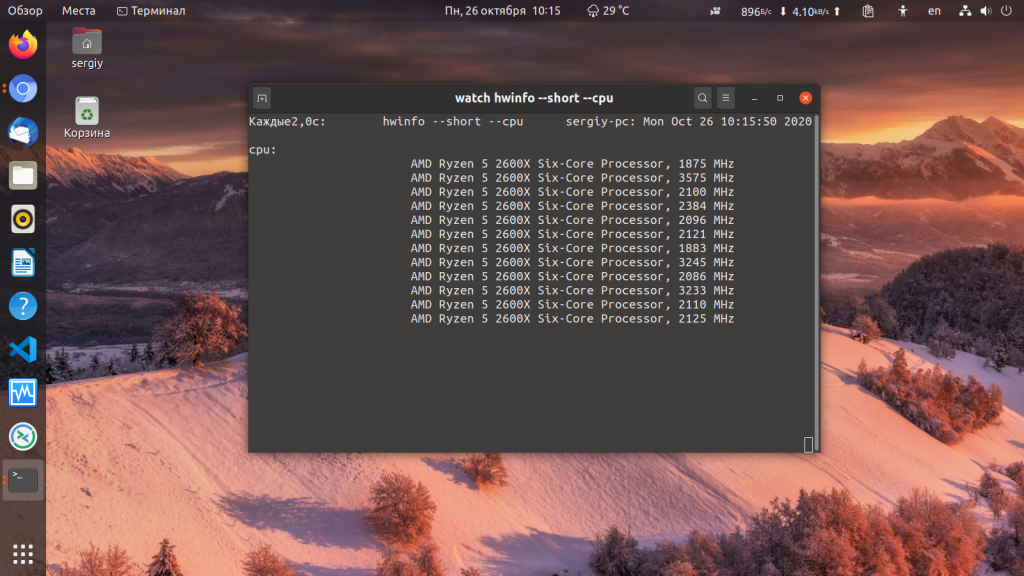
Если вы хотите отслеживать как меняется частота со временем используйте hwinfo в сочетании с утилитой watch:
Теперь вы знаете как посмотреть частоту процессора Linux, перейдём к управлению.
Управление частотой в Linux
Для управления частотой в операционной системе Linux используются политики CPU Governor. Они определяют как быстро будет изменятся частота при изменении нагрузки. Существует четыре политики:
- powersave — процессор работает на минимальной частоте;
- performance — процессор работает на максимальной частоте;
- ondemand — динамическое изменение частоты, при появлении нагрузки резко устанавливается самая высокая частота, а при снижении нагрузки частота медленно снижается;
- conservative — аналогично ondemand, только частота меняется более плавно;
- userspace — использовать частоту заданную пользователем;
- schedutil — изменение частоты на основе планировщика.
Самый выгодный в данном случае режим — это ondemand, частота повышается при необходимости и опускается если она не нужна. Чтобы посмотреть текущую политику управления частотой вам понадобится утилита cpupower, которую можно установить, установив этот пакет:
sudo apt install linux-tools-generic
Затем посмотрите информацию о процессоре:
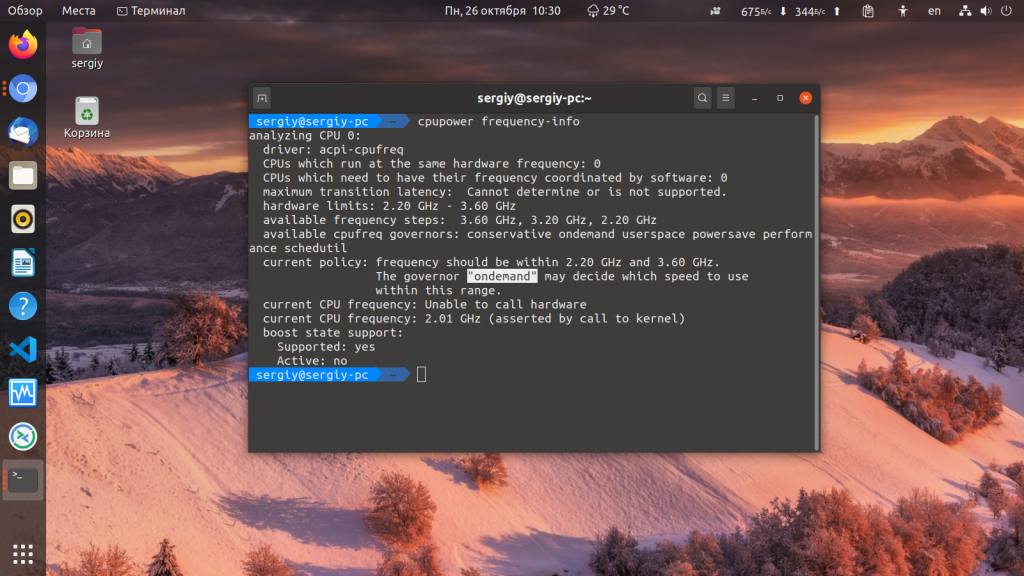
Как видите, сейчас для управления частотой используется политика ondemand. Для установки политики используйте команду frequency-set и опцию -g. Например, для performance:
sudo cpupower frequency-set -g performance
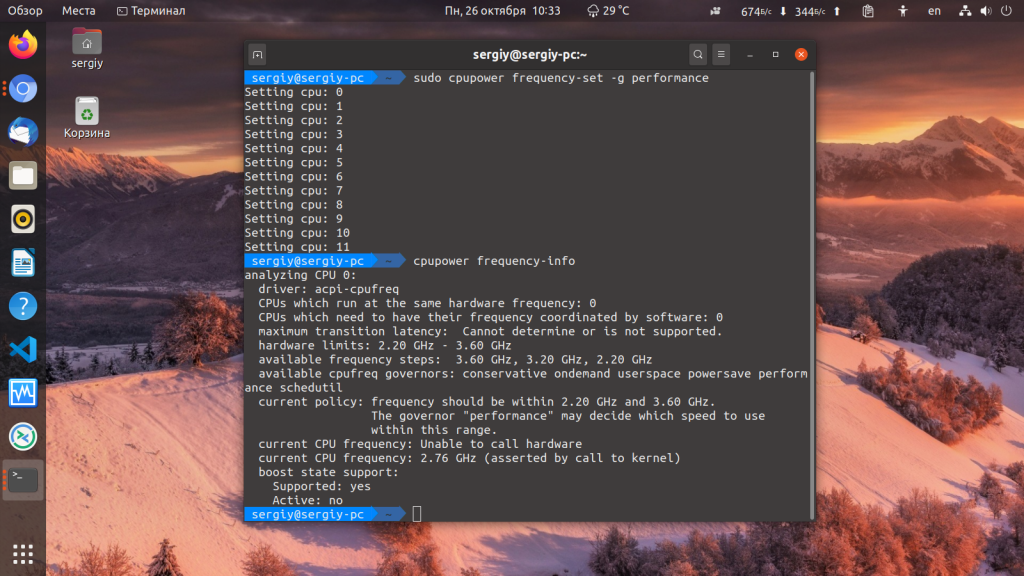
Теперь частота гораздо выше, а используемая политика performance. Для того чтобы вручную менять частоту установите политику userspace:
sudo cpupower frequency-set -g userspace
Для установки максимальной частоты используйте опцию -u:
sudo cpupower frequency-set -u 3600Mhz
Для установки минимальной частоты — опцию -d:
sudo cpupower frequency-set -d 2300Mhz
А для изменения текущей частоты процессора — опцию -f:
sudo cpupower frequency-set -f 3500Mhz
Частота всё-равно будет немного колебаться, но эти колебания будут в пределах выбранного диапазона.
Все эти изменения сбрасываются после перезагрузки, поэтому если вы хотите чтобы всё сохранялось, придется создать скрипт с нужными командами и добавить его в автозагрузку.
Если вы любите пользоваться графическим интерфейсом вместо команд, вам понравится утилита cpupower-gui. Она позволяет настроить все необходимые параметры в графическом интерфейсе. Для её установки выполните:
sudo apt install cpupower-gui
Для установки самой последней версии выполните такие команды:
echo ‘deb http://download.opensuse.org/repositories/home:/erigas:/cpupower-gui/xUbuntu_20.04/ /’ | sudo tee /etc/apt/sources.list.d/home:erigas:cpupower-gui.list
curl -fsSL https://download.opensuse.org/repositories/home:erigas:cpupower-gui/xUbuntu_20.04/Release.key | gpg —dearmor | sudo tee /etc/apt/trusted.gpg.d/home:erigas:cpupower-gui.gpg > /dev/null
sudo apt update
sudo apt install cpupower-gui
После завершения установки вы сможете найти программу в главном меню. Её окно выглядит вот так:
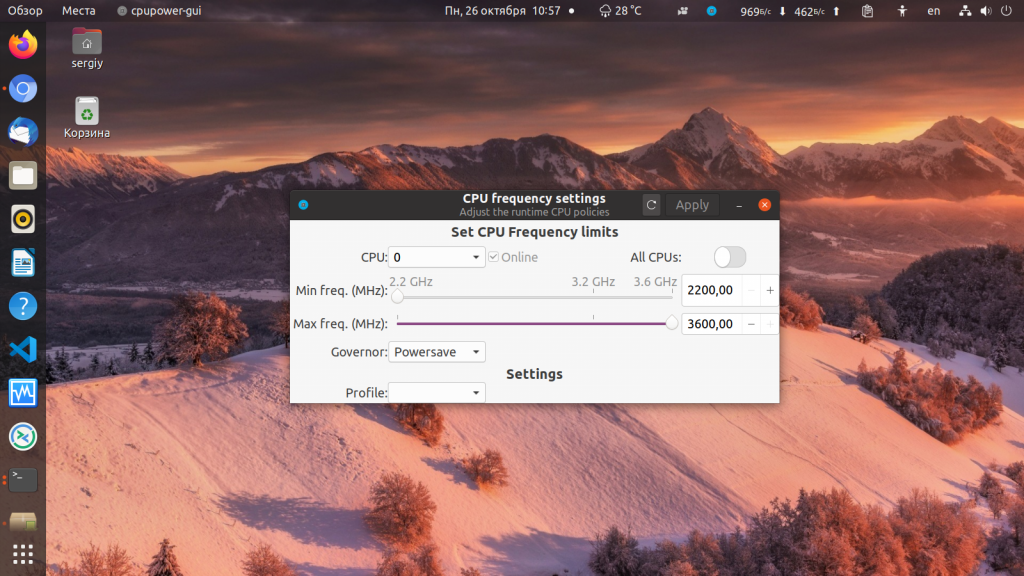
Утилита позволяет настроить максимальную и минимальную частоту, а также политику для каждого ядра по отдельности или для всех ядер вместе. Просто выберите нужные значения и нажмите кнопку Apply.
В отличие от консольных команд утилита позволяет устанавливать необходимые вам значения профиля и частоты при старте программы. Для этого в программе есть два профиля Balanced и Performance. Первый использует политику Powersave, а второй — Performance. Для того чтобы выбрать профиль по умолчанию надо отредактировать конфигурационный файл /etc/cpupower_gui.conf:
sudo vi /etc/cpupower_gui.conf

Измените значение параметра Profile на нужное и этот профиль будет выбираться по умолчанию при старте программы, останется только добавить её в автозагрузку. Кроме этих двух профилей можно создавать свои в папке /etc/cpupower_gui.d/. В этой папке уже лежит пример профиля, но рассматривать этот процесс подробнее мы не будем.
Выводы
В этой небольшой статье мы рассмотрели как меняется частота процессора Linux, как её настроить и зачем это необходимо.
Обнаружили ошибку в тексте? Сообщите мне об этом. Выделите текст с ошибкой и нажмите Ctrl+Enter.