- How to Install Android Emulator on Ubuntu 20.4.1
- How to Setup Android Emulator Without Installing Android Studio in Linux
- Install Command Line Tools
- Install Required Packages
- Find Correct System Image to Use
- Download System Image and Corresponding Packages
- Create a New AVD
- Run Emulator
- Conclusion
- About the author
- Nitesh Kumar
- How To Install google-android-emulator-installer on Ubuntu 22.04
- What is google-android-emulator-installer
- Install google-android-emulator-installer Using apt-get
- Install google-android-emulator-installer Using apt
- Install google-android-emulator-installer Using aptitude
- How To Uninstall google-android-emulator-installer on Ubuntu 22.04
- Uninstall google-android-emulator-installer And Its Dependencies
- Remove google-android-emulator-installer Configurations and Data
- Remove google-android-emulator-installer configuration, data, and all of its dependencies
- References
- Summary
How to Install Android Emulator on Ubuntu 20.4.1
Android SDK is the Android emulator developed by Google and it implements the API libraries and developer tools required to build, test, and debug apps for Android in Linux System. We can also install Android Emulator through Genymotion Android Emulator which is the alternative to the Android emulator. This video will cover the installation of Android Emulator on Ubuntu 20.4.1
Installation process:
For installing Android emulator, you need to have install java installed in your system. You should also install the needed dependency packages before installing the android emulator. Run the following commands for installing the dependencies.
[email protected]:~# apt-get install libgl1-mesa-dev Reading package lists. Done Building dependency tree Reading state information. Done The following additional packages will be installed: libegl-dev libegl1 libgl-dev libgl1 libgles-dev libgles1 libgles2 libglvnd-dev libglvnd0 libglx-dev libglx0 libopengl-dev libopengl0 libpthread-stubs0-dev libx11-dev libxau-dev libxcb1-dev libxdmcp-dev x11proto-core-dev x11proto-dev . Next, you need to download the android emulator package, and for that you need to run the following command.
[email protected]:~# wget http://dl.google.com/android/android-sdk_r24.4.1-linux.tgz --2020-12-23 09:47:02-- http://dl.google.com/android/android-sdk_r24.4.1-linux.tgz Resolving dl.google.com (dl.google.com). 216.58.196.78, 2404:6800:4009:809::200e Connecting to dl.google.com (dl.google.com)|216.58.196.78|:80. connected. HTTP request sent, awaiting response. 200 OK Length: 326412652 (311M) [application/x-tar] Saving to: ‘android-sdk_r24.4.1-linux.tgz’ android-sdk_r24.4.1-linux.tgz 100%[==========================================================>] 311.29M 144KB/s in 20m 44s 2020-12-23 10:07:47 (256 KB/s) - ‘android-sdk_r24.4.1-linux.tgz’ saved [326412652/326412652] After that, you should extract the downloaded package by making use of the following command.
[email protected]:~# tar -xvf android-sdk_r24.4.1-linux.tgz android-sdk-linux/ android-sdk-linux/tools/ android-sdk-linux/tools/emulator-x86 android-sdk-linux/tools/source.properties android-sdk-linux/tools/lint android-sdk-linux/tools/emulator64-mips android-sdk-linux/tools/android android-sdk-linux/tools/ddms android-sdk-linux/tools/emulator64-arm android-sdk-linux/tools/lib/ List the directory
[email protected]:~# ls -la total 318792 drwx------ 4 root root 4096 Dec 23 10:07 . drwxr-xr-x 20 root root 4096 Nov 6 04:51 .. drwxrwxr-x 5 249512 5000 4096 Oct 14 2015 android-sdk-linux -rw-r--r-- 1 root root 326412652 Oct 20 2015 android-sdk_r24.4.1-linux.tgz -rw------- 1 root root 290 Nov 16 20:51 .bash_history -rw-r--r-- 1 root root 3106 Dec 5 2019 .bashrc drwx------ 2 root root 4096 Jul 31 22:01 .cache -rw-r--r-- 1 root root 161 Dec 5 2019 .profile Change the directory :
[email protected]:~# cd android-sdk-linux [email protected]:~/android-sdk-linux# cd tools/ Later, change the directory to /android-sdk-linux/tools/ and execute the android file by running the following command to open the Android SDK manager.
[email protected]:~/android-sdk-linux/tools# ./android 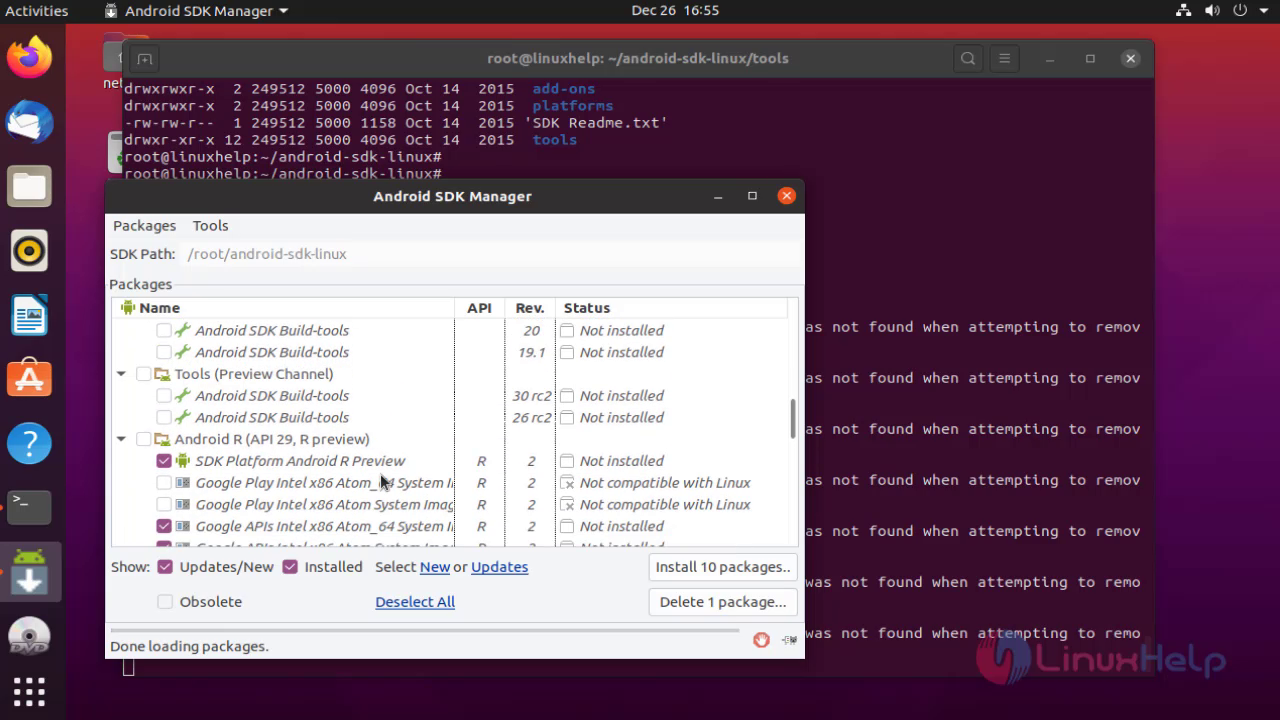
After that, Android SDK manager opens as follows.
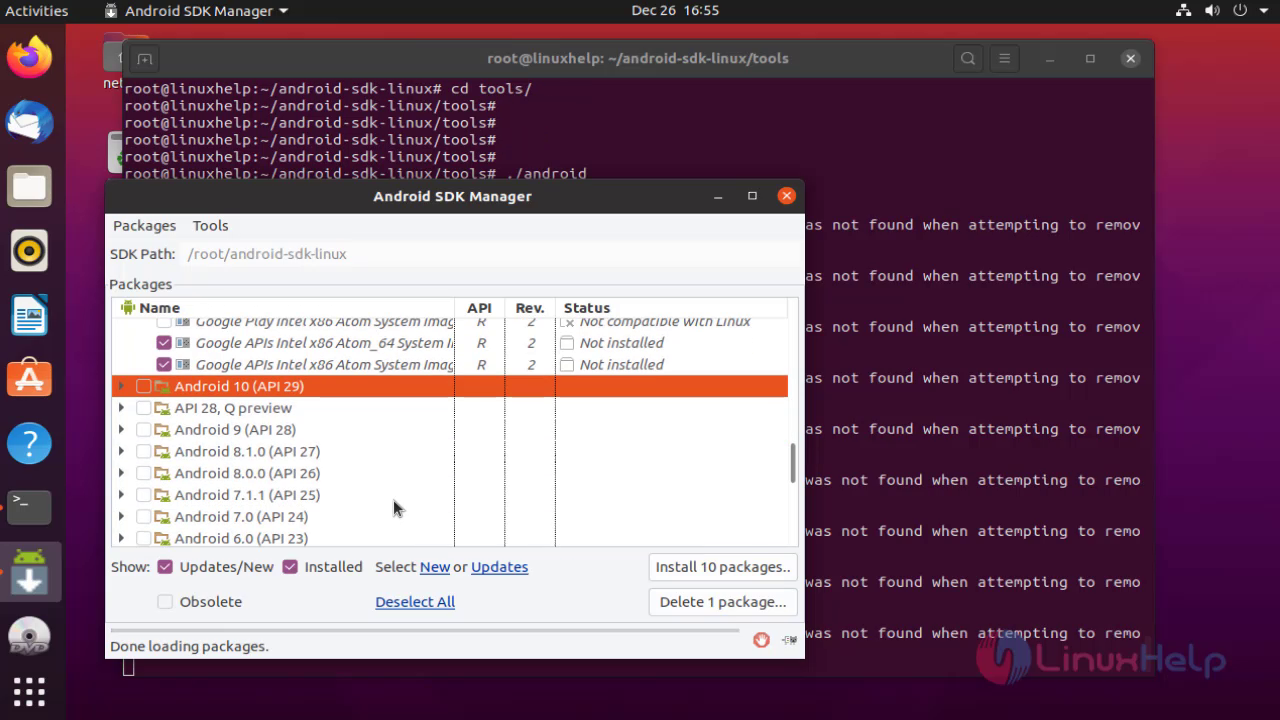
You can check out the Android SDKs for different versions.
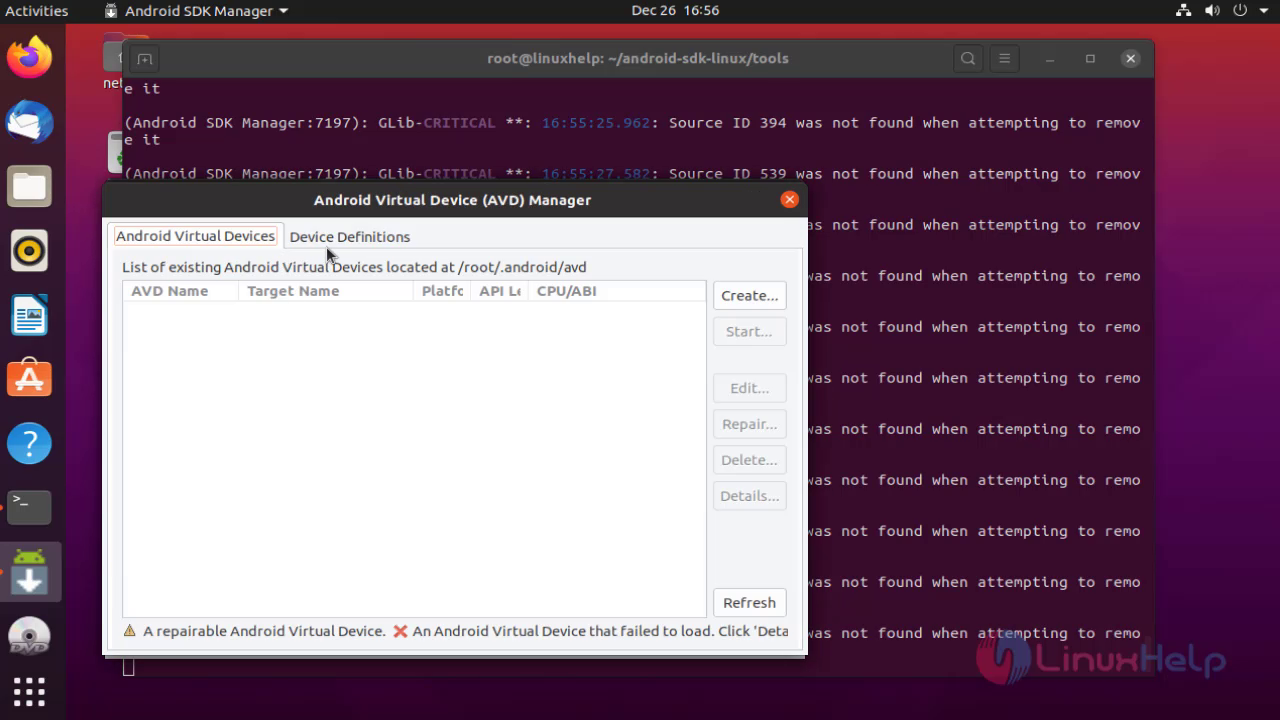
Also, you can check the list of existing Android Virtual Devices from the AVD manager. If there isn’ t any device, you can create one.

Also, the same way, you can check the list of Device definitions.
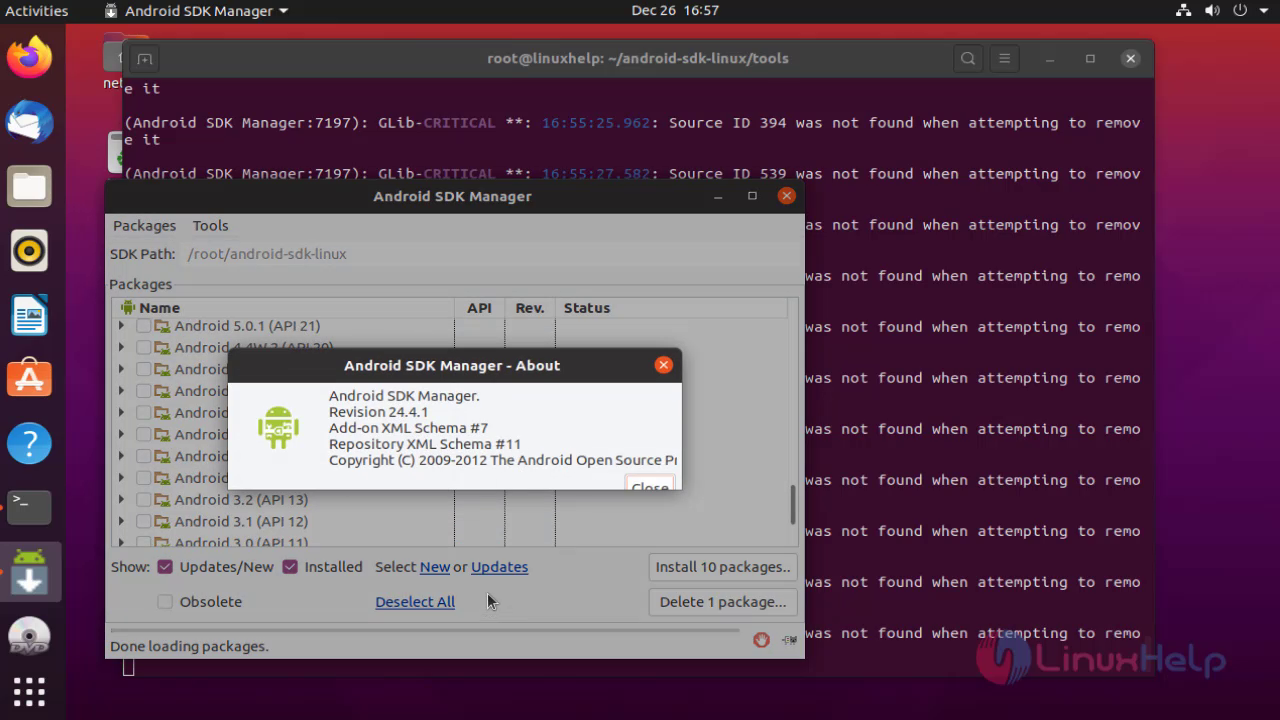
If you want to know more information on Android emulator, you can see its about section.
With this, the installation of Android SDK comes to an end.
How to Setup Android Emulator Without Installing Android Studio in Linux
![]()
This article will explain how to install the official Android emulator as a standalone application in Linux. The official Android emulator comes with the “Android Studio” application development suite. However, if you are not interested in developing Android apps and just want a working emulator without installing Android Studio, this article should help you. All the steps mentioned in the article are tested on Ubuntu 20.04 LTS version.
Install Command Line Tools
Download the latest version of “Android Command Line Tools” from here (scroll down to the command line section).
Extract the downloaded archive and make a new folder named “tools” inside “cmdline-tools” directory. Copy and paste all files from “cmdline-tools” folder to “tools” folder. Your final directory layout should look like this:
Install Required Packages
Go to the “tools/bin” folder, launch a new terminal window and run the following command to update repository details:
Next, run the following command to list available and installed packages:
Install some packages required for the Android emulator to work:
Find Correct System Image to Use
Next you need to make a note of the system image you want to load in the Android emulator. To get a list of downloadable system images, run the command below:
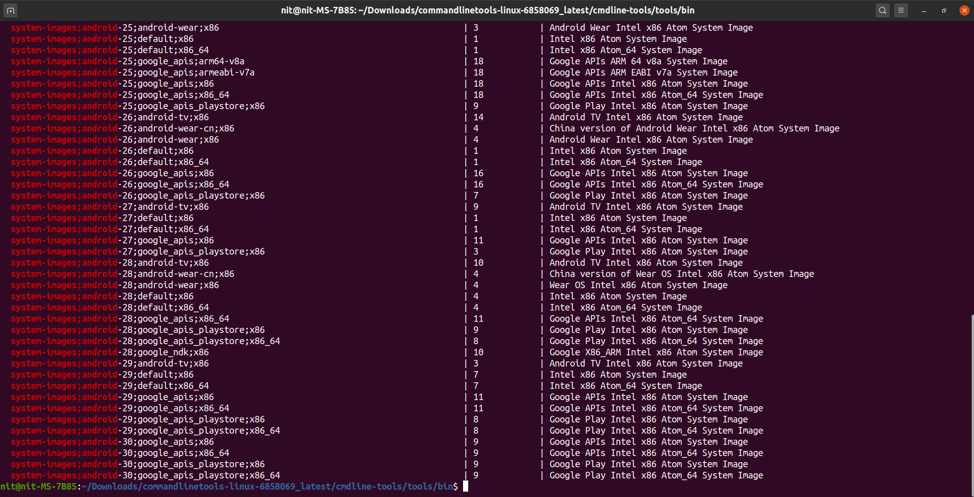
You should get some output similar to this:
You will see some numbers like “27”, “28” etc. in the name of system images. These numbers denote Android API levels. Find the Android version corresponding to the API levels from here and make a note of the appropriate system image you want to use in the emulator and the API level number.
Download System Image and Corresponding Packages
Next, download the following packages using the same API level number you finalized in the step above:
$ . / sdkmanager “platforms;android- 30 ” “system-images;android- 30 ;google_apis_playstore;x86_64” “build-tools;30.0.2”
For instance, if you decided to use “system-images;android-29;default;x86_64” as the system image, the command would change to:
$ . / sdkmanager “platforms;android- 29 ” “system-images;android- 29 ;default;x86_64” “build-tools;29.0.3”
You can always use the “list” switch to find correct command and version numbers:
Create a New AVD
AVD or “Android Virtual Device” is a set of configuration parameters that defines values for a virtual device that will emulate a real Android hardware device.
To create a new AVD, you need to use the system image you downloaded in the step above. Run the following command to create a new AVD:
$ . / avdmanager create avd -n “my_avd_30” -k “system-images;android- 30 ;google_apis_playstore;x86_64”
Replace “my_avd_30” with any name of your choice. You may be prompted to alter some configuration parameters. Follow on-screen instructions and change the values as per your requirements.
Confirm that the AVD has been successfully created using the command below:
You should get some output similar to this:
Available Android Virtual Devices:
Name: my_avd_30
Path: /home/nit/.android/avd/my_avd_30.avd
Target: Google Play (Google Inc.)
Based on: Android 11.0 (R) Tag/ABI: google_apis_playstore/x86_64
Sdcard: 512 MB
Note the path of AVD in the output above. At the same path, you can find a “config.ini” file that can be used to change configuration parameters of the AVD.
Run Emulator
Go to “emulator” folder (up a few directories) and use the following command to launch the emulator:
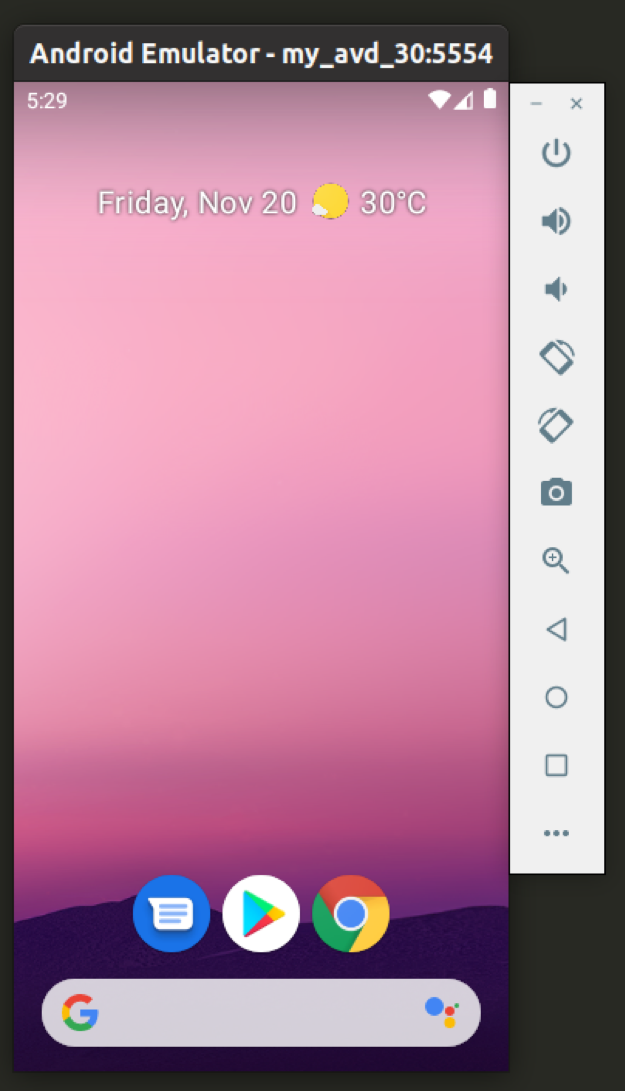
Replace “my_avd_30” with the name of your own AVD you created in the step above. Your Android emulator should be now up and running:
You can create as many as AVDs as you want and each AVD / System Image will be treated separately.
Conclusion
Android emulator provides an excellent way to emulate real life Android devices on your desktop PC. You can use the emulator to test some apps that are yet in development or you can use the emulator to regularly run Android compatible apps and games on a Linux PC. The performance of the emulator will depend on your system’s horsepower, virtualization technologies available on your PC and your system’s compatibility with the KVM kernel module.
About the author
Nitesh Kumar
I am a freelancer software developer and content writer who loves Linux, open source software and the free software community.
How To Install google-android-emulator-installer on Ubuntu 22.04
In this tutorial we learn how to install google-android-emulator-installer on Ubuntu 22.04.
What is google-android-emulator-installer
This package will download Google’s Android emulator binary package, create a Debian package, and install it.
The Android SDK includes an Android device emulator — a virtual device that runs on your computer. The Android Emulator lets you develop and test Android apps without using a physical device.
WARNING: Installing this Debian package causes android-emulator to be downloaded from dl.google.com and/or from other suggested mirrors. The End User License Agreement of this binary package is available at developer.android.com.
There are three ways to install google-android-emulator-installer on Ubuntu 22.04. We can use apt-get , apt and aptitude . In the following sections we will describe each method. You can choose one of them.
Install google-android-emulator-installer Using apt-get
Update apt database with apt-get using the following command.
After updating apt database, We can install google-android-emulator-installer using apt-get by running the following command:
sudo apt-get -y install google-android-emulator-installer Install google-android-emulator-installer Using apt
Update apt database with apt using the following command.
After updating apt database, We can install google-android-emulator-installer using apt by running the following command:
sudo apt -y install google-android-emulator-installer Install google-android-emulator-installer Using aptitude
If you want to follow this method, you might need to install aptitude first since aptitude is usually not installed by default on Ubuntu. Update apt database with aptitude using the following command.
After updating apt database, We can install google-android-emulator-installer using aptitude by running the following command:
sudo aptitude -y install google-android-emulator-installer How To Uninstall google-android-emulator-installer on Ubuntu 22.04
To uninstall only the google-android-emulator-installer package we can use the following command:
sudo apt-get remove google-android-emulator-installer Uninstall google-android-emulator-installer And Its Dependencies
To uninstall google-android-emulator-installer and its dependencies that are no longer needed by Ubuntu 22.04, we can use the command below:
sudo apt-get -y autoremove google-android-emulator-installer Remove google-android-emulator-installer Configurations and Data
To remove google-android-emulator-installer configuration and data from Ubuntu 22.04 we can use the following command:
sudo apt-get -y purge google-android-emulator-installer Remove google-android-emulator-installer configuration, data, and all of its dependencies
We can use the following command to remove google-android-emulator-installer configurations, data and all of its dependencies, we can use the following command:
sudo apt-get -y autoremove --purge google-android-emulator-installer References
Summary
In this tutorial we learn how to install google-android-emulator-installer package on Ubuntu 22.04 using different package management tools: apt, apt-get and aptitude.