- How to View Hardware Information in Linux
- 1. Lscpu Command – Show Linux CPU Information
- 2. Lshw Command – Show Linux Hardware Information
- 3. Lspci Command – Show Linux PCI Information
- 4. Lsusb Command – Show Linux USB Devices Information
- 5. Lsblk Command – Show Linux Block Devices Information
- 6. Df Command – Show Linux Disk Usage Information
- 7. Free Command – Show Linux Memory Information
- 8. Mount Command – Show Linux Mounted File System Information
- 9. Fdisk Command – Show Linux Partitions Information
- 12 Commands to Check Linux System & Hardware Information
- System info
- File system
- Hardware info
- Memory, BIOS, and Processor
- CPU information
- USB Controllers
- SATA
- SCSI devices
- Block devices
- PCI devices
- Conclusion
How to View Hardware Information in Linux
Being a Linux enthusiast implies that you are familiar with both the hardware and software entities of your system. Since it is the hardware that hosts the Linux operating system software, understanding the underlying hardware specs will help you achieve several objectives:
- You will know the Main Memory (RAM) allocation on your system and how much is usable. This information is important especially when you want to upgrade/change your Linux OS.
- You can quickly take note of available storage space and storage capacity on your Linux system in case you need to store more data, especially on a Linux server environment.
- You will be able to determine the performance status of critical hardware components that define your computer/machine.
The Linux operating system has a reputation of making life easier for users that want to achieve critical OS objectives like viewing the hardware information of their machine. Moreover, you do not need to install any third-party application package/software.
The commands associated with the display of your Linux hardware information cover CPU info, Memory info, and other hardware peripherals and devices info.
This article guide is going to highlight some of these commands and their usage.
1. Lscpu Command – Show Linux CPU Information
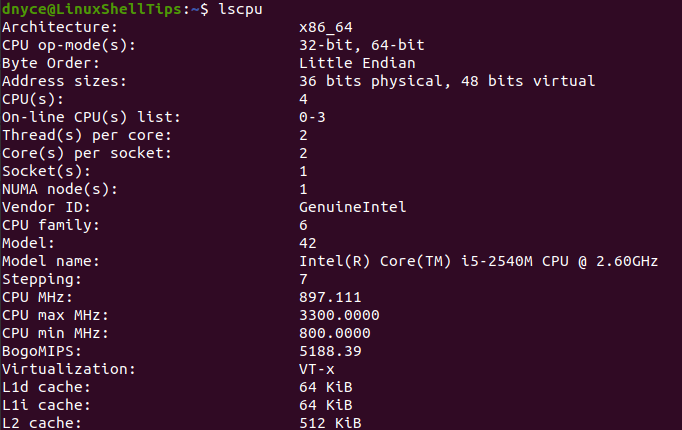
If you are interested in the CPU and Processing Unit hardware information of your machine/computer, consider the reputation of this Linux command. Its usage is straightforward as demonstrated below:
2. Lshw Command – Show Linux Hardware Information
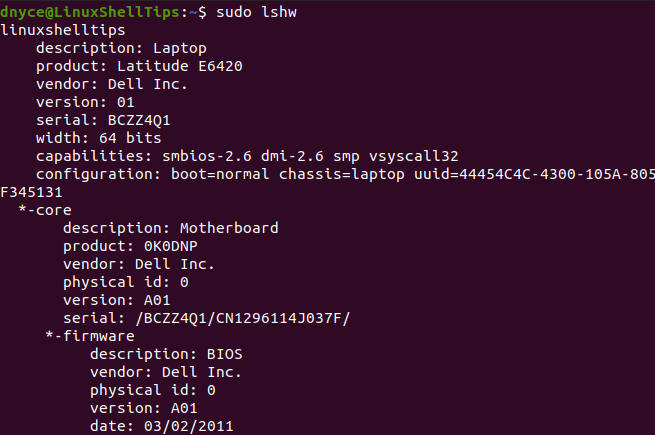
The output of the lshw command is not limited to CPU and Processing Unit hardware information. It also reveals essential hardware information related to hardware units like Network Adapters, Memory, USB Controllers, and Disk.
Running the lshw command as a super-user (Sudoer user) produces a more accurate output.
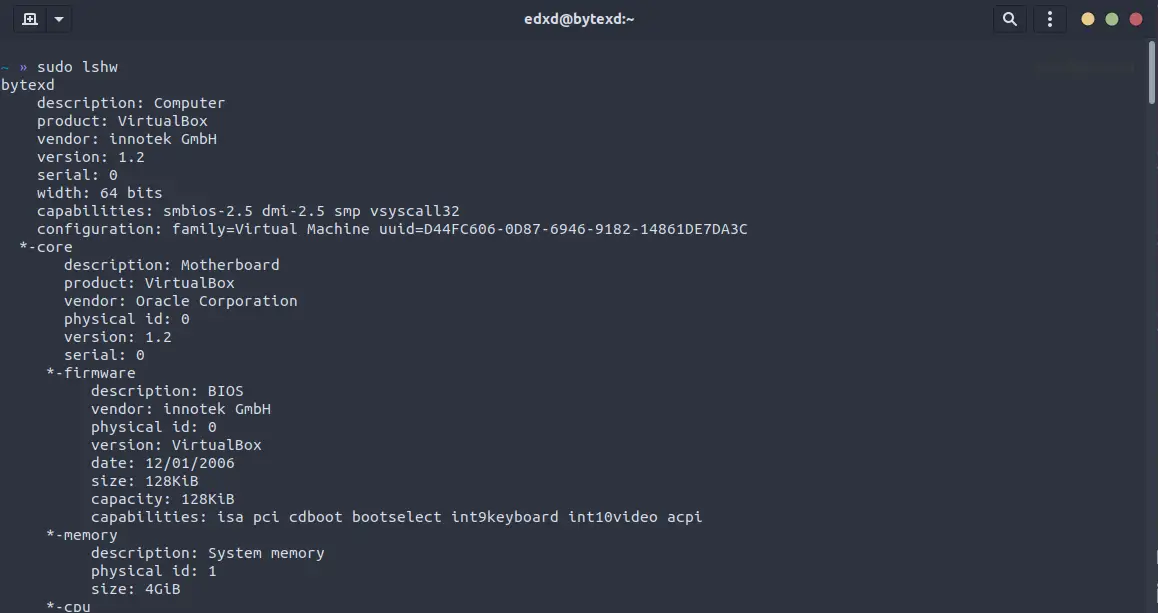
The lshw command’s output reveals your computer’s general info like vendor, product, and serial; the computer’s core, CPU, memory, network, and USB info.
3. Lspci Command – Show Linux PCI Information
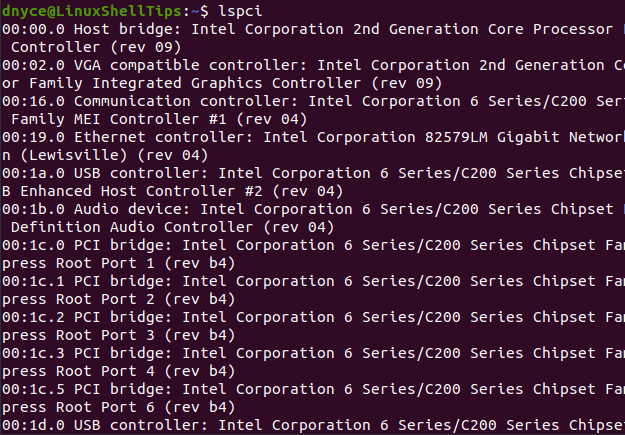
The lspci command has a dedicated functionality in detailing and briefing a machine’s PCI Buses hardware info together with the details of other connected hardware components.
Run lspci if you also need hardware info related to SATA Controllers, Network Adapters, USB Ports, Graphics Card, and VGA Adapter.
4. Lsusb Command – Show Linux USB Devices Information
The lsusb command suites a Linux user interested in hardware information associated with their machine’s USB controllers. It also reveals detailed information on hardware devices linked to the USB controllers.
A more detailed output can be achieved by using the «-v» option alongside lsusb command.
5. Lsblk Command – Show Linux Block Devices Information
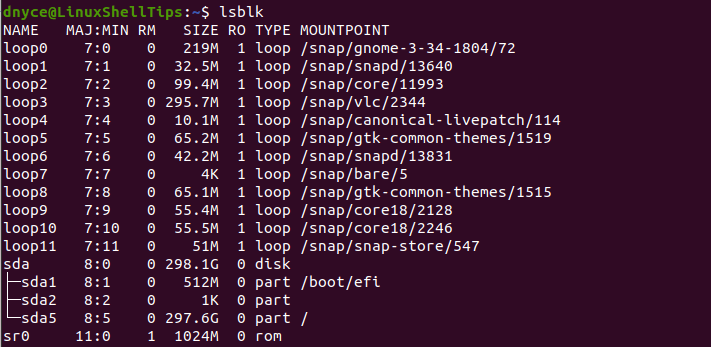
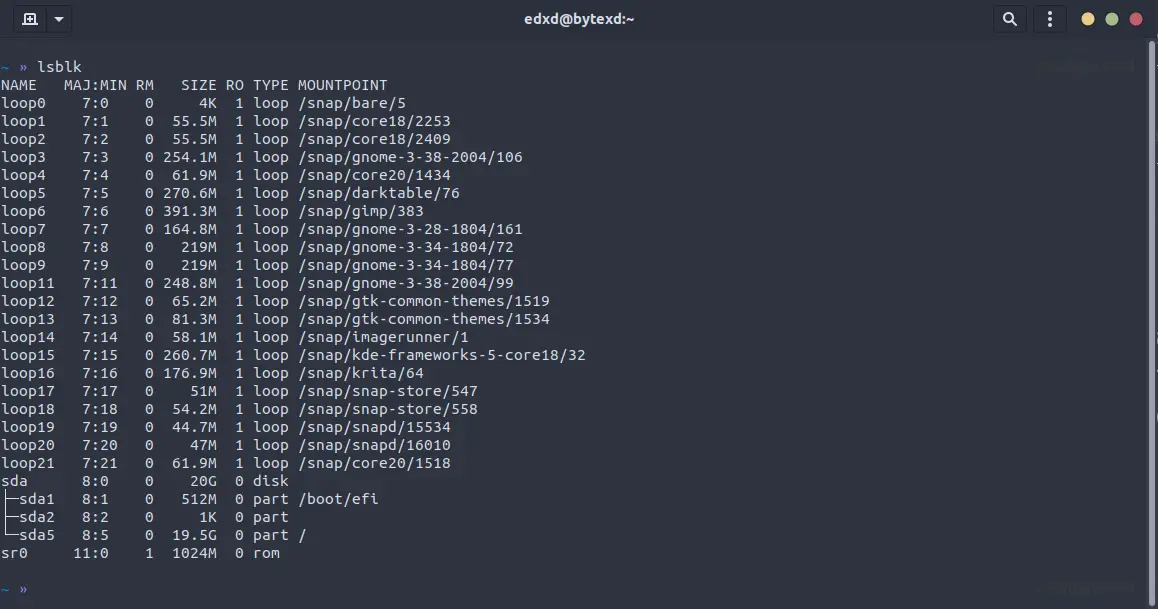
If you need hardware information on connected block devices like flash drives, optical drives, and internal hard drive partitions, you will appreciate what the lsblk command has to offer.
6. Df Command – Show Linux Disk Usage Information
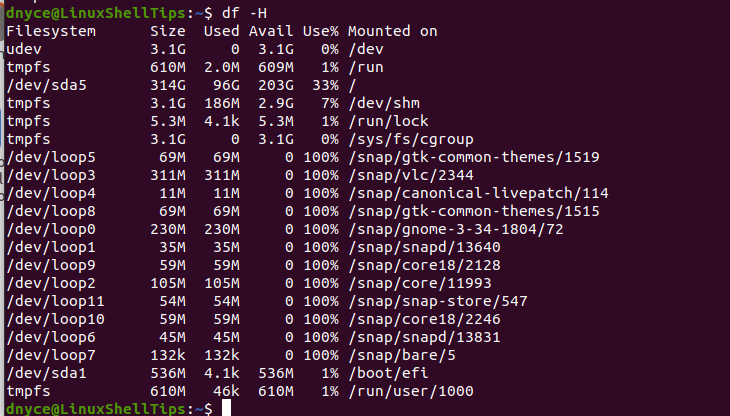
The df command details the filesystem partitions hardware info like available space, used space, and mount points.
7. Free Command – Show Linux Memory Information
The free command reveals important hardware info about the machine’s Swap and Main Memory.
8. Mount Command – Show Linux Mounted File System Information
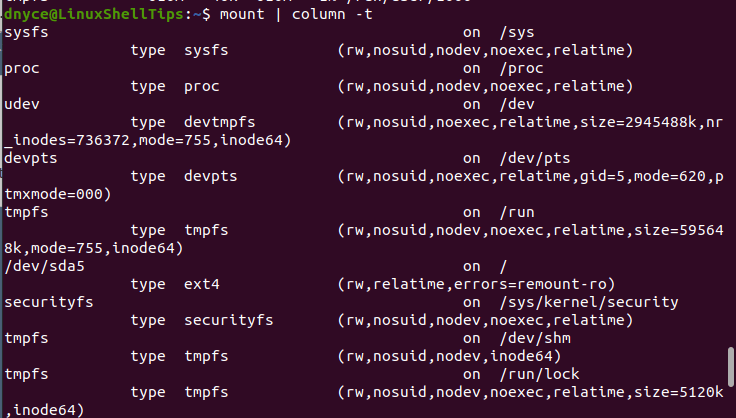
The mount command reveals mounted file systems in Linux.
9. Fdisk Command – Show Linux Partitions Information
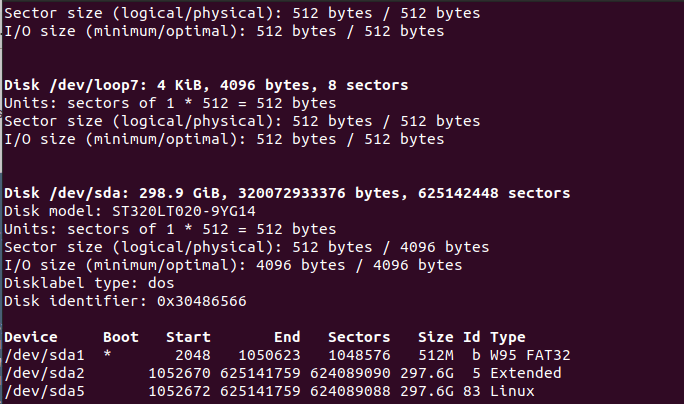
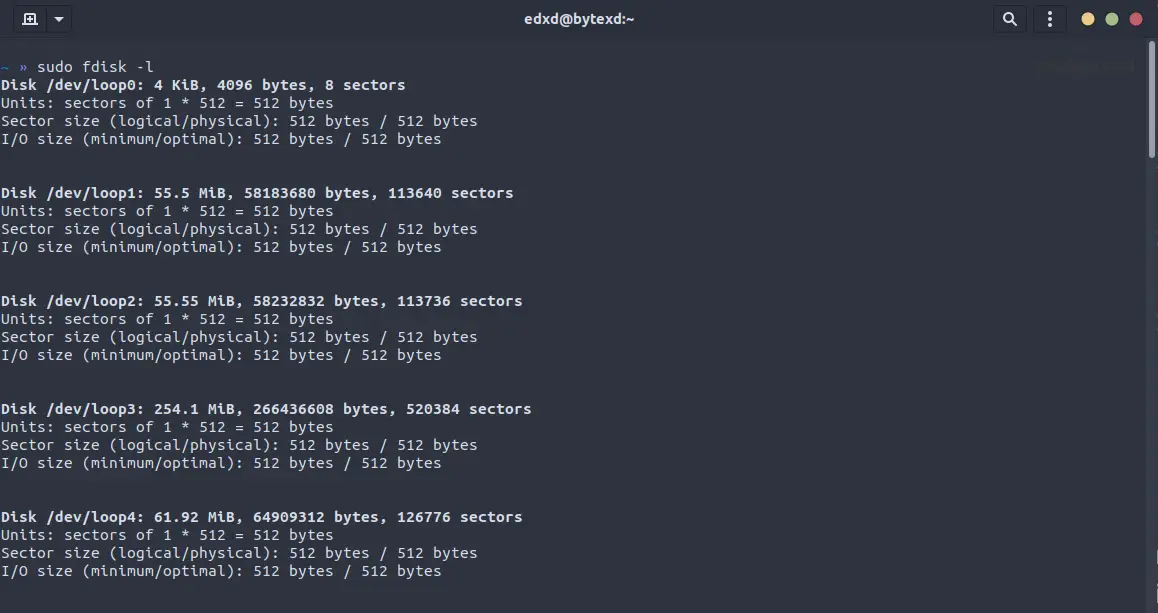
The fdisk command is prominent for detailing active hardware partition information of your Linux system. You however need to run the fdisk command as a Sudoer/root user.
The hardware commands discussed in this article should be able to get you any hardware information regarding your Linux-powered computer/machine.
12 Commands to Check Linux System & Hardware Information
Whether you are a Linux beginner user who wants to learn new commands or a frequent user who only needs a quick reminder, this tutorial is for you.
In this article we’ll explain 12 typical commands to check Linux system and hardware information.
Table of Contents
System info
You can know the system name or kernel name, system version or release, host or hardware name using the uname command with the -a flag.
You should get an input similar to mine:
Linux bytexd 5.13.0-41-generic #46~20.04.1-Ubuntu SMP Wed Apr 20 13:16:21 UTC 2022 x86_64 x86_64 x86_64 GNU/Linux
- Linux: system name,
- bytexd: network host name,
- 5.13.0-41-generic: kernel release
- #46~20.04.1-Ubuntu SMP Wed Apr 20 13:16:21 UTC 2022: kernel version, and
- x86_64: hardware name
The kernel is a program at the operating system’s core to control every system operation. The code lives in the memory to manage hardware and software interactions. For example, the kernel boots the system, device drivers, or charges and stops charging the device.
The SMP, short for Symmetrical Multi-processing, means a multiprocessor architecture with no CPU chosen as the main one. So from the above output, kernel version is 33 on Ubuntu version 20.04, dated seventh February at 2:25 p.m, 2022, in UTC time.
Alternatively, you can get info about specific components by running their respective commands.
File system
Use the fdisk command with the sudo command and the -l flag to check the file system partitions.
A partition is a logical hard disk division. The operating and file systems treat the divisions as a separate entity and manage them as if they are distinct hard drives.
Besides, the fdisk command modifies the file system distributions.
Hardware info
The lshw tool with the sudo command helps know the machine’s detailed hardware configuration. For instance, you can use the tool to inquire about the motherboard, RAM, or cache configurations, firmware version, bus speed, and CPU and speed.
Apart from the long list of settings, you can get a summarized configuration data by appending the -short flag to the lshw command.
The motherboard glues the system together, easing their intercommunication. RAM holds the currently used data, which fades when you switch off the computer. On the other hand, the cache is a small and fast memory component inserted between the RAM and the CPU to hold the frequently used data.
In the absence of power, the firm software, short for firmware , holds the low-level instructions. It lies on the motherboard, hosting hardware, and BIOS settings.
As the name suggests, the bus joins the computer components, enabling data transfer. Lastly, the processor (also known as the CPU ) executes instructions, such as arithmetic and control functions.
Now that you understand the primary hardware components, let’s check them.
Memory, BIOS, and Processor
4. dmidecode
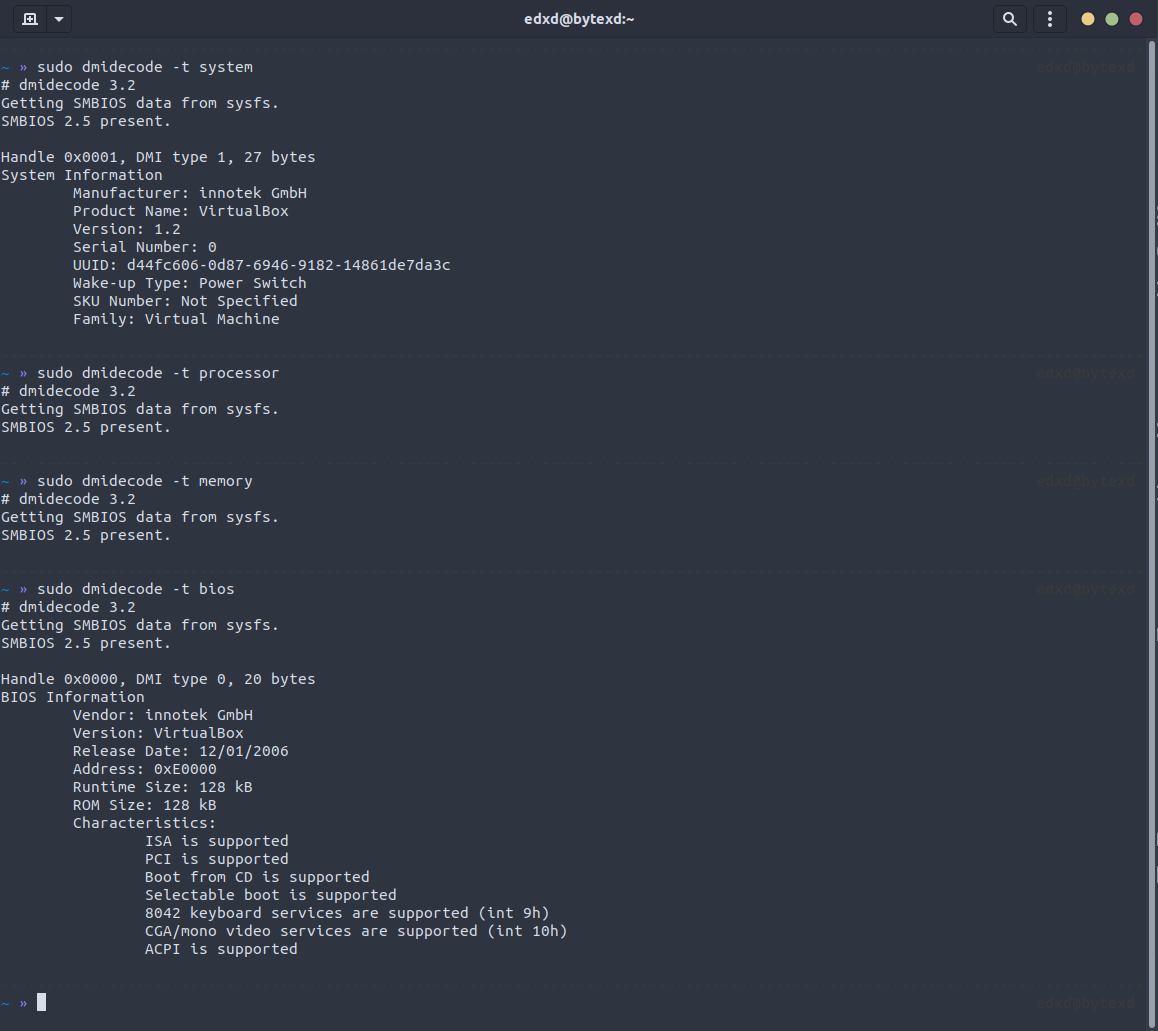
The dmidecode command with the sudo command and the -t flag checks the system, CPU, memory and BIOS information. You can use it to check the target component’s information, as follows.
sudo dmidecode -t processor
Apart from the -t flag, you can specify the ID from DMI table to get information about a specific hardware component. For example, appending code 0 after the -t flag reveals the BIOS information.
Bonus Commands
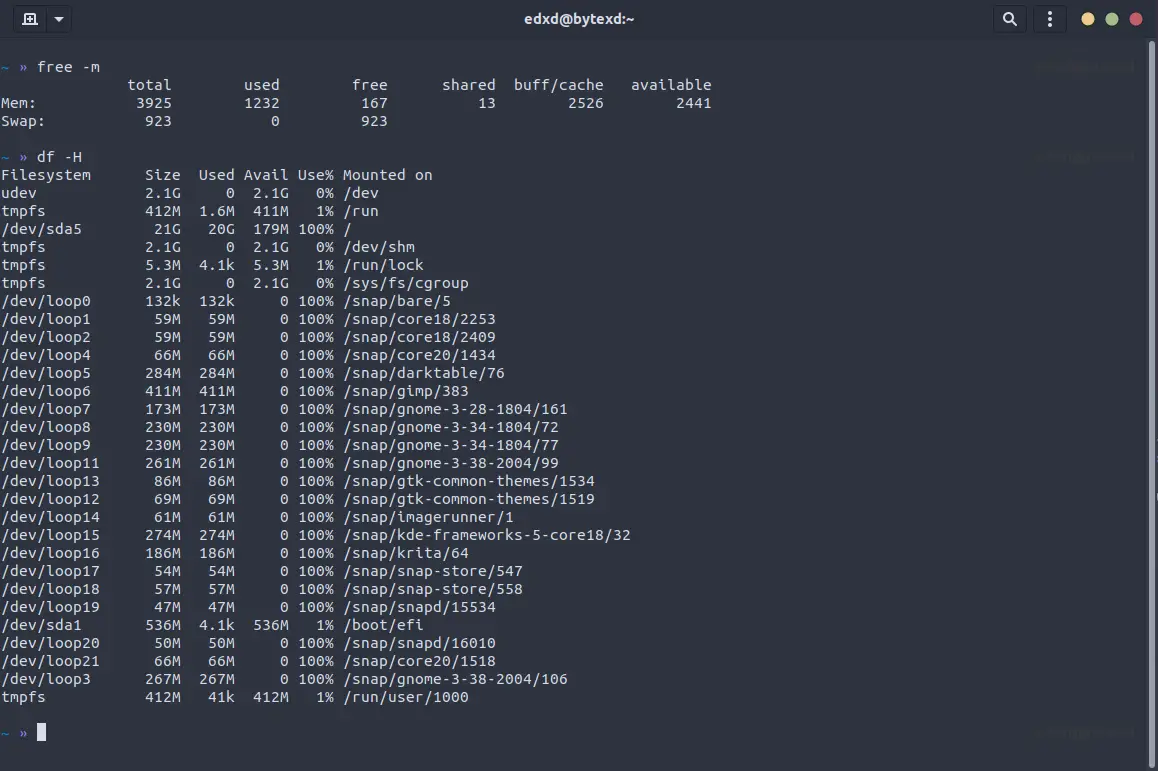
The free command with the -m flag shows you the total, used and free memory on your device.
The df command with the -H flag reveals the file system’s partitions, mount points and disk spaces.
CPU information
Use the lscpu command to check the CPU information.
Architecture: x86_64 CPU op-mode(s): 32-bit, 64-bit Byte Order: Little Endian Address sizes: 39 bits physical, 48 bits virtual CPU(s): 2 On-line CPU(s) list: 0,1 Thread(s) per core: 1 Core(s) per socket: 2 Socket(s): 1 NUMA node(s): 1 Vendor ID: GenuineIntel CPU family: 6 Model: 158 Model name: Intel(R) Core(TM) i7-7700K CPU @ 4.20GHz Stepping: 9 CPU MHz: 4199.996 BogoMIPS: 8399.99 Hypervisor vendor: KVM Virtualization type: full L1d cache: 64 KiB L1i cache: 64 KiB L2 cache: 512 KiB L3 cache: 16 MiB NUMA node0 CPU(s): 0,1 Vulnerability Itlb multihit: KVM: Mitigation: VMX unsupported Vulnerability L1tf: Mitigation; PTE Inversion Vulnerability Mds: Mitigation; Clear CPU buffers; SMT Host state unknown Vulnerability Meltdown: Mitigation; PTI Vulnerability Spec store bypass: Vulnerable Vulnerability Spectre v1: Mitigation; usercopy/swapgs barriers and __user pointer sanitization Vulnerability Spectre v2: Mitigation; Retpolines, STIBP disabled, RSB filling Vulnerability Srbds: Not affected Vulnerability Tsx async abort: Not affected Flags: fpu vme de pse tsc msr pae mce cx8 apic sep mtrr pge mca cmov pat pse36 clflush mmx fxsr sse sse2 ht syscall nx rdtscp lm constant_tsc rep_good nopl xtopology nons top_tsc cpuid tsc_known_freq pni ssse3 cx16 pcid sse4_1 sse4_2 hypervisor lahf_lm invpcid_single pti fsgsbase invpcid md_clear flush_l1d arch_capabilities
- Architecture is the arrangement of the CPU components.
- CPU op-mode(s) is the Linux version the system runs. If you see both 32 and 64-bit modes, your machine runs a 64-bit system. If you only see 32-bit, the computer is 32-bit.
- Byte Order of Little Endian value means my system prioritizes the least significant data units when ordering data in the memory. CPU(s) symbolize the number of cores assigned to the system, 4 in my system.
USB Controllers
USB controllers let a USB device communicate with the computer. You can check their information using the lsusb command.
lsusb -v # for detailed information
SATA
Short for Serial Advanced Technology Attached, SATA is an interface to transfer data between storage devices and the motherboard. It is preferred to PATA (Parallel Commands to Check Linux System & Hardware Information) because it is quicker in data transfer.
You can check SATA disk info like serial number and model by specifying the device path after the sudo and hdparm command.
The dev folder contains files attached to the local system. Most of its files are partitioned in alphabetical order.
For example, /dev/sda is the primary hard drive while /dev/sdb is secondary. The numbers after the drive name denote the partition order. For example, /dev/sda1 represents the first drive’s first partition.
SCSI devices
Short for Small Computer System Interface, SCSI is a set of standards to physically connect to and transfer data between peripheral devices and computers.
You can also use the lsscsi to list SATA and SCSI devices.
lsscsi -s # to show device sizes
In Linux, SCSI devices are named to help identify them. Like the SATA devices, the SCSI devices are labelled in alphabetical order. For example, /dev/scd0 is the first SCSI device.
If your system does not have the lsscsi tool, install it using your system’s installation package.
Block devices
A block device moves data in byte/bit sequences. Examples of block devices are CD-ROM, flash, or hard drives. You can physically attach the devices to the computer and access them remotely.
Use the lsblk command to list the block devices.
PCI devices
A Peripheral Component Interconnect (PCI) joins various peripheral devices to the Linux platform. Any device connecting to the PCI slot is called a PCI device. You can find more about the devices by running the lspci command.
lspci -v # for detailed information
Conclusion
There are many commands to check the Linux system and hardware information. As shown in this tutorial, you can comfortably remember the typical commands by understanding and grouping related devices.
