- Display History with Date and Time in Linux
- Display the Full Date and Time in the History Command Output
- Filter the History Command Output based on the Selected Date
- Filter the History Command Output based on the Multiple Date
- Filter the History Command Output based on the Range of Dates
- Filter the History Command Output based on the Range of Time
- FAQ
- How to Use the Linux history Command
- How to Use Linux history Command
- Use Date and Timestamps
- View the Size of the History Buffer
- Repeat a Command
- Search a Command by String
- List the Matching Commands
- Change the Executed Command
- Prevent Recording Commands in History
- Delete History
- Update the History File
- Set Date and Time for Each Command You Execute in Bash History
Display History with Date and Time in Linux
The history command is one of the essential utilities for the Linux administrator, usually used to track all the shell commands you execute in past.
When you execute the command, the shell captures it and then stores it in the separate file of the user’s home directory at ~/.bash_history . When the history command is executed, it fetches the data from this file and displays it as an output with the command and ID on the terminal screen.
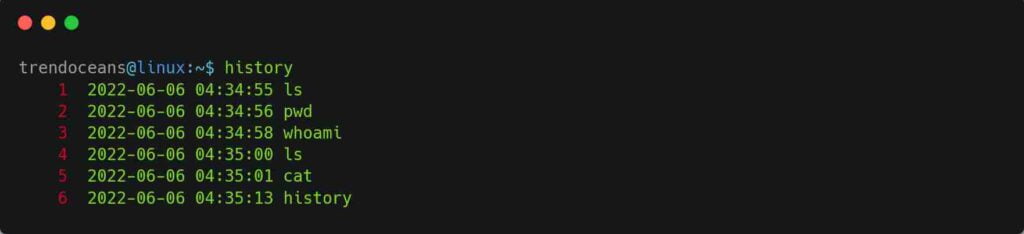
The history command does not display the date and time in the output, as shown below.
Below is the behaviour of the above command.

If you want to filter out commands executed by you on a specific date or time, then you have to export a HISTTIMEFORMAT variable with the legal date and time format codes.
A reference list of all the legal date and time format codes:
| %d | Day |
| %m | Month |
| %y | Year |
| %Y | Full Year |
| %T | Time |
| %F | Date (yy/mm/dd) |
Legal date and time format codes
From the above legal codes, once you decide on your requirements for the history command output, choose the legal code and assign it to the HISTTIMEFORMAT variable, and then export it to your current shell environment, as shown below.
$ export HISTTIMEFORMAT="%F %T "Display the Full Date and Time in the History Command Output
If you want to output the full date in (yy/mm/dd), format along with the command execution time in (hh/mm/ss) format in the history command output, you can export the HISTTIMEFORMAT global variable with the “%F” code to display the full date and the “%T” code to display the whole time in the format, execute the below command.
$ export HISTTIMEFORMAT="%F %T => "After that, execute the history command, and you will get a similar output as shown below with the command execution date and time.
Below is the behaviour of the above command.
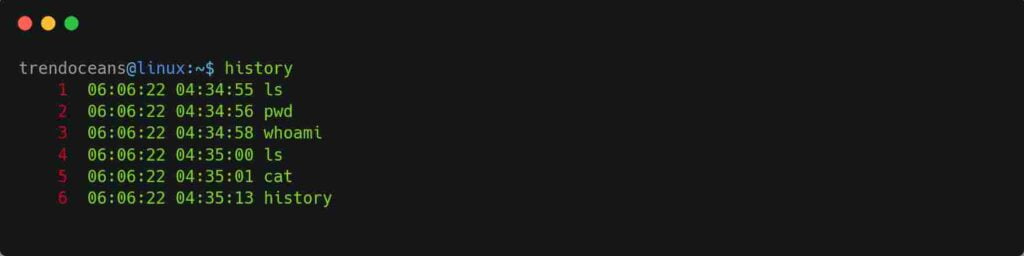
If you do not prefer to display output in the default full date format (yy/mm/dd) and display it in the custom format like (dd/mm/yy), use “%d” for a date, “%m” for a month, and “%y” for a year separated with color (:) as shown below.
$ export HISTTIMEFORMAT="%d:%m:%y %T "Below is the behavior of the above command.
From the above example, I expect you have got the idea of how to use this date and time code in your favour.
Once you decide on the format, you can set the HISTTIMEFORMAT variable in the ~/.bashrc file to execute it on every terminal session without re-specifying the environmental variable, using the below code.
$ echo 'export HISTTIMEFORMAT="%F %T "' >> ~/.bashrcThe above command appends ‘ export HISTTIMEFORMAT=»%F %T » ‘ in the user ~/.bashrc file. If the file does not exist, a new file will be created and then execute source ~/.bashrc to reload the configuration.
Filter the History Command Output based on the Selected Date
By now, you have understood the date and time format codes and their implementation with ~/.bashrc . What if you want to output a command executed on a specific date?
To do so, you need to pipe the grep command with history and specify the target date as shown below.
$ history | grep "2022-06-06"In the above code, the date format is in (yy/mm/dd), and below is the output of the above command.

Filter the History Command Output based on the Multiple Date
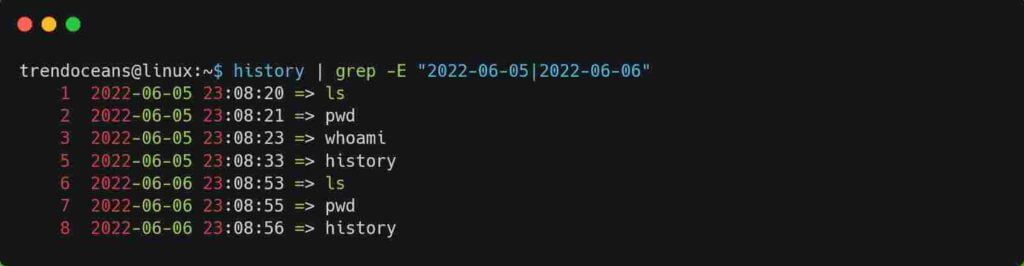
There will be situations where you are probably required to output command history for multiple dates simultaneously. As shown below, this task can be achieved by specifying all those dates separated with a vertical slash “|” within the grep command.
$ history | grep -E "2022-06-05|2022-06-06"The above command displays the command history of dates 2022-06-05 and 2022-06-06, as shown below.
Filter the History Command Output based on the Range of Dates
For output, the history command based on a range of dates in the output can be achieved using the awk command. Below is the sample command to output command from the range of dates between 2022-06-04 and 2022-06-06, as shown below.
$ history | awk '="2022-06-04" && $2<="2022-06-06") print $0>' Below is the behaviour of the above command.

Filter the History Command Output based on the Range of Time
To find the command you have executed in a specific block of time in a day, you can specify the time range from start to end, as shown below.
$ history | awk '="23:27:47" && $3<="23:28:04") print $0>' Below is the behaviour of the above command.

FAQ
1) I have done it, but in history, it shows all commands were executed on the current date.
It’s normal behaviour. The next day, when the new command is executed, it will pick the new date.
If you export the environment variable directly within the terminal, then restart the terminal. If you added the environment variables inside the ~/.bashrc file, then remove them from there and execute source ~/.bashrc to reload the configuration.
Innovative tech mind with 12 years of experience working as a computer programmer, web developer, and security researcher. Capable of working with a variety of technology and software solutions, and managing databases.
How to Use the Linux history Command
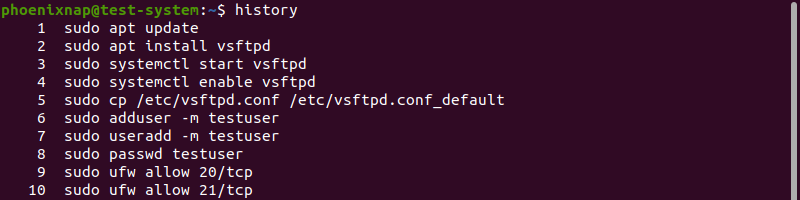
The history command in Linux is a built-in shell tool that displays a list of commands used in the terminal session. history allows users to reuse any listed command without retyping it.
In this tutorial, we will show you how the history command works and different ways to use it.

How to Use Linux history Command
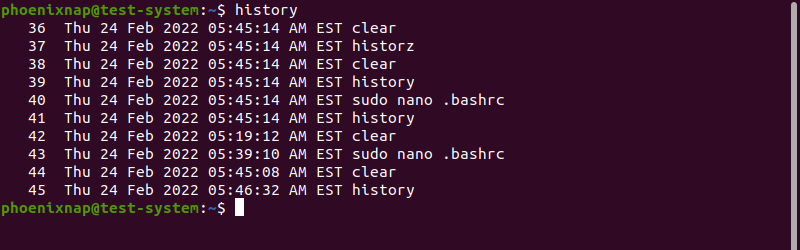
Using the history command without options displays the list of commands used since the start of the terminal session:
To display the command history list with a limited number of entries, append that number to the history command. For instance, to show only the latest five entries, use:

Once you close the terminal, the Bash shell saves new command history entries in the .bash_history file.
Use Date and Timestamps
The .bashrc file stores the Bash shell settings. Modifying this file allows you to change the output format of the history command.
Open the .bashrc file using a text editor such as Nano:
To change the output format to include date and timestamps, add the following line to the .bashrc file:
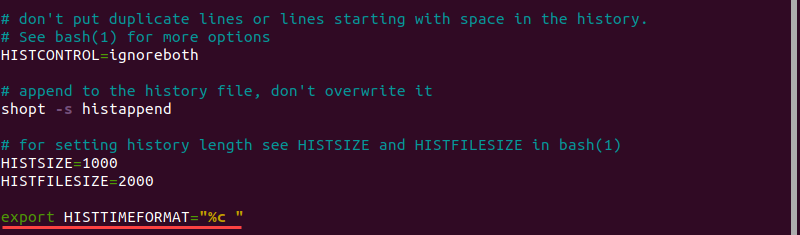
Note: The blank space before the closed quotation marks prevents the timestamp from connecting to the command name, making the history list easier to read.
Using different arguments after HISTTIMEFORMAT allows you to customize the level of detail in the timestamp:
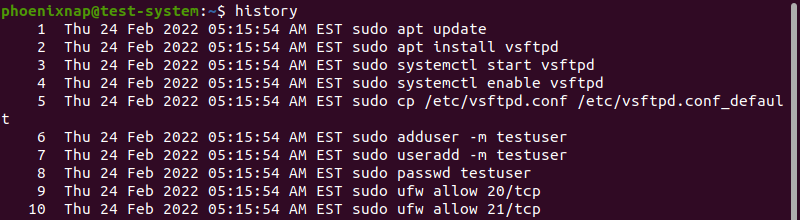
Save the changes to the .bashrc file, relaunch the terminal, and run the history command to confirm the new output format:
View the Size of the History Buffer
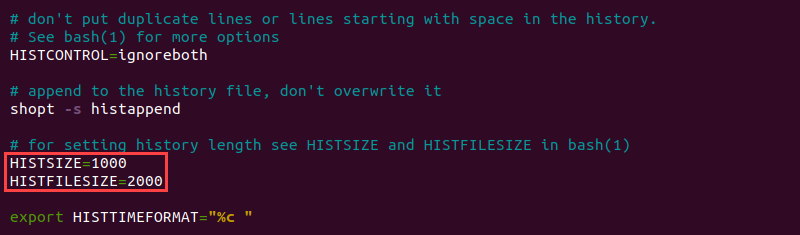
The .bashrc file contains two entries that control the size of the history buffer:
- HISTSIZE : The maximum number of entries for the history list.
- HISTFILESIZE : The maximum number of entries in the .bash_history file.
Editing the HISTSIZE and HISTFILESIZE values changes how the Bash shell displays and saves the command history.
For instance, changing the HISTSIZE value to 10 makes the history command list show a maximum of 10 latest entries.
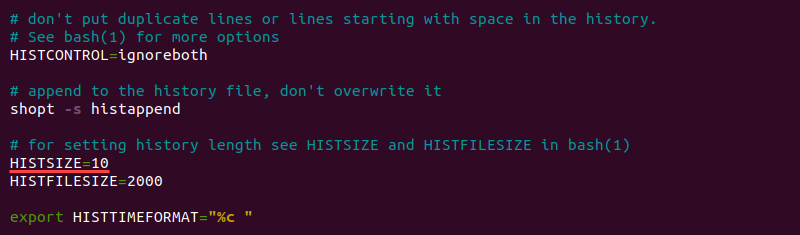
Saving the changes to the .bashrc file, relaunching the terminal, and running the history command confirms the new output format:
Repeat a Command
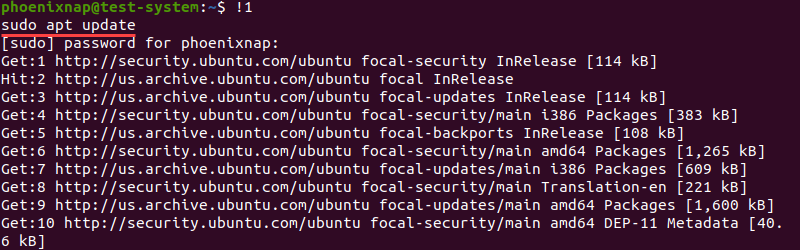
Running the history command allows you to reuse any of the commands on the list. For instance, to run the first command ( sudo apt update ) again, use:
Adding a dash (—) before the command number starts the count from the end of the list. For instance, to reuse the tenth last command ( history 5 ), use:

Use double exclamation points to repeat the last command:

Search a Command by String
Adding a string after the exclamation point runs the latest command that starts with that string. For example, to reuse the latest command that begins with sudo , use:

Using this method can cause problems if the shell runs an unexpected command, especially when searching for a command that starts with sudo . As a precaution, adding the :p argument displays the command without running it, allowing you to review the command and decide if you want to execute it.

To search for a command that contains a string, but may not start with it, add a question mark next to the exclamation point. For instance, to reuse the last command that contains echo :

In the example above, the shell reuses the last command that contains the echo string even though the command starts with sudo .
Check out our article on sudo command to learn how to use the sudo command with examples.
List the Matching Commands
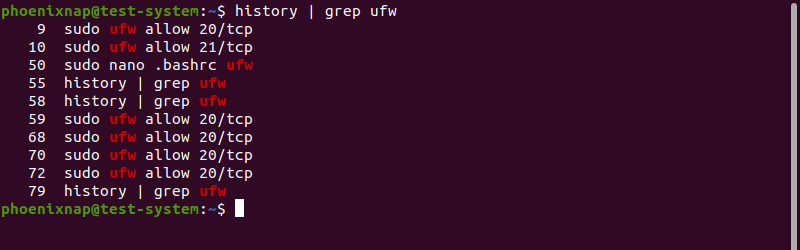
Combining history and grep allows you to display a list of commands that contain a string. For example, to list all commands that contain ufw , use:
Note: Learn more about using the grep command in Linux.
Change the Executed Command
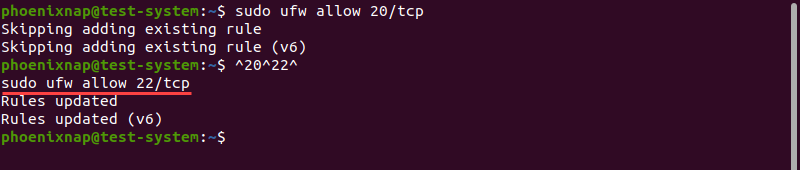
Use the following syntax to change the last executed command:
For instance, the ufw command to enable port 20 shows that the port is already enabled:

Use the syntax above to change the port number from 20 to 22:
Prevent Recording Commands in History
To prevent recording commands in the history list, temporarily disable recording by using:
To re-enable recording, use:
Delete History
Use the -d option with the history command to delete a command from the history list. For instance, delete command number 87 with:
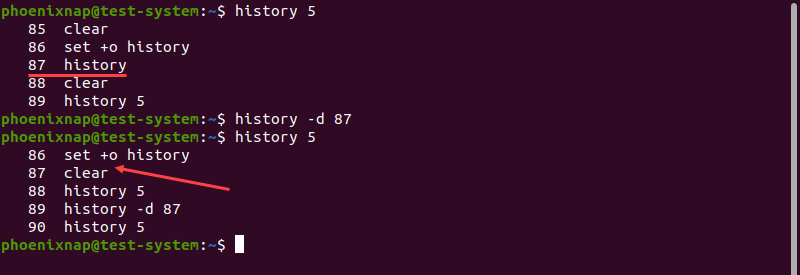
Use the -c option to clear the whole history list:
Update the History File
The Bash shell saves any updates to the command history list when you exit the terminal session. The history command also allows you to save changes while in the terminal session.
Using the -a option lets you append the command history entries from this session to the .bash_history file:
Another method is to use the -w option to save the entire history list to the .bash_history file:
After reading this tutorial, you should be able to use the history command in Linux to view, edit, and delete the command history list and reuse commands from it.
If you are interested in learning more about Linux commands, have a look at our Linux commands cheat sheet.
Set Date and Time for Each Command You Execute in Bash History
By default, all commands executed by Bash on the command line are stored in history buffer or recorded in a file called ~/.bash_history. This means that a system administrator can view a list of commands executed by users on the system or a user can view his/her command history using the history command like so.
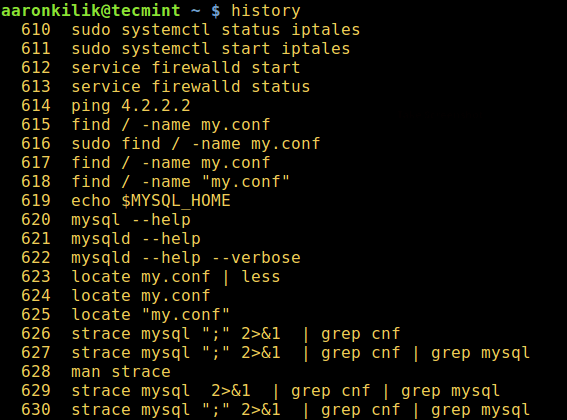
From the output of the history command above, the date and time when a command was executed is not shown. This is the default setting on most if not all Linux distributions.
In this article, we will explain how you can configure time stamp information when each command in the Bash history was executed to be displayed.
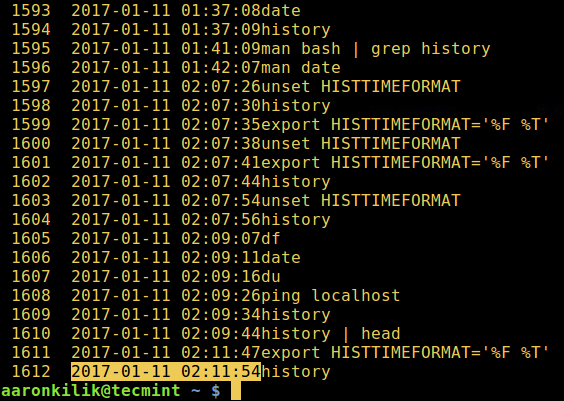
The date and time associated with each history entry can be written to the history file, marked with the history comment character by setting the HISTTIMEFORMAT variable.
There are two possible ways of doing this: one does it temporarily while the other makes it permanent.
To set HISTTIMEFORMAT variable temporarily, export it as below on the command line:
In the export command above, the time stamp format:
- %F – expands to full date same, as %Y-%m-%d (year-month-date).
- %T – expands to time; same as %H:%M:%S (hour:minute:seconds).
Read through the date command man page for additional usage information:
Then check your command history as follows:
However, if you want to configure this variable permanently, open the file ~/.bashrc with your favorite editor:
And add the line below in it (you mark it with a comment as your own configuration):
#my config export HISTTIMEFORMAT='%F %T'
Save the file and exit, afterwards, run the command below to effect the changes made to the file:
That’s all! Do share with us any interesting history command tips and tricks or your thoughts about this guide via the comment section below.