- Share your personal files
- Security
- Networks
- More Information
- Как сделать общую сетевую папку в Linux (настройка SMB в Linux)
- Share files between Linux and Windows computers
- Access Linux from Windows
- 1. Install and configure Samba
- 2. Modify LinuxSE
- 3. Enable your user
- 4. Start Samba
- 4. Configure the firewall
- 5. Access Samba from Windows
- Access Windows from Linux
- 1. Enable file sharing
- 2. Define a shared folder
- 3. Mount the shared folder under Linux
- Summary
- Send your scans to a Linux machine over your network
- 5 open source alternatives to Dropbox
Share your personal files
You can allow access to the Public folder in your Home folder from another computer on the network. Configure Personal File Sharing to allow others to access the contents of the folder.
You must have the gnome-user-share package installed for Personal File Sharing to be visible.
- Open the Activities overview and start typing Sharing .
- Click on Sharing to open the panel.
- If the Sharing switch in the top-right of the window is set to off, switch it to on.
If the text below Device Name allows you to edit it, you can change the name your computer displays on the network.
Security
To require other people to use a password when accessing your Public folder, switch the Require Password switch to on. If you do not use this option, anyone can attempt to view your Public folder.
This option is disabled by default, but you should enable it and set a secure password.
Networks
The Networks section lists the networks to which you are currently connected. Use the switch next to each to choose where your personal files can be shared.
More Information
- Sharing — Share your desktop, files, or media.
- Sharing Settings — Share your screen, or share media and other files over a local network or Bluetooth.
You can choose the displayed language by adding a language suffix to the web address so it ends with e.g. .html.en or .html.de.
If the web address has no language suffix, the preferred language specified in your web browser’s settings is used. For your convenience:
[ Change to English Language | Change to Browser’s Preferred Language ]
The material in this document is available under a free license, see Legal for details.
For information on contributing see the Ubuntu Documentation Team wiki page. To report errors in this documentation, file a bug.
Как сделать общую сетевую папку в Linux (настройка SMB в Linux)
Начните с установки пакетов samba и smbclient.
В Debian, Linux Mint, Ubuntu, Kali Linux и их производных для установки samba выполните команду:
sudo apt install samba smbclient
В Arch Linux, BlackArch и их производных выполните команду:
sudo pacman -S samba smbclient
Следующая команда не сработает, если отсутствует файл /etc/samba/smb.conf. Если у вас тоже нет этого файла, то создаёте его заглушку — к настройке самого файла smb.conf мы вернёмся позже:
sudo touch /etc/samba/smb.conf
Теперь нужно добавить пароль для пользователя Samba. Действует следующее правило: имя пользователя должно быть таким же, как у вашего текущего пользователя, а пароль можно установить иной, отличный от вашего системного пароля.
Для установки пароля Samba, выполните следующую команду:
Если вы хотите, чтобы у пользователя не было пароля, то укажите опцию -n.
Создайте папку, которая станет совместно используемой:
Узнаем абсолютный путь до папки ~/linuxshare:
Откройте для редактирования файл /etc/samba/smb.conf:
sudo gedit /etc/samba/smb.conf
Добавьте туда строки вида:
[ИМЯ_ПАПКИ] comment = Samba на Linux path = /home/ИМЯ_ПОЛЬЗОВАТЕЛЯ/ИМЯ_ПАПКИ valid users = ИМЯ_ПОЛЬЗОВАТЕЛЯ read only = no browsable = yes
Обратите внимание, что все пробелы в строках выше являются обязательными.
Для моих данных это строки:
[linuxshare] comment = Samba на Linux path = /home/mial/linuxshare valid users = mial read only = no browsable = yes
Теперь запустим службу SMB:
sudo systemctl start smb.service
Для добавления службы в автозагрузку выполните:
sudo systemctl enable smb.service
Для подключения к этой общей сетевой папке на Linux нужно использовать IP адреса компьютера Linux.
Создадим файл, чтобы сетевая папка не была пустой:
echo "Документ на Linux" > ~/linuxshare/document.txt
Посмотрите локальный IP адрес компьютера, на котором запущена Linux:
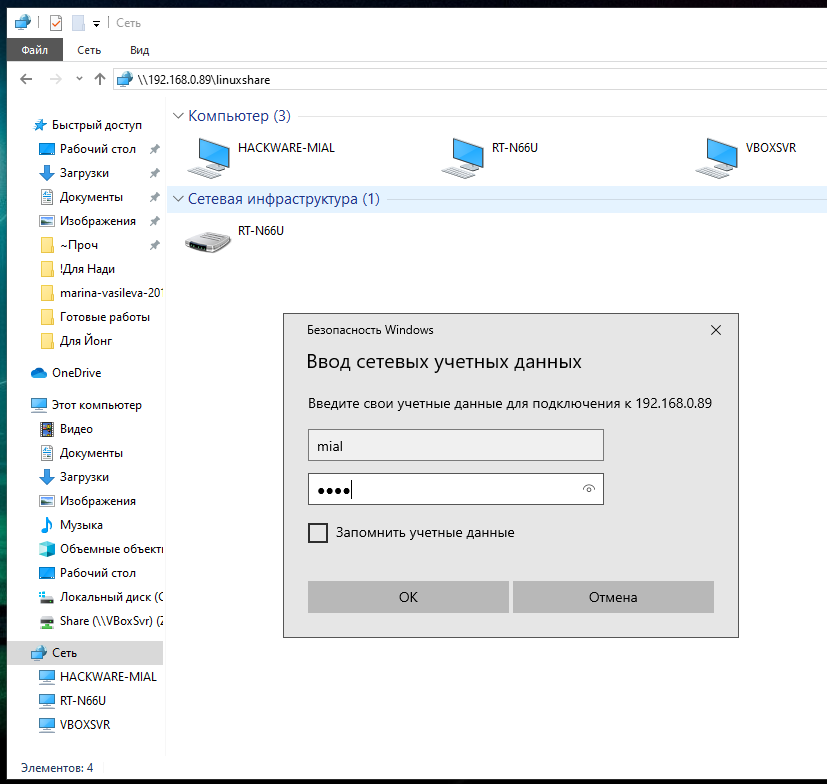
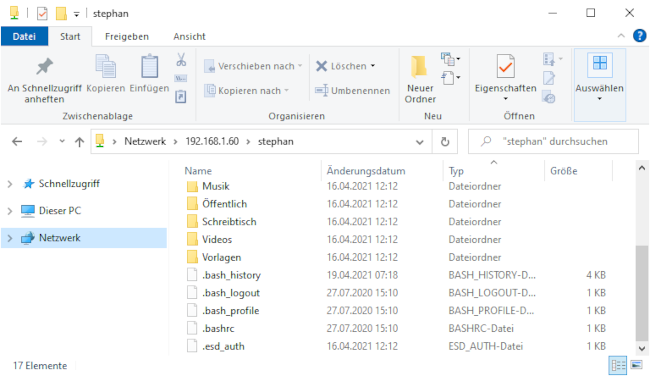
У меня этим IP является 192.168.0.89, а папку, как мы помним, я создал с именем linuxshare, тогда в Windows я перехожу в проводнике во вкладку «Сеть» и подключаюсь к этой папке следующим образом:
Вводим учётные данные (которые мы установили командой smbpasswd):
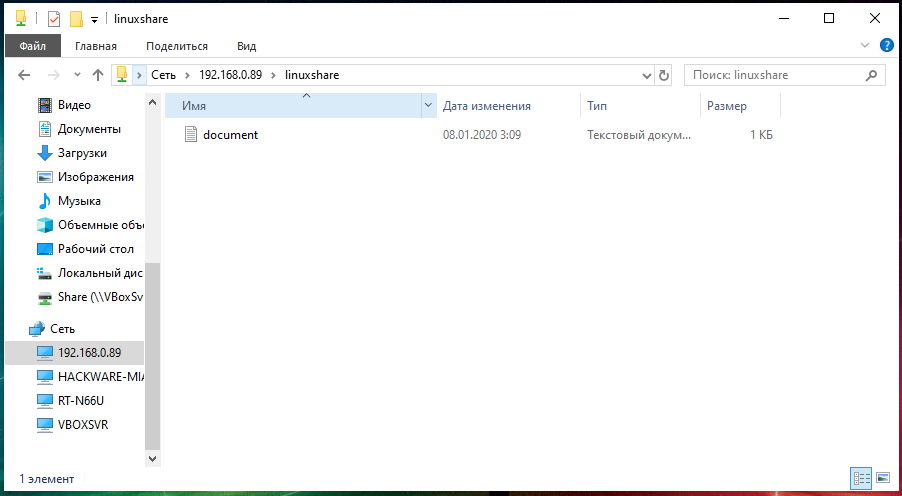
Видим содержимое совместно используемой папки, размещённой на Linux с помощью SMB:
Для подключения к сетевой папке из консоли Linux, запустите команду вида:
sudo smbclient //IP_АДРЕС/Папка -U ПОЛЬЗОВАТЕЛЬ
sudo smbclient //192.168.0.89/linuxshare -U mial
После ввода пароля нам становится доступным содержимое сетевой папки.
Share files between Linux and Windows computers
If you work with different operating systems, it’s handy to be able to share files between them. This article explains how to set up file access between Linux (Fedora 33) and Windows 10 using Samba and mount.cifs.
Samba is the Linux implementation of the SMB/CIFS protocol, allowing direct access to shared folders and printers over a network. Mount.cifs is part of the Samba suite and allows you to mount the CIFS filesystem under Linux.
Caution: These instructions are for sharing files within your private local network or in a virtualized host-only network between a Linux host machine and a virtualized Windows guest. Don’t consider this article a guideline for your corporate network, as it doesn’t implement the necessary cybersecurity considerations.
Access Linux from Windows
This section explains how to access a user’s Linux home directory from Windows File Explorer.
1. Install and configure Samba
Start on your Linux system by installing Samba:
Samba is a system daemon, and its configuration file is located in /etc/samba/smb.conf . Its default configuration should work. If not, this minimal configuration should do the job:
[global] workgroup = SAMBA server string = %h server (Samba %v) invalid users = root security = user [homes] comment = Home Directories browseable = no valid users = %S writable = yesYou can find a detailed description of the parameters in the smb.conf section of the project’s website.
2. Modify LinuxSE
If your Linux distribution is protected by SELinux (as Fedora is), you have to enable Samba to be able to access the user’s home directory:
setsebool -P samba_enable_home_dirs onCheck that the value is set by typing:
getsebool samba_enable_home_dirsYour output should look like this:
![]()
3. Enable your user
Samba uses a set of users and passwords that have permission to connect. Add your Linux user to the set by typing:
You will be prompted for a password. This is a completely new password; it is not the current password for your account. Enter the password you want to use to log in to Samba.
To get a list of allowed user types:
4. Start Samba
Because Samba is a system daemon, you can start it on Fedora with:
This starts Samba for the current session. If you want Samba to start automatically on system startup, enter:
On some systems, the Samba daemon is registered as smbd .
4. Configure the firewall
By default, Samba is blocked by your firewall. Allow Samba to access the network permanently by configuring the firewall.
You can do it on the command line with:
firewall-cmd --add-service=samba --permanentOr you do it graphically with the firewall-config tool:

5. Access Samba from Windows
In Windows, open File Explorer. On the address line, type in two backslashes followed by your Linux machine’s address (IP address or hostname):
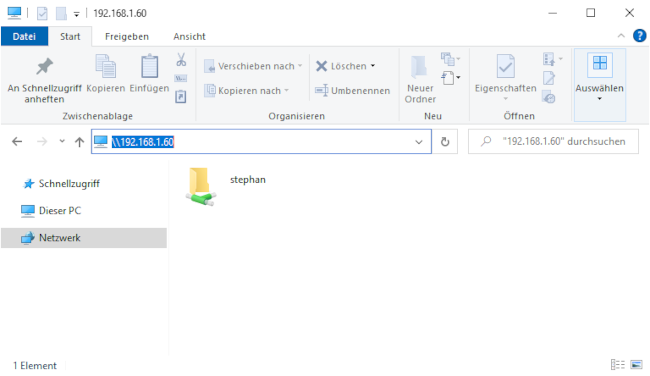
You will be prompted for your login information. Type in the username and password combination from step 3. You should now be able to access your home directory on your Linux machine:
Access Windows from Linux
The following steps explain how to access a shared Windows folder from Linux. To implement them, you need Administrator rights on your Windows user account.
1. Enable file sharing
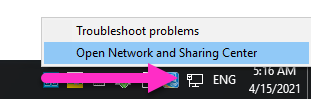
Open the Network and Sharing Center either by clicking on the
Windows Button > Settings > Network & Internet
or by right-clicking the little monitor icon on the bottom-right of your taskbar:
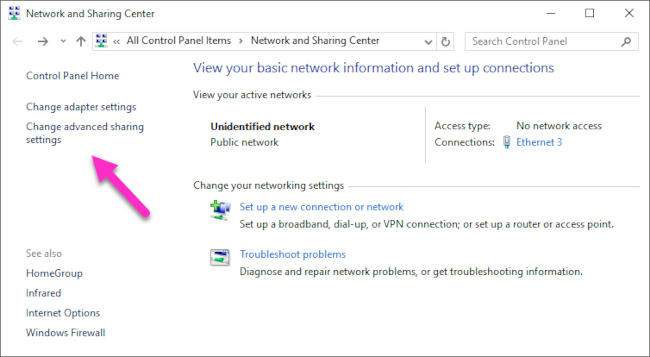
In the window that opens, find the connection you want to use and note its profile. I used Ethernet 3, which is tagged as a Public network.
Caution: Consider changing your local machine’s connection profile to Private if your PC is frequently connected to public networks.
Remember your network profile and click on Change advanced sharing settings:
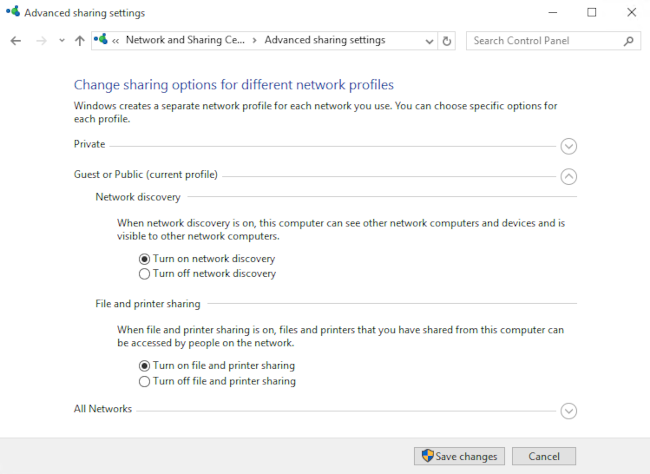
Select the profile that corresponds to your connection and turn on network discovery and file and printer sharing:
2. Define a shared folder
Open the context menu by right-clicking on the folder you want to share, navigate to Give access to, and select Specific people. :
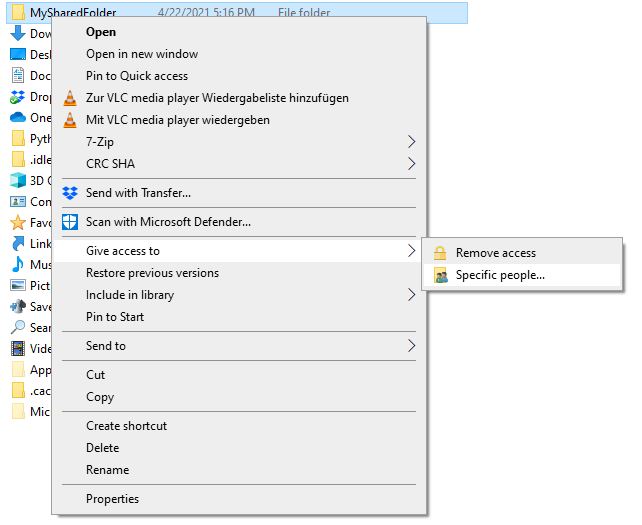
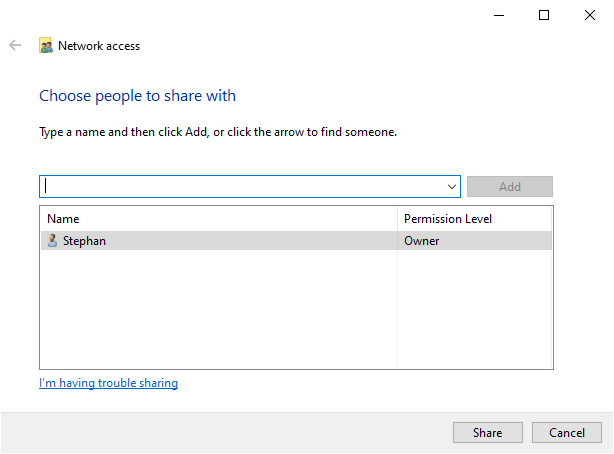
Check whether your current username is on the list. Click on Share to tag this folder as shared:
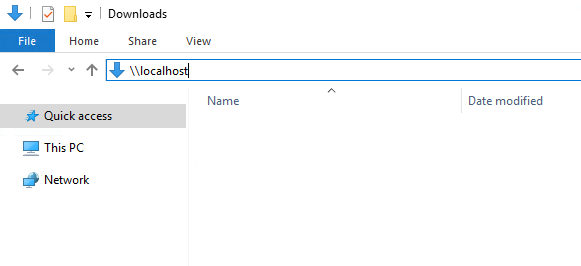
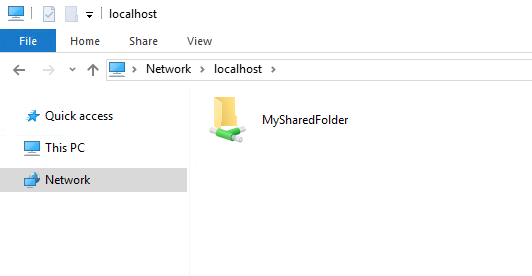
You can display a list of all shared folders by entering \\localhost in File Explorer’s address line:
3. Mount the shared folder under Linux
Go back to your Linux system, open a command shell, and create a new folder where you want to mount the Windows share:
Mounting Windows shares is done with mount.cifs, which should be installed by default. To mount your shared folder temporarily, use:
sudo mount.cifs ///MySharedFolder ~/WindowsShare/ -o user=,uid=$UID- is the Windows PC’s address info (IP or hostname)
- is the user that is allowed to access the shared folder (from step 2)
You will be prompted for your Windows password. Enter it, and you will be able to access the shared folder on Windows with your normal Linux user.
To unmount the shared folder:
You can also mount a Windows shared folder on system startup. Follow these steps to configure your system accordingly.
Summary
This shows how to establish temporary shared folder access that must be renewed after each boot. It is relatively easy to modify this configuration for permanent access. I often switch back and forth between different systems, so I consider it incredibly practical to set up direct file access.

Send your scans to a Linux machine over your network
Set up a Samba share to make a scanner easily accessible by a Linux computer over your network.

5 open source alternatives to Dropbox
Find a filesharing application that doesn’t compromise your security, freedom, or bank balance.