- create floppy images
- 2 Answers 2
- Linux img to floppy
- 4.3.1. Writing Disk Images From a Linux or Unix System
- 4.3.2. Writing Disk Images From DOS, Windows, or OS/2
- 4.3.3. Writing Disk Images From MacOS
- 4.3.3.1. Writing Disk Images with Disk Copy
- 4.3.3.2. Writing Disk Images with suntar
- Creating and Writing Floppy Disk Images in Linux with dd
- The dd Command
- Creating Floppy Disk Images in Linux to Backup Disks
- Writing Disk Images to Floppy Disks in Linux
- Formatting a Floppy/Troubleshooting
create floppy images
I’m running a virtualbox ms dos 6.22 emulator and I need quite a lot of virtual floppy images filled with software.
Does anyone know a good program to efficiently create floppy images and fill them with my specified files?? It’s for an Old School Gaming Night and we want it to be as authentic as possible. Both software as ways to mount several floppys at once (or to mount, unmount and to mount the next floppy in quick succession) using the terminal are appreciated.
I know I can use dosbox with imgmount but that doesn’t make it more efficient. In fact WITH dosbox I’ll need even more time since I’ll need to use the copy command instead of just dragging and dropping (the folders are a bit too diverse to create a batch file so using dosbox will result in a lot of typing)
2 Answers 2
You can create a blank floppy image with the command:
mkfs.msdos -C /path/imagefile.img 1440 On some systems /mkfs.msdos is under /sbin directory. Afterwards you can mount it as loopback device with command:
sudo mkdir /media/floppy1/ sudo mount -o loop /path/imagefile.img /media/floppy1/ To unmount, use the command
If you want to create an image from the physical floppy disk, use dd command (disclaimer — I didn’t try the below as my floppy is gone! but should work) (and assume that’s 1.44MB type floppy disk. 1.2MB ones should have gone at the time of DOS 6.22 )
dd bs=512 count=2880 if=/dev/fda of=/path/imagefile.img Thanks but I knew that already. I was just trying to find a more efficient way to making loads of floppy images. I’ll probably go and write a little gui to make it a bit faster to create and mount them. Thanks anyway
What I mean is that originally it was one game per floppy (or several of them in most cases). Since we want to make it as authentic as possible we need to create at least one image per game and since we want to have a wide variety of games we’ll need ‘loads of floppy images’. We can’t use the original floppy disks because they (in most cases) haven’t been used in a really long time and the magnetic disk order has degraded resulting in loads of crashes when running it from the real floppy disks, hence the images. I’ve made a gui because I will not create ALL images myself
Linux img to floppy
Bootable floppy disks are generally used as a last resort to boot the installer on hardware that cannot boot from CD or by other means.
Booting the installer from floppy disk reportedly fails on Mac USB floppy drives.
Disk images are files containing the complete contents of a floppy disk in raw form. Disk images, such as boot.img , cannot simply be copied to floppy drives. A special program is used to write the image files to floppy disk in raw mode. This is required because these images are raw representations of the disk; it is required to do a sector copy of the data from the file onto the floppy.
There are different techniques for creating floppies from disk images. This section describes how to create floppies from disk images on different platforms.
Before you can create the floppies, you will first need to download them from one of the Debian mirrors, as explained in Section 4.2, “Downloading Files from Debian Mirrors”.
No matter which method you use to create your floppies, you should remember to flip the write-protect tab on the floppies once you have written them, to ensure they are not damaged unintentionally.
4.3.1. Writing Disk Images From a Linux or Unix System
To write the floppy disk image files to the floppy disks, you will probably need root access to the system. Place a good, blank floppy in the floppy drive. Next, use the command
$ dd if=filename of=/dev/fd0 bs=1024 conv=sync ; sync where filename is one of the floppy disk image files. /dev/fd0 is a commonly used name of the floppy disk device, it may be different on your workstation. The command may return to the prompt before Unix has finished writing the floppy disk, so look for the disk-in-use light on the floppy drive and be sure that the light is out and the disk has stopped revolving before you remove it from the drive. On some systems, you’ll have to run a command to eject the floppy from the drive .
Some systems attempt to automatically mount a floppy disk when you place it in the drive. You might have to disable this feature before the workstation will allow you to write a floppy in raw mode . Unfortunately, how to accomplish this will vary based on your operating system.
If writing a floppy on powerpc Linux, you will need to eject it. The eject program handles this nicely; you might need to install it.
4.3.2. Writing Disk Images From DOS, Windows, or OS/2
If you have access to an i386 or amd64 machine, you can use one of the following programs to copy images to floppies.
The rawrite1 and rawrite2 programs can be used under MS-DOS. To use these programs, first make sure that you are booted into DOS. Trying to use these programs from within a DOS box in Windows, or double-clicking on these programs from the Windows Explorer is not expected to work.
The rwwrtwin program runs on Windows 95, NT, 98, 2000, ME, XP and probably later versions. To use it you will need to unpack diskio.dll in the same directory.
These tools can be found on the Official Debian CD-ROMs under the /tools directory.
4.3.3. Writing Disk Images From MacOS
An AppleScript, Make Debian Floppy , is available for burning floppies from the provided disk image files. It can be downloaded from ftp://ftp2.sourceforge.net/pub/sourceforge/d/de/debian-imac/MakeDebianFloppy.sit. To use it, just unstuff it on your desktop, and then drag any floppy image file to it. You must have Applescript installed and enabled in your extensions manager. Disk Copy will ask you to confirm that you wish to erase the floppy and proceed to write the file image to it.
You can also use the MacOS utility Disk Copy directly, or the freeware utility suntar . The root.bin file is an example of a floppy image. Use one of the following methods to create a floppy from the floppy image with these utilities.
4.3.3.1. Writing Disk Images with Disk Copy
If you are creating the floppy image from files which were originally on the official Debian GNU/Linux CD, then the Type and Creator are already set correctly. The following Creator-Changer steps are only necessary if you downloaded the image files from a Debian mirror.
- Obtain Creator-Changer and use it to open the root.bin file.
- Change the Creator to ddsk (Disk Copy), and the Type to DDim (binary floppy image). The case is sensitive for these fields.
- Important: In the Finder, use Get Info to display the Finder information about the floppy image, and “ X ” the File Locked check box so that MacOS will be unable to remove the boot blocks if the image is accidentally mounted.
- Obtain Disk Copy ; if you have a MacOS system or CD it will very likely be there already, otherwise try http://download.info.apple.com/Apple_Support_Area/Apple_Software_Updates/English-North_American/Macintosh/Utilities/Disk_Copy/Disk_Copy_6.3.3.smi.bin.
- Run Disk Copy , and select Utilities → Make a Floppy , then select the locked image file from the resulting dialog. It will ask you to insert a floppy, then ask if you really want to erase it. When done it should eject the floppy.
4.3.3.2. Writing Disk Images with suntar
- Obtain suntar from . Start the suntar program and select “ Overwrite Sectors. ” from the Special menu.
- Insert the floppy disk as requested, then hit Enter (start at sector 0).
- Select the root.bin file in the file-opening dialog.
- After the floppy has been created successfully, select File → Eject . If there are any errors writing the floppy, simply toss that floppy and try another.
Before using the floppy you created, set the write protect tab ! Otherwise if you accidentally mount it in MacOS, MacOS will helpfully ruin it.
Creating and Writing Floppy Disk Images in Linux with dd
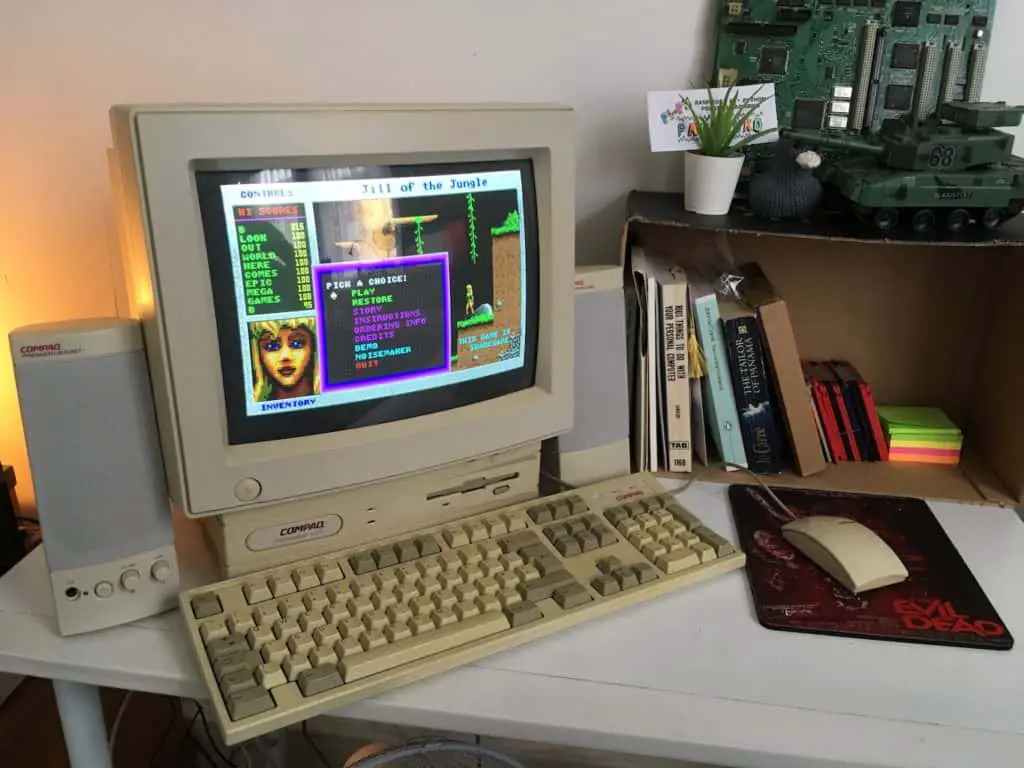
I dabble a bit in vintage computing – finding old computers, fixing them up, and getting them back into action – usually for playing games on era-appropriate hardware.
Part of this usually involves re-installing the operating system and loading up software.
This used to be pretty simple – when Windows computers came with floppy disk drives and included the required tools, it was pretty easy to get some MS-DOS software onto a disk ready for use on an older machine.
That, of course, isn’t the case anymore. Modern Windows PCs lack floppy drives and lack the tools for creating boot disks.
Linux to the rescue!
Linux has the required tools built right in, and cheap, compatible USB floppy disk drives are ubiquitous. So within no time at all, you’ll have your vintage PC back in action, like mine below.
The dd Command
The dd command will be used to read and write floppy images.
The full user manual for the dd command can be found by running:
…but all of the information you need to read and write floppy images is below.
Creating Floppy Disk Images in Linux to Backup Disks
If you have driver disks (which can be hard to track down online) or any other old disks still laying around, it’s worth making a backup before trying to use them – just in case you wear the disk out.
Attach your USB floppy drive with the disk you wish to back up inserted.
Now, we need to find out the path to the newly attached USB floppy drive – run:
The fdisk command will output a list of storage devices attached to your system. Among them (hopefully last in the list to make it easy to find) will be the device you just plugged in.
We’ll be using the sudo command frequently – many of these tasks require administrative privileges.
Next, use the dd command to read the contents of the filesystem on the floppy device. Note that /dev/sdb should be replaced with the path to the floppy device as identified on your system above:
sudo dd bs=512 count=2880 if=/dev/sdb of=my-image.img
The device names sdb/sdb may differ on your system! Make sure you identify your drive correctly, so you don’t accidentally destroy data.
The dd command has several options which can be specified – above; bs defines the number of bytes to be read or written at a time, the count option defines the number of blocks to be read or written – in this case, we specify enough blocks for a 1.44MB floppy disk. if defines the in file – in this case, the path to the floppy drive device, and of the out file – the name of the image we wish to write to.
Writing Disk Images to Floppy Disks in Linux
Once you’ve read the contents of a disk to an image file (or acquired one online), it can be written to a new disk for use.
*Writing a disk image will destroy anything that’s already on the target disk – make sure that a) you don’t have anything you want to keep on the disk and b) you have identified the correct device on your system as your floppy disk drive, so you don’t accidentally overwrite data on the wrong device!
The following command will read the image my-image.img and write it to the floppy device at /dev/sdb
sudo dd if=my-image.img of=/dev/sdb bs=512 conv=sync ; sync
Formatting a Floppy/Troubleshooting
Floppy disks are flimsy, magnetic storage, unsuitable for long-term (and sometimes even short-term) data preservation. Please don’t put your only copy of anything on a floppy; it could be corrupted at pretty much any moment.
If you keep getting issues while writing a disk image, try the following.
- Running sudo eject /dev/sdb to force eject the drive
- Disconnect and reconnect the drive with the disk inserted
- Reformatting the disk by running mke2fs /dev/sdb
- Again, make sure you have the right device path before trying to reformat!
- Once re-formatted, try imaging the disk again.
If you’re having trouble creating an image from an existing disk, the best you can do is try it using a different disk drive or computer.