- How do I install ALL development libraries?
- 4 Answers 4
- Tutorial Install Development Tools On Ubuntu 20.04 & 21.04
- Install Development Tools On Ubuntu 20.04 & 21.04
- Prerequisites to Install Development Tools on Ubuntu
- How to Setup/Install Development Tools on Ubuntu
- Install Make on Ubuntu 20.04 & 21.04
- How to find Available Software Group Name and Package Name on Ubuntu
- Install Developer Tools and IDEs on Ubuntu
- How to Remove Developer Tools and IDEs on Ubuntu
- How to Update Developer Tools and IDEs on Ubuntu
- Conclusion
- How to Install Development Tools on CentOS, RHEL & Fedora
- Development Tools Installation
- Check Installed Versions
- Related Posts
- A Beginner’s Guide to POSTing Files Using Curl
- How to Set User-Agent String with Curl
- Posting Request Body with Curl
- 4 Comments
How do I install ALL development libraries?
I want to preinstall all the libraries one could ever need onto a system so someone building something would always have the libraries available. Like in a computer lab where users are not root. I want to do something like apt-get install lib* but I don’t think that will be a good idea. Is there a package like most-libs-used?
4 Answers 4
apt-cache search dev|grep "\-dev"|cut -d' ' -f1|sort > available-devs.txt
It will create the file available-devs.txt with a list of all available -dev packges in the archive (and within any PPAs or other archives you have added). You can then go and install them all. You can’t install them all at the same time, as there are more package names than allowable program arguments in a POSIX system, so you’ll have to install some bit by bit. Also, if you really want to install all of them, I hope you have a very large storage system for your main OS partition.
Also, that only grabs the ones for the arch you’re currently on, I think. To install both i386 and x86_64 versions on a 64-bit Ubuntu install, you’d need even more space, and have to install a lot more of the same, with :i386 appended to the package name. But not all libraries in the archive are set up for MultiArch support yet.
On versions of Ubuntu with multarch support enabled by default (11.10 and later), the metapackage ia32-libs-multarch has many of the commonly needed library packages as dependencies. Of course, ia32-libs-multarch only exists on 64-bit systems, and it provides 32-bit libraries. Installing it will probably not do what you want.
But you can use its list of dependencies (that’s for 12.04, here’s 11.10) as a reference for what libraries you might want to install to support software users run that is not provided by Ubuntu packages. (If software is provided by Ubuntu packages, then you have to be able to run commands as root to install it normally, and then dependencies will just be installed as needed.)
On Ubuntu 12.04, you can install those packages manually (that is, the versions for the system’s actual architecture):
sudo apt-get install install bluez-alsa gstreamer0.10-fluendo-mp3 gstreamer0.10-plugins-base gstreamer0.10-plugins-good gtk2-engines gtk2-engines-murrine gtk2-engines-oxygen gtk2-engines-pixbuf gvfs ibus-gtk libacl1 libaio1 libao4 libasound2 libasound2-plugins libasyncns0 libattr1 libaudio2 libcanberra-gtk-module libcap2 libcapi20-3 libcups2 libcupsimage2 libcurl3 libdbus-glib-1-2 libesd0 libfontconfig1 libfreetype6 libgail-common libgconf-2-4 libgdbm3 libgettextpo0 libglapi-mesa libglu1-mesa libgphoto2-2 libgphoto2-port0 libgtk2.0-0 libmpg123-0 libncursesw5 libnspr4 libnss3 libodbc1 libopenal1 libpulse-mainloop-glib0 libpulsedsp libqt4-dbus libqt4-network libqt4-opengl libqt4-qt3support libqt4-script libqt4-scripttools libqt4-sql libqt4-svg libqt4-test libqt4-xml libqt4-xmlpatterns libqtcore4 libqtgui4 libqtwebkit4 librsvg2-common libsane libsdl-image1.2 libsdl-mixer1.2 libsdl-net1.2 libsdl-ttf2.0-0 libsdl1.2debian libsqlite3-0 libssl0.9.8 libssl1.0.0 libstdc++5 libstdc++6 libxaw7 libxml2 libxp6 libxslt1.1 libxss1 libxtst6 odbcinst1debian2 xaw3dg libgl1-mesa-dri libgl1-mesa-glx libnss-ldap libpam-ldap libpam-winbind You can do this on previous releases too, though you’ll have to change some of the versions numbers in the package names (which ones need it will become apparent if you jus try running the command as-is, and you can look up packages with similar names here. For Ubuntu 11.10, you could install the packages named as dependencies here. (Though it would probably be easier to look at error messages from running the above command, and just substitute the small handfull of packages from that list.)
Tutorial Install Development Tools On Ubuntu 20.04 & 21.04
When you want to install packages from the source or compile software, you will need Development Tools & Libraries. Also, it is required for developers to build packages in a Linux system. Development tools contain include all necessary applications such as GCC, g++, make, libc6-dev, and dpkg-dev packages. Depending on your Linux distribution, these tools could be installed in different ways. Join us to review the Tutorial Install Development Tools On Ubuntu 20.04 & 21.04. Various interesting packages are available on Eldernode, have a look and order your own Ubuntu VPS Hosting.
Install Development Tools On Ubuntu 20.04 & 21.04
In this article, you will learn how to install the development tools group on Ubuntu. You can install the developer tools in two ways, individually one by one, or all at once. To make it easier, we will show you how to install it all at once.
Prerequisites to Install Development Tools on Ubuntu
To let this tutorial work better, please consider the below Prerequisites:
_ A non-root user with Sudo privileges. To setup, follow our Initial server setup on Ubuntu 21.04.
How to Setup/Install Development Tools on Ubuntu
Since the development tools packages are available under default apt repositories for most of the Ubuntu-based systems, run the command below to install the development tools package on your Ubuntu system:
sudo apt-get install build-essentialIn this way, you install the developer tools all at once and all the build-essential package is installed on your system now.
When the installation is finished, use the following command to check installed versions of important binaries:
Install Make on Ubuntu 20.04 & 21.04
You can also install the latest version of developer tools and IDEs (PHPStorm, WebStorm, PyCharm, Android Studio, Eclipse, NetBeans, etc.) using Ubuntu Make. It is a command-line utility that will install all the required dependency packages in an easy way.
In this section, you will learn How to install Ubuntu Make on Ubuntu 20.04 & 21.04. Then, you will review the installation of the latest version of developer tools and IDEs using Ubuntu Make on Ubuntu 20.04 & 21.04.
Ubuntu Make package is available in the official universe package repository of Ubuntu.
In the first step, you will enable the official universe package repository on Ubuntu. So, run the command below to do this:
sudo apt-add-repository universeNow, use the following command to update the APT package repository cache:
In this step, you are ready to install Ubuntu Make. So, use the command below and then press Y to and Enter confirm the installation:
sudo apt install ubuntu-makeOnce the installation is finished, you can check if Ubuntu Make is working correctly or not. run the following command to do this:
If you can view the current version in the output, it means that Ubuntu Make is working correctly.
How to find Available Software Group Name and Package Name on Ubuntu
To install a developer tool or IDE, you need to know the group name and the developer tool or IDE package name. It is not complicated to find them. Use the following command to find out the supported groups and developer tool or IDE package name:
Then, to find what software is available in your desired group, scroll down on the umake output. Note that each of the groups has its own set of software. However, you should see all the currently available software package names. But if you wish to find the available software programs in your desired group faster and not to scroll and search, run the following command:
Note: Do not forget to replace your desired group with
Let’s see an example. If you want to see what software is available in the web group, run the command below:
So, you will see ”firefox-dev and visual-studio-code”. And any more in case of existence in the time of reading this article.
Install Developer Tools and IDEs on Ubuntu
When you make sure of the group name and the developer tool or IDE package name, you are ready to install the developer tool or IDE on your Ubuntu using Ubuntu Make.
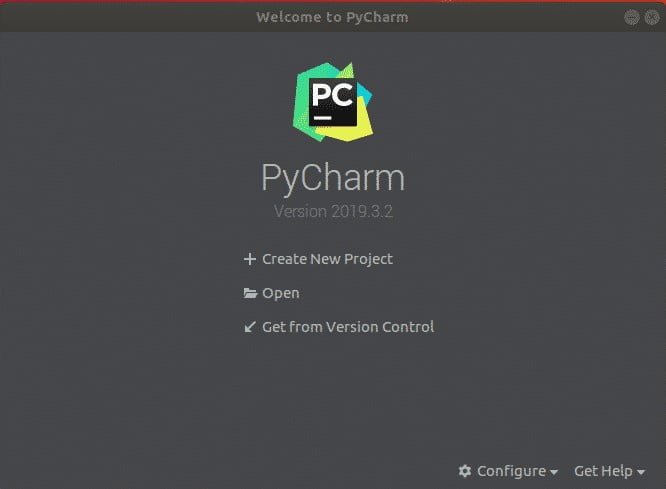
To continue this section, let’s continue with an example. As a python developer, if you need to install PyCharm Community Edition on your Ubuntu machine, you can use Ubuntu Make. So, due to the above explanation, the group name should be ide and the package name be pycharm.
Run the umake command to install pycharm from the ide group using Ubuntu Make:
Then, you will be asked for your login password and an installation path. Type the password and press to continue. You can also leave the default and press .
Next, you can see the Ubuntu Make will start downloading and installing all the PyCharm dependencies and PyCharm. So, you will be able to start it from the Application Menu of Ubuntu.

How to Remove Developer Tools and IDEs on Ubuntu
You can also remove Developer Tools and IDEs using Ubuntu Make. To show you how easy is this, we remove PyCharm Community IDE as an example, which we installed earlier.
So, run umake with the -r flag as follows:
In this way, PyCharm Community IDE will be removed.
How to Update Developer Tools and IDEs on Ubuntu
Updating the installed developer tools or IDEs is not possible using Ubuntu Make. So, you can use a trick to update the already installed developer tools and IDEs using Ubuntu Make. Follow the below path to do this;
1- Remove the installed developer tool or IDE that you want to update:
2- Install the developer tool or IDE again with Ubuntu Make:
The developer tool or IDE should be updated now.
Note: While using this trick, you may lose your developer tool or IDE configuration. But the developer tool or IDE will be updated. You just need to reconfigure the developer tool or IDE.
Conclusion
In this article, you learned How to Install Development Tools On Ubuntu 20.04 & 21.04. Two different methods were explained. Also, you can install the development tools group in other Linux distributions such as RHEL, CentOS, Fedora, OpenSUSE, Debian, Mint, and Arch Linux.
Click on a star to rate it!
Average rating 5 / 5. Vote count: 1
No votes so far! Be the first to rate this post.
How to Install Development Tools on CentOS, RHEL & Fedora
Development tools packages are required to install on your system if you have planned to build software. It’s also useful for building packages on your system. Development tools contain useful tools like GCC, g++, make, libtool, rpmbuild and autoconf etc packages. This tutorial will help you to install development tools on CentOS, RHEL & Fedora systems.
Development Tools Installation
Use the following set of commands to install development packages on your RedHat and their derivative systems.
### CentOS/RHEL 7/6/5 yum update yum groupinstall "Development Tools"### Fedora 28/27/26/25/24/23 dnf update dnf groupinstall "Development Tools"
To find out what is in this group use command
yum groupinfo "Development Tools" Loaded plugins: fastestmirror Loading mirror speeds from cached hostfile * base: mirror.cc.columbia.edu * extras: mirror.metrocast.net * updates: mirror.solarvps.com Group: Development Tools Group-Id: development Description: A basic development environment. Mandatory Packages: =autoconf =automake binutils =bison =flex =gcc =gcc-c++ gettext =libtool make =patch pkgconfig =redhat-rpm-config =rpm-build =rpm-sign Default Packages: =byacc =cscope =ctags [. ]
Check Installed Versions
After successful installation of the build-essential package on your system, let’s check installed versions of important binaries.
gcc --version gcc (GCC) 4.8.5 20150623 (Red Hat 4.8.5-4) Copyright (C) 2015 Free Software Foundation, Inc.
make —version GNU Make 3.82 Built for x86_64-redhat-linux-gnu Copyright (C) 2010 Free Software Foundation, Inc. License GPLv3+: GNU GPL version 3 or later
Related Posts
A Beginner’s Guide to POSTing Files Using Curl
How to Set User-Agent String with Curl
Posting Request Body with Curl
4 Comments
Hi,
Can anybody please help,how to install a gnome-keyring development package in cent0s 8.
I need to create a sample C/C++ program which should use gnome-keyring API to create and access the own keyring for storing password. I got some sample programs from gnome developer site.But while compiling the program I get error saying “gnome-keyring.h” is not found. When I surfed net,i got to know that gnome-keyring-devel shoud be installed to get libraries and include files for the development. yum install allows gnome-keyring not gnome-keyring-devel.So I am not sure if centos 8 really has the development package for gnome-keyring. There are .so created under /usr/lib64/gnome-keyring no include directory or .pc found in the system for the same. Anybody has any idea how can create application that uses gnome-keyring featues and how can I access the keyring API in the program. Sample program I tried for locking the keyring #include
#include int main() GnomeKeyringResult lock_result = gnome_keyring_lock_all_sync();
if (lock_result == GNOME_KEYRING_RESULT_OK) printf(“Successfully locked\n”);
return 0;
> else printf(“Error locking keyring: %d\n”, lock_result);
return 1;
>
>