- How to Install YUM on Ubuntu
- Background
- How to Install YUM on Ubuntu — The Instructions
- A new VM
- References
- Как установить yum (dnf) в Debian Linux
- Введение
- Установка yum с помощью apt-get
- Установите yum с помощью apt
- Установка yum с помощью aptitude
- Как удалить yum в Debian
- How To Install yum4 on Ubuntu 22.04
- What is yum4
- Install yum4 Using apt-get
- Install yum4 Using apt
- Install yum4 Using aptitude
- How To Uninstall yum4 on Ubuntu 22.04
- Uninstall yum4 And Its Dependencies
- Remove yum4 Configurations and Data
- Remove yum4 configuration, data, and all of its dependencies
- References
- Summary
- How To Install yum on Ubuntu 18.04
- What is yum
- Install yum Using apt-get
- Install yum Using apt
- Install yum Using aptitude
- How To Uninstall yum on Ubuntu 18.04
- Uninstall yum And Its Dependencies
- Remove yum Configurations and Data
- Remove yum configuration, data, and all of its dependencies
- References
- Summary
- Linux install yum ubuntu
- Learn Latest Tutorials
- Preparation
- Trending Technologies
- B.Tech / MCA
- Javatpoint Services
- Training For College Campus
How to Install YUM on Ubuntu
If you have found yourself on this page it is probably because you want to know how to install YUM on Ubuntu. I have heard people compare using YUM on Ubuntu to hammering nails with a screwdriver handle.
Short Answer: Bad idea, don’t do it!
Long Answer: You CAN install YUM on Ubuntu even though you shouldn’t. Keep reading to learn how…..
Background
YUM is a package management utility for Red Hat based systems such as RHEL or CentOS. It is used to manage RPM packages. Ubuntu has its own package management system. The equivalent tool for Ubuntu is apt. This is what you really should be using if you want to install or manage packages on Ubuntu.
| RHEL/CentOS | Ubuntu / Debian | |
| Package Type | .rpm | .deb |
| Low Level Package Manager Tool | rpm | dpkg |
| High Level Package Manager Tool | yum | apt |
While theoretically possible, using YUM to install RPM packages on an Ubuntu system would be a really bad idea. Using two package manager would mean that neither package manager would be aware of what the other was doing. YUM wouldn’t take into account what has already been installed on the system. This could lead to files being overwritten. Files would be placed inconsistently across the system. It would lead to chaos.
How to Install YUM on Ubuntu — The Instructions
OK, so …. this was one of the more messed up things I’ve tested out on a Linux system. There were two different packages I found that could be installed. The fact that someone created this package and placed it in the Ubuntu repo in the first place indicates that it was created and place here intentionally for a purpose.
The first package I found was yum-utils. This seems to include yum and some of the tools that go along with it which allow for the creation of a repo. This is important.
Install yum-utils using apt:
sudo apt update -y sudo apt install -y yum-utils Test it out. It turns out that it doesn’t come with repositories configured so you won’t be able to find any packages at all.
yum search nginx yum list all You can create a test repo like this:
vi /etc/yum/repos.d/myrepo.repo The repo definition will look like this:
[myrepo] name=My extras packages for CentOS 7.4.1708 baseurl=http://mirror.centos.org/centos/7/os/x86_64/ enabled=1 sudo yum-config-manager --enable myrepo yum search nginx yum list all It seemed to be working after this. We were able to install a package as a test. Once installed though, every command we ran would segfault. After this we gave up and destroyed the VM that we were installing this on.
A new VM
We cloned a new VM for a new test using just the yum package.
Here we go ahead and install the yum package using apt.
sudo apt update sudo apt install yum We tested this out again. As expected, it didn’t work since we didn’t have a repo setup.
yum search nginx yum list all We decided to setup another repo. This time it would be for NGINX.
sudo vi /etc/yum/repos.d/nginx.repo The definition would look like this.
[nginx-stable] name=nginx stable repo baseurl=http://nginx.org/packages/centos/7/os/x86_64/ gpgcheck=1 enabled=1 gpgkey=https://nginx.org/keys/nginx_signing.key module_hotfixes=true [nginx-mainline] name=nginx mainline repo baseurl=http://nginx.org/packages/mainline/centos/7/os/x86_64/ gpgcheck=1 enabled=0 gpgkey=https://nginx.org/keys/nginx_signing.key module_hotfixes=true We attempted to enable the repo but it didn’t work out since we didn’t have the actual “yum-config-manager” tool installed. This apparently come with yum-utils but not with the regular yum package.
sudo yum-config-manager --enable nginx We tested out removing the packages as well. This seemed to work OK except that it didn’t seem to want to remove the repo config dirs which isn’t such a huge issue.
sudo apt remove --auto-remove yum sudo apt purge --auto-remove yum References
Как установить yum (dnf) в Debian Linux
yum — это расширенный интерфейс для rpm, в этом руководстве мы узнаем, как установить yum в Debian Linux.
Введение
Yum (Yellow dog Updater, Modified) — это автоматическая программа обновления и установки/удаления пакетов для систем rpm. Он автоматически вычисляет зависимости и определяет, что должно произойти для установки пакетов. Это облегчает обслуживание групп машин без необходимости вручную обновлять каждую из них с помощью rpm. .
- Множество репозиториев
- Простой конфигурационный файл
- Правильный расчет зависимостей
- Быстрая работа
- Поведение, совместимое с rpm
- Поддержка групп comps.xml, включая группы из нескольких репозиториев
- Простой интерфейс.
Есть три способа установить yum (dnf) на Debian. Мы можем использовать apt-get, apt и aptitude. В следующих разделах мы опишем каждый способ. Вы можете выбрать один из них.
Установка yum с помощью apt-get
Обновите базу данных apt с помощью apt-get, используя следующую команду.
После обновления базы данных apt мы можем установить yum с помощью apt-get, выполнив следующую команду:

Установите yum с помощью apt
Обновите базу данных apt с помощью apt, используя следующую команду.
После обновления базы данных apt мы можем установить yum с помощью apt, выполнив следующую команду:
Установка yum с помощью aptitude
Если вы хотите следовать этому методу, вам может потребоваться сначала установить aptitude, так как aptitude обычно не установлен по умолчанию в Debian. Обновите базу данных apt с помощью aptitude, используя следующую команду.
После обновления базы данных apt, мы можем установить yum с помощью aptitude, выполнив следующую команду:
sudo aptitude install dnf 
Как удалить yum в Debian
Для удаления только пакета yum (dnf) мы можем использовать следующую команду:
Чтобы удалить yum и его зависимости, которые больше не нужны в Debian, мы можем использовать следующую команду:
sudo apt-get -y autoremove dnfЧтобы удалить конфигурацию и данные yum из Debian 10, мы можем использовать следующую команду:
Чтобы удалить конфигурацию yum, данные и все его зависимости, мы можем использовать следующую команду:
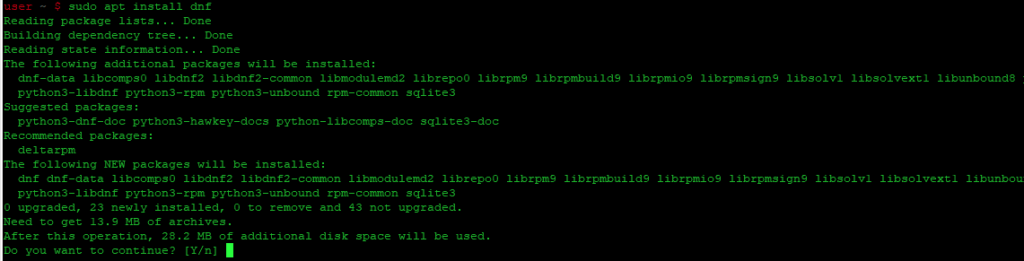
sudo apt-get -y autoremove --purge dnfHow To Install yum4 on Ubuntu 22.04
In this tutorial we learn how to install yum4 on Ubuntu 22.04.
What is yum4
This is a transitional package. It can safely be removed.
There are three ways to install yum4 on Ubuntu 22.04. We can use apt-get , apt and aptitude . In the following sections we will describe each method. You can choose one of them.
Install yum4 Using apt-get
Update apt database with apt-get using the following command.
After updating apt database, We can install yum4 using apt-get by running the following command:
sudo apt-get -y install yum4 Install yum4 Using apt
Update apt database with apt using the following command.
After updating apt database, We can install yum4 using apt by running the following command:
Install yum4 Using aptitude
If you want to follow this method, you might need to install aptitude first since aptitude is usually not installed by default on Ubuntu. Update apt database with aptitude using the following command.
After updating apt database, We can install yum4 using aptitude by running the following command:
sudo aptitude -y install yum4 How To Uninstall yum4 on Ubuntu 22.04
To uninstall only the yum4 package we can use the following command:
Uninstall yum4 And Its Dependencies
To uninstall yum4 and its dependencies that are no longer needed by Ubuntu 22.04, we can use the command below:
sudo apt-get -y autoremove yum4 Remove yum4 Configurations and Data
To remove yum4 configuration and data from Ubuntu 22.04 we can use the following command:
Remove yum4 configuration, data, and all of its dependencies
We can use the following command to remove yum4 configurations, data and all of its dependencies, we can use the following command:
sudo apt-get -y autoremove --purge yum4 References
Summary
In this tutorial we learn how to install yum4 package on Ubuntu 22.04 using different package management tools: apt, apt-get and aptitude.
How To Install yum on Ubuntu 18.04
In this tutorial we learn how to install yum on Ubuntu 18.04.
What is yum
Yum (Yellow dog Updater, Modified) is an automatic updater and package installer/remover for rpm systems. It automatically computes dependencies and figures out what things should occur to install packages. It makes it easier to maintain groups of machines without having to manually update each one using rpm.
* Multiple Repositories * Simple config file * Correct dependency calculation * Fast operation * rpm-consistent behavior * comps.xml group support, including multiple repository groups * Simple interface There are three ways to install yum on Ubuntu 18.04. We can use apt-get , apt and aptitude . In the following sections we will describe each method. You can choose one of them.
Install yum Using apt-get
Update apt database with apt-get using the following command.
After updating apt database, We can install yum using apt-get by running the following command:
sudo apt-get -y install yum Install yum Using apt
Update apt database with apt using the following command.
After updating apt database, We can install yum using apt by running the following command:
Install yum Using aptitude
If you want to follow this method, you might need to install aptitude first since aptitude is usually not installed by default on Ubuntu. Update apt database with aptitude using the following command.
After updating apt database, We can install yum using aptitude by running the following command:
sudo aptitude -y install yum How To Uninstall yum on Ubuntu 18.04
To uninstall only the yum package we can use the following command:
Uninstall yum And Its Dependencies
To uninstall yum and its dependencies that are no longer needed by Ubuntu 18.04, we can use the command below:
sudo apt-get -y autoremove yum Remove yum Configurations and Data
To remove yum configuration and data from Ubuntu 18.04 we can use the following command:
Remove yum configuration, data, and all of its dependencies
We can use the following command to remove yum configurations, data and all of its dependencies, we can use the following command:
sudo apt-get -y autoremove --purge yum References
Summary
In this tutorial we learn how to install yum package on Ubuntu 18.04 using different package management tools: apt, apt-get and aptitude.
Linux install yum ubuntu
Learn Latest Tutorials


Preparation


Trending Technologies


B.Tech / MCA


Javatpoint Services
JavaTpoint offers too many high quality services. Mail us on h[email protected], to get more information about given services.
- Website Designing
- Website Development
- Java Development
- PHP Development
- WordPress
- Graphic Designing
- Logo
- Digital Marketing
- On Page and Off Page SEO
- PPC
- Content Development
- Corporate Training
- Classroom and Online Training
- Data Entry
Training For College Campus
JavaTpoint offers college campus training on Core Java, Advance Java, .Net, Android, Hadoop, PHP, Web Technology and Python. Please mail your requirement at [email protected].
Duration: 1 week to 2 week
Like/Subscribe us for latest updates or newsletter 


