- WUBI – Установка Ubuntu прямо из под Windows
- Install Linux on Windows with WSL
- Prerequisites
- Install WSL command
- Change the default Linux distribution installed
- Set up your Linux user info
- Set up and best practices
- Check which version of WSL you are running
- Upgrade version from WSL 1 to WSL 2
- Ways to run multiple Linux distributions with WSL
- Want to try the latest WSL preview features?
- Additional resources
WUBI – Установка Ubuntu прямо из под Windows
Есть множество способов попробовать Ubuntu. Кому-то больше нравится установить самому рядом с Windows, кто-то меняет жесткие диски, кто-то насилует виртуальную машину. Для меня самый простой способ – Wubi. Windows-based Ubuntu Installer. Приложение, позволяющее установить Ubuntu как обычную программу для Windows.
Суть Wubi очень проста – запускаем программу, она создает папку на жестком диске, куда закачиваются необходимые файлы, скачивается оригинальный образ Ubuntu, небольшие настройки, перезагрузка… И Ваша Ubuntu готова к использованию!
Точно таким же образов можно установить почти все продукты, основанные на Ubuntu – Kubuntu, Xubuntu, Mythbuntu. Раньше так же были Netbook-версии, но на 11.04 осталась только для Ubuntu. Для версии 11.10, скорее всего, появится еще Lubuntu.
Wubi имеется на всех дисках с Ubuntu. Она находится в корневой папке диске, файл wubi.exe. Но этот файл можно и отдельно скачать. На сайте Ubuntu есть прямая ссылка на него.
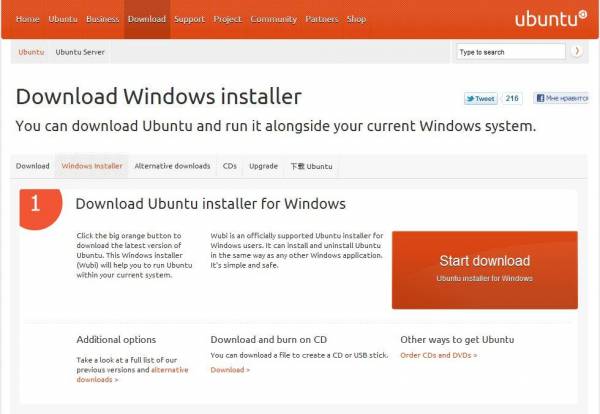
Вот эта оранжевая кнопочка с надписью «Start download» — и начнется закачка. Программа весит совсем ничего, меньше 1,5 мегабайт. Но все же лучше все-таки скачать оригинальный CD-образ. Почему, расскажу позже.
После запуска увидим вот это:
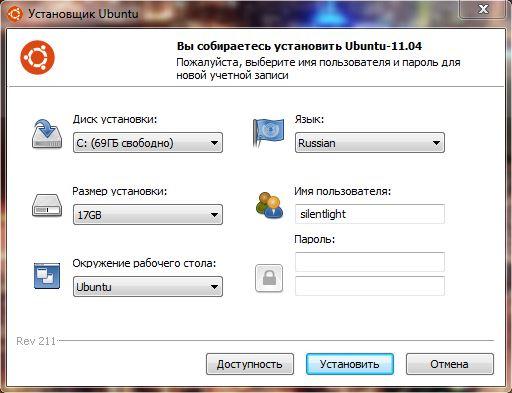
Собственно, главное окно программы. Все очень просто, согласитесь, даже запутаться негде!
В самом первом окошечке выбирается на какой жесткий диск Вы хотите установить Ubuntu. У меня он один, поэтому я его и оставлю.
Чуть ниже выбирается место, которое необходимо для новой Ubuntu. Возможно от 3 до 30 Гб, с шагов в 1 Гб. Сама Ubuntu занимает около 7 Гб, но я ставлю максимум. Мало ли что понадобится…
В нижнем списке выбираем какую систему необходимо установить. Напомню, что на дисках для 11.04 это могут быть Ubuntu, Ubuntu Netbook, Kubuntu, Xubuntu и Mythbuntu. Кому что больше нравится.
В колонке справа выбирается язык будущей системы, вводится имя пользователя (login) и пароль с подтверждение. Получается, что пароль один на всю систему – и для входа пользователя, и для администратора.
Так же возможна настройка особых средств для людей с ограниченными возможностями. Для этого следует нажать кнопочку «Доступность».
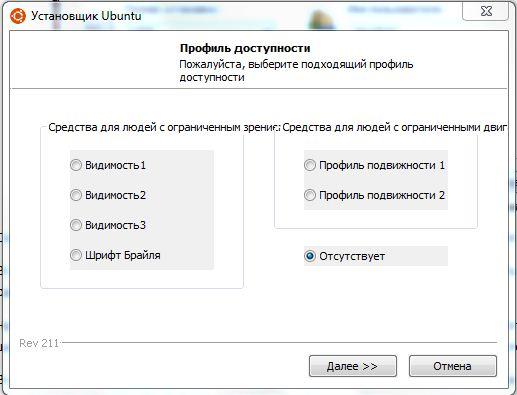
Перед нами появится вот такое окно. Что значит каждый из пунктов, я не знаю, потому что сам не пробовал, не было необходимости. При желании можно поэкспериментировать. По кнопке «Далее» вернемся на предыдущее окно программы.
Больше настаивать нечего. Если все-таки хотите установить Ubuntu – смело жмем «Установить», если не хотите…
Устанавливаем. Начнется загрузка файлов и образа. Я говорил, что скачивать оригинальный образ лучше, потому что можно обойтись без скачивания образа для Wubi, просто пропустив этот момент. Для этого установщик и файл образа должны находиться в одном каталоге, неважно в каком.
Установщик проверит файл образа и, если все в порядке, извлечет необходимые файлы из него. Никаких дополнительных файлов, например MD5, скачивать не надо.
Такой способ удобен для тех, у кого по умолчанию будет скачиваться х64 образ. При желании иметь х86 систему достаточно, чтобы образ и установщик Wubi были в одном месте, и тогда будет установлена х86 система.
Внимание! Файл образа при таком способе должен быть обязательно CD-диском и не альтернативным. С DVD-дисками Wubi, к сожалению не дружит. Хотя сам файл Wubi на DVD-дисках имеется.
Если все прошло правильно, Вы увидите вот такое окно:
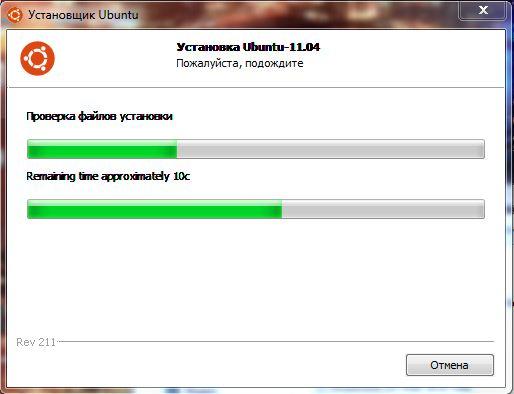
У меня запечатлен как раз момент проверки файла образа диска.
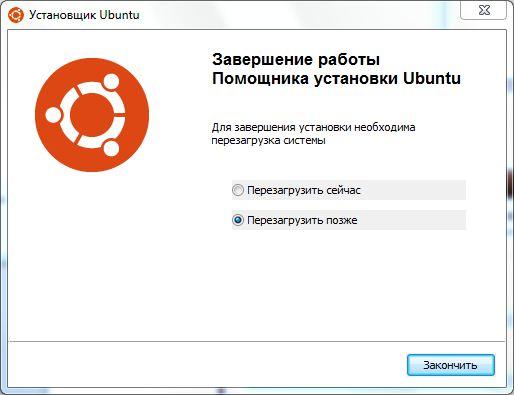
По окончанию установки (1 минута при имеющемся образе, 30 минут при скачивании) достаточно только перезагрузится:
Если что-то пошло не так, или Вам не понравилась Ваша Ubuntu, ее легко можно удалить. Снова запускаем этот же установщик:
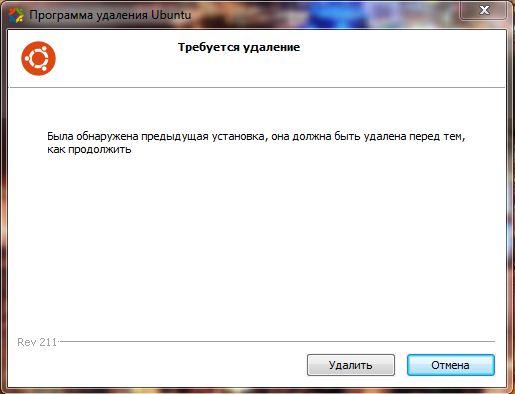
Нажимаем кнопку «Удалить» и система полностью стирается с Вашего компьютера. Как будто никогда и не было!
При желании можно экспериментировать сколько угодно раз.
Бывает, что при запуске установщика Wubi выскакивает ошибка. Ничего страшного, просто нажимаем кнопочку «Отмена» необходимое количество раз. На систему, как на Windows, так и на Ubuntu, это не влияет.
Каждой сборке Ubuntu соответствует своя версия установщика Wubi. На примере использована версия Wubi 211 – она соответствует Ubuntu 11.04. Если хотите более раннюю версию, их легко найти в интернете.
Install Linux on Windows with WSL
Developers can access the power of both Windows and Linux at the same time on a Windows machine. The Windows Subsystem for Linux (WSL) lets developers install a Linux distribution (such as Ubuntu, OpenSUSE, Kali, Debian, Arch Linux, etc) and use Linux applications, utilities, and Bash command-line tools directly on Windows, unmodified, without the overhead of a traditional virtual machine or dualboot setup.
Prerequisites
You must be running Windows 10 version 2004 and higher (Build 19041 and higher) or Windows 11 to use the commands below. If you are on earlier versions please see the manual install page.
Install WSL command
You can now install everything you need to run WSL with a single command. Open PowerShell or Windows Command Prompt in administrator mode by right-clicking and selecting «Run as administrator», enter the wsl —install command, then restart your machine.
This command will enable the features necessary to run WSL and install the Ubuntu distribution of Linux. (This default distribution can be changed).
If you’re running an older build, or just prefer not to use the install command and would like step-by-step directions, see WSL manual installation steps for older versions.
The first time you launch a newly installed Linux distribution, a console window will open and you’ll be asked to wait for files to de-compress and be stored on your machine. All future launches should take less than a second.
The above command only works if WSL is not installed at all, if you run wsl —install and see the WSL help text, please try running wsl —list —online to see a list of available distros and run wsl —install -d to install a distro. To uninstall WSL, see Uninstall legacy version of WSL or unregister or uninstall a Linux distribution.
Change the default Linux distribution installed
By default, the installed Linux distribution will be Ubuntu. This can be changed using the -d flag.
- To change the distribution installed, enter: wsl —install -d . Replace with the name of the distribution you would like to install.
- To see a list of available Linux distributions available for download through the online store, enter: wsl —list —online or wsl -l -o .
- To install additional Linux distributions after the initial install, you may also use the command: wsl —install -d .
If you want to install additional distributions from inside a Linux/Bash command line (rather than from PowerShell or Command Prompt), you must use .exe in the command: wsl.exe —install -d or to list available distributions: wsl.exe -l -o .
If you run into an issue during the install process, check the installation section of the troubleshooting guide.
To install a Linux distribution that is not listed as available, you can import any Linux distribution using a TAR file. Or in some cases, as with Arch Linux, you can install using an .appx file. You can also create your own custom Linux distribution to use with WSL.
Set up your Linux user info
Once you have installed WSL, you will need to create a user account and password for your newly installed Linux distribution. See the Best practices for setting up a WSL development environment guide to learn more.
Set up and best practices
We recommend following our Best practices for setting up a WSL development environment guide for a step-by-step walk-through of how to set up a user name and password for your installed Linux distribution(s), using basic WSL commands, installing and customizing Windows Terminal, set up for Git version control, code editing and debugging using the VS Code remote server, good practices for file storage, setting up a database, mounting an external drive, setting up GPU acceleration, and more.
Check which version of WSL you are running
You can list your installed Linux distributions and check the version of WSL each is set to by entering the command: wsl -l -v in PowerShell or Windows Command Prompt.
To set the default version to WSL 1 or WSL 2 when a new Linux distribution is installed, use the command: wsl —set-default-version , replacing with either 1 or 2.
To set the default Linux distribution used with the wsl command, enter: wsl -s or wsl —setdefault , replacing with the name of the Linux distribution you would like to use. For example, from PowerShell/CMD, enter: wsl -s Debian to set the default distribution to Debian. Now running wsl npm init from Powershell will run the npm init command in Debian.
To run a specific wsl distribution from within PowerShell or Windows Command Prompt without changing your default distribution, use the command: wsl -d , replacing with the name of the distribution you want to use.
Learn more in the guide to Basic commands for WSL.
Upgrade version from WSL 1 to WSL 2
New Linux installations, installed using the wsl —install command, will be set to WSL 2 by default.
The wsl —set-version command can be used to downgrade from WSL 2 to WSL 1 or to update previously installed Linux distributions from WSL 1 to WSL 2.
To see whether your Linux distribution is set to WSL 1 or WSL 2, use the command: wsl -l -v .
To change versions, use the command: wsl —set-version 2 replacing with the name of the Linux distribution that you want to update. For example, wsl —set-version Ubuntu-20.04 2 will set your Ubuntu 20.04 distribution to use WSL 2.
If you manually installed WSL prior to the wsl —install command being available, you may also need to enable the virtual machine optional component used by WSL 2 and install the kernel package if you haven’t already done so.
To learn more, see the Command reference for WSL for a list of WSL commands, Comparing WSL 1 and WSL 2 for guidance on which to use for your work scenario, or Best practices for setting up a WSL development environment for general guidance on setting up a good development workflow with WSL.
Ways to run multiple Linux distributions with WSL
WSL supports running as many different Linux distributions as you would like to install. This can include choosing distributions from the Microsoft Store, importing a custom distribution, or building your own custom distribution.
There are several ways to run your Linux distributions once installed:
- Install Windows Terminal(Recommended) Using Windows Terminal supports as many command lines as you would like to install and enables you to open them in multiple tabs or window panes and quickly switch between multiple Linux distributions or other command lines (PowerShell, Command Prompt, PowerShell, Azure CLI, etc). You can fully customize your terminal with unique color schemes, font styles, sizes, background images, and custom keyboard shortcuts. Learn more.
- You can directly open your Linux distribution by visiting the Windows Start menu and typing the name of your installed distributions. For example: «Ubuntu». This will open Ubuntu in it’s own console window.
- From Windows Command Prompt or PowerShell, you can enter the name of your installed distribution. For example: ubuntu
- From Windows Command Prompt or PowerShell, you can open your default Linux distribution inside your current command line, by entering: wsl.exe .
- From Windows Command Prompt or PowerShell, you can use your default Linux distribution inside your current command line, without entering a new one, by entering: wsl [command] . Replacing [command] with a WSL command, such as: wsl -l -v to list installed distributions or wsl pwd to see where the current directory path is mounted in wsl. From PowerShell, the command get-date will provide the date from the Windows file system and wsl date will provide the date from the Linux file system.
The method you select should depend on what you’re doing. If you’ve opened a WSL command line within a Windows Prompt or PowerShell window and want to exit, enter the command: exit .
Want to try the latest WSL preview features?
Try the most recent features or updates to WSL by joining the Windows Insiders Program. Once you have joined Windows Insiders, you can choose the channel you would like to receive preview builds from inside the Windows settings menu to automatically receive any WSL updates or preview features associated with that build. You can choose from:
- Dev channel: Most recent updates, but low stability.
- Beta channel: Ideal for early adopters, more reliable builds than the Dev channel.
- Release Preview channel: Preview fixes and key features on the next version of Windows just before its available to the general public.