- How do I configure my static DNS in interfaces?
- 13 Answers 13
- How to set DNS Servers in Ubuntu 18.04 Linux
- Setting Nameservers on Ubuntu 18.04 Server
- Viewing a server’s current DNS assignment
- NetworkManager on Ubuntu Desktop
- Ubuntu: How to configure DNS servers in /etc/network/interfaces correctly for resolvconf?
- 4 Answers 4
How do I configure my static DNS in interfaces?
I am not sure if my interfaces refreshed. How do I properly configure my network with my static DNS addresses?
Reboot your computer. Do not run /etc/init.d/networking restart. The error is caused by the default route already existing. This setup looks correct to me.
As Matt H says, /etc/network/interfaces is picky about stuff already existing. You can have a perfect setup, but already have something there, and it will complain. If it is the default route it is complaining about, you can remove it by running ip route del default to get the computer into a state where you can hand over the management of this stuff to /etc/network/interfaces
13 Answers 13
As the questioner gives the contents of his /etc/network/interfaces I infer that he is using ifup to configure interfaces. But since he may actually be using NetworkManager, I will discuss that as well.
If you are using ifup then DNS settings go in /etc/network/interfaces . For each interface you add dns-* options appropriate for the nameserver(s) available over that interface. E.g., if a nameserver at address 1.2.3.4 is available over interface eth0, then add dns-nameservers 1.2.3.4 to the iface eth0 stanza.
If you are using NetworkManager then settings are entered in the Connection Editor (network indicator | Edit Connections. ) in the IPv4 Settings tab.
Doing /etc/init.d/networking restart to reconfigure interfaces is deprecated. If you are using ifup then first ifdown each active network interface, then ifup each interface. If you are using NetworkManager then, first, disable networking using the indicator (top of the desktop); then open a terminal and run
sudo /etc/init.d/network-manager restart and then enable networking using the indicator.
Regarding the fact that /etc/init.d/networking restart resulted in
RTNETLINK answers: File exists Failed to bring up eth0 This means that ifupdown thinks that eth0 is already up. Use ifdown —force eth0 to cause ifupdown to stop believing that it has already configured the interface.
Regarding the «deprecated» message, this message is no longer printed in Ubuntu 12.10 but you should still note that initscripts are «on their way out». To restart a service foo , use service foo restart or restart foo . Note also that if you want to reconfigure your interfaces it is better to ifdown them one by one than to rely on restarting «networking».
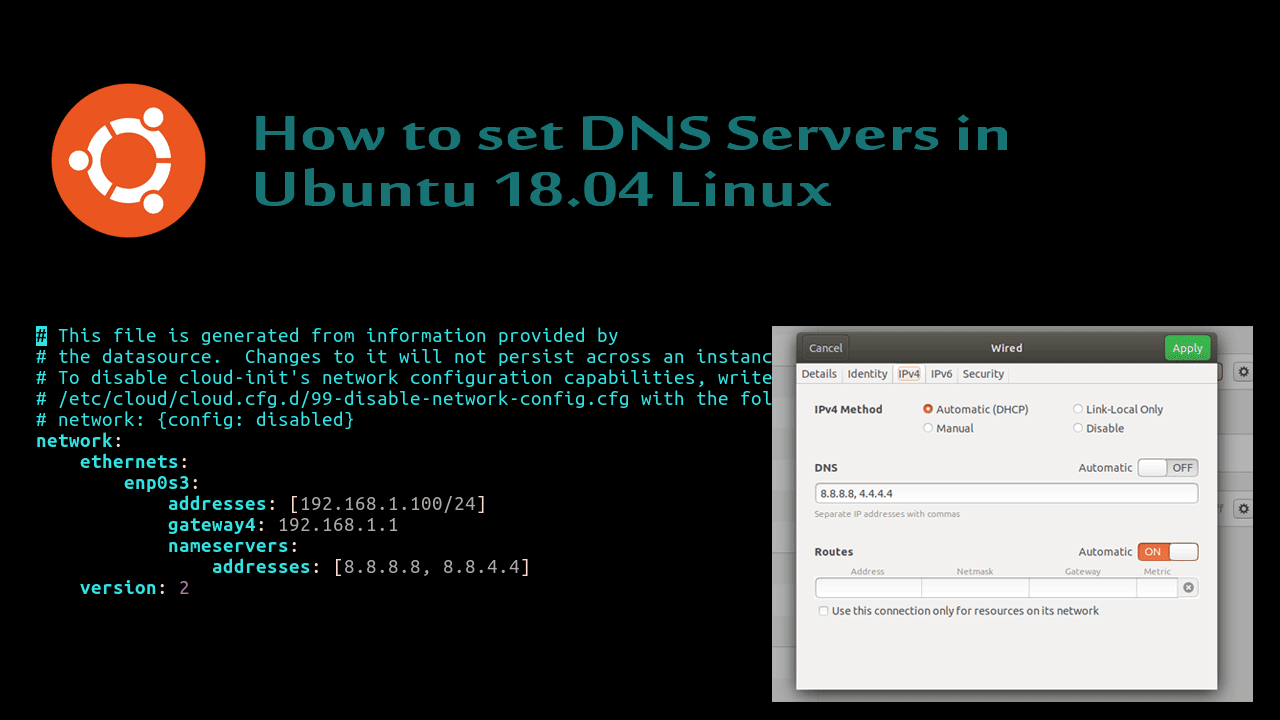
How to set DNS Servers in Ubuntu 18.04 Linux
It is important to know how to set DNS nameservers in Ubuntu, especially if you are a system administrator working on an Ubuntu server operating system. This tutorial explains how to set DNS server on Ubuntu 18.04, we will cover both Ubuntu server and desktop operating systems.
There are multiple methods for setting DNS nameservers on an Ubuntu Linux, and which method you use depends on which version of Ubuntu you’re running. If you are using the Ubuntu server 18.04, you need to add DNS configuration to the interface configuration file. Desktop users need to set DNS server using the NetworkManager graphical configuration tool.
Setting Nameservers on Ubuntu 18.04 Server
We need to add DNS nameservers to the yaml interface configuration file. You can find the interface file under the /etc/netplan directory. Depends on the install type, name of the config file should be either 50-cloud-init.yaml or 01-netcfg.yaml.

On my server, the file looks like this:

Network interface enp0s3 has been configured with a static IP address and DNS servers has been set to 8.8.8.8 and 8.8.4.4.
nameservers: addresses: [8.8.8.8, 8.8.4.4]Edit this line to match your Name Server. You can add multiple servers, make sure each name server is separated by comma. After you make changes, save the file and reload the configuration with the netplan apply command:
Note that, Prior to Ubuntu 18.04, DNS name servers were configured in /etc/network/interfaces file.
Viewing a server’s current DNS assignment
To check what name servers your server is currently using, you could check the Netplan configuration file if static IP addresses being used, otherwise we can run the systemd-resolve command.
The systemd-resolve command will let you know what DNS nameservers your server is currently pointing to.

NetworkManager on Ubuntu Desktop
NetworkManager is the service that runs in the background and manages your network connections in Ubuntu desktop distribution. With NetworkManager, to set DNS server, you need to edit the network connection via graphical user interface.
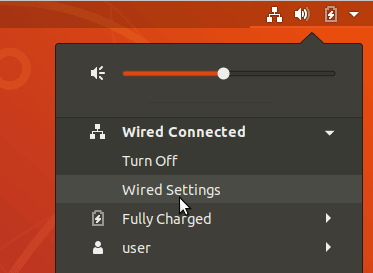
Go to IPV4 tab (or IPv6) add IP Addresses under the DNS field (Turn off automatic DNS if you don’t want to assign nameserver from the DHCP server).
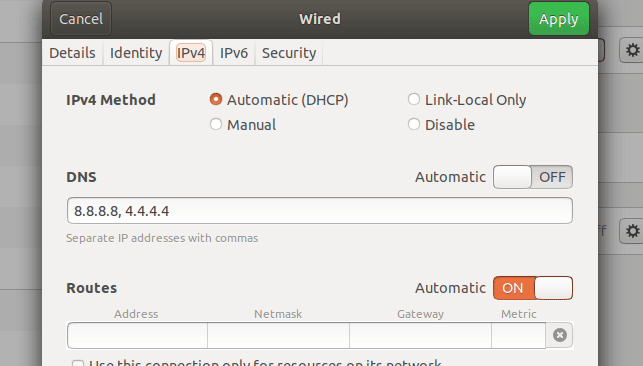
After making changes, you will need to turn off and reconnect the network to apply new settings.
On Ubuntu 16.04 and older versions of Ubuntu, there was a file, /etc/resolv.conf, that was used to configure DNS name servers. Although /etc/resolv.conf still exist on Ubuntu 18.04, it is no longer where you configure your DNS name servers.
Ubuntu: How to configure DNS servers in /etc/network/interfaces correctly for resolvconf?
All examples I have seen of configurations ( /etc/network/interfaces ) showed that you configure an interface and then underneath that gave the dns-* lines such as:
auto eth0 iface eth0 inet static . dns-nameservers 127.0.0.2 dns-search example.com my.example.com Now I am aware that the DNS protocol is independent of the transport mechanism. Therefore it shouldn’t be per-se wrong to add an IPv6 address on the dns-nameservers line. However, since I am also configuring the interface for IPv6 anyway, it made sense to add the dns-nameservers line there:
iface eth0 inet6 static . dns-nameservers ::2 dns-search example.com my.example.com . or did it? Because when resolvconf creates /etc/resolv.conf it simply ignores all the IPv6 DNS servers. It also seems to ignore dns-search and dns-domain . The only line it seems to honor is the dns-nameservers line from the IPv4 configuration for eth0 . What is the correct method of configuring DNS servers? Further circumstantial evidence as to why it should be part of each respective iface stanza. Quote from man 8 resolvconf :
The ifup(8) program can be used to configure network interfaces according to settings in /etc/network/interfaces(5) . To make ifup push nameserver information to resolvconf when it configures an interface, add dns- lines to the relevant iface stanza in /etc/network/interfaces . To add nameserver addresses add a line beginning with dns-nameservers .
If you still have this problem then please post your whole /etc/network/interfaces file and the output of /usr/share/resolvconf/dump-debug-info which is included in the resolvconf package in Ubuntu 15.04.
4 Answers 4
It is correct to put dns-* options in either the iface eth0 inet static stanza or the iface eth0 inet6 static stanza. The options become active when the logical interface definition to which they belong becomes active.
I just tested this on my own Ubuntu 15.04 machine which I normally configure with DHCP. I disabled NetworkManager and edited /etc/network/interfaces so that it looks like this:
iface eth0 inet static address 192.168.178.22 netmask 255.255.255.0 dns-nameservers 8.8.8.8 dns-search foo iface eth0 inet6 static address fe80::390:f5ff:fef7:96b9/64 dns-nameservers ::2 dns-search bar $ ifconfig eth0 eth0 Link encap:Ethernet HWaddr 00:90:f5:f7:96:b9 inet addr:192.168.178.22 Bcast:192.168.178.255 Mask:255.255.255.0 inet6 addr: fe80::390:f5ff:fef7:96b9/64 Scope:Link UP BROADCAST RUNNING MULTICAST MTU:1500 Metric:1 RX packets:2114609 errors:0 dropped:1 overruns:0 frame:0 TX packets:1757693 errors:0 dropped:0 overruns:0 carrier:0 collisions:0 txqueuelen:1000 RX bytes:2033346950 (2.0 GB) TX bytes:1318685445 (1.3 GB) Interrupt:20 Memory:f7e00000-f7e20000 $ cat /etc/resolv.conf # Dynamic resolv.conf(5) file for glibc resolver(3) generated by resolvconf(8) # DO NOT EDIT THIS FILE BY HAND -- YOUR CHANGES WILL BE OVERWRITTEN nameserver ::2 nameserver 8.8.8.8 search bar foo Note that the addresses, dns-nameservers and dns-search options from both stanzas are now active.
On my RPi running Ubuntu 16.04.2 LTS, my findings were as follows:
Note: I uninstalled NetworkManager and just left resolvconf to do its stuff. (This is a fixed server so things don’t change much network wise.)
IF I had the dns-search and dns-nameserver lines on only ONE interface (the primary, wired one) but not the other (wlan0) then on reboot, about 95% of the time my /etc/resolv.conf file would be empty.
e.g. When my interfaces file looked like this:
# The primary network interface auto enxb827ebbfedcf iface enxb827ebbfedcf inet static address 192.168.1.16 netmask 255.255.255.0 network 192.168.1.0 broadcast 192.168.1.255 gateway 192.168.1.1 dns-search summer.co.uk summer.vpn dns-nameserver 192.168.1.16 dns-nameserver 192.168.1.1 # end stanza with clear line+ # The loopback network interface auto lo iface lo inet loopback auto wlan0 iface wlan0 inet static address 192.168.1.17 netmask 255.255.255.0 network 192.168.1.0 broadcast 192.168.1.255 gateway 192.168.1.1 wpa-conf /etc/wpa_supplicant/wpa_supplicant.conf THEN after a reboot my resolv.conf would look like this:
# Dynamic resolv.conf(5) file for glibc resolver(3) generated by resolvconf(8) # DO NOT EDIT THIS FILE BY HAND -- YOUR CHANGES WILL BE OVERWRITTEN However, on one or two reboots I noticed that it DID have what I wanted, e.g.
# Dynamic resolv.conf(5) file for glibc resolver(3) generated by resolvconf(8) # DO NOT EDIT THIS FILE BY HAND -- YOUR CHANGES WILL BE OVERWRITTEN nameserver 192.168.1.16 nameserver 192.168.1.1 search summer.co.uk summer.vpn Solution When I gave BOTH interfaces (wired and wlan0) the dns-search and dns-nameserver lines, it all worked fine on every reboot (so far anyway)
i.e. the following interfaces file works for me:
# The primary network interface auto enxb827ebbfedcf iface enxb827ebbfedcf inet static address 192.168.1.16 netmask 255.255.255.0 network 192.168.1.0 broadcast 192.168.1.255 gateway 192.168.1.1 dns-search summer.co.uk summer.vpn dns-nameserver 192.168.1.16 dns-nameserver 192.168.1.1 # end stanza with clear line+ # The loopback network interface auto lo iface lo inet loopback auto wlan0 iface wlan0 inet static address 192.168.1.17 netmask 255.255.255.0 network 192.168.1.0 broadcast 192.168.1.255 gateway 192.168.1.1 dns-search summer.co.uk summer.vpn dns-nameserver 192.168.1.16 dns-nameserver 192.168.1.1 wpa-conf /etc/wpa_supplicant/wpa_supplicant.conf and gives me the following correct resolv.conf after every reboot (so far)
# Dynamic resolv.conf(5) file for glibc resolver(3) generated by resolvconf(8) # DO NOT EDIT THIS FILE BY HAND -- YOUR CHANGES WILL BE OVERWRITTEN nameserver 192.168.1.16 nameserver 192.168.1.1 search summer.co.uk summer.vpn I assume this duplicate config is normal, if somewhat redundant.
Conclusion: If an interface (other than lo0) lacks dns-search and dns-nameserver information, then resolvconf puts nothing in your resolv.conf file. (It’s as if ifup did the wlan0 interface second and ifup wiped resolv.conf or such like.)
I’m not sure if this is a bug or not, feels wrong to me though.