- How do I install kernel header files?
- Case of Obsolete kernel package
- How to Install Kernel Headers in Ubuntu and Debian
- Install Kernel Headers in Ubuntu and Debian
- How to install kernel headers on Linux
- Install Kernel Headers on Debian, Ubuntu or Linux Mint
- Install Kernel Headers on Fedora, CentOS or RHEL
- Support Xmodulo
- How to Install Linux Kernel Headers on Fedora 38/37/36 Linux
- What are Linux Kernel Headers? Explained
- Step 1: Update Fedora
- Step 2: Check the Current Linux Kernel
- Step 3: Install Linux Kernel Headers
- Step 4: Verify Linux Kernel Headers Installation
- Conclusion:
How do I install kernel header files?
You should be able to install the kernel header files for the currently running kernel by running the following in a terminal:
sudo apt-get install linux-headers-$(uname -r) In general, the kernel header packages are named linux-header-* where «*» indicates the version & variant (generic, server, etc.).
hey thanks but could you tell me what does generic, server, etc means i want to write (kernel driver)
This won’t install the headers for future updates automatically and you’ll have to re-run this command every time. Therefore, it’s recommended to install the metapackage instead, as described in another answer.
sudo apt-get install linux-headers-generic if you are on a Desktop installation. The apt-get will solve the dependencies and install the correct version of kernel headers.
In Debian Wheezy I get the error message «Package linux-headers-generic is not available, but is referred to by another package. [. ] E: Package ‘linux-headers-generic’ has no installation candidate»
@IQAndreas the linux-headers-generic package is ubuntu specific. On Debian you should use sudo apt-get install linux-headers-$(uname -r)
I have linux-headers-generic installed on 18.04 but still don’t have the headers for the newest and current kernel version. Maybe it’s just a bug with this version, I’ve compiled kernel modules in earlier versions so I must’ve had the correct headers back then.
Case of Obsolete kernel package
This should cover another problem when: the currently running kernel is obsolete, meaning it’s not in the repository anymore neither its headers. So the best thing to do is to update the kernel to last version in the repository.
linux-generic is a meta package to keep current version of the kernel & its headers:
sudo apt-get update sudo apt-get install linux-generic Note: Depending on your Ubuntu edition, See if you need linux-lowlatency (Ubuntu Studio), linux-signed-generic or linux-virtual .
How to Install Kernel Headers in Ubuntu and Debian
In our last article, we have explained how to install kernel headers in CentOS 7. Kernel Headers contain the C header files for the Linux kernel, which offers the various function and structure definitions required when compiling any code that interfaces with the kernel, such as kernel modules or device drivers and some user programs.
It is very important to note that the kernel headers package you install should match with the currently installed kernel version on your system. If your kernel version ships with the default distribution installation or you have upgraded your Kernel using dpkg or apt package manager from the Ubuntu or Debian base repositories, then you must install matching kernel headers using package manager only. And if you’ve compiled kernel from sources, you must also install kernel headers from sources.
In this article, we will explain how to install Kernel Headers in Ubuntu and Debian Linux distributions using default package manager.
Install Kernel Headers in Ubuntu and Debian
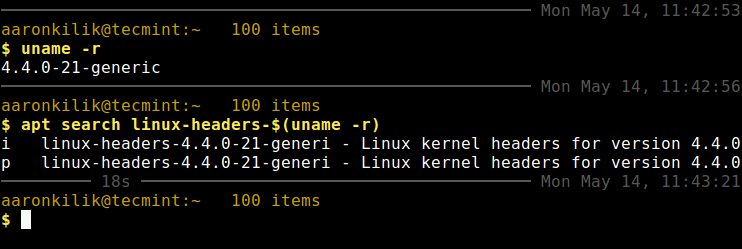
First check your installed kernel version as well as kernel header package that matches your kernel version using following commands.
$ uname -r $ apt search linux-headers-$(uname -r)
On Debian, Ubuntu and their derivatives, all kernel header files can be found under /usr/src directory. You can check if the matching kernel headers for your kernel version are already installed on your system using the following command.
$ ls -l /usr/src/linux-headers-$(uname -r)

From the above output, it’s clear that the matching kernel header directory doesn’t exist, meaning the package is not yet installed.
Before you can install the appropriate kernel headers, update your packages index, in order to grab information about the latest package releases, using the following command.
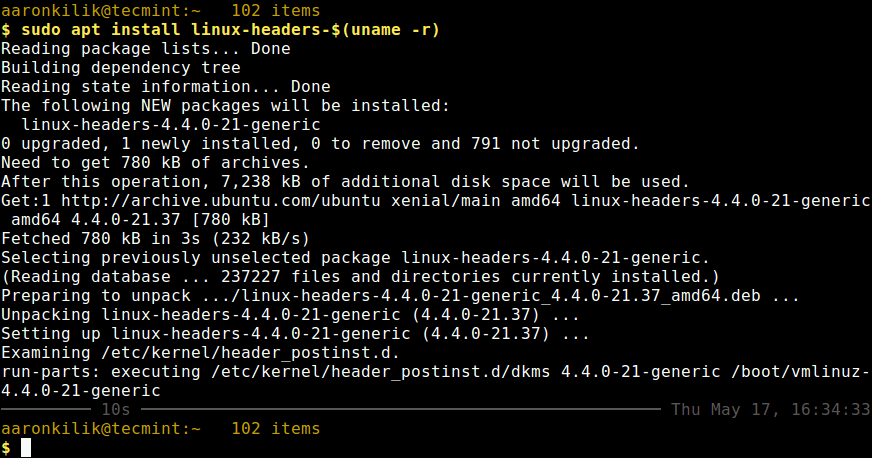
Then run the following command that follows to install the Linux Kernel headers package for your kernel version.
$ sudo apt install linux-headers-$(uname -r)
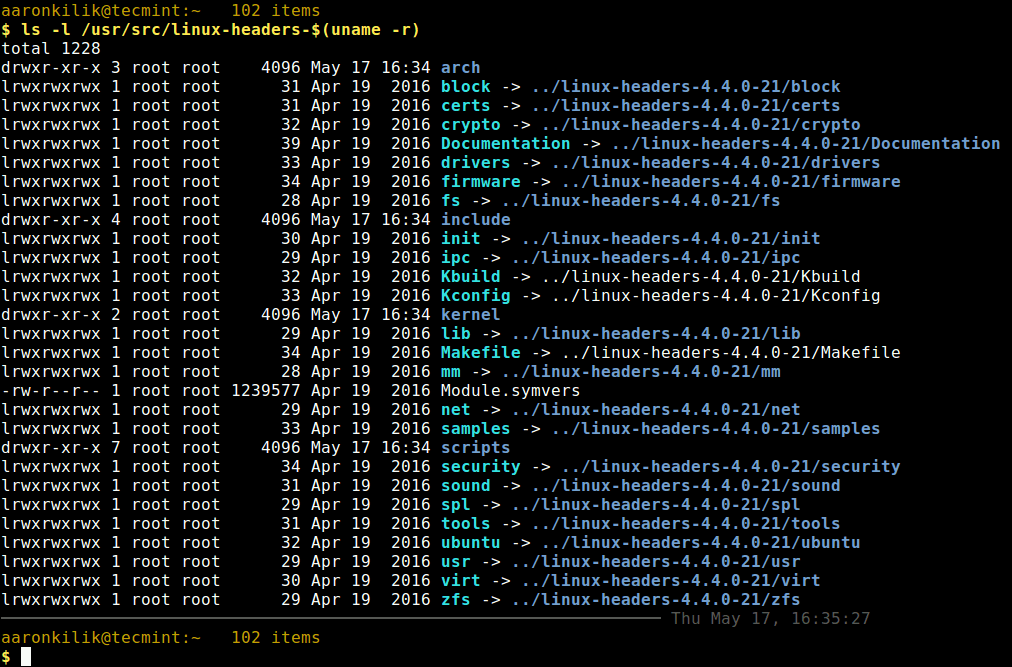
Next, check if the matching kernel headers have been installed on your system using the following command
$ ls -l /usr/src/linux-headers-$(uname -r)
That’s all! In this article, we have explained how to install kernel headers in Ubuntu and Debian Linux and other distributions in the Debian family tree.
Always keep in mind that to compile a kernel module, you will need the Linux kernel headers. If you have any quires, or thoughts to share, use the comment form below to reach us.
How to install kernel headers on Linux
Question: I need to install kernel headers to install a device driver for my kernel. What is a proper way to install matching kernel headers on [insert your Linux distro]?
When you compile a device driver a custom kernel module, you need to have kernel header files installed on your Linux system. Kernel headers are needed also when you build a userspace application which links directly against the kernel. When you install kernel headers in such cases, you must make sure to kernel headers are exactly matched with the kernel version of your system (e.g., 3.13.0-24-generic).
If your kernel is the default version that comes with the distribution, or you upgraded it using the default package manager (e.g., apt-get , aptitude or yum ) from base repositories, you can install matching kernel headers using the package manager as well. On the other hand, if you downloaded the kernel source and compiled it manually, you can install matching kernel headers by using make command.
Here we assume that your kernel comes from base repositories of your Linux distribution, and see how we can install matching kernel headers.
Install Kernel Headers on Debian, Ubuntu or Linux Mint
Assuming that you did not manually compile the kernel, you can install matching kernel headers using apt-get command.
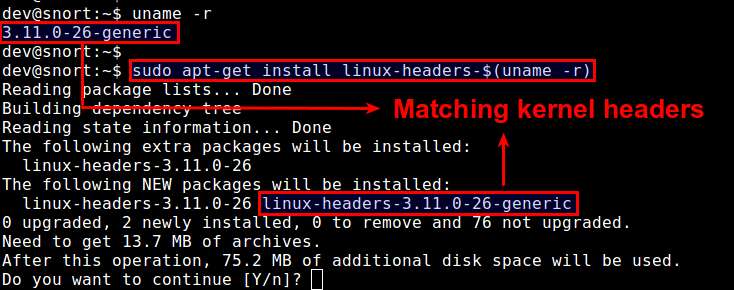
First, check if matching kernel headers are already available on your system using dpkg-query command.
$ dpkg-query -s linux-headers-$(uname -r)
dpkg-query: package 'linux-headers-3.11.0-26-generic' is not installed and no information is available
Go ahead and install matching kernel headers as follows.
$ sudo apt-get install linux-headers-$(uname -r)
Verify that matching kernel headers are successfully installed.
$ dpkg-query -s linux-headers-$(uname -r)
Package: linux-headers-3.11.0-26-generic Status: install ok installed
The default location of kernel headers on Debian, Ubuntu or Linux Mint is /usr/src .
Install Kernel Headers on Fedora, CentOS or RHEL
If you did not manually upgrade the kernel, you can install matching kernel headers using yum command.
First, check if matching kernel headers are already installed on your system. The default location of kernel header files is /usr/src/kernels/ .
If no matching kernel headers are found in that directory, go ahead and install kernel headers with yum command as follows.
$ sudo yum install kernel-devel
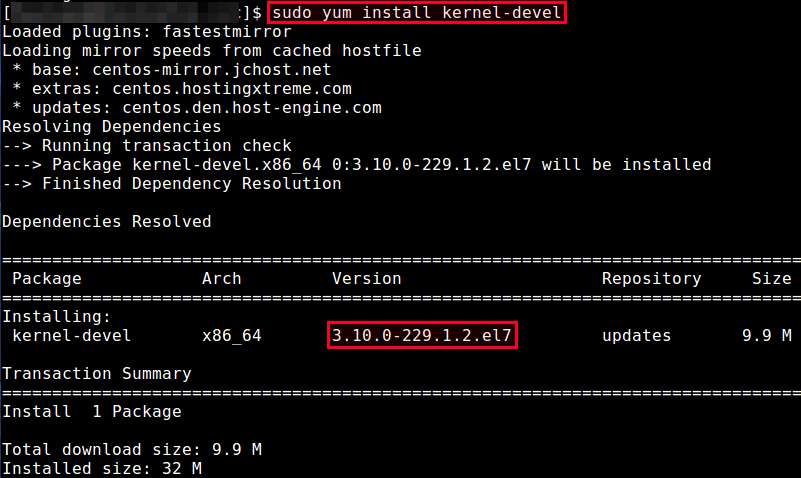
If the kernel header files installed by the above command do not match with your current kernel, this is because your kernel is outdated. In this case, update the installed kernel to the latest by running the following command. This will install the matching kernel automatically. You will need to reboot after updating the kernel.
Now verify that matching kernel headers are installed by running:
arch firmware ipc Makefile samples System.map vmlinux.id block fs Kconfig mm scripts tools crypto include kernel Module.symvers security usr drivers init lib net sound virt
Support Xmodulo
This website is made possible by minimal ads and your gracious donation via PayPal or credit card
Please note that this article is published by Xmodulo.com under a Creative Commons Attribution-ShareAlike 3.0 Unported License. If you would like to use the whole or any part of this article, you need to cite this web page at Xmodulo.com as the original source.
How to Install Linux Kernel Headers on Fedora 38/37/36 Linux

If you use a Fedora Linux system, you may need to install missing kernel headers to build and install specific software. This guide will show you how to install missing kernel headers on Fedora.
What are Linux Kernel Headers? Explained
Linux Kernel Headers are crucial for connecting the Linux Kernel with user-space programs. They consist of a collection of C header files that define all the interfaces and data structures used by the kernel. These headers enable direct communication between user-space programs and the kernel, allowing user-space software to access information about the kernel’s configuration, such as its version or build options. This makes it easier for users to build Linux-specific software on their machines. Understanding the importance of Linux Kernel Headers is essential for new users who want to delve deeper into their system’s configuration.
Step 1: Update Fedora
Before proceeding, ensure your system is up-to-date regarding the Linux Kernel. If any Linux Kernel packages are updated, ensure to restart your system.
Step 2: Check the Current Linux Kernel
First, to install the missing kernel headers, it’s essential to check the current kernel version. This step can be done by executing the following command in the terminal.
The command will show the version of the currently running kernel. Note this version as it will be needed in the next step.
Step 3: Install Linux Kernel Headers
After identifying the kernel version, the kernel headers package can be installed. On Fedora Linux, this can be done by executing the following command in the terminal.
sudo dnf install kernel-headersSometimes this may work but not correctly if you install Nvidia Drivers; you may need to use the following command instead.
sudo dnf install kernel-headers-$(uname -r) This command installs the kernel headers package corresponding to the currently running kernel version. Now, rebooting your Fedora system after installing any kernel packages is an optional step that you may choose to take.
Step 4: Verify Linux Kernel Headers Installation
After installing the headers package for your Linux Kernel, you can verify the successful installation by running the following command.
sudo dnf list installed | grep kernel-headersThis command will show a list of all the installed kernel-headers packages. The package you recently installed should be visible in the list.
kernel-headers.x86_64 6.1.5-200.fc37 @updates Conclusion:
In conclusion, installing Linux Kernel headers on Fedora is a straightforward process that involves checking the current kernel version, installing the matching headers package, and verifying the installation. These steps ensure the kernel headers are in place for building and installing specific software.