- Saved searches
- Use saved searches to filter your results more quickly
- License
- iguy0/PS4Linux-Kernel
- Name already in use
- Sign In Required
- Launching GitHub Desktop
- Launching GitHub Desktop
- Launching Xcode
- Launching Visual Studio Code
- Latest commit
- Git stats
- Files
- README.md
- About
- Install PS4 Linux distros with Rufus or Balena Etcher on Windows, Linux or Mac
- Video Guide: Install PS4 Linux distros with Rufus or Balena Etcher
- Requirements
- Windows, Linux or Mac
- Rufus or Balena Etcher
- USB Drive
- Files
- USB Hub, USB Keyboard and Mouse
- Exploitable PS4
- Install PS4 Linux distros with Rufus or Balena Etcher on Windows, Linux or Mac
- Step 1. Install Ps4 Linux on USB drive
- Step 1.1 Install PS4 Linux with Rufus (Windows)
- Step 1.2 Install PS4 Linux with Balena Etcher (Windows, Linux or Mac)
- Step 2. Copy kernel and initramfs to USB drive
- Step 3. Boot to Linux distro on PS4 and setup the USB drive
- Conclusion
- 4 Comments
Saved searches
Use saved searches to filter your results more quickly
You signed in with another tab or window. Reload to refresh your session. You signed out in another tab or window. Reload to refresh your session. You switched accounts on another tab or window. Reload to refresh your session.
PS4 Kernel Sources 5.3.7 — In short, i have updated the newest PS4 Gentoo Kernel sources with the new Bikal chip patches.
License
iguy0/PS4Linux-Kernel
This commit does not belong to any branch on this repository, and may belong to a fork outside of the repository.
Name already in use
A tag already exists with the provided branch name. Many Git commands accept both tag and branch names, so creating this branch may cause unexpected behavior. Are you sure you want to create this branch?
Sign In Required
Please sign in to use Codespaces.
Launching GitHub Desktop
If nothing happens, download GitHub Desktop and try again.
Launching GitHub Desktop
If nothing happens, download GitHub Desktop and try again.
Launching Xcode
If nothing happens, download Xcode and try again.
Launching Visual Studio Code
Your codespace will open once ready.
There was a problem preparing your codespace, please try again.
Latest commit
Git stats
Files
Failed to load latest commit information.
README.md
ps4-sources 5.3.7 + Bikal patches(should work for most PS4 versions)
In short this is the combination of https://github.com/ps4gentoo/ps4-linux and https://github.com/Ps3itaTeam/ps4-linux/tree/ps4-4.14.93-baikal. It works phenomenally well on my PS4. I use psxita v2 with this kernel. Unfortunately I haven’t tested on other versions since i only own a 2115b, but as far as i could tell from the patches it should work on ALL* versions now. You are more than welcome to confirm this by creating an issue with the model and behavior.
About
PS4 Kernel Sources 5.3.7 — In short, i have updated the newest PS4 Gentoo Kernel sources with the new Bikal chip patches.
Install PS4 Linux distros with Rufus or Balena Etcher on Windows, Linux or Mac
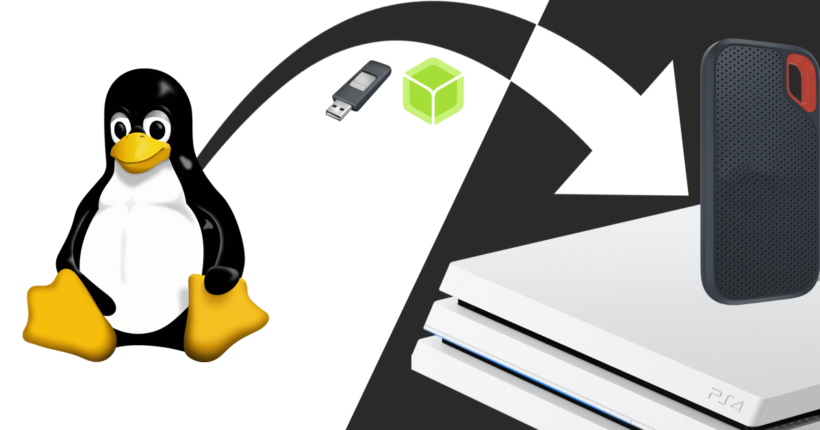
I started off the website releasing two distros – Fedora 35 and Pop OS for PS4. And, let us not forget the latest release – Nobara OS for PS4. While Fedora 35 could be installed using the rescueshell, i.e., the usual method, I introduced an easier and alternate method to install PS4 Linux distros, especially for Pop OS and Nobara. The alternate method requires Linux, preferably Ubuntu. Unfortunately, many of you whoa aren’t used to Linux were facing issues installing these distros. So, here is a way to install PS4 Linux distros using Rufus or Balena Etcher.
This method will work equally well on Windows, Linux or Mac and is fast. Many of you might have used this method for installing Gentoo for PS4 back in the day. For now, this method is supported by Pop OS and Nobara, which are PS4Linux.com releases, and obviously, Gentoo.
In this article, we will see how you could install PS4 Linux distros on your USB drive bypassing the rescueshell method and set it up for use.
For people who are more comfortable following a video guide, here is a step-by-step guide for the process.
Video Guide: Install PS4 Linux distros with Rufus or Balena Etcher

Instead, if you love reading, let us begin with the requirements.
Requirements
Windows, Linux or Mac
The best part about this method is that it isn’t exclusive to Linux, as the earlier alternate method. This method will infact work very well on any OS that has support for image writing tools like Rufus. Else, if you are feeling adventurous, you might also try writing the distro to the USB device using terminal commands. We won’t be covering that here, as the aim is to make the process simple for everyone.
Rufus or Balena Etcher
If you are on Windows, I recommend Rufus. If on Linux or Mac, go for Balena Etcher. You may download the latest version of these applications from the Downloads section.
USB Drive
The distros we plan to install with this method are storage hungry, as they include many useful applications by default. Generally, a 16GB USB stick will suffice for the installation. But, if you intend to do anything meaningful with the distro, like gaming, you will need a bigger storage, preferably an SSD with more than 100GB.
Files
- Distro of your choice (Check Downloads section) – Download the file with _im_ in its filename and with an extension – img.xz. For example, Pop OS for PS4 will have two files – popos_21_10_ps4linux.tar.xz and popos_21_10_im_ps4linux.img.xz. Download the second one as the first one will not work with this method.
- bzImage (Download according to your model)
- initramfs.cpio.gz (Check Downloads section)
- Gparted (post-installation)
USB Hub, USB Keyboard and Mouse
This goes without saying. A USB 3.0 hub with atleast 4 ports is recommended, especially if you have a PS4 Slim.
Exploitable PS4
Check out the article here to find if your PS4 is exploitable or not. This will work only on exploit-ready PS4s.
Now, let us see how the installation works.
Install PS4 Linux distros with Rufus or Balena Etcher on Windows, Linux or Mac
Step 1. Install Ps4 Linux on USB drive
Step 1.1 Install PS4 Linux with Rufus (Windows)
- Plug USB drive on your PC.
- If using a large USB device (SSD or HDD), tick List USB Hard drives.
- Choose the appropriate USB device under Device. Please be careful while making the selection.
- On Rufus, to the right of Boot selection, click on SELECT and choose the img.xz distro you downloaded earlier.
- Leave everything else as is, and click on START.
- Click on OK, which will wipe the USB drive.
- Let the process complete.
Step 1.2 Install PS4 Linux with Balena Etcher (Windows, Linux or Mac)
- Plug USB drive on your PC.
- Click on Flash from file and choose the img.xz distro you downloaded earlier.
- In the next step, click on Change and choose your USB device properly.
- Click on Flash!
- Click Yes on the UAC prompt.
- Wait for the process to complete.
This would take time depending on your PC and the USB drive’s speed.
Step 2. Copy kernel and initramfs to USB drive
- On your Computer, check for a newly created 50 MB FAT32 partition. Mount it, if necessary on Linux or Mac. If the partition doesn’t show up on Windows, follow these steps:-
- Press Ctrl + R.
- Type diskmgmt.msc and press Enter.
- Find the 50 MB FAT32 partition at the starting of your USB device and right click on it and click on Change Drive Letter and Paths.
- Click on Add.
- Make sure Assign the following drive letter is checked and choose an available drive letter.
- Click OK.
- Go back to explorer. The partition will be mounted now.
- Copy the downloaded bzImage and initramfs.cpio.gz to that partition.
Step 3. Boot to Linux distro on PS4 and setup the USB drive
- Load Linux payload on PS4 with the prepared USB drive plugged in. You may choose any payload. It doesn’t have to be the 1GB VRAM payload.
- Once booted into the distro, install Gparted.
- On Ubuntu and Ubuntu-based distros, like Pop OS, open a terminal, type sudo apt install gparted and press Enter.
- On Fedora and Fedora-based distros, like Nobara, open a terminal, type sudo dnf install gparted and press Enter.
- Start Gparted by typing sudo gparted in a terminal and pressing Enter. Let Gparted load. If it takes a lot of time, quit and go back to the terminal. Now, type sudo gparted /dev/sda and press Enter.
- Now, right click on the second partition with the label – psxitarch. Click on Resize/Move and move the slider at top to extreme right.
- Click OK and then click on the green tick above to apply the changes.
That’s it! Now, you are ready to use the distro for your purposes – gaming, streaming or whatever you feel like. Enjoy!
Conclusion
From now on, every distro released by PS4Linux.com will have two versions – the one which could be installed using the alternate method and/or the rescueshell method. The other one will be exclusive for the Rufus or Balena Etcher method. Those who plan on using alternate or rescueshell method may download the version with an extension – tar.xz, while those planning to do it with Rufus or Etcher can download the file with an img.xz extension.
By the way, did you hit any roadblocks? Don’t worry! I am just a comment away.
4 Comments
I installed nobara this way but there was no space left for downloading gparted, so booting os and extending the partition is only available on os that already have gparted (could crash due to insufficient space) or just resize it on a pc.
That’s odd, because I made sure to leave more than 1GB free for Gparted installation. Can you send a screenshot of this no space error?
Unfortunately i installed another distro already but on a new relase i will try it again and post a screenshot if something will go wrong. My aim is emulation and some old games, so any improvement is worth testing 😁. I actually don’t know if for example yuzu or cemu is performing better on your recent distro, for sure i will test next relase. The new arch from darkstorm is fine but the whole feel is somehow laggy. Firefox hangs somtimes for a while, even file browser is loading for a while, on fedora 35 it was not laggy at all.
i have read a lot about the installing linux distros on ps4. I want to ask if my installed games on internal disk they deleted when install a linux distro, or the distro works along with my games.