- How to Install Kernel Headers in CentOS 7
- Install Kernel Headers in CentOS 7
- Обновление ядра CentOS
- 1. Проверка текущей версии ядра
- 2. Установка ядра
- С помощью yum
- Ручное обновление
- 3. Применение нового ядра
- Если система не загружается после обновления ядра
- Удаление ядра
- Возможные ошибки
- 1. Фатальная ошибка: : Нет такого файла или каталога.
- 2. [] Ошибка 127
- How to Compile Linux Kernel on CentOS 7
- Install Required Packages for Kernel Compilation
- Compile and Install Kernel in CentOS 7
- Configure the Kernel in CentOS 7
- Compile the Kernel in CentOS 7
How to Install Kernel Headers in CentOS 7
When you compile a custom kernel module such as a device driver on a CentOS system, you need to have kernel header files installed on the system, which include the C header files for the Linux kernel. Kernel header files provide different kinds of function and structure definitions required when installing or compiling any code that interfaces with the kernel.
When you install Kernel Headers, make sure it matches with the currently installed kernel version on the system. If your Kernel version comes with the default distribution installation or you have upgraded your Kernel using yum package manager from system base repositories, then you must install matching kernel headers using package manager only. If you’ve compiled Kernel from sources, you can install kernel headers from sources only.
In this article, we will explain how to install Kernel Headers in CentOS/RHEL 7 and Fedora distributions using default package manager.
Install Kernel Headers in CentOS 7
First confirm that the matching kernel headers are already installed under /usr/src/kernels/ location on your system using following commands.

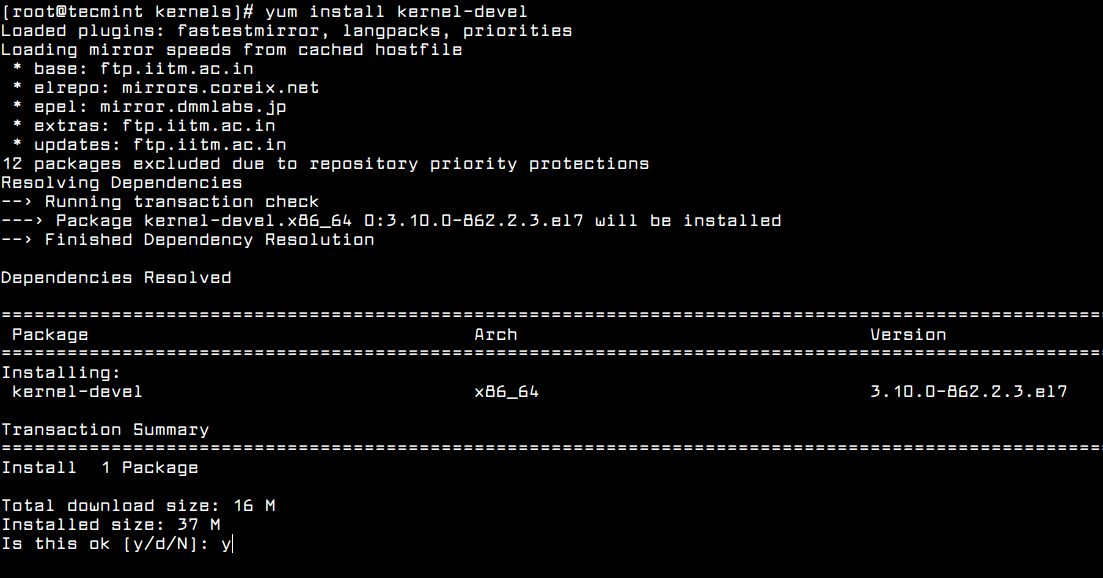
If no matching kernel headers are located in the /usr/src/kernels/ directory, go ahead and install kernel headers, which is provided by the kernel-devel package that can be installed using default package manager as shown.
# yum install kernel-devel [On CentOS/RHEL 7] # dnf install kernel-devel [On Fedora 22+]
After installing the kernel-devel package, you can find all the kernel headers files in /usr/src/kernels directory using following command.
# ls -l /usr/src/kernels/$(uname -r)
Note on a VPS (for instance a Linode VPS), a kernel may have a customized version name, in such scenario, you have to identify the kernel version manually and check the installed kernel header files using following commands.
# uname -r # ls -l /usr/src/kernels/3.10.0-862.2.3.el7.x86_64
![]()
Sample Output
total 4544 drwxr-xr-x. 32 root root 4096 May 16 12:48 arch drwxr-xr-x. 3 root root 4096 May 16 12:48 block drwxr-xr-x. 4 root root 4096 May 16 12:48 crypto drwxr-xr-x. 119 root root 4096 May 16 12:48 drivers drwxr-xr-x. 2 root root 4096 May 16 12:48 firmware drwxr-xr-x. 75 root root 4096 May 16 12:48 fs drwxr-xr-x. 28 root root 4096 May 16 12:48 include drwxr-xr-x. 2 root root 4096 May 16 12:48 init drwxr-xr-x. 2 root root 4096 May 16 12:48 ipc -rw-r--r--. 1 root root 505 May 9 19:21 Kconfig drwxr-xr-x. 12 root root 4096 May 16 12:48 kernel drwxr-xr-x. 10 root root 4096 May 16 12:48 lib -rw-r--r--. 1 root root 51205 May 9 19:21 Makefile -rw-r--r--. 1 root root 2305 May 9 19:21 Makefile.qlock drwxr-xr-x. 2 root root 4096 May 16 12:48 mm -rw-r--r--. 1 root root 1093137 May 9 19:21 Module.symvers drwxr-xr-x. 60 root root 4096 May 16 12:48 net drwxr-xr-x. 14 root root 4096 May 16 12:48 samples drwxr-xr-x. 13 root root 4096 May 16 12:48 scripts drwxr-xr-x. 9 root root 4096 May 16 12:48 security drwxr-xr-x. 24 root root 4096 May 16 12:48 sound -rw-r--r--. 1 root root 3409102 May 9 19:21 System.map drwxr-xr-x. 17 root root 4096 May 16 12:48 tools drwxr-xr-x. 2 root root 4096 May 16 12:48 usr drwxr-xr-x. 4 root root 4096 May 16 12:48 virt -rw-r--r--. 1 root root 41 May 9 19:21 vmlinux.id
In addition, if you need header files for the Linux kernel for use by glibc, install the kernel-header package using following command.
# yum install kernel-headers [On CentOS/RHEL 7] # dnf install kernel-headers [On Fedora 22+]
Now you are good to go with compiling your own or existing kernel modules for software such as VirtualBox and many more.
That’s it! In this article, we have explained how to install kernel-devel and kernel-header packages in CentOS/RHEL 7 and Fedora systems. Remember that before you can compile kernel modules such as device driver on a Linux system, you should have necessary kernel header files installed. If you have queries, please use the comment form below to reach us.
Обновление ядра CentOS

Обновлено: 12.05.2022 Опубликовано: 04.03.2019
Ядро операционной системы является основным ее элементом — оно выполняет функции распределения ресурсов и предоставления интерфейса для взаимодействия с оборудованием. Из соображений безопасности или обеспечения корректной работы современного оборудования может возникнуть необходимость обновления ядра.
1. Проверка текущей версии ядра
Перед обновлением необходимо убедиться, что текущая версия ядра уже не обновлена. Это выполняется командой:
* в данном примере установлено ядро версии 3.10.0.
2. Установка ядра
Перед обновлением ядра, необходимо обновить саму систему:
После стоит перезагрузить систему:
Далее у нас на выбор два способа обновления ядра — с использованием репозитория или вручную, скачав исходник с kernel.org.
С помощью yum
Самый быстрый и безопасный способ обновить ядро CentOS — воспользоваться автоматической установкой из репозитория. Минусом тут является то, что можно установить только ту версию, которая имеется в наличие в данном репозитории.
Последняя версии ядра для CentOS находится в репозитории ELRepo (не путать с EPEL). Сначала устанавливаем его.
Переходим на веб-страницу elrepo.org и копируем ссылку на последнюю версию репозитория для нашей версии операционной системы, например:

Импортируем ключ репозитория:
rpm —import https://www.elrepo.org/RPM-GPG-KEY-elrepo.org
Воспользовавшись ссылкой, устанавливаем сам репозиторий:
yum install https://www.elrepo.org/elrepo-release-7.0-3.el7.elrepo.noarch.rpm
* список установленных репозиториев можно посмотреть командой yum repolist.
Теперь можно установить ядро:
yum —enablerepo=elrepo-kernel install kernel-ml
Ручное обновление
Чаще всего, администратор пользуется встроенными в сборку Linux инструментами (как описано выше) — это безопаснее и проще. Однако, если нужной версии ядра нет в репозитории или мы хотим установить тестовую версию, необходима ручная установка.
Ручная установка неадаптированного для определенной сборки Linux ядра — потенциальный риск для системы. Обновление стоит проводить сначала в тестовой среде, а также выполнить резервное копирование всех важных данных.
Для начала переходим на сайт kernel.org и копируем ссылку на нужную версию ядра Linux:

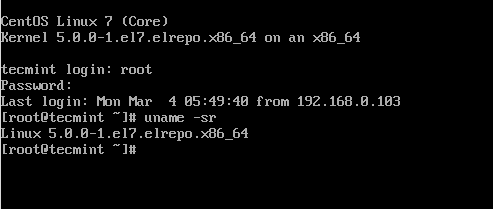
* в данном примере мы скопировали ссылку на нестабильную версию ядра 5.0.
Воспользовавшись ссылкой, скачиваем ядро на компьютер с Linux:
* если система вернет ошибку, нужно установить wget — yum install wget.
Распаковываем скачанный архив:
tar -xvf linux-5.0-rc8.tar.gz -C /usr/src
* в данном примере мы распаковываем архив linux-5.0-rc8.tar.gz в каталог /usr/src.
Переходим в каталог, куда распаковали исходник ядра:
Устанавливаем инструменты для компиляции пакетов:
yum groupinstall «Development Tools»
yum install ncurses-devel openssl-devel bc
Создаем свою конфигурацию для ядра:
Или используем текущую конфигурацию для ядра:
На все вопросы, которые задает система можно отвечать нажатием Enter, чтобы принимать значения по умолчанию.
* процедура может занять много времени.
После устанавливаем ядро и модули:
make modules_install install
3. Применение нового ядра
Хорошей идеей после установки нового ядра будет его проверка. Перезагружаем систему и в окне со списком вариантов загрузки, выбираем с использованием нового ядра.
После загрузки системы тестируем ее, и если все работает, корректно, настраиваем систему на автоматический выбор нужной нам версии.
Чтобы система грузилась с использованием нового ядра, необходимо внести изменения в GRUB:
* данной настройкой мы говорим загрузчику использовать первое ядро для загрузки (первым идет последнее по версии ядро).
Применяем настройки для grub:
grub2-mkconfig -o /boot/grub2/grub.cfg
Можно перезагружать компьютер:
После загрузки проверяем текущую версию ядра:
Если система не загружается после обновления ядра
При установке новой версии ядра, старые версии тоже сохраняются и их можно выбрать при загрузке CentOS.
Если управление осуществляется удаленно по SSH, мы должны подключить монитор к компьютеру и включить его. В процессе загрузки выскочит окно со списком систем:
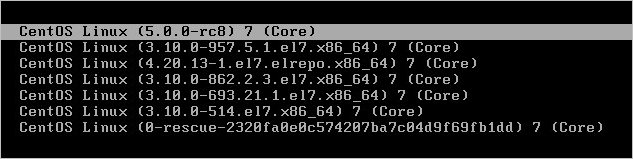
Выбираем вариант загрузки с предыдущей версией ядра.
Удаление ядра
Рассмотрим несколько сценариев удаления ядра.
1. Удалить конкретную версию.
Выводим список ядер, установленных в системе:
Удаляем ядро командой, на подобие:
yum remove kernel-ml-5.17.6-1.el7.elrepo.x86_64
* где kernel-ml-5.17.6-1.el7.elrepo.x86_64 — ядро в системе, которое будет удалено.
Важно загрузить систему под другой версией ядра, чтобы при удалении не возникло проблем.
2. Чистка системы от устаревших версий ядер.
Мы можем удалить ядра, которые устарели в нашей системе. Для жтого нам нужна утилита yum-utils:
package-cleanup —oldkernels —count=2
* в данном примере мы удалим все ядра, оставив по версии последних два.
Возможные ошибки
1. Фатальная ошибка: : Нет такого файла или каталога.
Причина: в системе не установлен один из пакетов, содержащий необходимые библиотеки.
Решение: необходимо воспользоваться поисковиком, чтобы определить, какой именно пакет необходим для продолжения установки и воспользоваться командой yum install для его установки.
2. [] Ошибка 127
Например: [include/generated/timeconst.h] Ошибка 127
Причина: как и с предыдущей ошибкой, в системе не установлен один из пакетов, содержащий необходимые библиотеки.
Решение: аналогично предыдущему примеру решения проблемы, необходимо воспользоваться поисковиком, чтобы определить, какой именно пакет необходим для продолжения установки и воспользоваться командой yum install для его установки.
How to Compile Linux Kernel on CentOS 7
Running a custom compiled Linux Kernel is always useful, specially when you are looking to enable or disable specific Kernel features, which are not available in default distribution-supplied kernels.
In this article, I will explain how to compile and use latest Linux Kernel from the sources in CentOS 7 distribution (instructions provided here are also works on RHEL and Fedora).
If you don’t want to go through these complex setup, then follow our easy article that explains How to Install or Upgrade to Kernel on CentOS 7 using third-party RPM repository.
Install Required Packages for Kernel Compilation
First, make sure to update your software package repositories, install the development tools needed for compiling a kernel, and install the ncurses library using the following yum command.
# yum update # yum install -y ncurses-devel make gcc bc bison flex elfutils-libelf-devel openssl-devel grub2
Compile and Install Kernel in CentOS 7
Download the latest Kernel 4.17 sources using wget command under /usr/src/ directory or you can also download the latest kernel by going to kernel.org.
# cd /usr/src/ # wget https://cdn.kernel.org/pub/linux/kernel/v4.x/linux-4.17.11.tar.xz
Extract the archived files and change directories using following commands.
# tar -xvf linux-4.17.11.tar.xz # cd linux-4.17.11/
Configure the Kernel in CentOS 7
The Kernel must be correctly configured with the following required configuration options within the CentOS 7 environment.
CONFIG_KVM_GUEST=y CONFIG_VIRTIO_PCI=y CONFIG_VIRTIO_PCI_LEGACY=y CONFIG_BLK_DEV_SD CONFIG_SCSI_VIRTIO=y CONFIG_VIRTIO_NET=y CONFIG_SERIAL_8250=y CONFIG_SERIAL_8250_CONSOLE=y
I strongly suggest you to copy the running Kernel configuration ( .config ) from the /boot directory to new kernel linux-4.17.11 directory.
# cp -v /boot/config-3.10.0-693.5.2.el7.x86_64 /usr/src/linux-4.17.11/.config
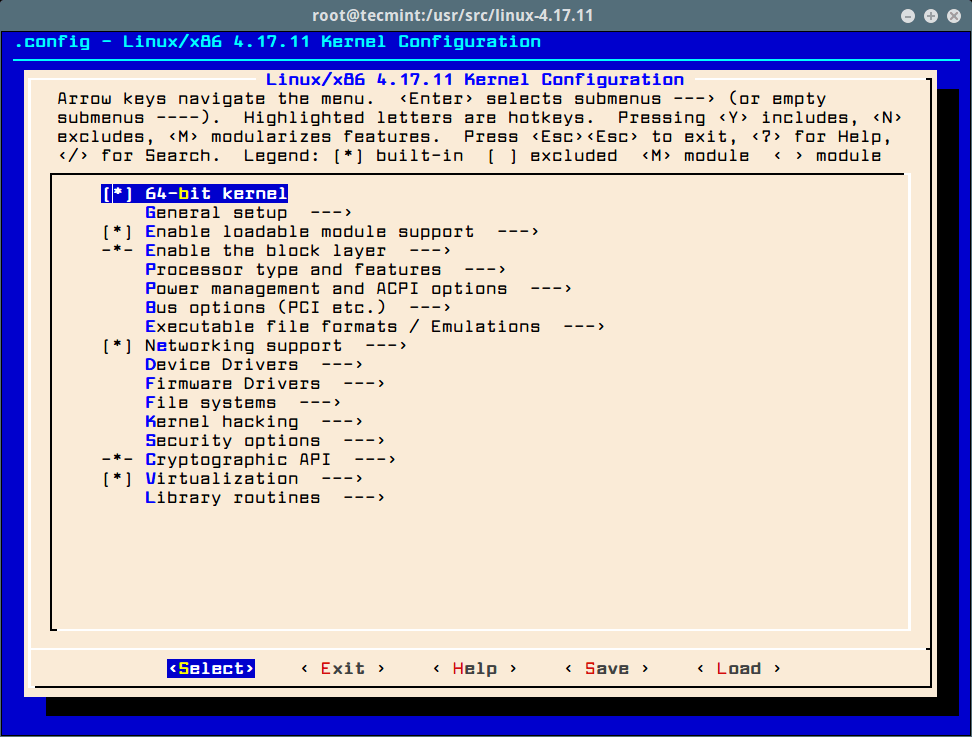
Now run the make menuconfig command to configure the Linux kernel. Once you execute the below command a pop up window appears with all the menus. Here you can enable or disable certain kernel features. If you unfamiliar with these menus, just hit ESC key to exit.
# cd /usr/src/linux-4.17.11/ # make menuconfig
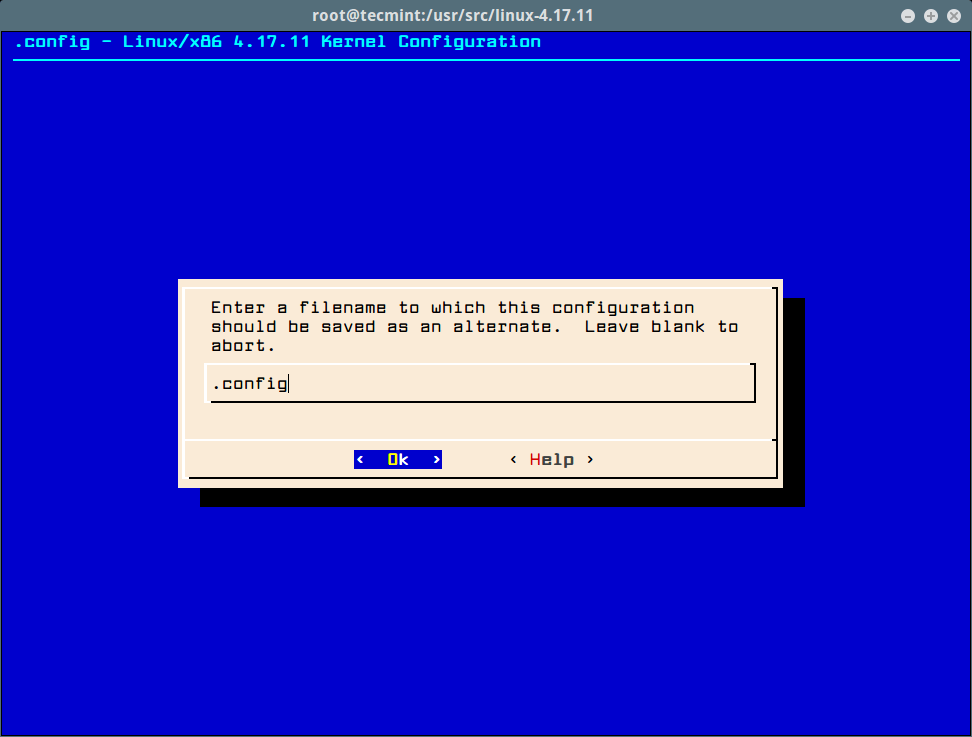
Once your kernel configuration options are set, click on Save to save the configuration interface and exit from the menu.
Compile the Kernel in CentOS 7
Before starting kernel compilation, make sure your system has more than 25GB of free space on the file system. To confirm, you can check the file system free space using df command as shown.
Now compile and install the kernel and modules using following commands (it may take several hours). The compilation process place files under /boot directory and also make a new kernel entry in your grub.conf file.
# make bzImage # make modules # make # make install # make modules_install
Once the compilation completes, reboot the system and verify newly installed Kernel.
That’s it. I hope this article will be much helpful to you all. If you’re facing any problems or difficulties while compiling or installing kernel feel free to ask or post your questions using our comment form below.