- Настройка DNS в Ubuntu
- Настройка DNS в Ubuntu через GUI
- Настройка DNS через терминал Ubuntu
- Выводы
- How to set DNS Nameserver on Ubuntu 20.04
- Change DNS Nameserver via GUI
- Change DNS Nameserver via Config File
- Why Change DNS Nameserver on Ubuntu?
- Просмотр и изменение DNS в Linux
- how to change DNS server permanently on Ubuntu 20.04?
Настройка DNS в Ubuntu
Сервера DNS используются системой для преобразования сложных для запоминания IP адресов в простые доменные имена. Это делается потому что людям сложно запоминать несколько никак не связанных цифр, но очень просто запомнить слово.
Когда компьютеру нужно узнать IP адрес какого-либо домена, он отправляет запрос известному ему DNS серверу. Эти сервера могут быть получены автоматически от роутера по DHCP или же заданы в ручную. В этой статье мы рассмотрим как выполняется настройка DNS Ubuntu 16.04 и более старых версиях.
Настройка DNS в Ubuntu через GUI
Раньше, для настройки DNS серверов, которые будут использоваться системой было достаточно внести адреса нужных серверов в файл /etc/resolv.conf. Но сейчас всей конфигурацией сети в Ubuntu управляет NetworkManager, а этот файл теперь представляет собой только ссылку на файл NetworkManager.
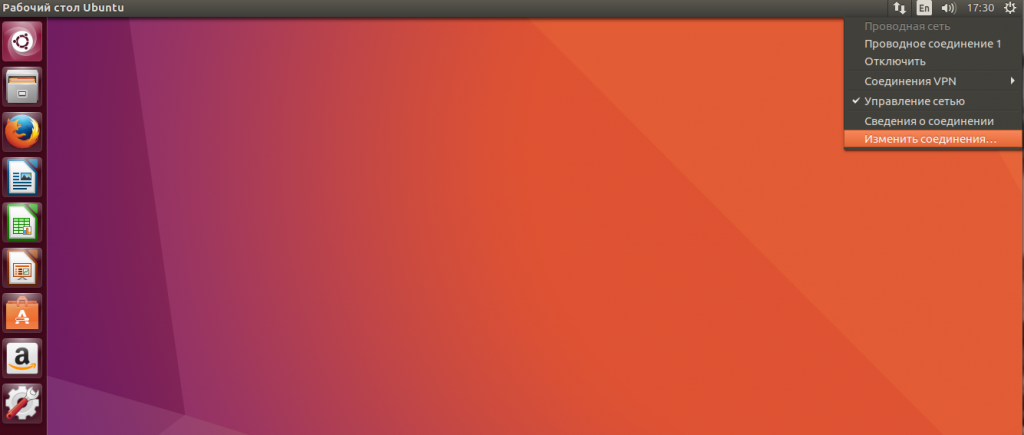
Этот способ до сих пор работает, но в нем вы можете настроить DNS на LiveCD, или до перезагрузки. После перезагрузки все настройки собьются и придется все делать заново. Поэтому, чтобы все сохранилось нужно выполнять все действия через интерфейс NetworkManager. Сначала откройте контекстное меню для значка сети на панели и выберите «Изменить подключения»:
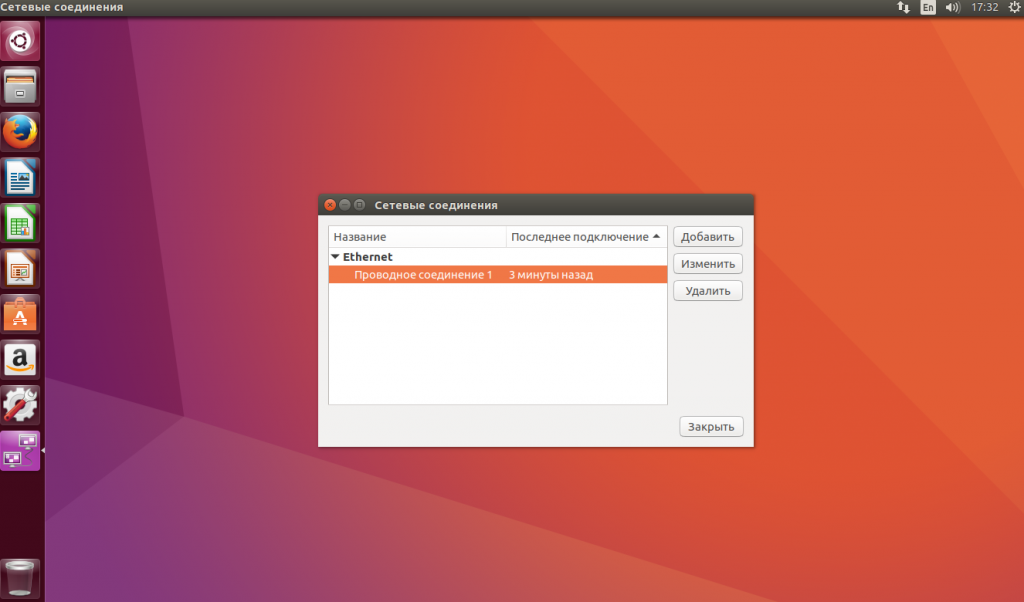
Выберите ваше подключение и нажмите «Изменить»:
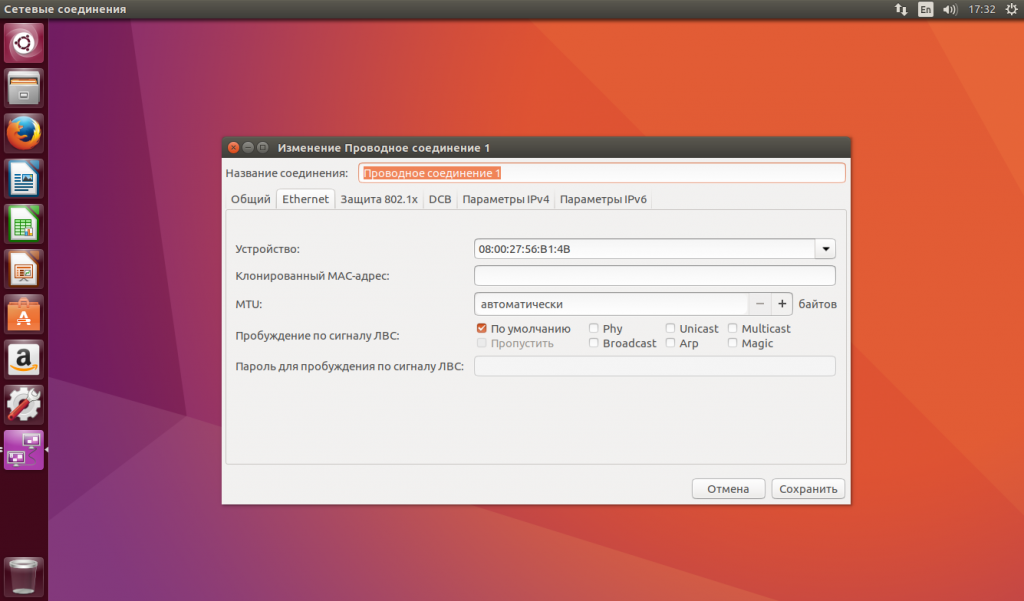
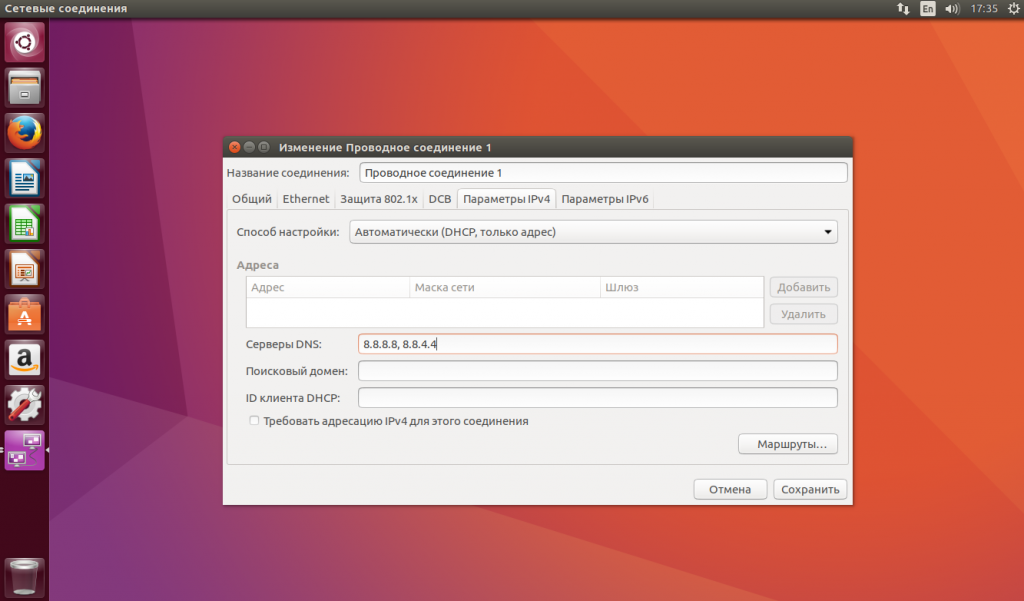
В открывшемся окне перейдите на вкладку «Параметры IPv4»:
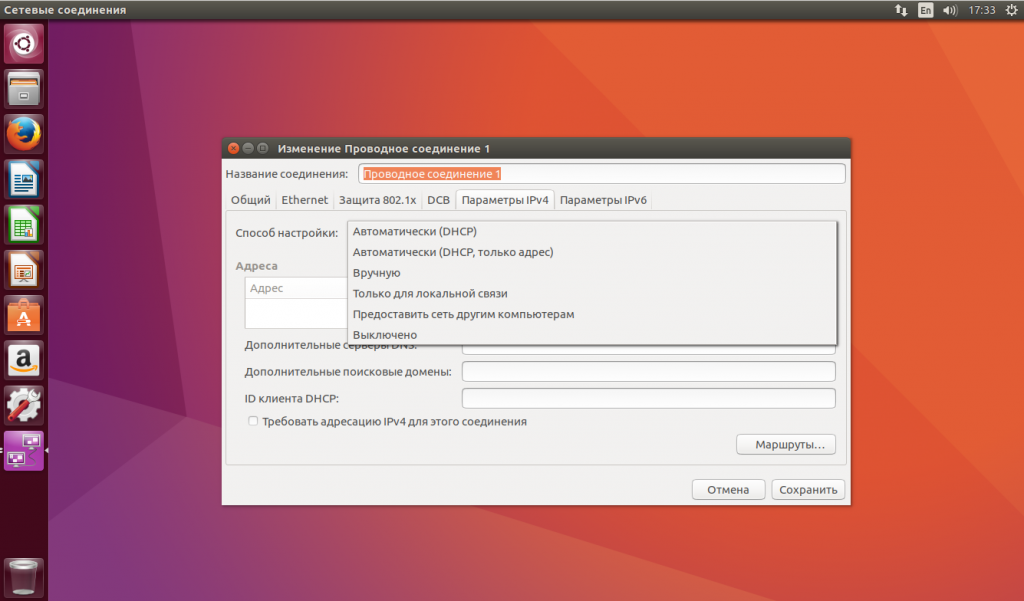
Затем, в поле «Способ настройки» выберите «Автоматически (DHCP, только адрес)»:
Теперь немного ниже появиться поле «Серверы DNS», где вам нужно прописать нужные серверы, можно несколько адресов через запятую. Например, можно указать сервера от Google:
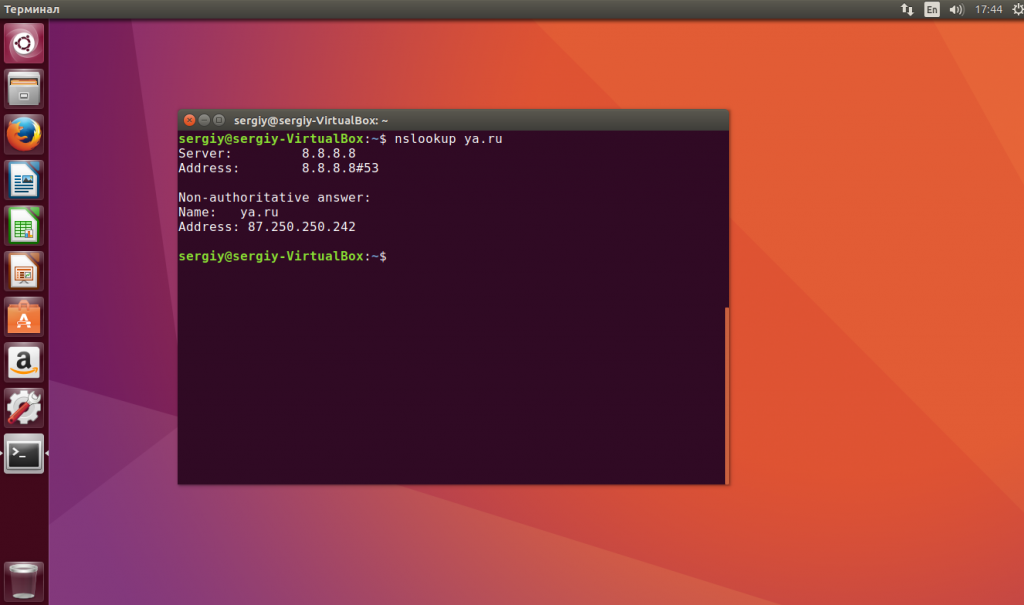
Поле этого нажмите «Сохранить» и «Закрыть». Теперь можете переподключитесь к этому соединению и можете проверять текущий DNS сервер:
Собственно, это все, но есть еще один способ настройки через консоль, если этот не сработал или вы предпочитаете работать из консоли.
Настройка DNS через терминал Ubuntu
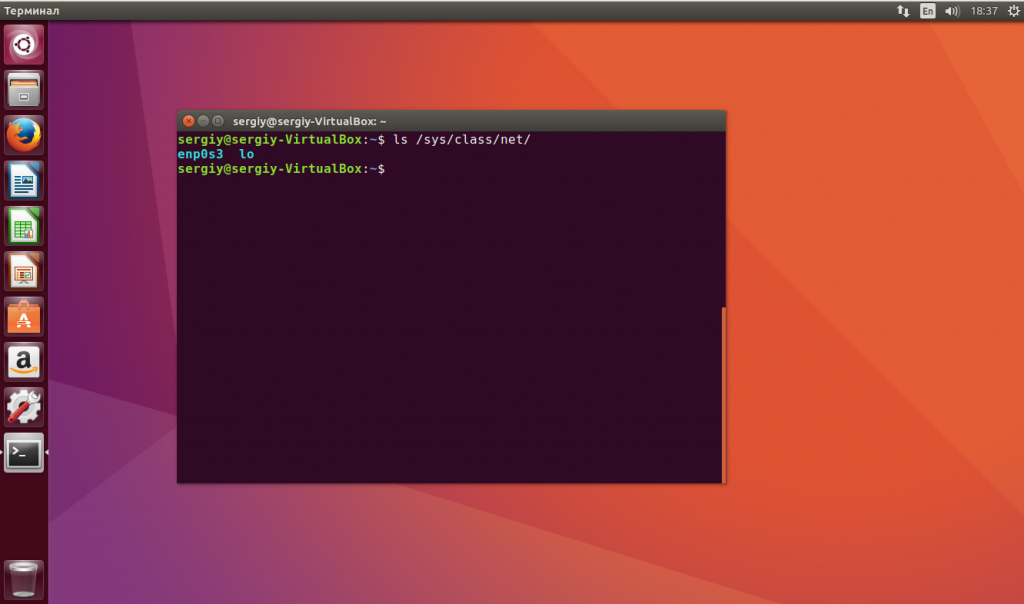
В Ubuntu есть унифицированный интерфейс настройки сети, который настраивается через конфигурационный файл /etc/network/interfaces. Сначала смотрим список сетевых интерфейсов:
Откройте файл для редактирования и найдите в нем имя своего сетевого интерфейса, например, auto enp0s3, если такой секции нет, ее нужно добавить:
sudo vi /etc/network/interfaces
auto enp0s3
iface enp0s3 inet dhcp
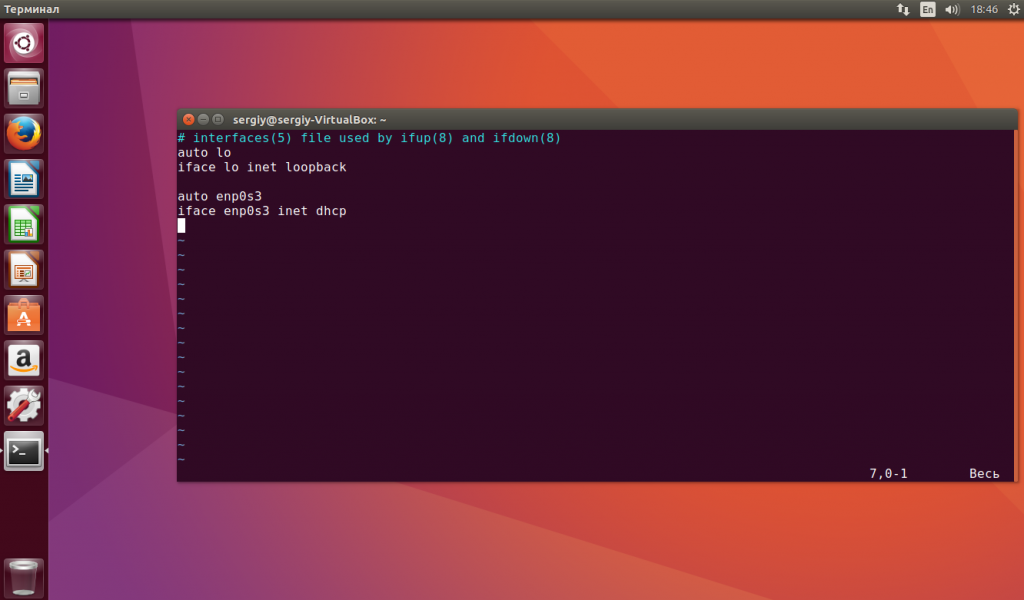
Затем, добавьте в эту секцию строчку:
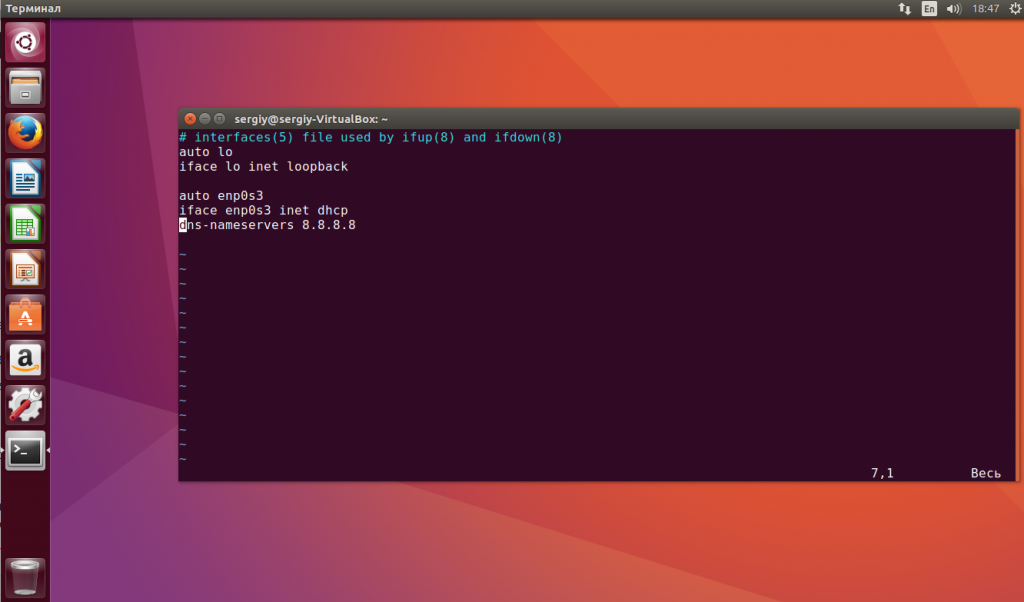
Здесь адрес 8.8.8.8 — это адрес вашего DNS сервера. Но эта настройка сработает, только если ваш DHCP клиент не пытается назначить адрес самостоятельно. Чтобы указать DNS адрес на уровне DHCP сервера нужно добавить такую строчку в конфигурационный файл /etc/dhcp/dhclient.conf:
sudo vi /etc/dhcp/dhclient.conf
supersede domain-name-servers 8.8.8.8

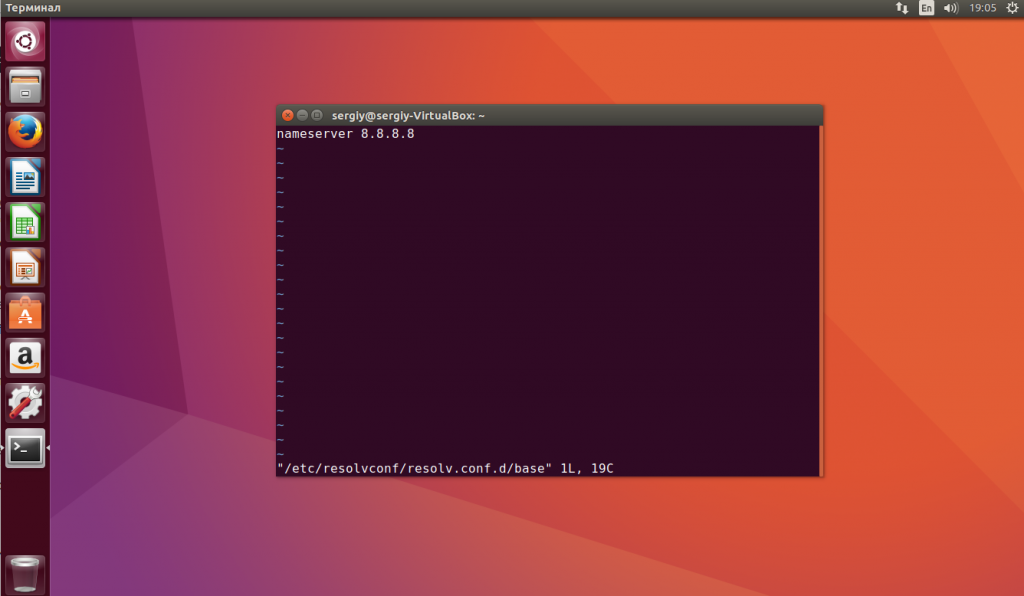
Здесь тоже адрес 8.8.8.8 означает адрес DNS сервера. Для верности, вы можете добавить свои адреса DNS серверов в файл /etc/resolvconf/resolv.conf.d/base:
sudo vi /etc/resolvconf/resolv.conf.d/base
Чтобы настройки вступили в силу необходимо перезапустить сеть:
sudo systemctl restart networking
Возможно, даже лучше будет если вы полностью перезагрузите компьютер. Теперь вы можете открыть /etc/resolv.conf и посмотреть применялся ли новый адрес DNS:
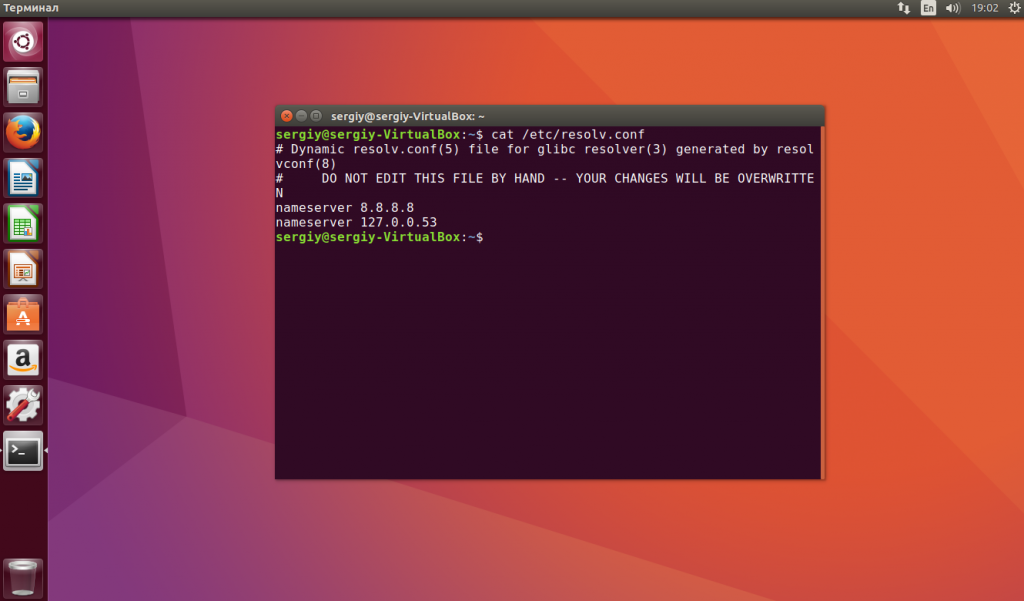
Как видите, в моем примере все заработало. Подобно этому выполняется настройка dns linux для любого дистрибутива.
Выводы
В этой небольшой статье мы рассмотрели как выполняется настройка DNS Ubuntu 16.04 через графический интерфейс или терминал. В Ubuntu автоматической настройкой DNS могут заниматься множество утилит и это создает некоторые проблемы при настройке, но со всем можно разобраться. Надеюсь, эта информация была полезной для вас.
Обнаружили ошибку в тексте? Сообщите мне об этом. Выделите текст с ошибкой и нажмите Ctrl+Enter.
How to set DNS Nameserver on Ubuntu 20.04
The Domain Name System (DNS) translates text-based domain names to numeric IP addresses. By default, most networks are configured to work with DNS servers supplied by the internet service provider. However, users are free to change the DNS nameservers.
This tutorial will show you how to change DNS nameservers on your Ubuntu machine using GUI or the command line.
- Ubuntu 20.04 (both methods also work on Ubuntu 18.04 and later)
- Access to the terminal
- Sudo privileges
Change DNS Nameserver via GUI
Use Ubuntu Settings to complete all the steps to change DNS addresses via the graphical user interface.
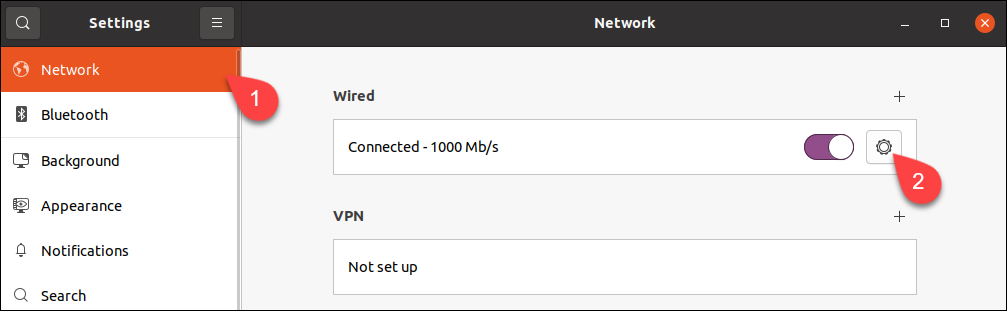
1. Launch Settings and click the Network tab in the menu on the left.
2. Click the cogwheel next to the connection you wish to set up.
Note: To change the settings for a wireless connection, select the Wi-Fi tab, choose a wireless network and proceed with the steps below.
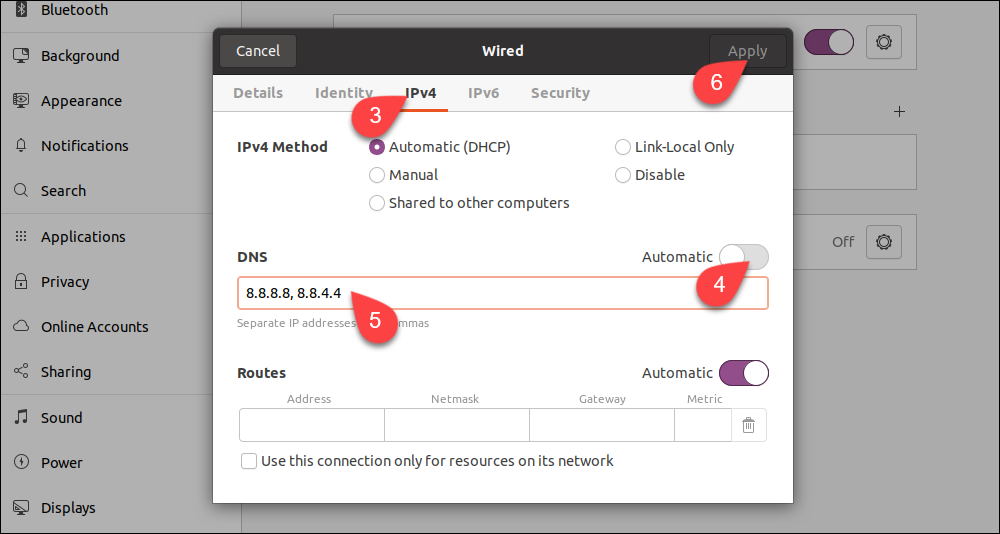
3. Go to the IPv4 tab.
4. Disable automatic DNS configuration by turning off the switch next to the DNS field.
5. Type new DNS addresses in the field. The example shows Google’s public DNS nameservers.
6. Click Apply.
The system is now configured to work with the new DNS servers.
Note: If you wish to set up IPv6 nameservers, go to the IPv6 tab and enter them there. The IPv6 address format is different from IPv4. For example, Google’s IPv6 DNS servers are: 2001:4860:4860::8888 and 2001:4860:4860::8844 .
Change DNS Nameserver via Config File
If you do not use a GUI, change DNS settings with the command line Netplan tool.
1. Go to the Netplan directory:
2. List the directory contents with ls to see the name of the yaml file containing network configuration.

Open the file in a text editor. Your file may have a different name.
sudo nano 01-network-manager.yamlEthernet connections are listed in the ethernets section of the file. If there are any wireless connections, you can find them in the wifis section. Netplan stores the current DNS configuration parameters in nameservers subsections of each section.
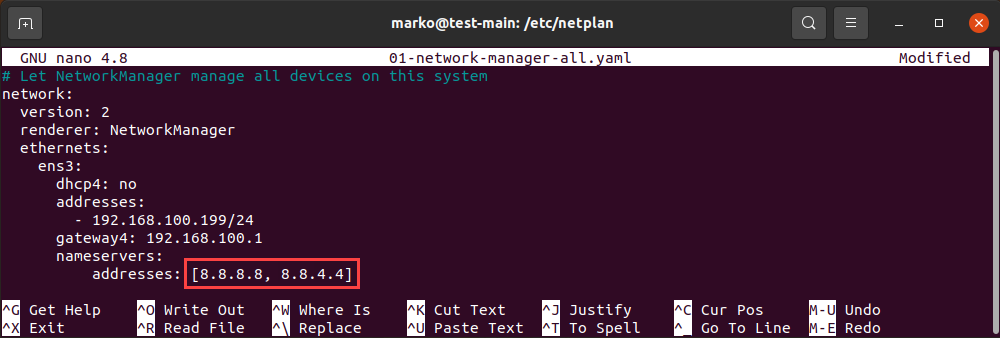
Replace the addresses located in the file with the DNS addresses you want to use. You can enter more than two addresses. Save the changes and exit.
Note: The file on your system may lack the entire ethernets or wifis section. In that case, add the lines that are missing, making sure you respect the indentation provided in the example.
3. Apply the changes you made in the config file:
If the operation is successful, there is no output. To check if the system successfully applied the changes, type:
resolvectl status | grep "DNS Server" -A2The output lists your current DNS servers:

Why Change DNS Nameserver on Ubuntu?
In most cases, your default DNS settings offer optimal performance. However, there are scenarios in which you should consider switching to a third-party DNS provider:
- Large companies with better infrastructure are usually more capable of providing uninterrupted DNS service. If your ISP is unreliable and you experience frequent downtimes, switching the DNS provider may be the solution.
- Third-party DNS servers can be faster than those provided to you by your ISP.
Note: Since latency is the primary consideration for DNS, a fast third-party server located far away may provide inferior service to a slower one that is closer to you.
- Some DNS providers offer filters that prevent phishing sites from reaching your computer. The same mechanism is also used to block sensitive content on the internet. Businesses often employ this DNS feature.
- Internet Service Providers sometimes block content on the DNS level, so switching to another DNS nameserver may help you access some geo-restricted websites.
Note: Learn how to install PowerDNS on Ubuntu, a flexible and robust DNS solution.
This tutorial showed you how to set your DNS nameservers on Ubuntu, either using a GUI or CLI.
Просмотр и изменение DNS в Linux
Служба DNS (англ. Domain Name System — система доменных имён) используется для получения информации о доменах. Основное её предназначение — увязывать IP-адрес и доменное имя хоста. Посмотреть, к какому DNS-серверу подключен компьютер с Linux на борту, не просто, а очень просто. Как просто и поменять DNS в Linux.
Если Linux снабжён графическим интерфейсом, достаточно открыть сведения о сетевом соединении и посмотреть в строчку DNS.

По понятным причинам нас этот способ не очень интересует. Да и элементы интерфейса могут у разных сред рабочего стола различаться. Рассмотрим просмотр и настройку DNS в терминале Linux.
Традиционно DNS в Linux настраивалась через файл /etc/resolv.conf. Сейчас, однако, он может оказаться бесполезным. Откроем его любым консольным текстовым редактором, например nano:
Мы можем увидеть следующее:

Это значит, что в системе есть systemd, который содержит свой локальный сервер DNS. Его адрес и прописан в этом файле. Однако, в конечном итоге, используются другие DNS-серверы! Посмотреть их можно по-разному. Можно использовать команду
Вы увидите нечто подобное тому, что на скриншоте ниже. Если в системе несколько сетевых интерфейсов, информация будет предоставлена по каждому.

Другой способ — использовать утилиту nmcli. Введите команду
nmcli device show | grep DNS 
Как изменить DNS? Если в системе нет systemd, то это можно сделать редактированием файла /etc/resolv.conf. Откройте его любым текстовым редактором, найдите строку nameserver и впишите адреса DNS-серверов. Если их несколько, введите их адреса последовательно. Например:
nameserver 8.8.8.8 nameserver 8.8.4.4 Если в ОС есть systemd, вышеописанных способ бесполезен, поскольку настройки будут перезаписываться при перезагрузке системы. В данном случае нам нужно редактировать файл /etc/systemd/resolved.conf.
В разделе Resolve отредактируйте строку DNS. При необходимости уберите символ # для раскомментирования. Адреса DNS-серверов прописываются через запятую.

Как видим на этом примере, systemd несколько усложнил операционную систему Linux. Однако настроить DNS в ней до сих пор не составляет труда. Кроме того, в Linux можно пользоваться и файлом hosts.
how to change DNS server permanently on Ubuntu 20.04?
I know there are other posts here asking this, but those suggestions do not help, the configuration keeps changing and I simply cannot get my own changes to persist. I have the Google 8.8.8.8 and 8.8.4.4 servers in my Network Manager configuration in the GUI, and systemd-resolv —status returns
Link 2 (enp38s0f1) Current Scopes: DNS DefaultRoute setting: yes LLMNR setting: yes MulticastDNS setting: no DNSOverTLS setting: no DNSSEC setting: no DNSSEC supported: no Current DNS Server: 8.8.8.8 DNS Servers: 8.8.8.8 8.8.4.4 DNS Domain: ~. ;; Query time: 0 msec ;; SERVER: 192.168.1.1#53(192.168.1.1) ;; WHEN: Mon Oct 05 11:08:26 EDT 2020 ;; MSG SIZE rcvd: 83 so my default route 192.168.1.1 as DNS . Furthermore, /etc/resolv.conf is a symlink to /run/systemd/resolve/resolv.conf , which in turn reads
# Generated by dhcpcd from enp38s0f1.dhcp, wlp0s20f3.dhcp # /etc/resolv.conf.head can replace this line domain fios-router.home nameserver 192.168.1.1 # /etc/resolv.conf.tail can replace this line The only enp38s0f1.dhcp file on this system (I’ve searched / ) is /run/dhcpcd/resolv.conf/enp38s0f1.dhcp , which reads
# Generated by dhcpcd from enp38s0f1.dhcp domain fios-router.home search fios-router.home nameserver 192.168.1.1 I have tried to write in other nameservers there, but they do not persist. In the past I’ve made the changes persistent by making the file immutable with chattr +i , but
lsattr /run/dhcpcd/resolv.conf/enp38s0f1.dhcp lsattr: Inappropriate ioctl for device While reading flags on /run/dhcpcd/resolv.conf/enp38s0f1.dhcp so that attribute is not available here. And besides, I shouldn’t have to make the file immutable anyway: there should presumably be some way I can control the DNS server.. Edit: In response to comments below:
$ dpkg -l *dnsmasq* --- Desired=Unknown/Install/Remove/Purge/Hold | Status=Not/Inst/Conf-files/Unpacked/halF-conf/Half-inst/trig-aWait/Trig-pend |/ Err?=(none)/Reinst-required (Status,Err: uppercase=bad) ||/ Name Version Architecture Description +++-================-===============-============-============================================ un dnsmasq (no description available) ii dnsmasq-base 2.80-1.1ubuntu1 amd64 Small caching DNS proxy and DHCP/TFTP server un dnsmasq-base-lua (no description available)