- Как я переносил рабочую систему Ubuntu MATE 14.04 на новый SSD-диск
- How to Clone Linux HDD to SSD Without Re-installing
- Is There a Reliable Way to Clone Linux HDD to SSD
- How to Clone Linux Hard Drive to SSD via Disk Cloning Software
- How to Clone HDD to SSD for Linux with EaseUS Disk Copy
- Step-by-Step Guide
- Video Tutorial — HDD to SSD Clone
- How to Clone Linux Hard Drive to SSD Using dd Command
- Steps to clone a Linux hard drive:
- Clone HDD to SSD Linux? Here It Is!
- FAQs on Clone Linux HDD to SSD
- Video Tutorial
Как я переносил рабочую систему Ubuntu MATE 14.04 на новый SSD-диск
Как-то, работая, заметил, что мой личный ноутбук на i5-ом, с 8 гигабайтами ОЗУ на Linux уступает служебной, менее мощной, «лошадке».
Было решено сделать «ход конём»: вместо старого SATA HDD был приобретен новый SSD диск. Админы по сути своей существа ленивые, и я не стал исключением. Вспоминать все, что было сделано заново, выстраивая свою рабочую среду, не хотелось от слова совсем, и перенос операционной системы был наименее беспроблемным вариантом в моем случае. Итак, приступим.
В ноутбук, через переходник-контроллер в слот DVD-привода, был подключен вторым новый SSD-диск на 60 Гб, определившийся в системе как /dev/sdb.
На старом 320 Гб HDD-диске /dev/sda было три раздела: /dev/sda1 (swap — предварительно отключен), /dev/sda2 (/корневой раздел), /dev/sda3 (/home). Полный объем всех данных на всех разделах занимал около 50 Гб.
Загрузился в режим LiveUSB, на Ubuntu MATE 14.04 с usb-флешки. Gparted-ом создал раздел sdb1 на SSD-диске. Флаги не ставил. Входим в привилегированный режим root:
Проверяем есть ли поддержка TRIM:
hdparm -I /dev/sdb | grep -i trim * Data Set Management TRIM supported (limit 1 block).
Вывод листинга означает, что поддержка TRIM есть и она активна.
Проверяем выравнивание разделов:
parted /dev/sdb align-check opt 1 Если 1 выровнено или 1 aligned, то все в порядке.
Создаем каталоги точек монтирования:
mount /dev/sdb1 /mnt/sdb1 mount /dev/sda2 /mnt/sda2 Переносим, синхронизируя данные с корневого раздела:
rsync -qaHEAXh /mnt/sda2/* /mnt/sdb1 где:
-q — уменьшить уровень подробностей
-a — архивный режим
-H — сохранять жесткие ссылки
-E — сохранить исполняемость файлов
-A — сохранить списки ACL
-X — сохранить расширенные атрибуты
-h — выходные числа в легко воспринимаемом формате
Монтируем раздел с каталогом пользователя и также переносим с него данные:
mount /dev/sda3 /mnt/sda3 rsync -qaHEAXh /mnt/sda3/* /mnt/sdb1/home Для большей сохранности от случайных ошибок отмонтируем разделы исходного HDD-диска:
umount /mnt/sda2 umount /mnt/sda3 Монтируем файловые системы нативной ОС, в которую перенесли данные:
mount --bind /proc /mnt/sdb1/proc mount --bind /dev /mnt/sdb1/dev mount --bind /sys /mnt/sdb1/sys Операцией chroot изменяем рабочий корневой каталог на тот, в который переносим данные:
Бекапим один из конфигурационных файлов со сведениями о файловых системах:
Добавляем актуальную метку UUID раздела sdb1 в fstab:
ls -l /dev/disk/by-uuid |grep sdb >> /etc/fstab И приводим его к примерному виду:
# / was on /dev/sdb1 during installation
UUID=c45939b4-3a58-4873-aa6e-247746hgftb5 / ext4 errors=remount-ro 0 1
Обновляем конфигурационный файл загрузчика Linux:
Проверяем, правильно ли выставлены значения UUID раздела в конфигурационном файле grub.cfg:
cat /boot/grub/grub.cfg | grep «uuid sda2» где вместо «uuid sda2» подставляйте свое значение uuid-раздела. У меня остались старые значения, поэтому:
Отмонтируем файловые системы:
umount /mnt/sdb1/sys umount /mnt/sdb1/dev umount /mnt/sdb1/proc Меняем в grub.cfg все старые значения uuid раздела sda2, на новые значения uuid раздела sdb1. Мне проще было сделать так. Вы можете сделать это по своему.
Ставим сервер mysql, в котором есть утилита replace (пароль любой, одинаковый — не пригодится):
apt-get install mysql-server-5.5 replace 'old_uuid' 'new_uuid' -- /mnt/sdb1/boot/grub/grub.cfg где old_uuid и new_uuid, старое и новое значения соответственно.
Проверяем поменялись ли значения в grub.cfg:
cat /mnt/sdb1/boot/grub/grub.cfg | grep «uuid sdb1» Заново монтируем файловые системы и chroot-имся:
mount --bind /proc /mnt/sdb1/proc mount --bind /dev /mnt/sdb1/dev mount --bind /sys /mnt/sdb1/sys chroot /mnt/sdb1 Устанавливаем сам загрузчик на sdb:
Размонтируем всё смонтированное:
umount /mnt/sdb1/sys umount /mnt/sdb1/dev umount /mnt/sdb1/proc umount /mnt/sdb1 Выходим из привилегированного режима root-а:
Перегружаемся в новую систему. При перезагрузке в BIOS не забываем выбрать и установить загрузку с нового устройства.
How to Clone Linux HDD to SSD Without Re-installing
Linux clone hard drive to SSD can help upgrade a Linux EXT hard drive, and migrate Linux operating system, programs, data and everything from one hard drive to a Solid State Drive. To clone Linux HDD to SSD, download EaseUS disk cloning software to start.

Before you dive into the detailed information on this topic, let’s see the differences between the ways you use to clone Linux HDD to SSD.
| Methods | Effectiveness | Difficulty |
|---|---|---|
| Using Disk Cloning Software | 👍High — Almost 100% cloning success rate and suitable for newbie and professional users | ⭐ |
| Using dd Command | Medium — Not sure, and improper use will erase data on the disk. Suitable for advanced or professional users | ⭐⭐⭐ |
Is There a Reliable Way to Clone Linux HDD to SSD
Now there are millions of users who still use Linux OS or dual systems. However, compared with Windows users, applications for Linux are de-facto much less. For example, when a Linux user wants to clone Linux HDD to SSD, it’s hard to find compatible or exclusive Linux disk cloning software.
You may ask, how do I clone Linux drive to SSD? To save your precious time, we will let you know two reliable ways — EaseUS Disk Copy and dd Command.
Most times, experienced Linux users will suggest you clone Linux HDD to SSD or clone Linux hard drive to a smaller/larger Solid State Drive by using the ‘dd’ command. But for average users like us, can you understand what each command is for?
Though not Linux-based, EaseUS Disk Copy is Linux hard drive supported, and it can easily replace the dd command with an automatic way to clone Linux hard drives. It’s easy, fast, and straightforward to transfer one hard drive content to the other with several clicks.
How to Clone Linux Hard Drive to SSD via Disk Cloning Software
EaseUS Disk Copy is prominent disk cloning software based on the Windows operating system, and it fully supports HDD to SSD cloning, so you can achieve the purposes in the following.
- Clone a hard drive for backup and recovery use.
- Easily copy operating from HDD to SSD without reinstalling.
- Replace a laptop’s hard drive without losing data.
- Upgrade a Linux hard drive to a bigger one or from an old one to a new one.
- Thanks to the sector-by-sector function, you can clone a hard disk with bad sectors.
Undoubtedly, EaseUS Disk Copy should rank as the top choice if you’re looking for a Linux HDD to SSD cloning method. On this page, you will learn the detailed guide to cloning HDD to SSD and copying all the Linux installations to the new SSD step by step.
How to Clone HDD to SSD for Linux with EaseUS Disk Copy
The Linux clone hard drive to SSD takes no more than four procedures:
- #1. The source hard drive cleanup (optional)
- #2. Connect the source hard drive and target SSD on a desktop or laptop
- #3. Initialize SSD (optional)
- #4. Start Linux hard drive cloning with EaseUS Disk Copy
The hard drive cleanup is necessary to reduce the disk space consumption on the new SSD because, after cloning, your SSD will surely keep identical to the old hard drive. By removing junk files and useless large files beforehand, you can keep the cloned drive clean.
Next, you should use the proper connection way to connect both of your drives to a Windows computer. The desktop computer allows you to connect two hard drives by installing them in the tower case or through a SATA-to-USB cable, while the laptop will only let you use the cable or external hard drive enclosure for connection.
By the way, if your SSD is newly bought and not initialized at the moment, before heading to the disk cloning process, try to initialize the SSD so that your computer can recognize it with no problem.
At last, after downloading EaseUS Disk Copy, let’s begin to do Linux clone hard drive to SSD:
Step-by-Step Guide
Step 1. Take out the hard drive from your Linux computer and connect it to the other Windows computer where EaseUS Disk Copy is installed, as well as the target SSD.
Step 2. On EaseUS Disk Copy, click Disk Mode and select the source Linux hard drive. Here, at the bottom-left corner, you must tick the box in front of Sector by sector copy, which lets you clone the Linux EXT hard drive to SSD in Windows with the same disk layout. Click Next to continue.

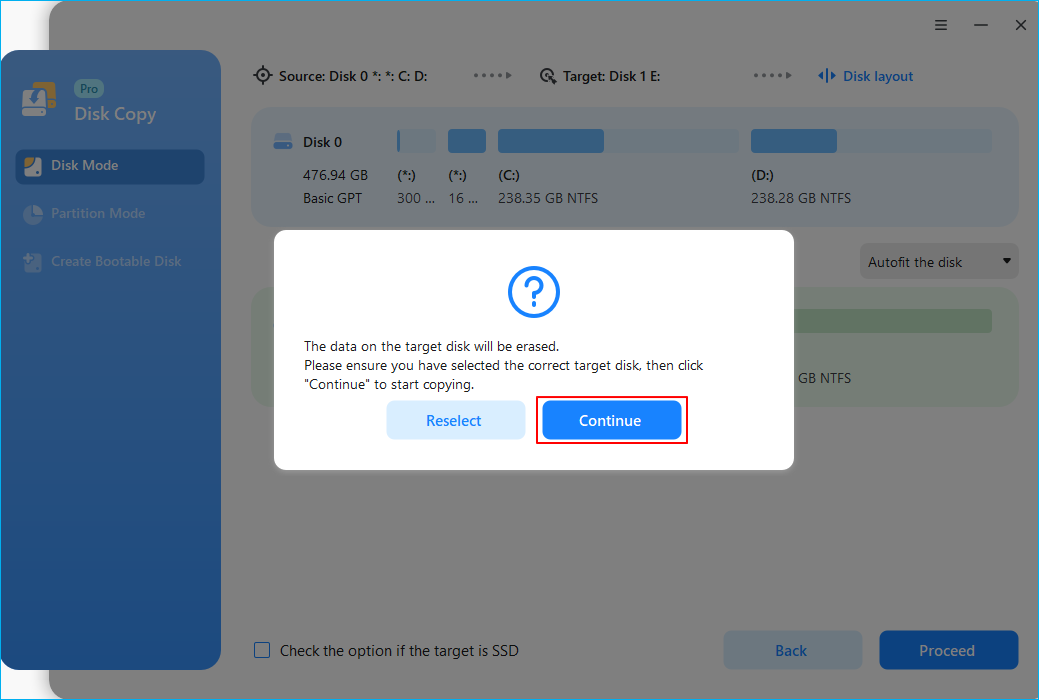
Step 3. Select the destination SSD where you want to clone/copy the old disk and click Next to continue. Click OK to confirm if the program asks to erase data on the destination disk.
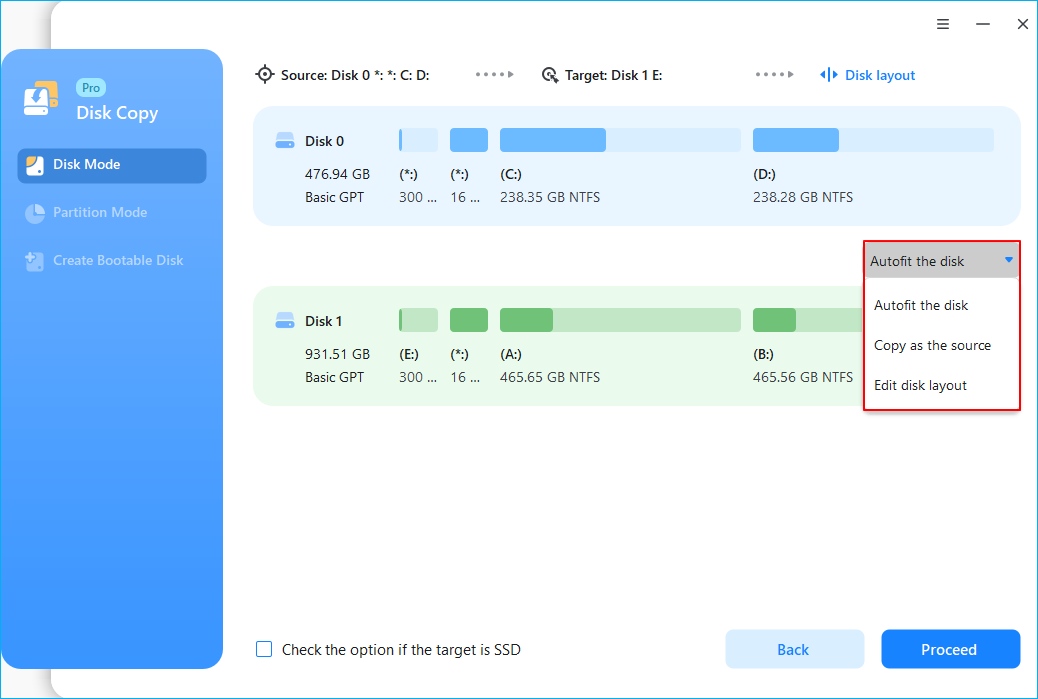
Step 4. Check and edit the disk layout as Autofit the disk, Copy as the source or Edit disk layout. Autofit the disk is recommended.
- Copy as the source option will copy/clone the same layout of partitions on your source disk to the destination disk.
- Edit disk layout allows you to resize or move partition layout on the destination disk manually.
- If your destination disk is an SSD drive, do remember to tick Check the option if the target is SSD.
Click «Proceed» to start the Linux hard drive cloning process right away.
If you like this post, you can share it on your social platforms to help more people.
Video Tutorial — HDD to SSD Clone
This tutorial is also available on cloning HDD to SSD for Linux with EaseUS Disk Copy.

How to Clone Linux Hard Drive to SSD Using dd Command
What’s the ‘dd’ command in Linux? In simple words, ‘dd’ is a command-line utility for Unix and Unix-like operating systems whose primary purpose is to convert and copy files. On Unix, device drivers for hardware (such as hard disk drives) and special device files (such as /dev/zero and /dev/random) appear in the file system just like normal files.
As long as you grasp each essential dd command concept and have a clear mind for the whole process, you can spend twenty steps more or less with Linux OS and programs migration from one drive to the other.
Steps to clone a Linux hard drive:
# init 0
ok boot
# dd if=/dev/rdsk/c0t0d0s2 of=/dev/rdsk/c0t2d0s2 bs=128k
# fsck /dev/rdsk/c0t2d0s2
# mount /dev/dsk/c0t2d0s2 /mnt
# cd /mnt/etc
# vi vfstab
(Modify entries for the new disk)
# cd /
# umount /mnt
# init 0
# boot disk2 -s
# sys-unconfig
# boot disk2
Clone HDD to SSD Linux? Here It Is!
In this article, we have listed two solutions for you to do Linux clone hard drive. The second method for the dd command is a little bit complex but works. If you are a computer beginner, we think the disk cloning software is better for easy steps and an intuitive interface.
FAQs on Clone Linux HDD to SSD
1. Why is my SSD not bootable after cloning?
The SSD is not bootable after cloning may be due to the following reasons:
- Not configured as the boot disk is the copied SSD.
- SSD incompatibility with BIOS boot mode.
- The disk copying procedure was messed up or stopped.
- Missing boot partitions, boot components, or incomplete clones.
2. Do I need to format SSD before cloning?
Your new SSD needs to be initialized and partitioned before you can use it. These procedures are unnecessary if you are cloning your SSD or conducting a clean installation of your operating system. The new SSD will be initialized and partitioned through a clean installation of your operating system or cloning to an SSD.
3. Is it good to clone OS to SSD?
Cloning an HDD to an SSD is generally not a bad idea. And it will be really helpful to you. If your SSD contains files on it, you should back them up beforehand because cloning an HDD to an SSD would erase all of the data on the destination device.
- How to Clone M.2 SSD with Only One Slot [Step-by-Step Guide] Larissa/2023-06-25
- (2023) Top 2 Silicon Power Cloning Software Jean/2023-02-22
- (Easiest Way) How to Clone 2.5 SSD to M.2 with Best SSD Cloning Software Jerry/2023-02-22
- Detailed Guide | How to Replace Laptop Hard Drive Without Losing Data Jerry/2023-06-13
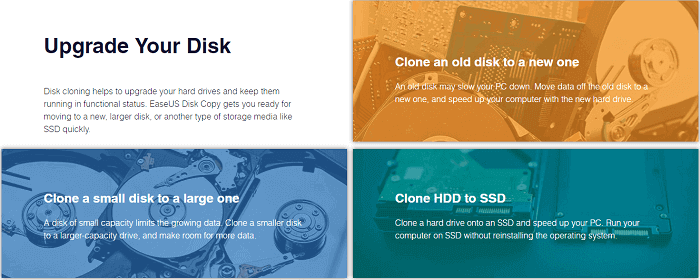
- Clone an old disk to a new one
- Clone a small disk to a large one
- Clone HDD to SSD
Video Tutorial

How to Clone HDD to SSD on Windows 10/8/7