- Температура процессора Linux
- Температура процессора в Linux
- 1. Установка
- 2. Настройка программы
- Использование sensors
- Использование psensor
- Выводы
- Похожие записи
- Оцените статью
- Об авторе
- 15 комментариев к “Температура процессора Linux”
- How to Check CPU Temperature on Linux
- Check CPU Temperature Using Lm-Sensors
- Check CPU Temperature Using Psensor
- Install Psensor
- Using Psensor
- Check Temperature Without Third-Party Utilities
Температура процессора Linux
В этой небольшой статье мы рассмотрим как посмотреть температуру процессора с помощью lm_sensors. Lm_sensors — это акроним от Linux monitoring sensors. Это набор инструментов с открытым исходным кодом, с помощью которого вы можете посмотреть и отслеживать многие параметры работы системы, такие как напряжение, температура, влажность и обороты кулеров.
Кроме того, утилита позволяет определять допустимые границы показателей, например, та же температура процессора Linux для определенной модели. Таким образом, вы можете найти неполадку в системе вовремя и заменить неработающий элемент, например, вентилятор, чтобы избежать перегрева и выхода и строя оборудования.
Температура процессора в Linux
1. Установка
Обычно, пакет lm_sensors уже предустановлен в большинстве систем и сконфигурирован для работы. Но если в вашей системе его нет, то программу не так сложно установить. В ArchLinux:
sudo yum install lm_sensors
В Debian, Ubuntu или Linux Mint:
sudo apt-get install lm-sensors
2. Настройка программы
Когда установка будет завершена, нам необходимо выполнить настройку, чтобы определить все сенсоры, подключенные к системе. Для этого выполните:
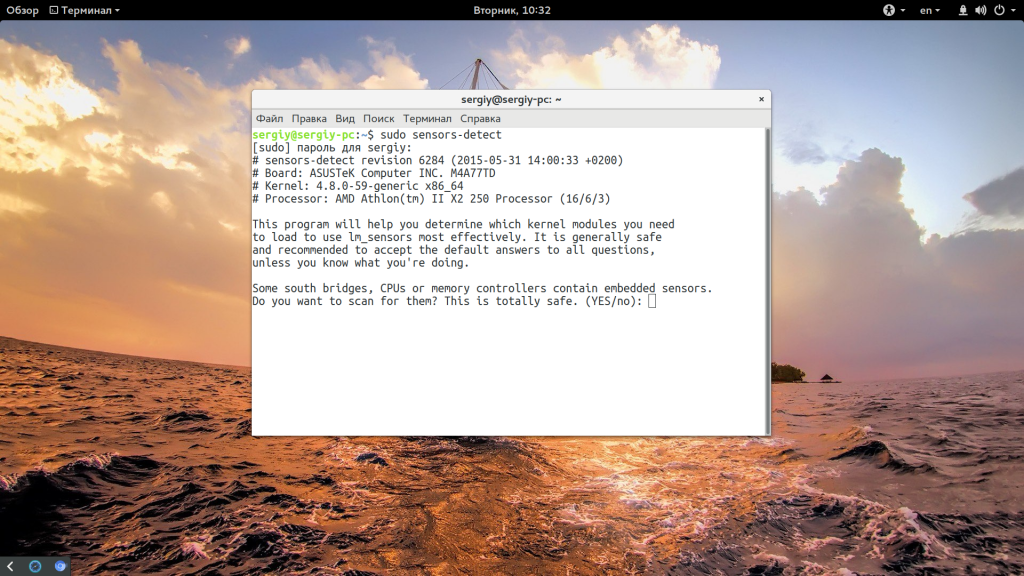
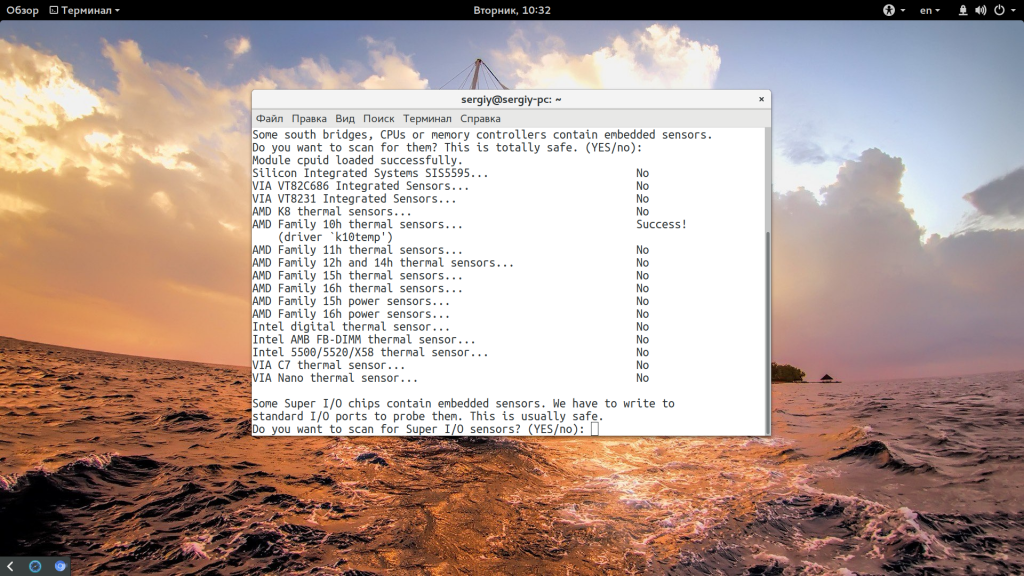
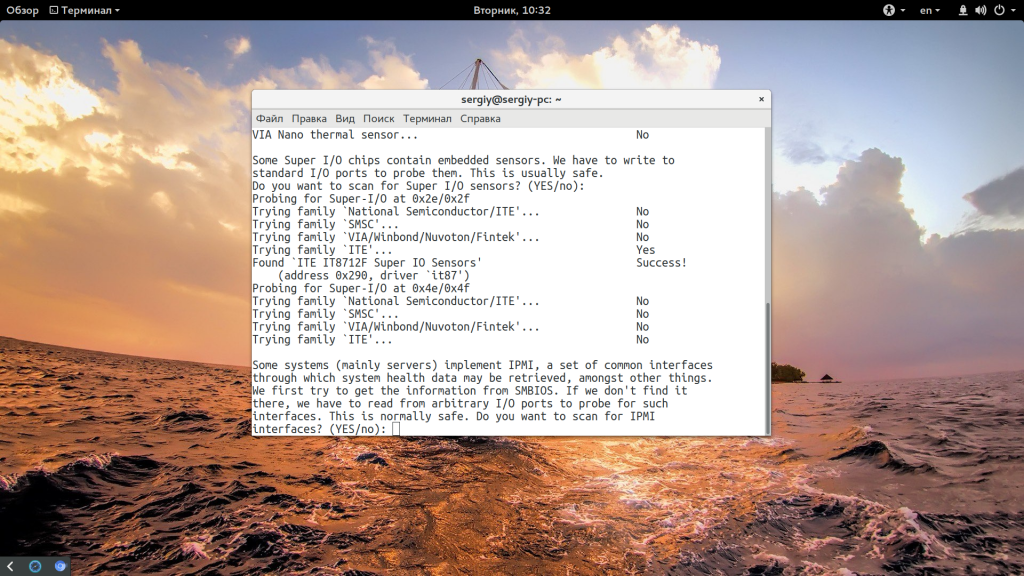

Утилита sensors-detect пытается найти все установленное оборудование и загрузить рекомендованные для него модули ядра. В большинстве случаев вам будет достаточно нажимать кнопку Enter в ответ на все вопросы программы, тем самым давая ответы по умолчанию. Мы рассматривали более подробно sensors-detect в статье управление кулером Linux.
Использование sensors
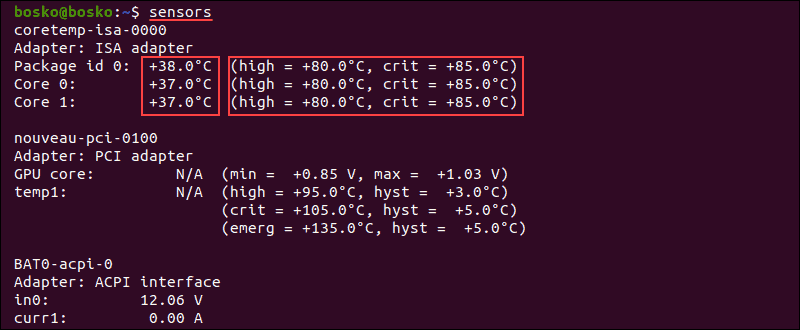
Теперь можно перейти к просмотру доступной температуры. Для этого наберите:
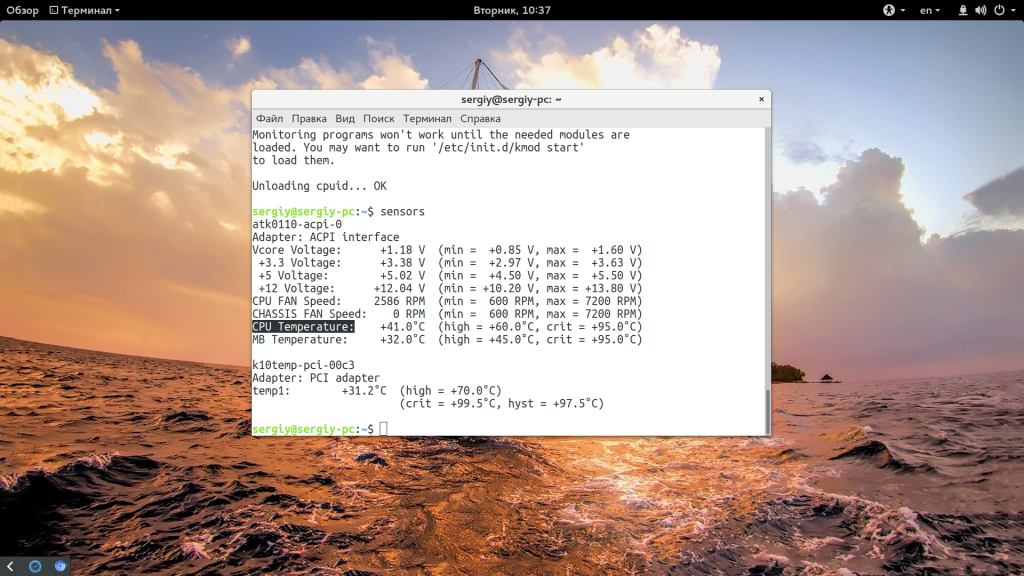
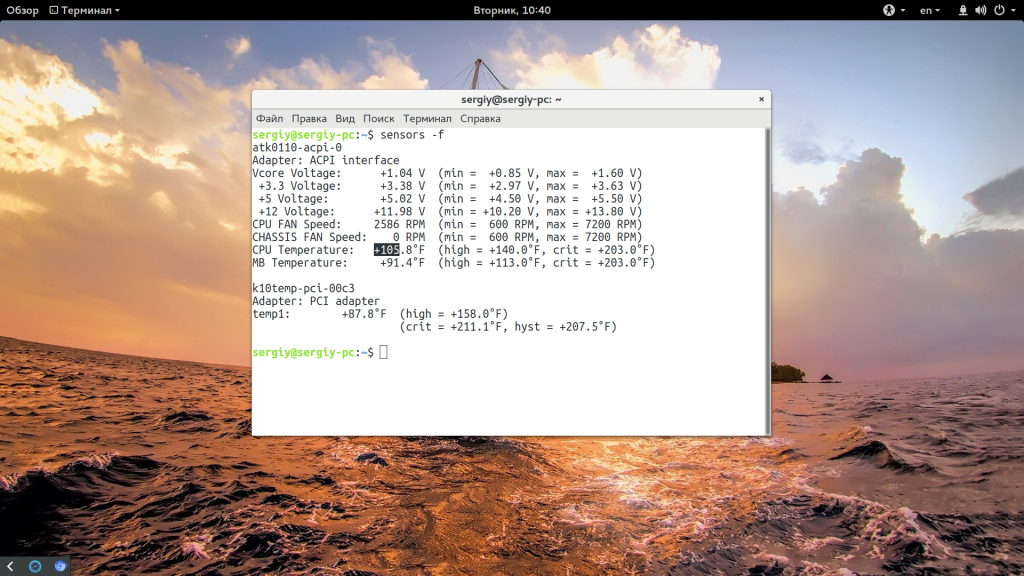
Здесь отображается не только температура процессора Linux, но и другие полезные показатели, такие как, напряжение и частота вращения вентиляторов. Для любителей, можно вывести температуру процессора в Фаренгейтах с помощью опции -f:
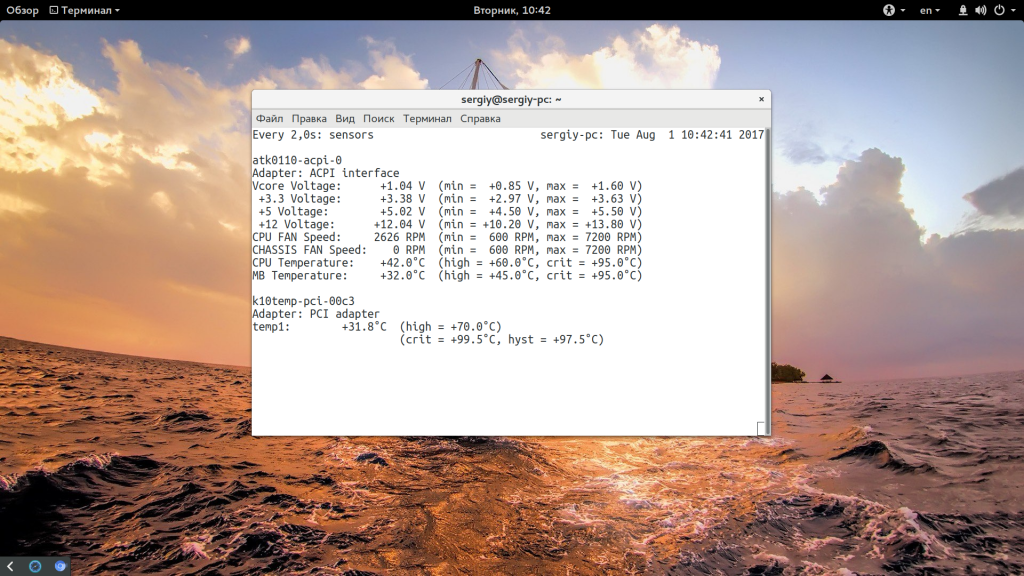
Чтобы постоянно наблюдать за температурой процессора можно использовать команду watch. По умолчанию она будет обновлять информацию раз в две секунды:
Если вы видите, что для какого-либо компонента температура становится критической, значит пора разобрать системный блок и посмотреть что там произошло, возможно, нужно поменять термопасту или заменить кулер.
Использование psensor
Если вы не любите работать в терминале и вам больше по душе графический интерфейс, то можно воспользоваться графической утилитой psensor, которая берет информацию через lm_sensors. Чтобы установить ее в Ubuntu выполните:

Дальше утилиту можно запустить из главного меню или командой:
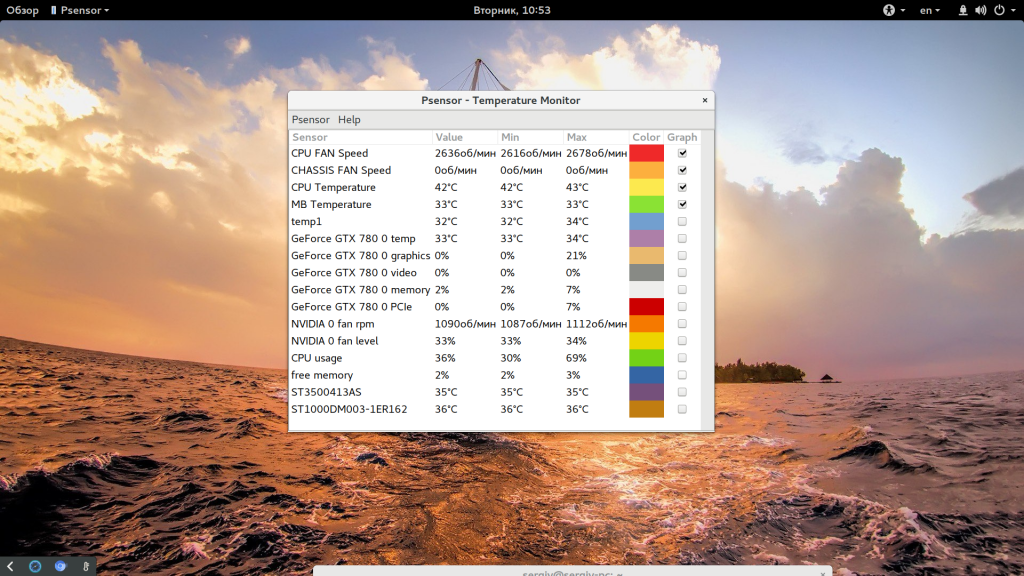
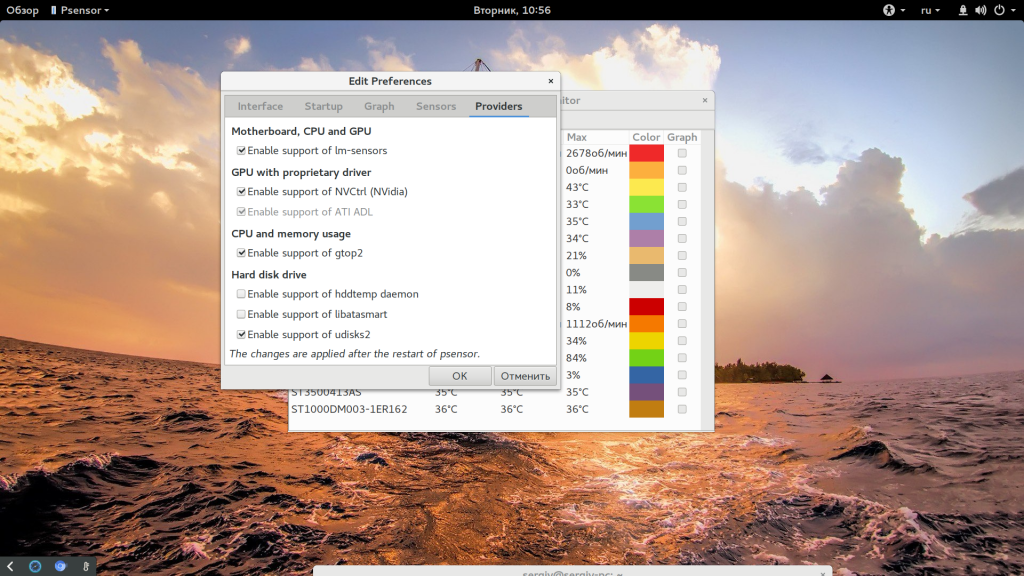
Здесь отображается вся та же информация, что и в lm_sensors, но, кроме того, есть температура видеокарты, жесткого диска, загрузка процессора и видеокарты, а также другие параметры. В настройках утилиты вы можете выбрать единицу измерения температуры:

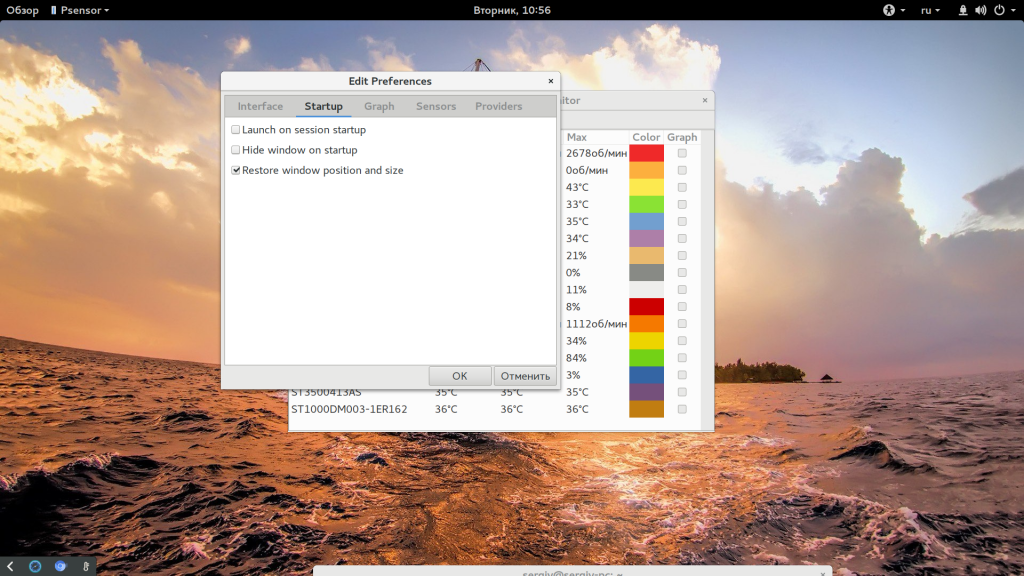
И выбрать датчики, которые нужно использовать:
Выводы
В этой статье мы рассмотрели как узнать температуру процессора linux. Надеюсь, эта информация была полезной для вас. Если у вас остались вопросы, спрашивайте в комментариях.
На завершение видео о том как посмотреть температуру процессора linux:

Обнаружили ошибку в тексте? Сообщите мне об этом. Выделите текст с ошибкой и нажмите Ctrl+Enter.
Похожие записи
Оцените статью
Об авторе
Основатель и администратор сайта losst.ru, увлекаюсь открытым программным обеспечением и операционной системой Linux. В качестве основной ОС сейчас использую Ubuntu. Кроме Linux, интересуюсь всем, что связано с информационными технологиями и современной наукой.
15 комментариев к “Температура процессора Linux”
Использую lm_sensors в связке с gkrellm, предварительно собрав ядро с нужными модулями для сенсоров. Ответить
у меня нет коменды whatch 🙁
—
юзаю такое
—
xuser@mbs:~$ cat bin/sr.sh
#!/bin/sh
#
while [ true ]; do
sensors | grep -v POWER | grep -v CHASSIS
echo — — —
sleep $1
done
—
sr.sh 5
acpitz-virtual-0
Adapter: Virtual device
temp1: +40.0°C (crit = +75.0°C) atk0110-acpi-0
Adapter: ACPI interface
Vcore Voltage: +1.17 V (min = +1.45 V, max = +1.75 V)
+3.3 Voltage: +3.38 V (min = +3.00 V, max = +3.60 V)
+5.0 Voltage: +4.97 V (min = +4.50 V, max = +5.50 V)
+12.0 Voltage: +12.24 V (min = +11.20 V, max = +13.20 V)
CPU FAN Speed: 1573 RPM (min = 0 RPM, max = 1800 RPM)
CPU Temperature: +31.0°C (high = +90.0°C, crit = +125.0°C)
MB Temperature: +39.0°C (high = +70.0°C, crit = +125.0°C) k8temp-pci-00c3
Adapter: PCI adapter
Core0 Temp: +32.0°C
Core1 Temp: +40.0°C — — — Ответить
но все равно я буду использовать свой скрипт. Потому что в его выводе нет лишней информации.
—
вот полный выовд sensors
acpitz-virtual-0
Adapter: Virtual device
temp1: +40.0°C (crit = +75.0°C) atk0110-acpi-0
Adapter: ACPI interface
Vcore Voltage: +1.22 V (min = +1.45 V, max = +1.75 V)
+3.3 Voltage: +3.38 V (min = +3.00 V, max = +3.60 V)
+5.0 Voltage: +4.95 V (min = +4.50 V, max = +5.50 V)
+12.0 Voltage: +12.24 V (min = +11.20 V, max = +13.20 V)
CPU FAN Speed: 1614 RPM (min = 0 RPM, max = 1800 RPM)
CHASSIS FAN Speed: 0 RPM (min = 0 RPM, max = 1800 RPM)
POWER FAN Speed: 0 RPM (min = 0 RPM, max = 1800 RPM)
CHASSIS4 FAN FAN Speed: 0 RPM (min = 0 RPM, max = 1800 RPM)
CHASSIS2 FAN FAN Speed: 0 RPM (min = 0 RPM, max = 1800 RPM)
CHASSIS3 FAN FAN Speed: 0 RPM (min = 0 RPM, max = 1800 RPM)
CPU Temperature: +40.0°C (high = +90.0°C, crit = +125.0°C)
MB Temperature: +47.0°C (high = +70.0°C, crit = +125.0°C) k8temp-pci-00c3
Adapter: PCI adapter
Core0 Temp: +38.0°C
Core1 Temp: +44.0°C Ответить
Большое спасибо adminu за этот блог,очень нужен для начинающих.Автору видео о температурных данных для Линукс.Всё работет без сучка и задоринки.У меня Linux Mint 19.1 Tessa- пару лет назад в первые в жизни поставил Ubuntu и что . не пошло.Пришлось присесть на Windows.Не созрел тогда и базы знаний,практический не было(т.е. опыта) да и главное возраст стал подпирать,торопить(секрета не делаю мне под 70 лет).Сделал вторую попытку(тянет меня к Линуксу,почему- простой,скоростной,а главное очень умный.Он предугадывает твои желания.Надо только его понять.Мой «рекорд» по установке-Linux Mint 19.1 — 32 минуты,рабочая версия с минимумом программ*условно «триал») и можно работать.На расширенную «версиию» Linux Mint 19.1 (c «примочками» и «бубнами») по полной программе-«расширенная» версия для IT-гурманов- ещё + 35 минут.И «дело в шляпе».
Всем всего наилучшего. Ответить
Уважаемый админ.-вопрос как показать в комментариях фото графической оболочки Psensor в работе? Ответить
Загрузите фото на какой-либо файлообменник, а потом добавьте полученную ссылку в комментарий. Ответить
Большое спасибо за быстрый ответ.Пробовал вставить через текстовый редактор,не знаю прошло или нет. Ответить
Очень круто, что стольким людям реально нравится Linux.. Жаль, что их нет среди моего окружения :((
В общем респект, и всего наилучшего! Ответить
Подскажите пожалуйста, а можно вывести данные сенсоров температуры в таскбаре? А поверх всех приложений? Ответить
Я не нашёл способа, где была бы отображена максимальная температура процессора за время, пока работает мониторинг Ответить
How to Check CPU Temperature on Linux
Like any electrical component, CPUs generate heat when being used. Some resource-demanding programs cause the CPU to increase the clock speed, which results in higher temperatures. Dust buildup also causes the CPU to overheat.
High temperatures shorten the lifespan of sensitive components, so keeping track of CPU temperatures is crucial. This way, you prevent performance throttling or component damage.
In this tutorial, you will learn how to use different tools and in-built utilities to check CPU temperature on Linux machines.

Check CPU Temperature Using Lm-Sensors
Lm-sensors is a command-line utility for hardware monitoring. Use the tool to check the temperature of the CPU and other components. Follow these steps to install and configure Lm-sensors:
1. Open the terminal and install these packages using a package manager for your distribution. In Ubuntu, use the following command:
sudo apt install hddtemp lm-sensorsWait for the lm-sensors and hddtemp to finish downloading and installing.
2. Execute the sensors command to see the CPU temperature. The output shows the current temperature readings of all sensors in the machine. The results include the temperature of each core and maximum thresholds.
3. To check SSD and hard drive temperatures, execute the following command:

The output shows the temperature of the selected disk.
4. To see which system components you can monitor, run sudo sensors-detect .
Answer YES to multiple scanning requests until the system scan is complete.
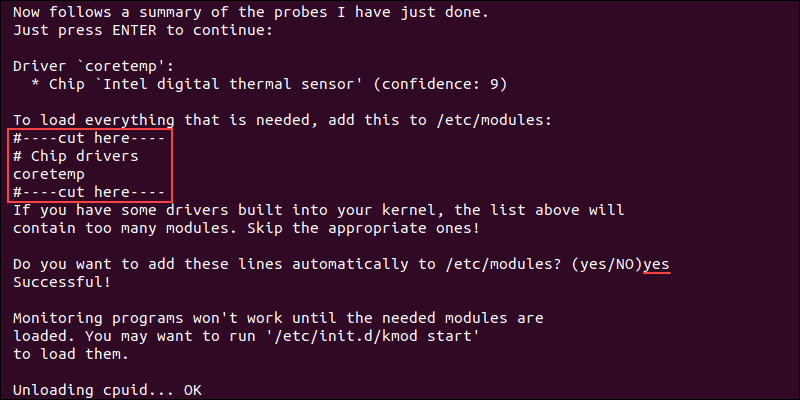
When the scan completes, the output shows the summary.
5. To ensure that system monitoring works, load the needed modules using the following command:

6. To run the sensors command repeatedly and get real-time data in the terminal, execute the following command:
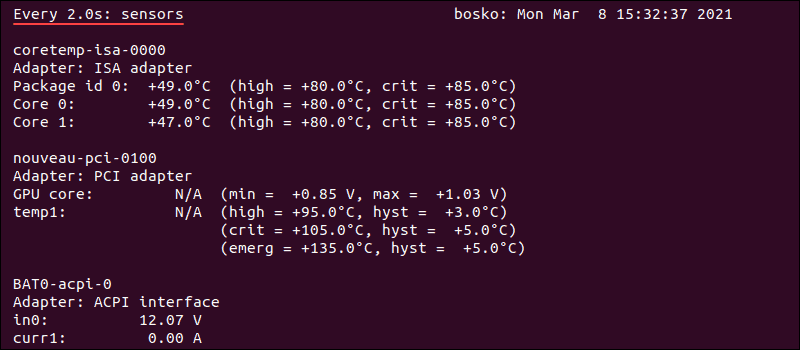
The output refreshes every two seconds and displays the current CPU temperature reading.
Note: To check CPU usage on Linux, read our tutorial on How to check CPU usage.
Check CPU Temperature Using Psensor
Psensor is a GUI app that allows you to monitor the temperature of various system components. This utility also allows you to monitor CPU usage and fan speed.
Psensor includes an applet indicator for Ubuntu, allowing you to display the temperature in the top panel to notify you when the temperatures get too high.
Install Psensor
Before installing Psensor, you need to install and configure Lm-sensors.
1. Run this command to install the necessary packages:
sudo apt install lm-sensors hddtemp2. Next, scan for sensors in your machine:
Answer YES to any scan requests until the scan is completed.
3. To make sure the packages are installed, execute the sensors command.
4. Update the package repository with sudo apt update .
5. Install Psensor using the following command:
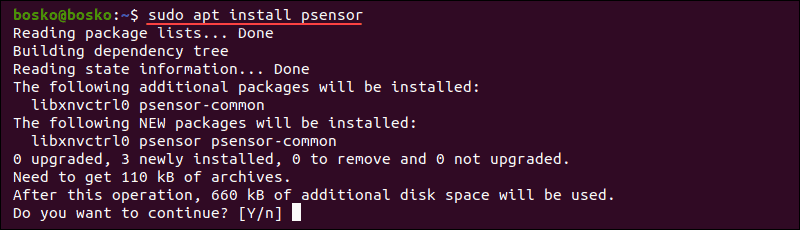
Answer YES and wait for the installation to finish.
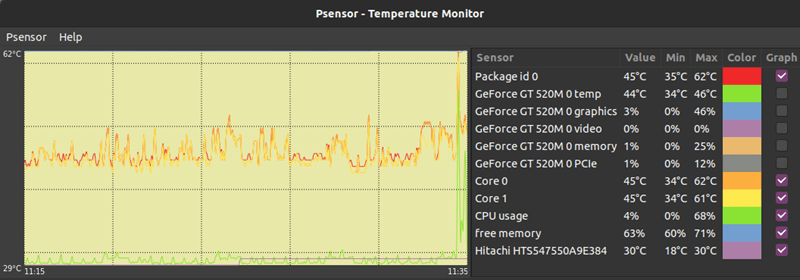
Using Psensor
Search for Psensor in the app menu and open the utility. The app displays a graph of the selected values and shows the CPU temperature, CPU and memory usage, free RAM, GPU temperature, and HDD temperature.
To configure Psensor and set which stats you want to see, follow these steps:
1. Click Psensor in the menu bar, followed by Preferences.
2. Check off the boxes for the options you want – whether Psensor launches on system startup, the update interval, graph colors, etc.

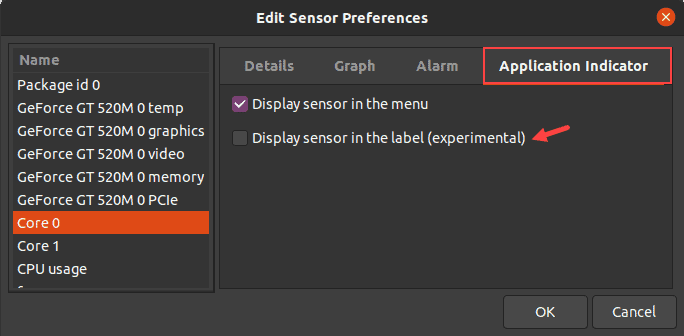
3. To show CPU or HDD temperatures in the top panel, go to Sensor Preferences under the Application Indicator. Enable the Display sensor in the label option.
Note: Learn more about monitoring CPU performance by referring to our article on Linux perf, a lightweight command-line utility.
Check Temperature Without Third-Party Utilities
There is a way to use the in-built utilities to check the CPU temperature if you don’t want to use third-party apps.
1. To check the CPU temperature without installing a third-party app, use the following command:
cat /sys/class/thermal/thermal_zone*/temp
The output shows the CPU temperature in the five-digit format. Here, 49000 means 49C.
2. If you get several thermal zones and different temperatures, execute the following command to see what a single thermal zone represents:
For example, run cat /sys/class/thermal/thermal_zone2/type to see the type of thermal zone 2.
The CPU temperature is in the zone labeled x86_pkg_temp.
3. To see what all the thermal zones are referring to, use:

The output shows the last stored temperature for that thermal zone in degrees Celsius. In this example, there is only one thermal zone, labeled x86_pkg_temp, which represents the CPU temperature.
You now know how to check CPU temperature on Linux using various utilities. The guide also showed how to configure the tools to display other information, such as GPU and HDD temperature.