- Create the bootable media
- How to make a bootable USB stick
- In Linux Mint
- In Windows, Mac OS, or other Linux distributions
- How to make a bootable DVD
- In Linux
- In Windows
- In Mac OS
- Install Linux Mint
- Installing Linux Mint on the computer
- How to Install Linux Mint 19 from USB Drive
- Downloading Linux Mint 19:
- Making Bootable USB Drive from Linux:
- Making Bootable USB Drive from Windows:
- Booting from the USB Drive:
- Installing Linux Mint 19:
- About the author
- Shahriar Shovon
Create the bootable media
The easiest way to install Linux Mint is with a USB stick.
If you cannot boot from USB, you can use a blank DVD.
How to make a bootable USB stick
In Linux Mint
Right-click the ISO file and select Make Bootable USB Stick , or launch Menu ‣ Accessories ‣ USB Image Writer .
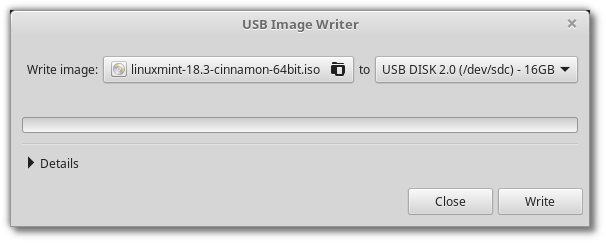
Select your USB device and click Write .
In Windows, Mac OS, or other Linux distributions
Download Etcher, install it and run it.
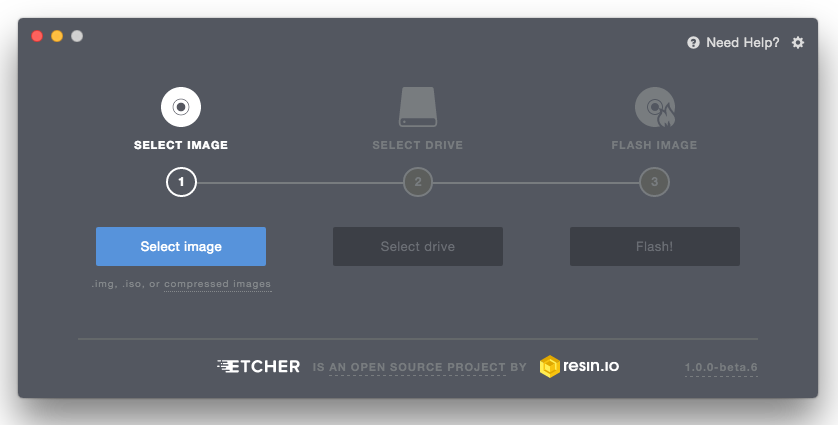
Click Select image and select your ISO file.
Click Select drive and select your USB stick.
How to make a bootable DVD
Optical discs are slow and burning to disc is prone to errors.
To prevent issues, burn at the lowest possible speed.
Burn the content of the ISO onto the DVD, not the ISO file itself. When finished, your DVD should contain directories such as boot and casper , it shouldn’t be an empty DVD containing an .iso file.
In Linux
In Windows
Right-click the ISO file and select Burn disk image .
To make sure the ISO was burned without any errors, select Verify disc after burning .
In Mac OS
Right-click the ISO file and select Burn Disk Image to Disc .
© Copyright 2017, Linux Mint Revision d8fbd844 .
Versions latest Downloads pdf html epub On Read the Docs Project Home Builds Free document hosting provided by Read the Docs.
Install Linux Mint
When you boot the computer from the USB stick (or DVD), Linux Mint starts a live session . It logs you in automatically as a user called mint and shows you a desktop with the installer on it:
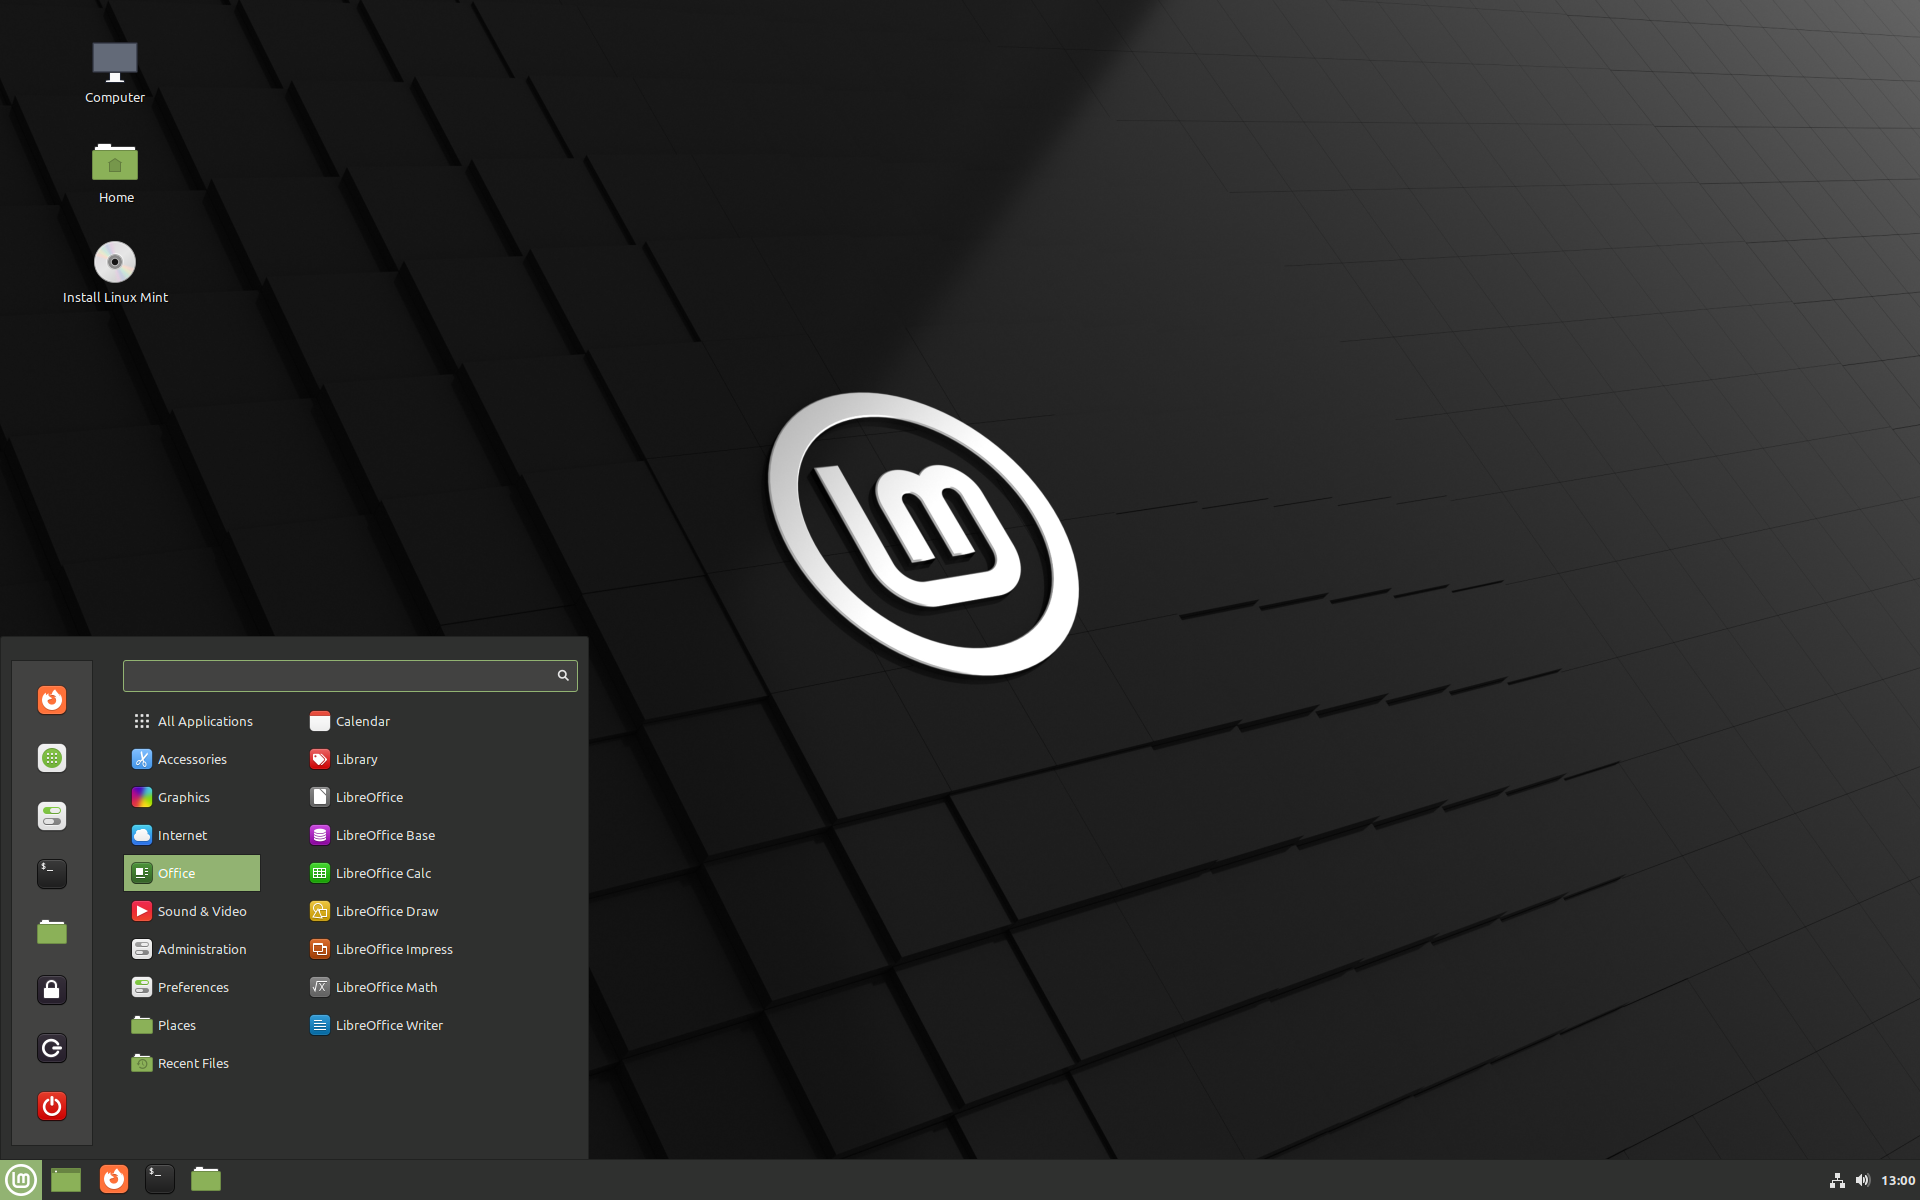
The Linux Mint live session
The live session is similar to a normal session (i.e. to Linux Mint once it is permanently installed on the computer), but with the following exceptions:
- The Live session is slower (it is loaded from a USB stick or DVD as opposed to a SSD or HDD).
- Changes you make in the live session are not permanent. They are not written to the USB stick (or DVD) and they do not impact the system installed by the installer.
- Some applications work differently (or not at all) in the live session (Timeshift, Flatpak, Update Manager, Welcome Screen..etc.).
The username for the live session is mint . If asked for a password press Enter .
Installing Linux Mint on the computer
To permanently install Linux Mint on your computer:
If Linux Mint is the only operating system you want to run on this computer and all data can be lost on the hard drive, choose Erase disk and install Linux Mint .
Encrypt the new Linux Mint installation for security refers to full disk encryption. At this stage of the installation your keyboard layout wasn’t yet selected so it is set to en_US. If you decide to use this option, keep this in mind when entering a password. Note that there are issues with this option and some NVIDIA drivers. If you are new to Linux use home directory encryption instead (you can select it later during the installation).
If another operating system is present on the computer, the installer shows you an option to install Linux Mint alongside it. If you choose this option, the installer automatically resizes your existing operating system, makes room and installs Linux Mint beside it. A boot menu is set up to choose between the two operating systems each time you start your computer.
If you want to manage the partitions or specify which partitions to use, select Something else .
Linux Mint requires one partition to be mounted on the root / directory.
The Linux Mint operating system (without additional software or personal data) takes roughly 15GB, so give this partition a decent size (100GB or more).
ext4 is recommended. It is the most popular Linux filesystem.
Also create a swap partition. This partition is used for hibernation and as a safety buffer in case your computer runs out of RAM. Give this partition a size equal to the amount of RAM in your computer.
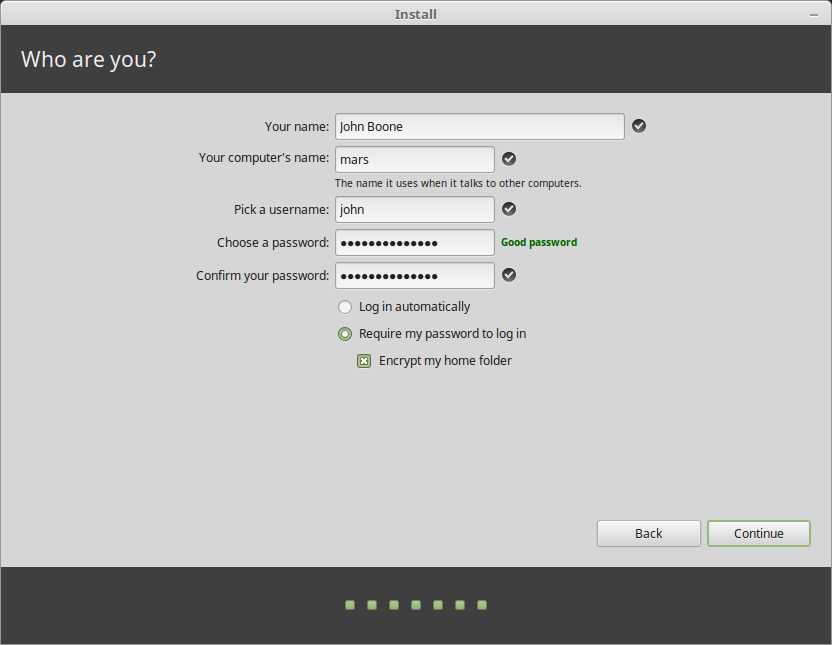
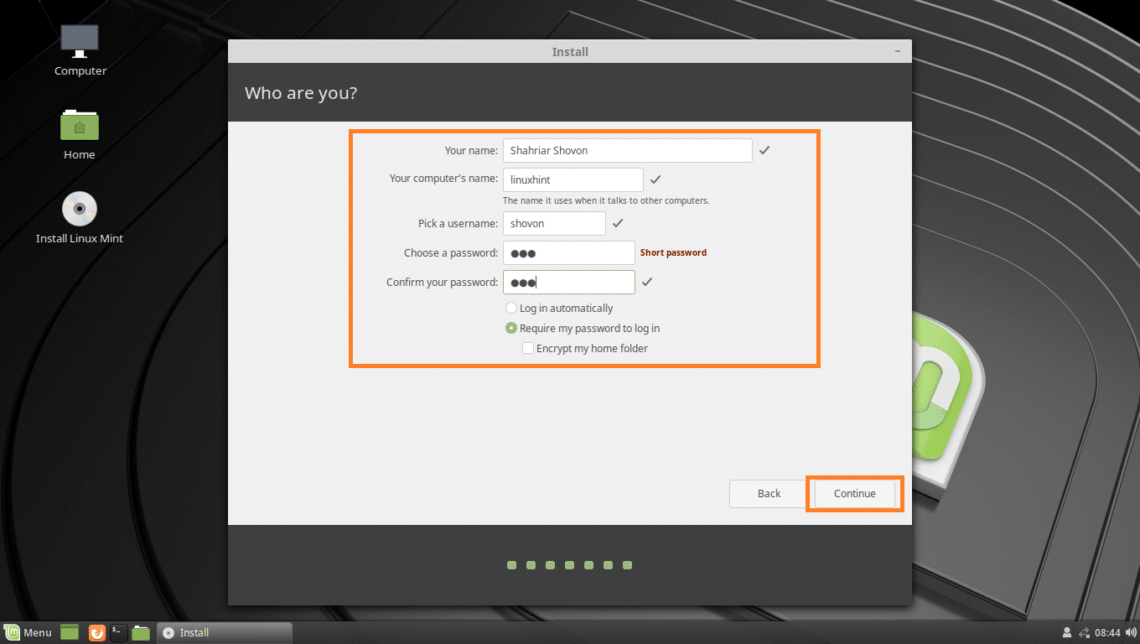
Your name can be your real name, but it doesn’t have to be. It is only used locally, in the screensaver and on the login screen.
Your username is what you log in as, and your hostname is the name of your computer on the network.
To prevent bugs only use lowercase characters, with no punctuation or accentuation.
To protect your personal data against local attacks (people around you, or in case your computer gets stolen), tick Encrypt my home folder .
When the installation is finished, click Restart Now .

The computer will then start to shut down and ask you to remove the USB disk (or DVD). Upon reboot, your computer should show you a boot menu or start your newly installed Linux Mint operating system.
© Copyright 2017, Linux Mint Revision d8fbd844 .
Versions latest Downloads pdf html epub On Read the Docs Project Home Builds Free document hosting provided by Read the Docs.
How to Install Linux Mint 19 from USB Drive
![]()
Linux Mint is based on Ubuntu Linux distribution. Linux Mint 19 codename Tara is based on Ubuntu 18.04 LTS. So all the software that is available on Ubuntu 18.04 LTS is also available on Linux Mint 19. Linux Mint 19 also has some extra softwares.
Linux Mint 19 features a nice looking Cinnamon desktop environment. Linux Mint 19 also has images for MATE and XFCE desktop environment.
Beta version of Linux Mint 19 is available for download at the time of this writing. Stable version should be released at the end of June according to Linux Mint’s blog.
In this article, I will show you how to make a Linux Mint 19 bootable USB drive and install Linux Mint 19 from it. Let’s get started.
Downloading Linux Mint 19:
When the stable version of Linux Mint 19 will be released, you can download an image of Linux Mint 19 from https://linuxmint.com/download.php
Linux Mint 19 “Tara” Cinnamon BETA can be downloaded from https://blog.linuxmint.com/?p=3581
Linux Mint 19 “Tara” MATE BETA can be downloaded from https://blog.linuxmint.com/?p=3582
Linux Mint 19 “Tara” XFCE BETA can be downloaded from https://blog.linuxmint.com/?p=3583
I am going use Linux Mint 19 “Tara” Cinnamon BETA in this article.
Making Bootable USB Drive from Linux:
If you have a Linux distribution such as Ubuntu/Debian/Fedora etc installed on your computer, you can make a bootable USB drive of Linux Mint 19 “Tara” with the following command:
NOTE: Here /dev/sdb is the USB drive. You may have a different identifier. Make sure you check with sudo lsblk before you run this command.
Once the process is completed, you should be able to boot from the USB drive.
Making Bootable USB Drive from Windows:
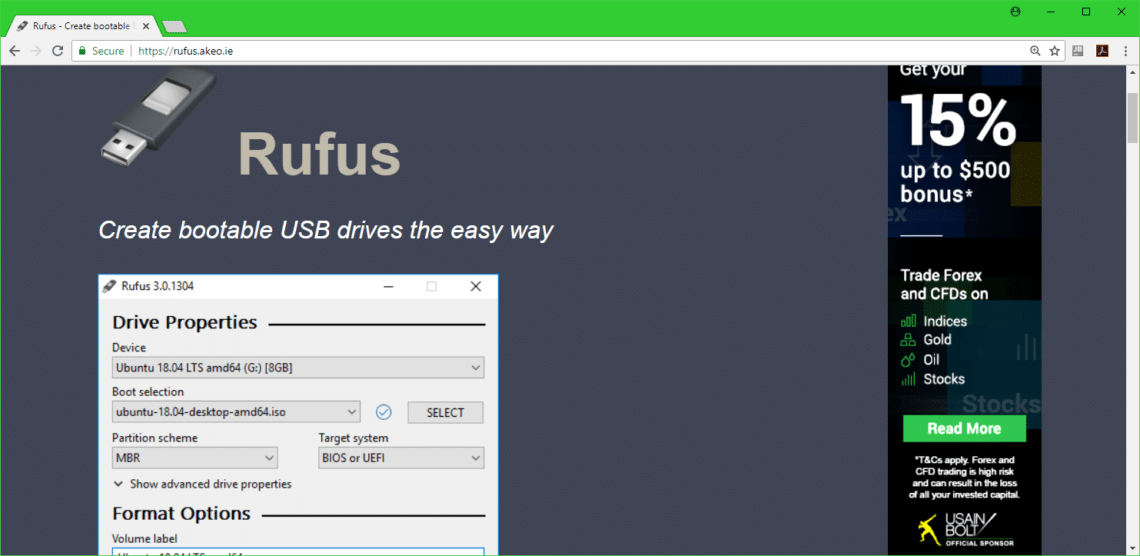
From Windows, Rufus can be used to make a Linux Mint 19 bootable USB drive.
First go to the official website of Rufus at https://rufus.akeo.ie/ and you should see the following window.
Scroll down a little bit to the Download section and click on Rufus Portable link as marked in the screenshot below.
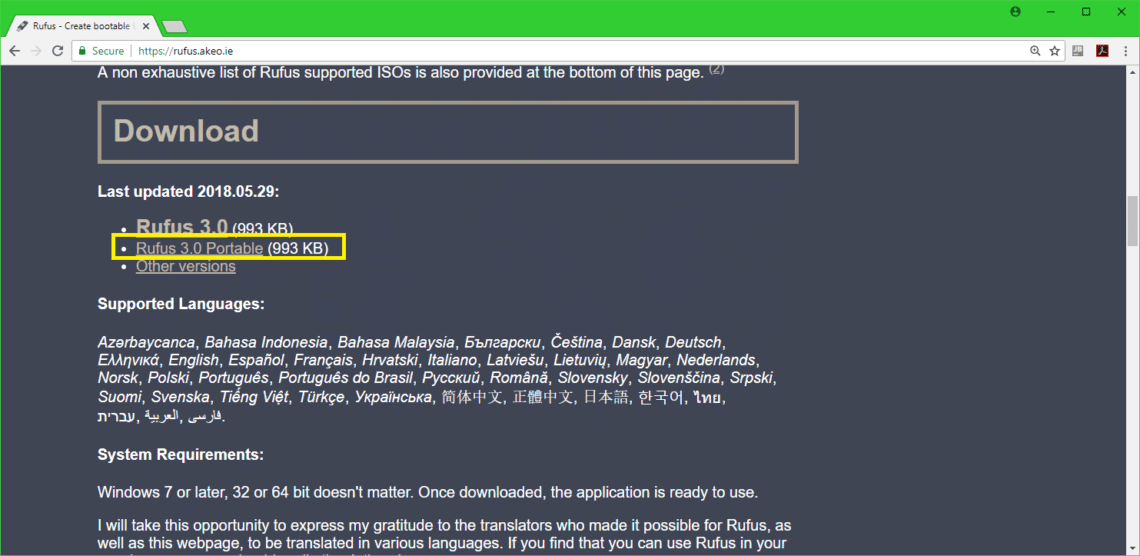
Rufus Portable should be downloaded.
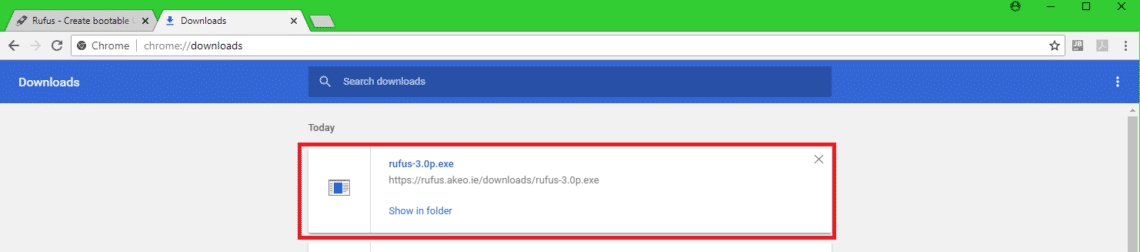
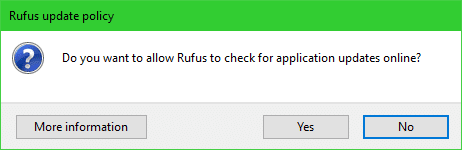
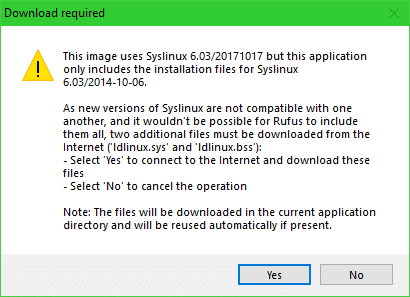
Now run Rufus Portable.
Click on No.
Rufus Portable should start.
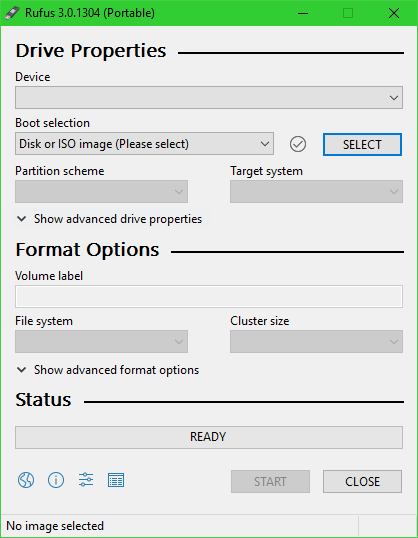
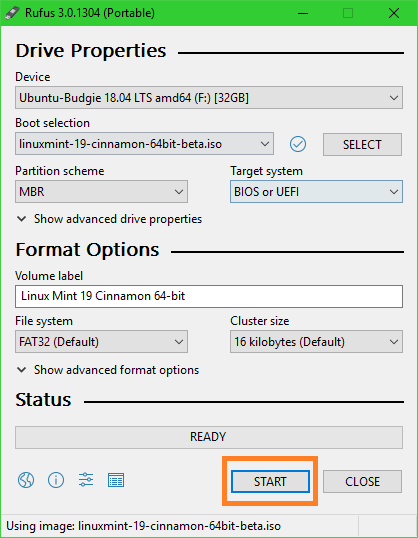
Now insert your USB drive. Rufus should detect and select it as you can see from the marked section of the screenshot below.
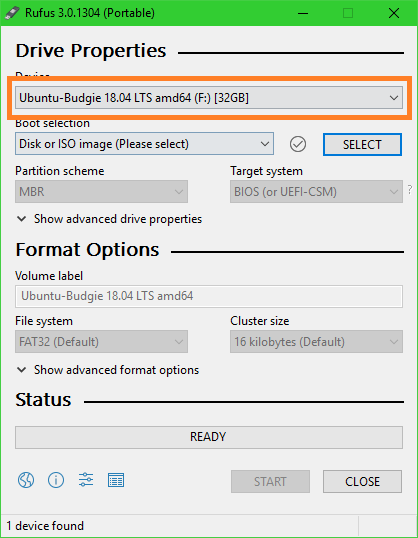
Now click on Select.
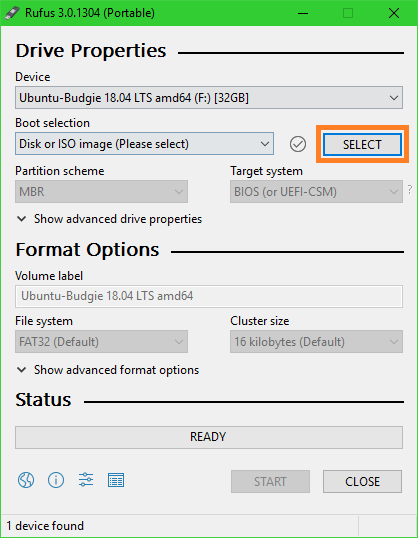
A file picker should be opened. Select your Linux Mint 19 iso file you just downloaded and click on Open.

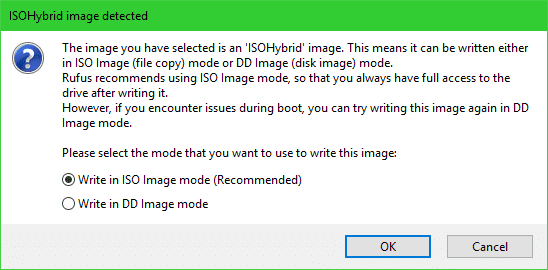
It should be selected. Now click on START as marked in the screenshot below.
Click on YES.
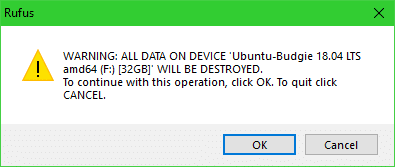
If you don’t know what it is, just leave the default and click on OK.
All the data of your USB drive should be erased. If you don’t have anything important on your USB drive, click on OK. Otherwise, make a backup of your data and try again.
It should take a while for the process to complete.
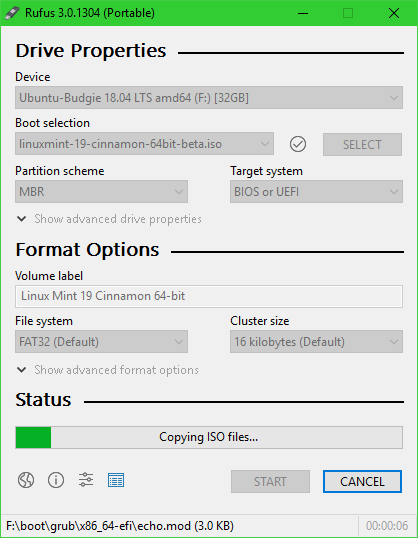
Once it’s completed, you can click on CLOSE.

You USB drive is now ready.
Booting from the USB Drive:
Now that you have a bootable USB drive of Linux Mint 19, you can boot from it and install Linux Mint 19 on your computer. First insert your USB drive to your computer. Now you have to select your USB drive from the BIOS of your computer. Usually you press F2 or Delete or some other keys just after you pressed the power button of your computer. It depends on the motherboard of your computer. Please check the manual of your Motherboard for more information.
Once you select your USB drive from the BIOS, you should see the following window. Select Start Linux Mint 19 Cinnamon 64-bit and press .
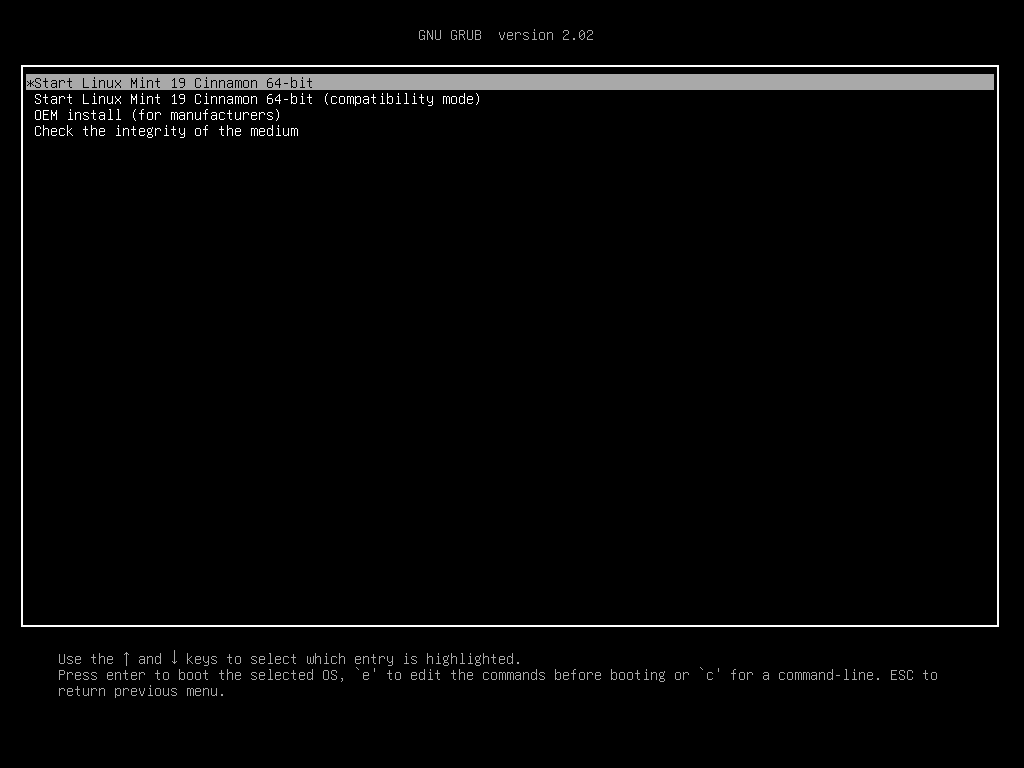
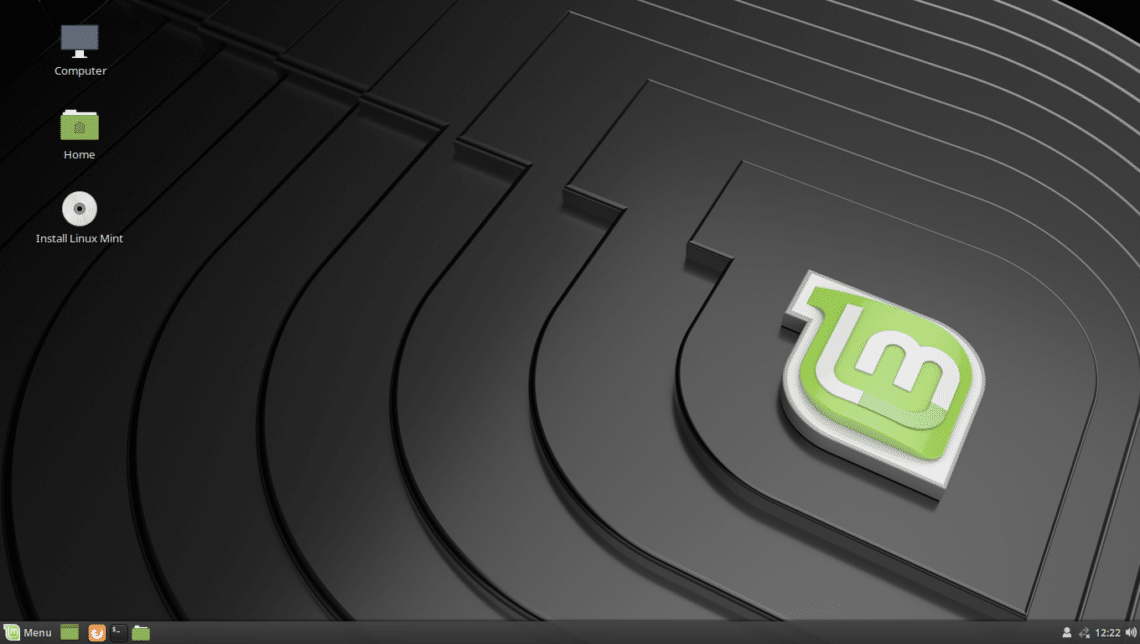
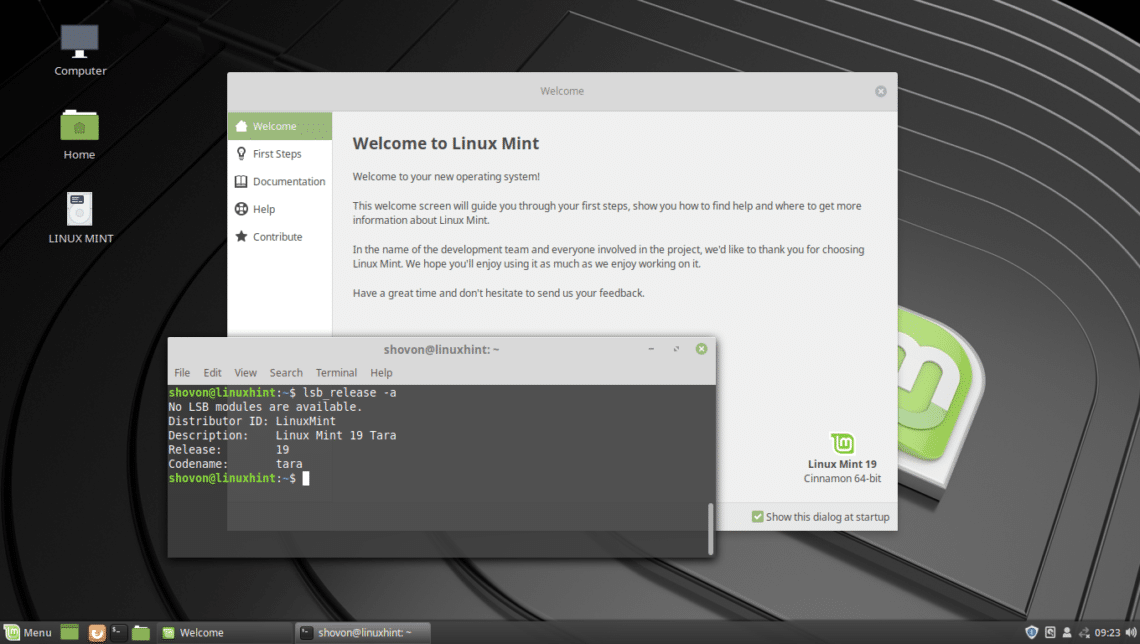
You should be booted into the Linux Mint 19 Cinnamon Live DVD.
Installing Linux Mint 19:
In this section, I will show you how to install Linux Mint 19 on your computer.
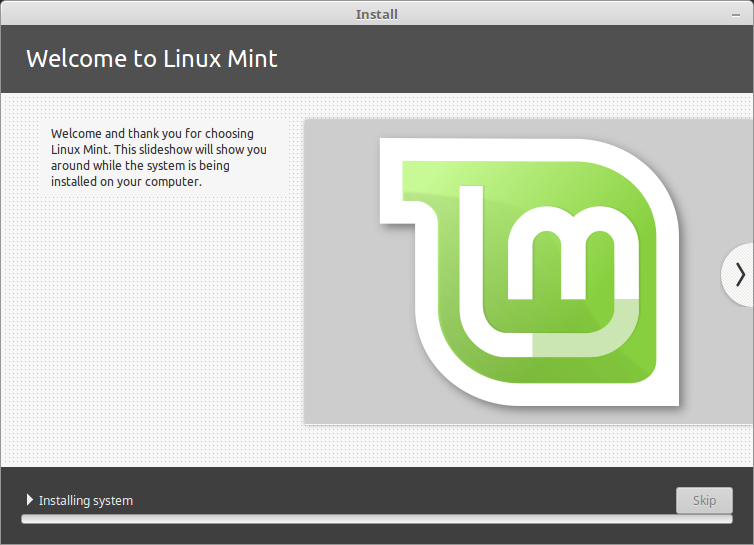
First double click on Install Linux Mint icon as marked in the screenshot below.
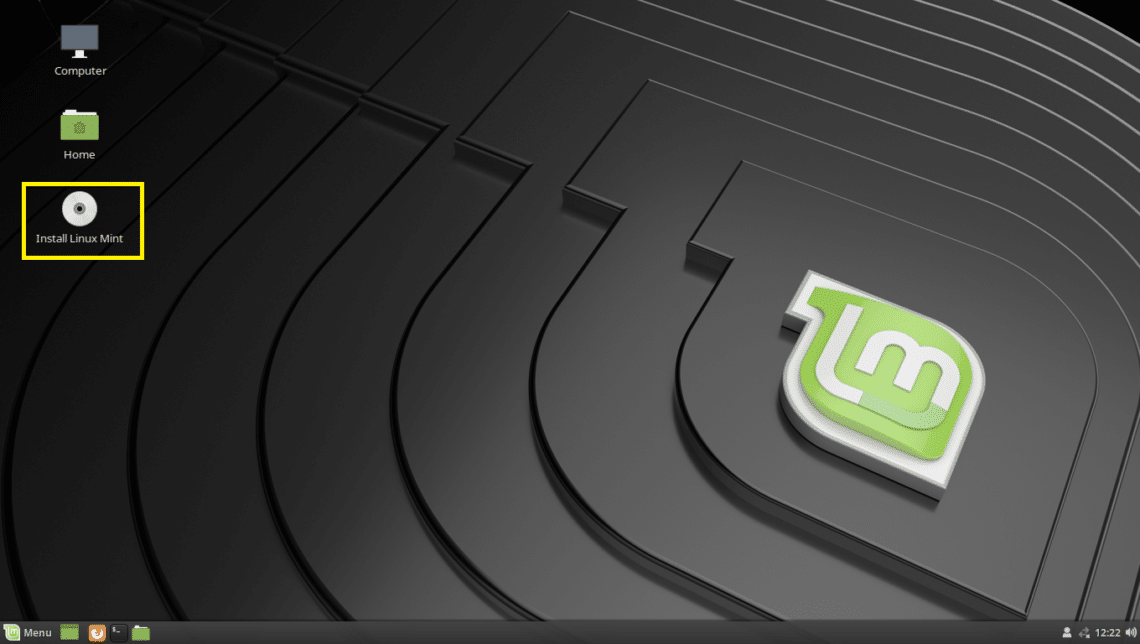
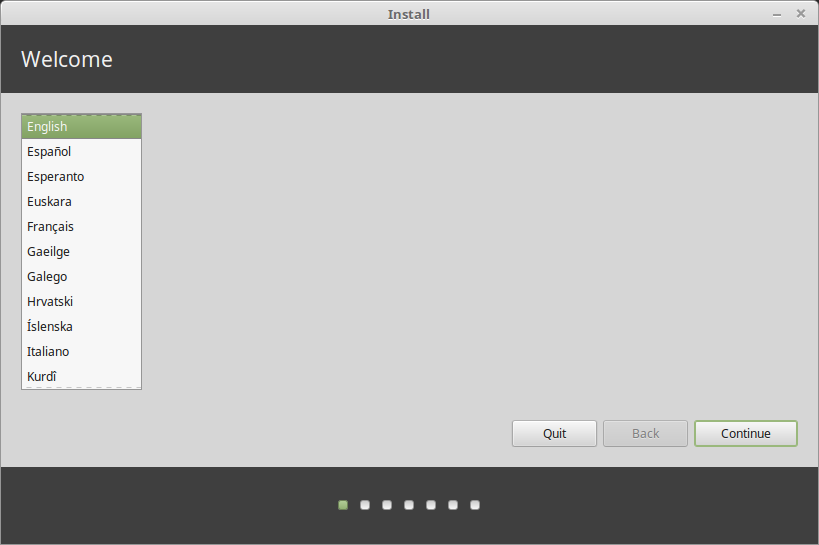
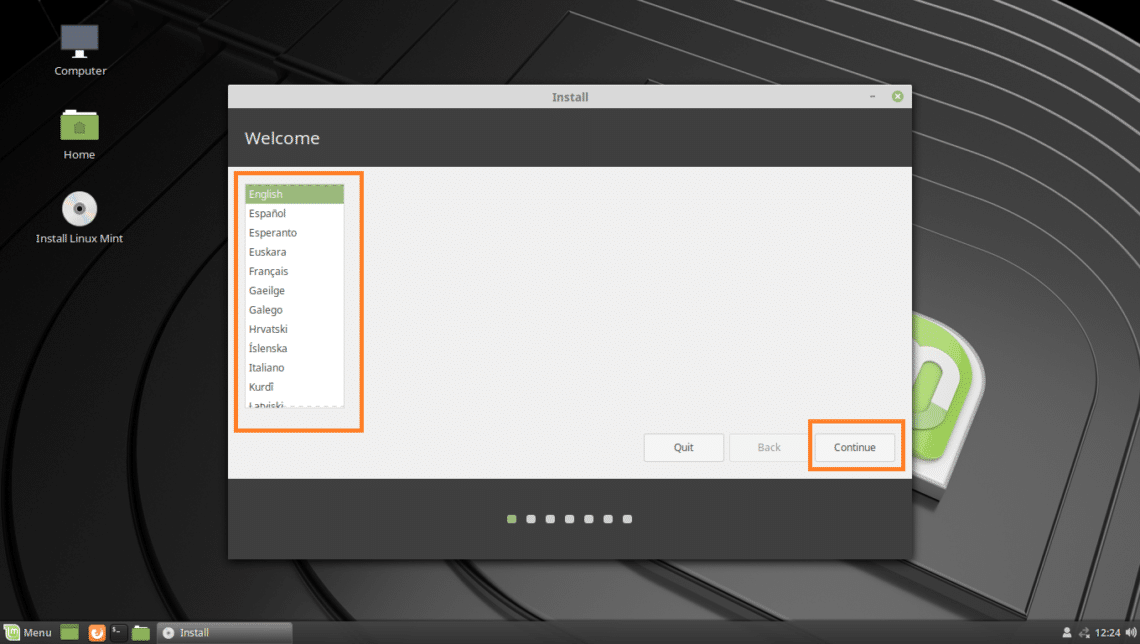
The Linux Mint 19 installer should start. Select your language and click on Continue.
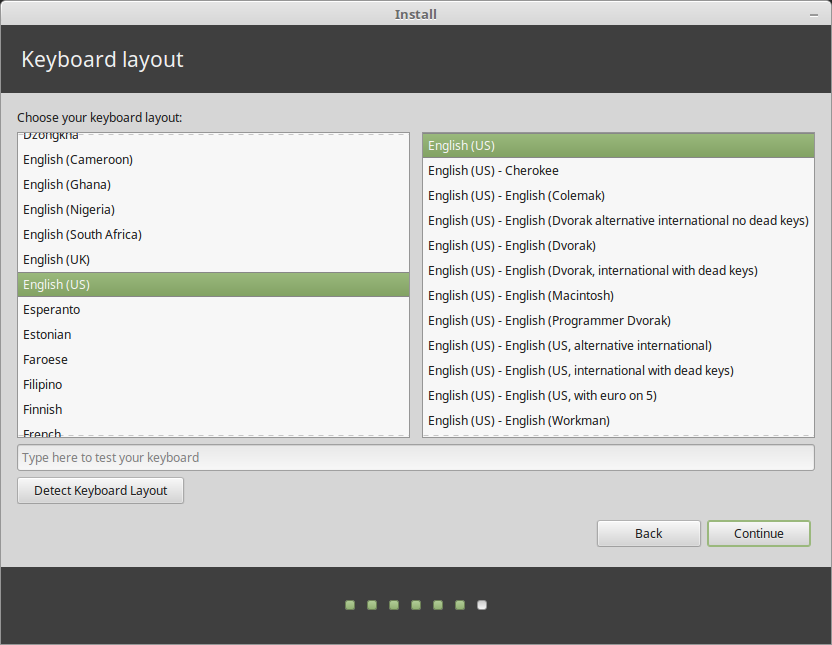
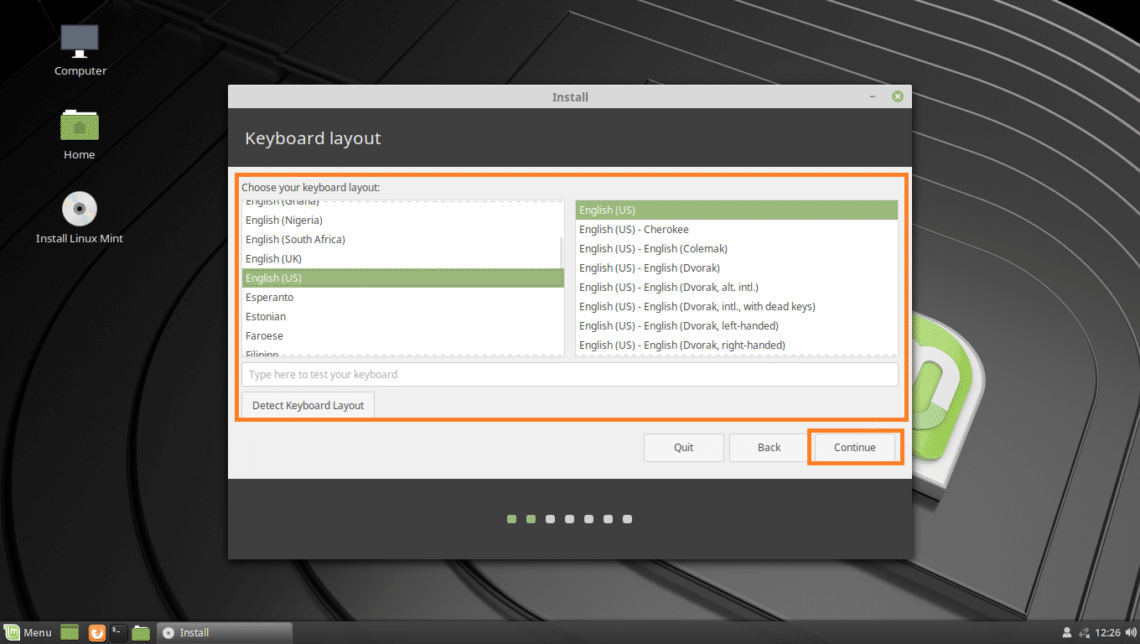
Now select your Keyboard layout and click on Continue.
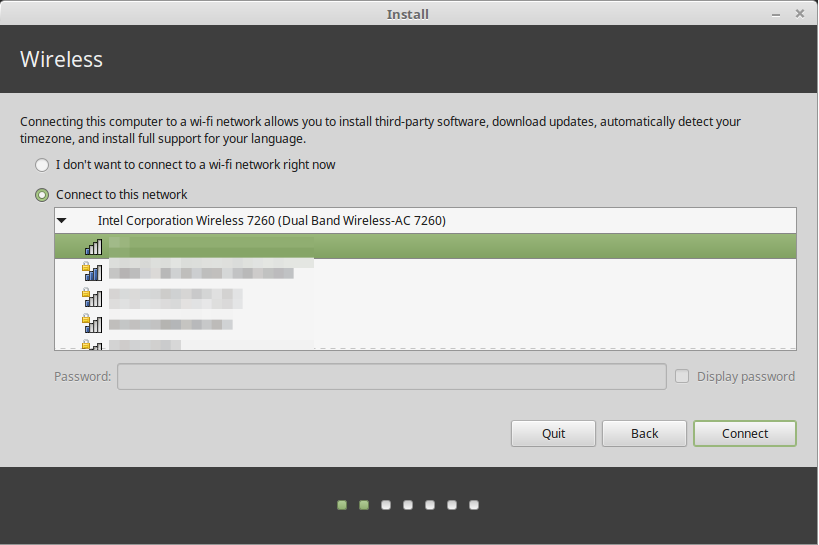
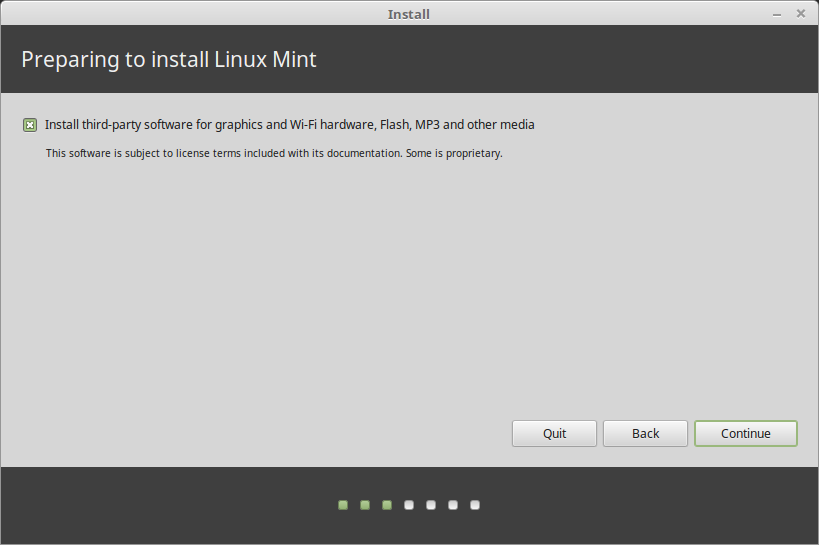
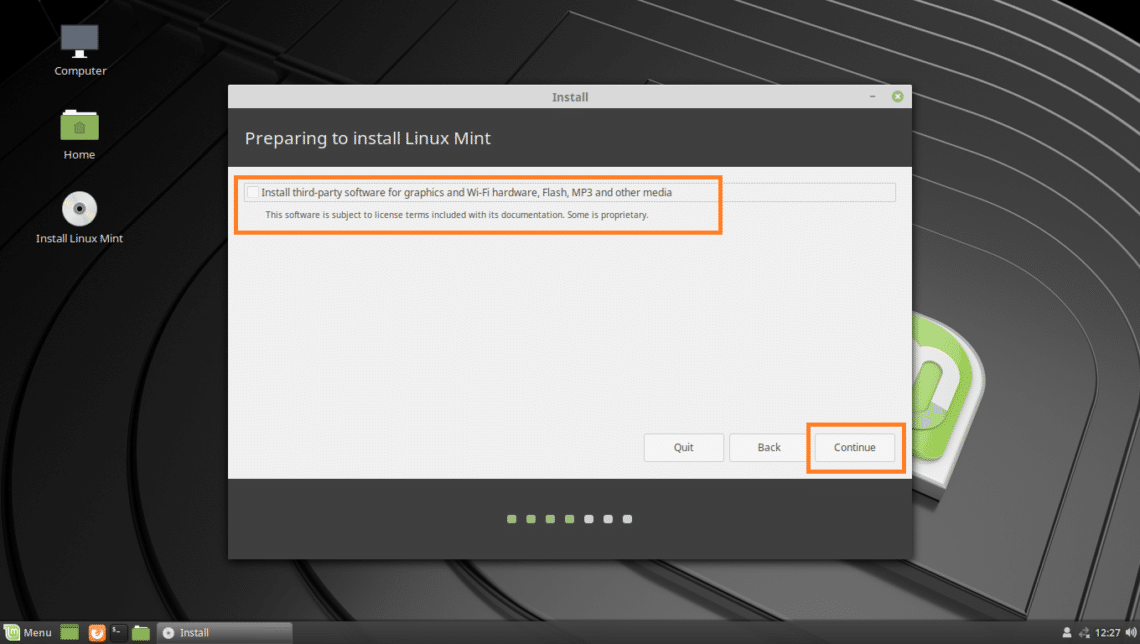
If you want to install third party drivers and multimedia codecs while installing Linux Mint 19, mark the Install third-party software for graphics and Wi-Fi hardware, Flash, MP3 and other media as marked in the screenshot below. You will need internet connectivity for that. Once you’re done, click on Continue.
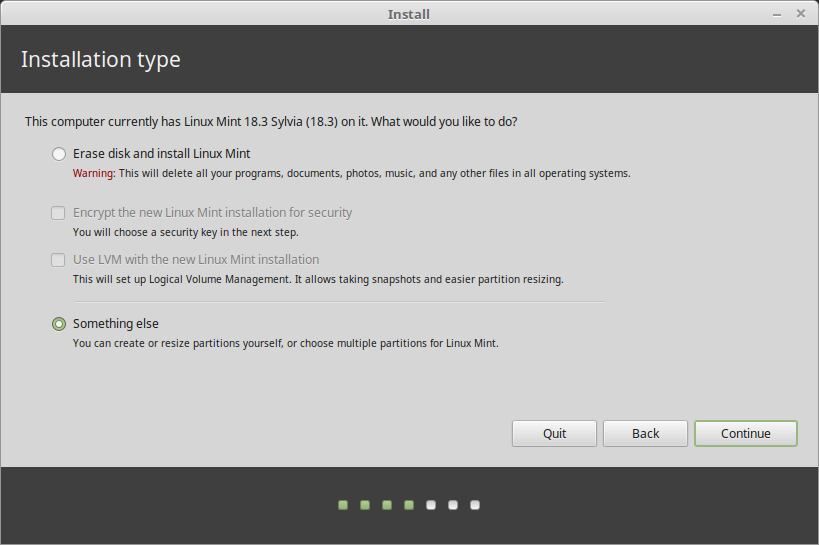
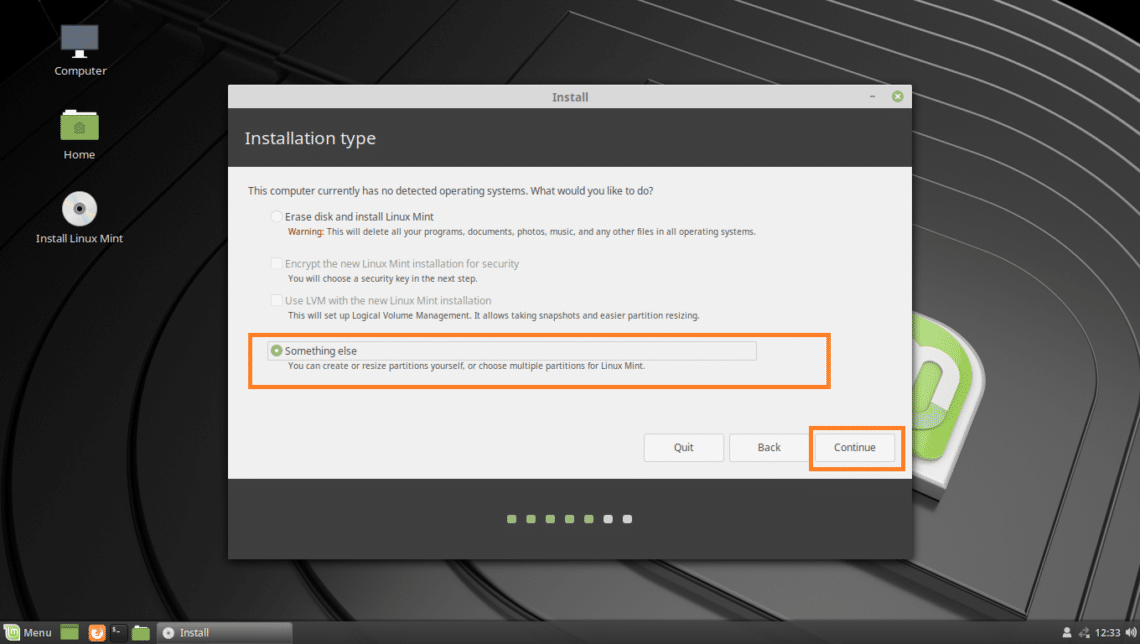
If you want to erase everything and install Linux Mint 19 on your hard drive, the easiest option is Erase disk and install Linux Mint.
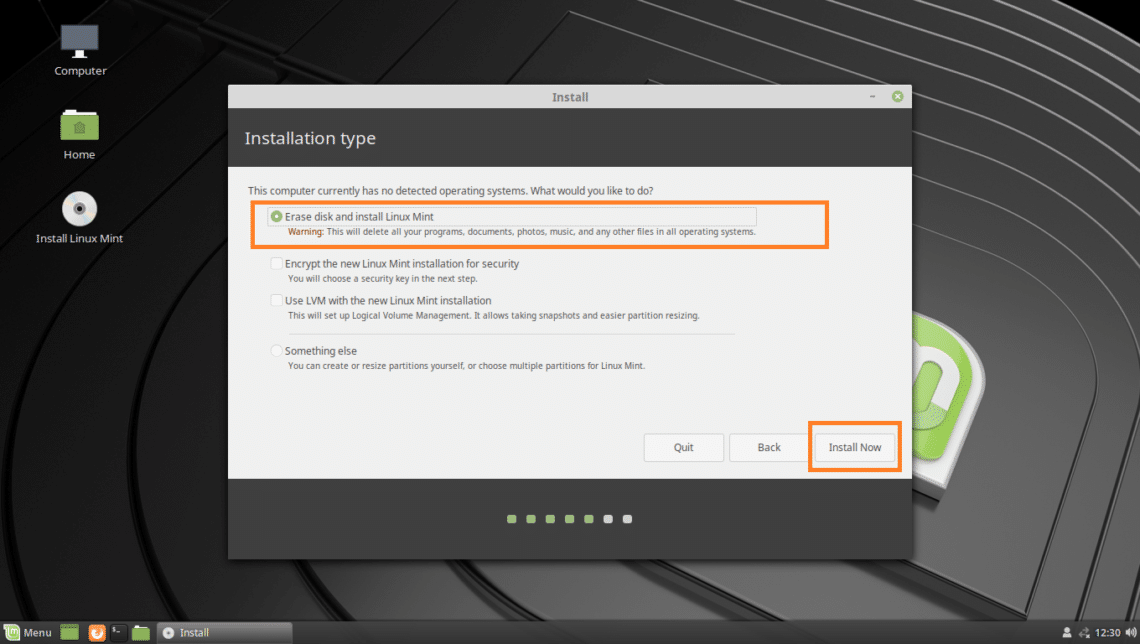
But if you want to dual boot Windows and Linux, then you will have to select Something else. In this case you can do manual partitioning and install Linux Mint 19 on custom partitions. That’s what I am going to show you in this article.
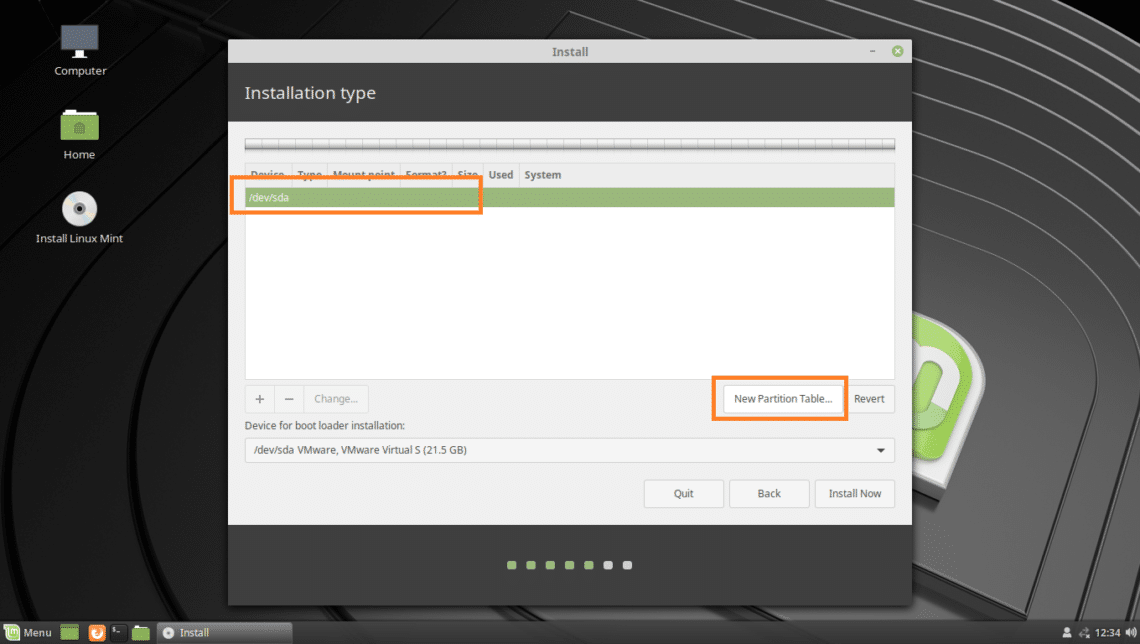
You may not have a partition table on your hard drive. Just select your hard drive and click on New Partition Table…
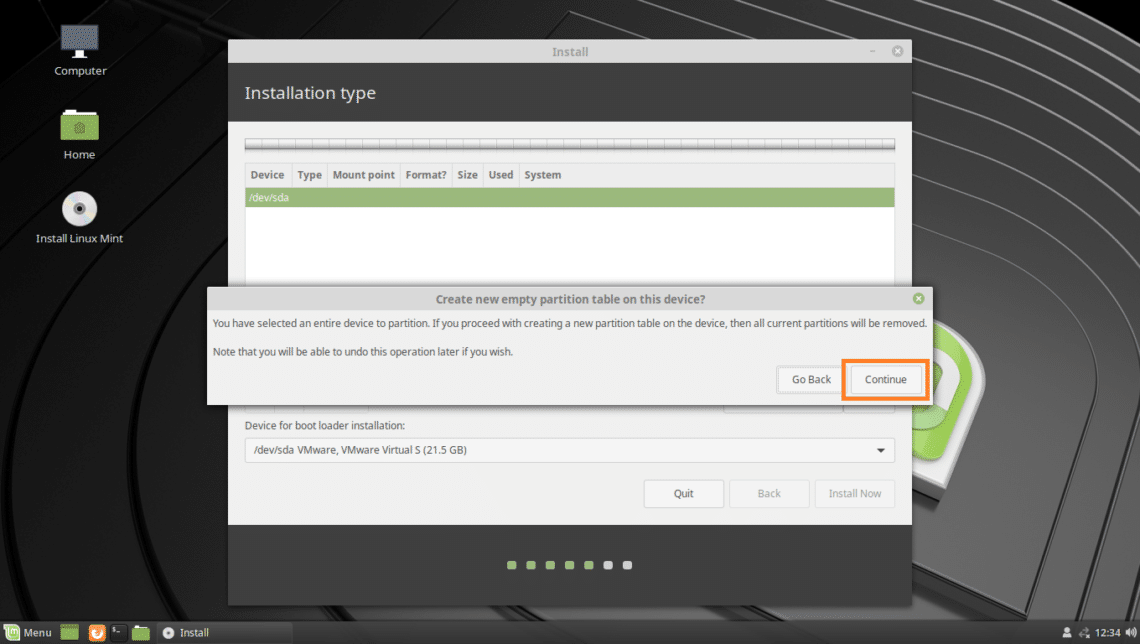
Now click on Continue.
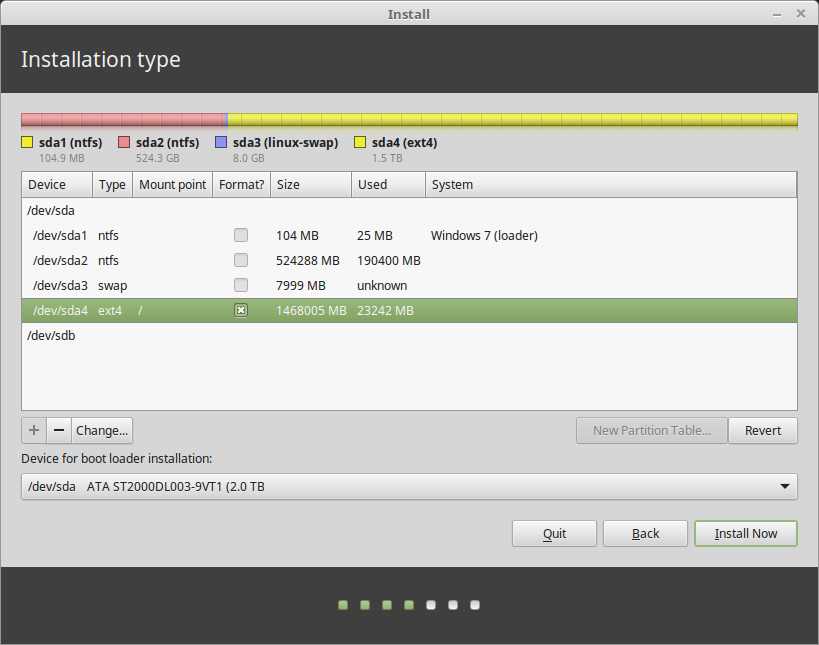
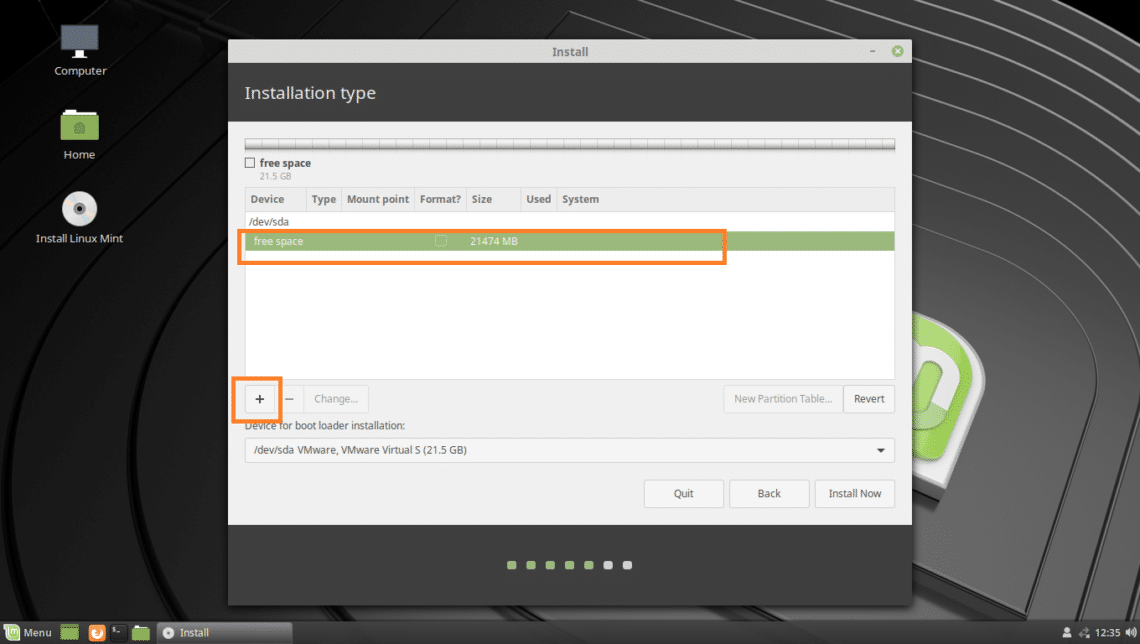
For UEFI installation, you need an EFI System partition and a Root(/) partition. For BIOS installation, you only need a Root(/) partition. I am going for the UEFI installation.
To create a new partition, select free space, and click on the + button.
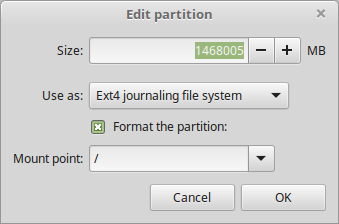
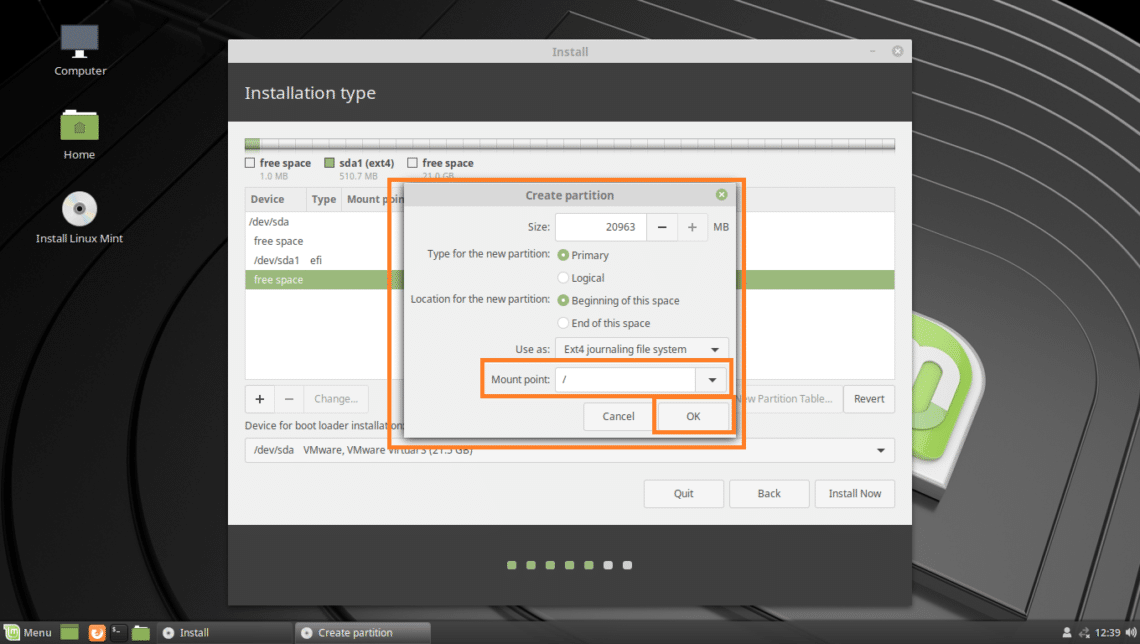
On the Create partition window, make sure the following options are selected. Once you’re done, click on OK. EFI System Partition should be 512 MB in size.

Now create a Root(/) partition with the rest of the free space. Make sure the Mount point is set to /. Once you’re done, click on OK.
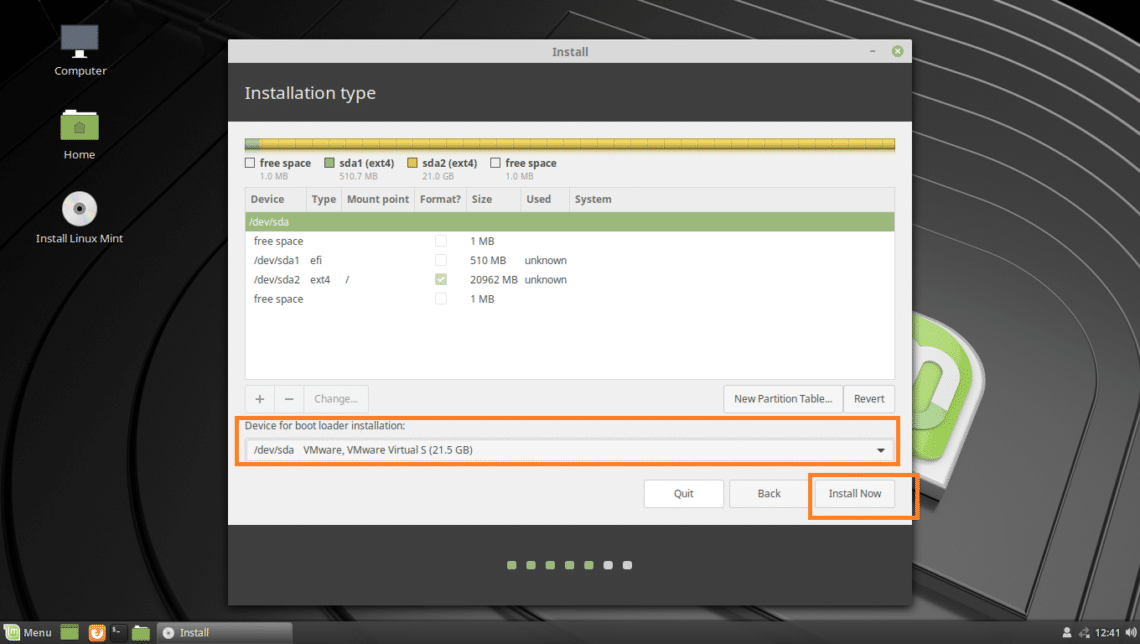
Now make sure the correct Device for boot loader installation is selected and then click on Install Now.
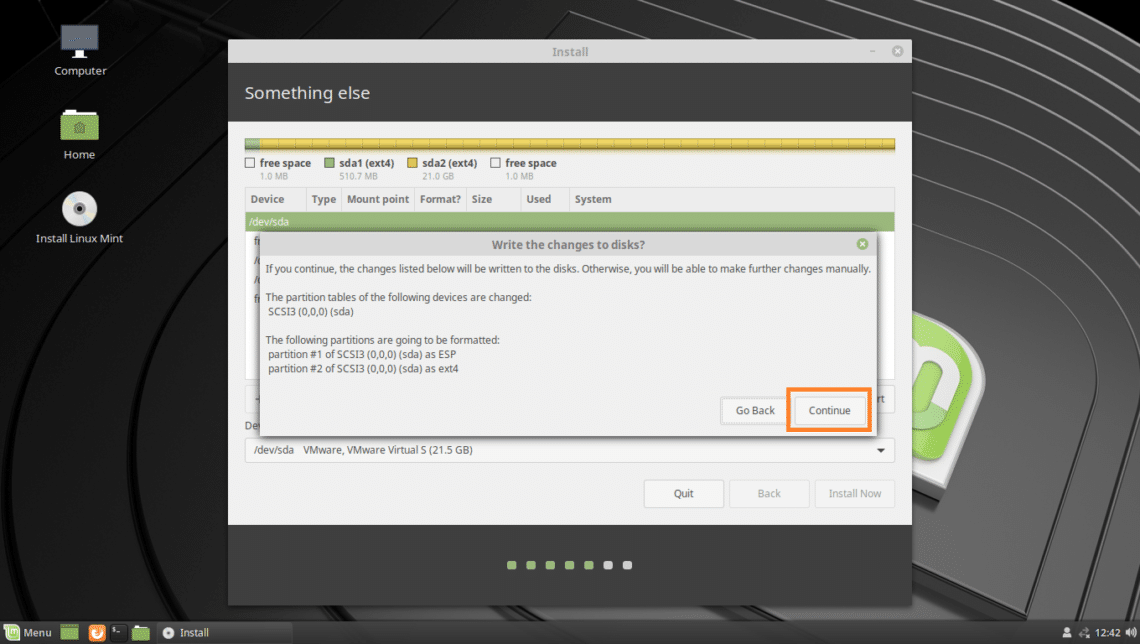
Click on Continue.
You may see this warning, just click on Continue.
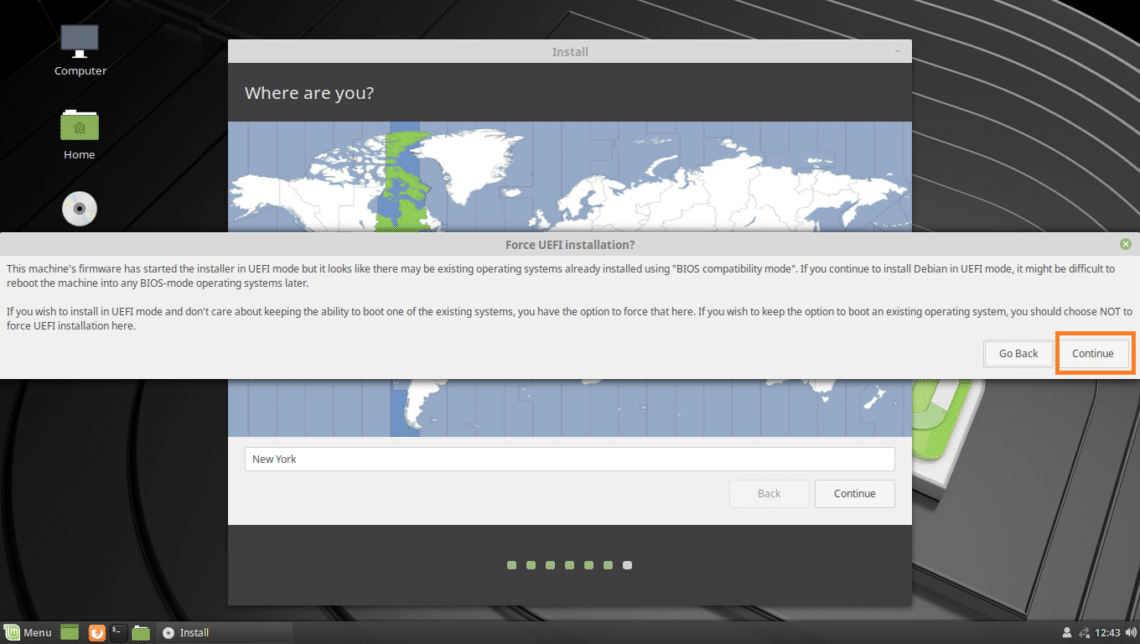
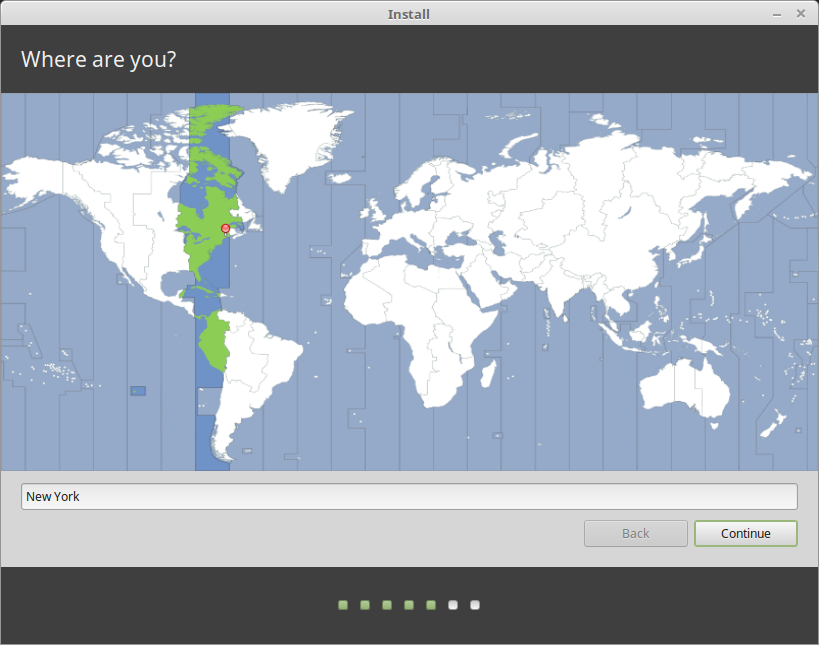
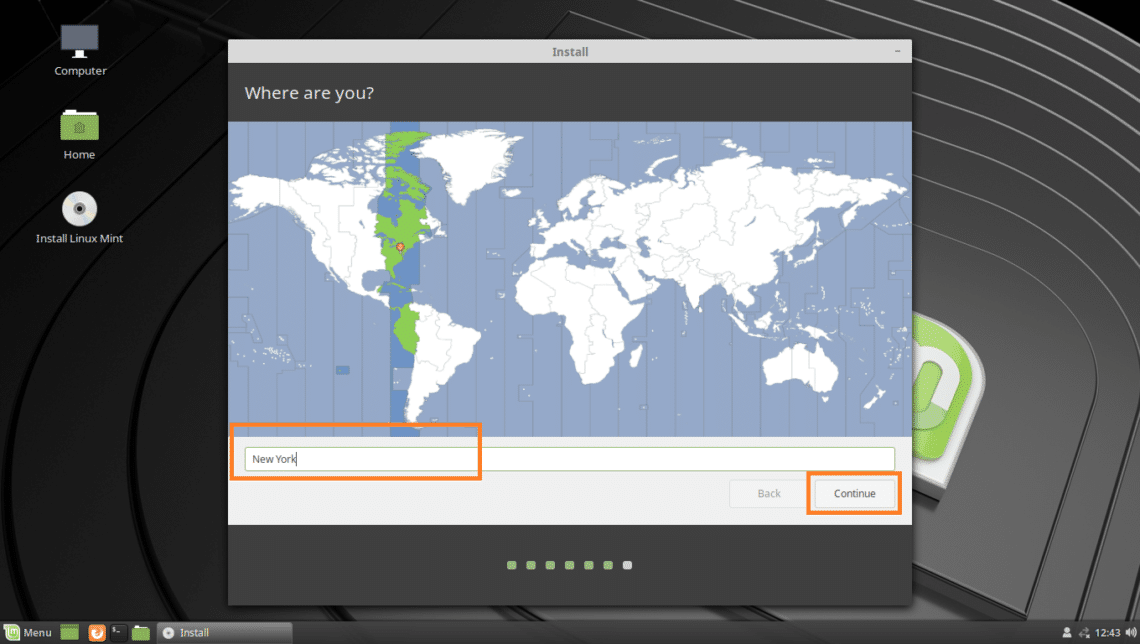
Now select your location and click on Continue.
Now fill in your personal details and click on Continue.
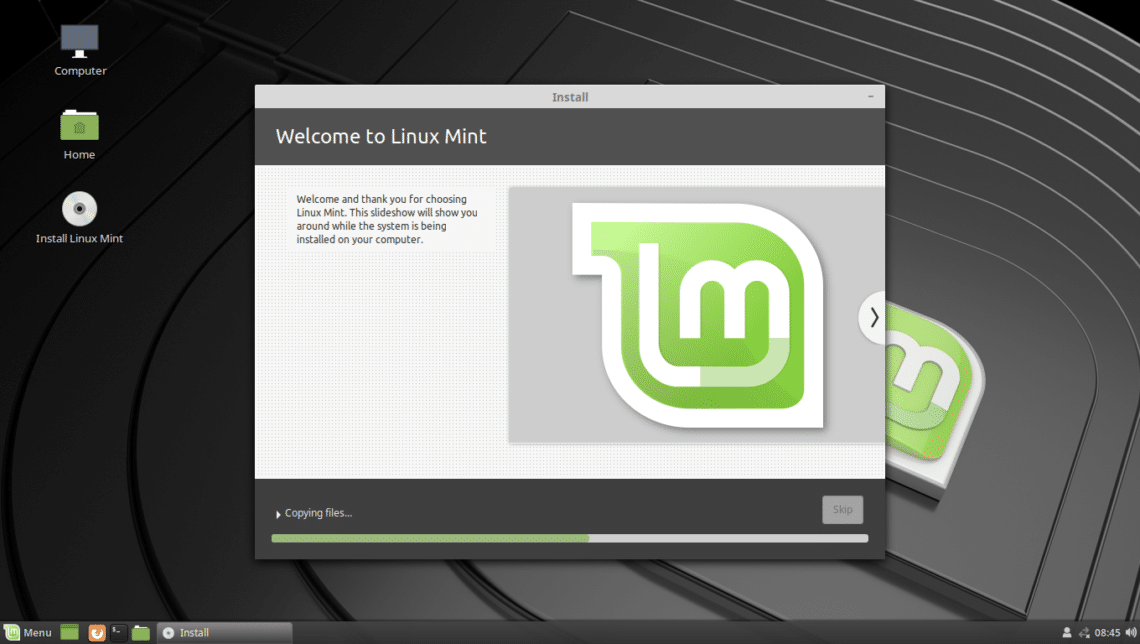
The installation should start.
Once the installation is complete, click on Restart Now.
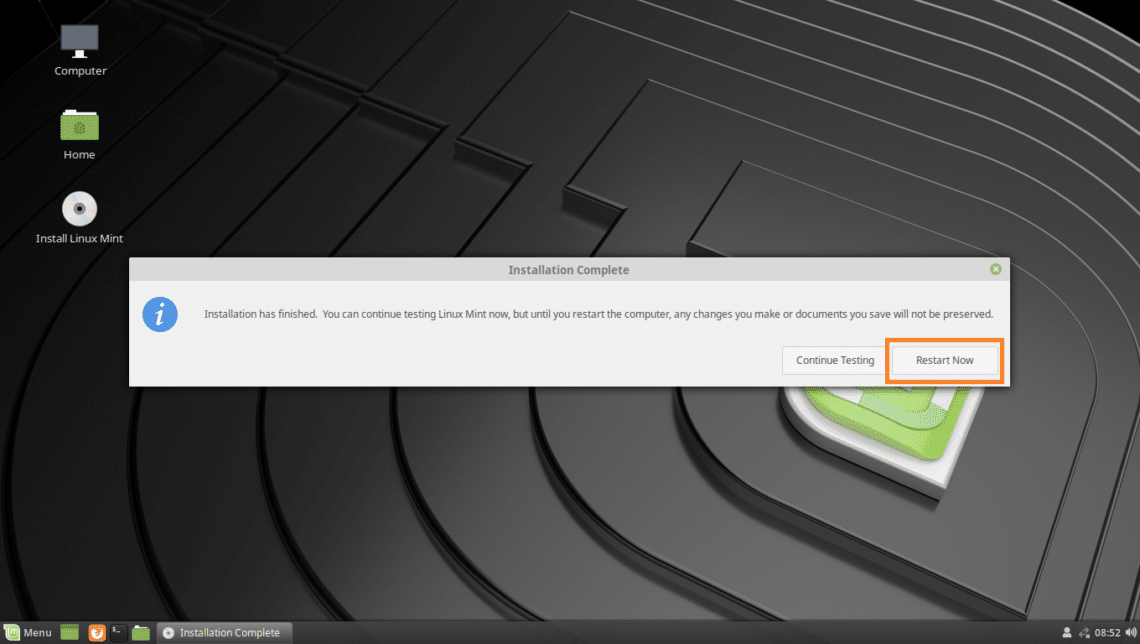
Your computer should restart and once it starts you should be booted into your newly installed Linux Mint 19 operating system.
Linux Mint 19 Cinnamon Desktop Environment:
That’s how you make bootable USB drive of Linux Mint 19 and install Linux Mint 19 from the USB drive. Thanks for reading this article.
About the author
Shahriar Shovon
Freelancer & Linux System Administrator. Also loves Web API development with Node.js and JavaScript. I was born in Bangladesh. I am currently studying Electronics and Communication Engineering at Khulna University of Engineering & Technology (KUET), one of the demanding public engineering universities of Bangladesh.