Installation of Linux Mint 21 [Cinnamon Edition] Desktop
Linux Mint is a modern, polished, easy-to-use, and comfortable community-driven GNU/Linux desktop distribution based on the popular Ubuntu Linux distribution. It is a great and recommended distribution for computer users switching from Windows or Mac OS X operating system to the Linux platform.
Linux Mint 21 code-named “Vanessa” is the latest version of the popular Linux Mint desktop operating system that is available in three versions, namely Cinnamon, Xfce, and MATE. It is an LTS (Long Term Support) release that is built atop Ubuntu 22.04 and will be supported until 2027.
Linux Mint 21 ships with several updated software, improvements, and many new features that will offer you a more pleasant desktop experience:
This guide will walk you through the steps to install Linux Mint 21 Cinnamon edition, but the steps below also work for Mate and XFCE editions.
Before you proceed, ensure that you have a 4 GB USB drive for the installation medium and a stable broadband internet connection to download the ISO image.
Step 1: Download Linux Mint 21 ISO Images
First of all, you need to download the ISO image from the links below:
Once you downloaded the preferred desktop edition, make sure to verify the ISO image by generating the SHS256 sum as shown:
$ sha256sum -b linuxmint-21-cinnamon-64bit.iso [for Cinnamon] $ sha256sum -b linuxmint-21-mate-64bit.iso [for Mate] $ sha256sum -b linuxmint-21-xfce-64bit.iso [for XFCE]

Compare it with the sum presented in the sha256sum.txt which you can download from the ISO download page as highlighted in the following screenshot.

Next, you need to create a bootable media-USB flash/DVD using the Rufus utility or these useful USB creator tools in order to create a Linux Mint bootable USB drive.
Step 2: Installation of Linux Mint 21 Cinnamon Edition
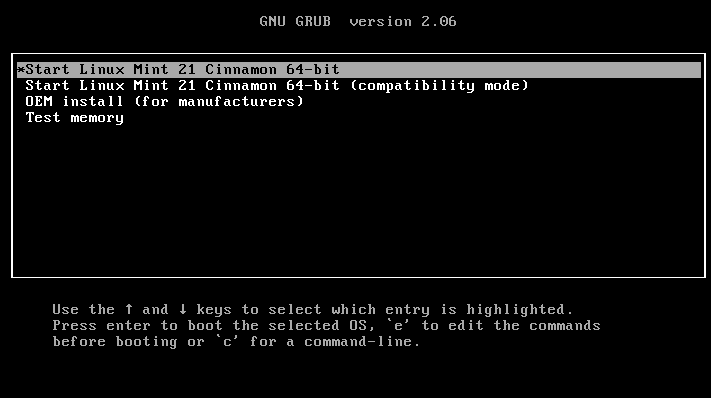
Now plug in the bootable USB flash drive into your computer and reboot. Once the system has rebooted, press your BIOS key for selecting the boot device and select the USB drive to boot from it. Once the system has booted, from the grub menu, select the first option and click enter to load Linux Mint.
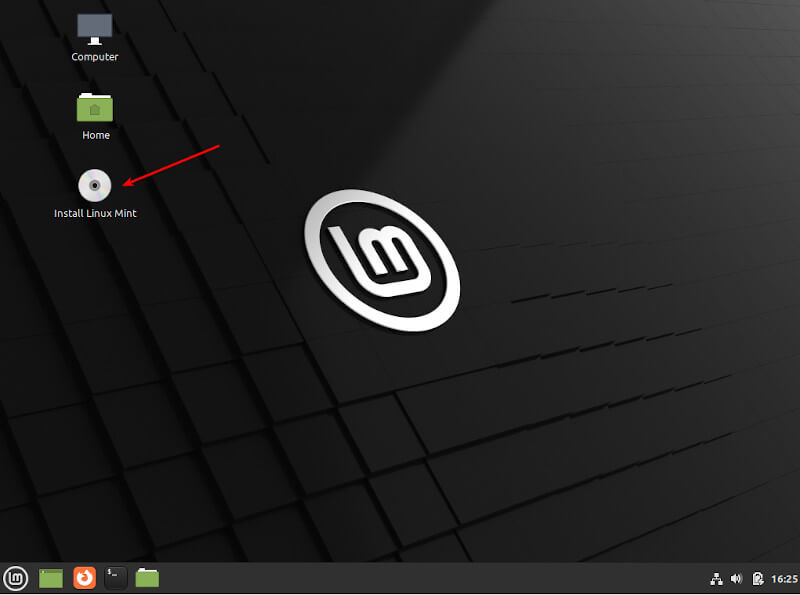
From the desktop, click Install Linux Mint to launch the installation wizard as highlighted in the following screenshot.
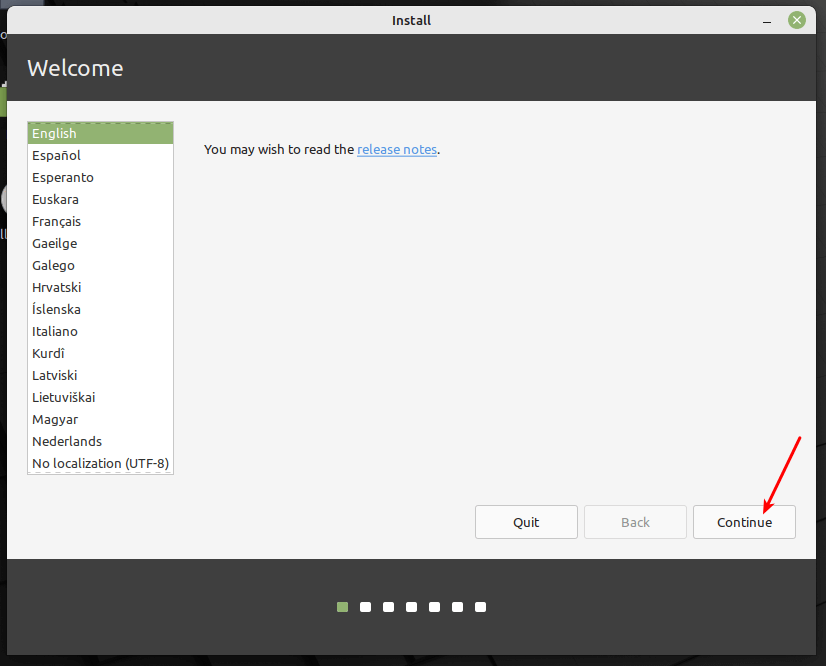
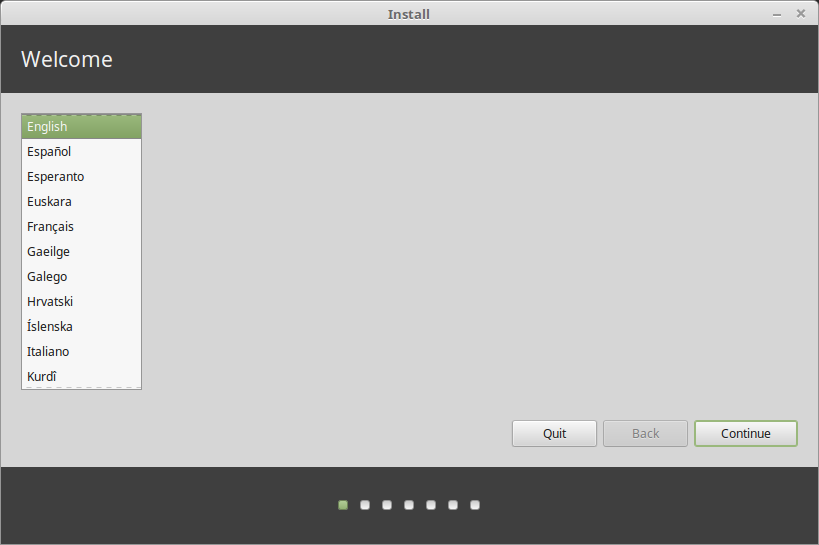
After the installation wizard opens up, you can optionally read the release note, then click Continue.
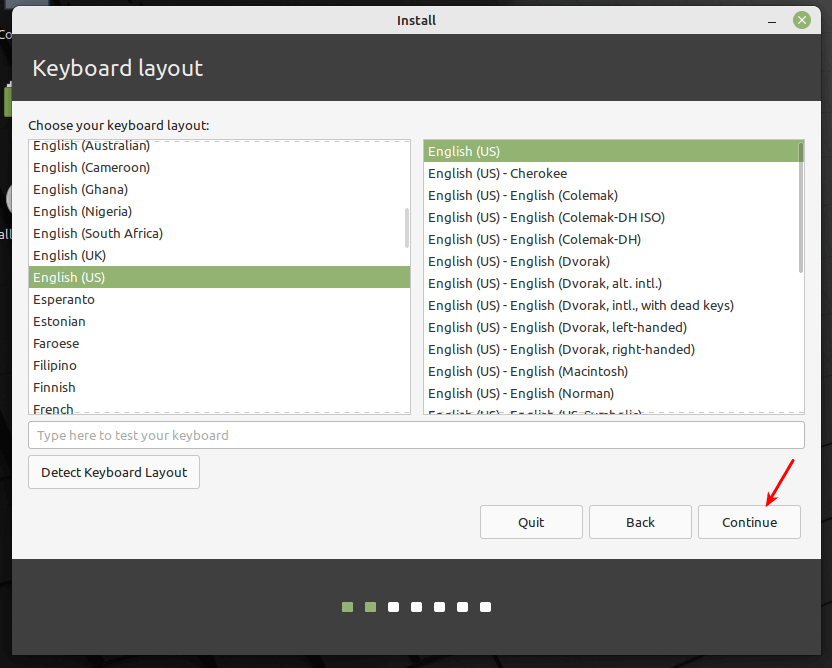
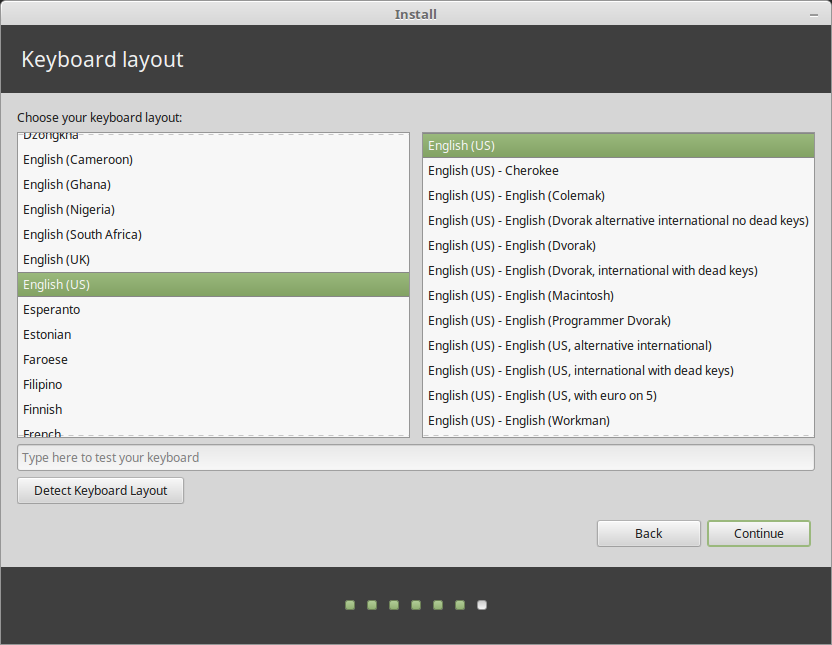
Next, select the keyboard layout and click Continue.
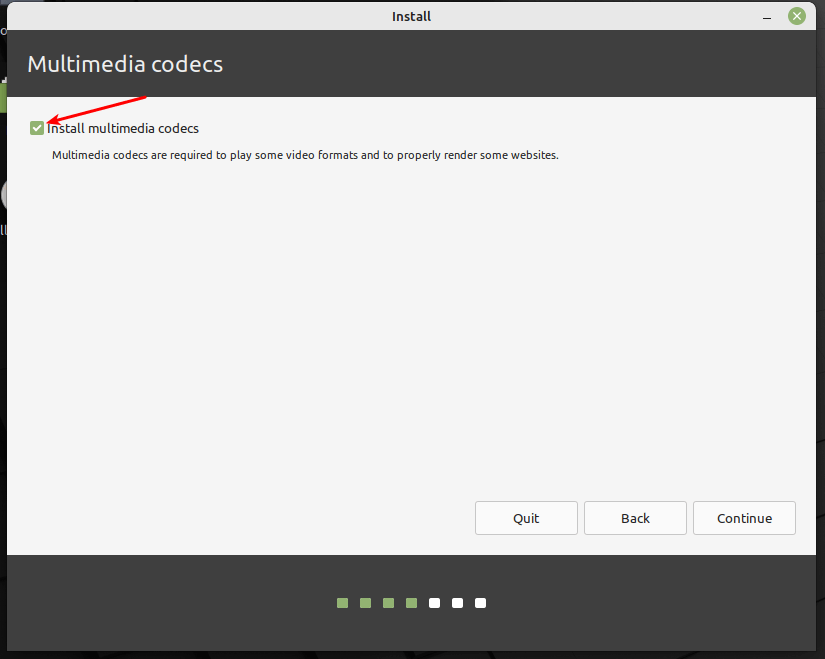
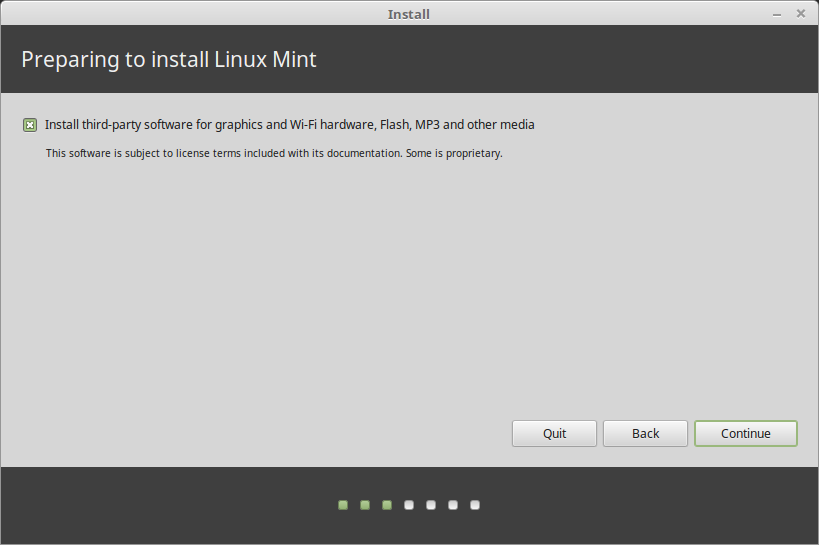
In the next windows, check the option Install Multimedia codes (which are required to play certain video formats and more), and click Continue.
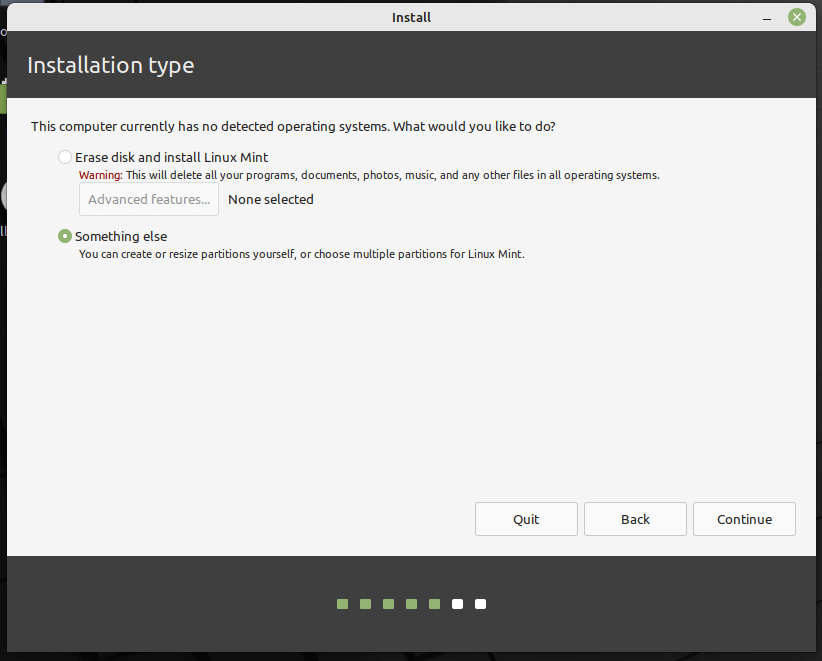
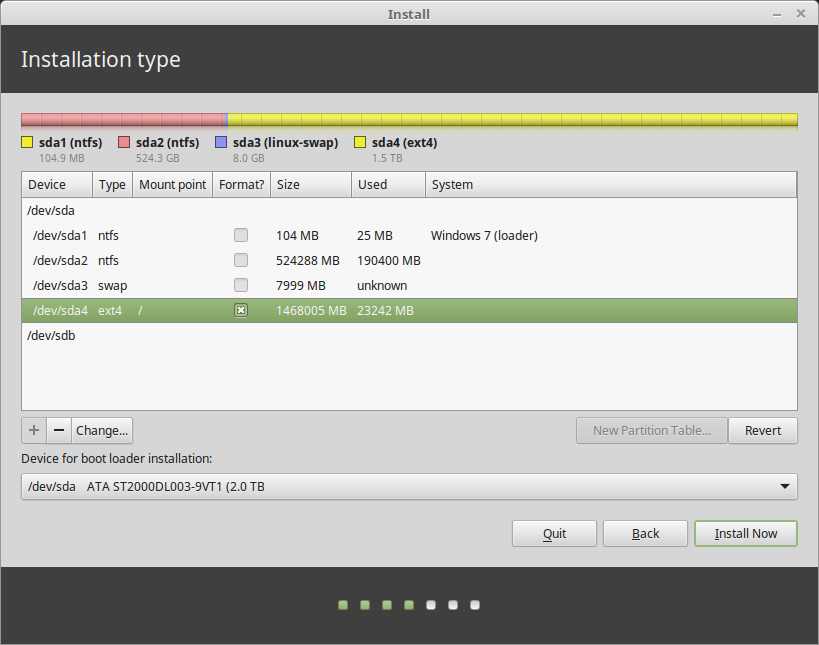
Now pick the installation type by selecting the second option, Something else to enable you to manage partitions for installing Linux Mint.
Note: If you already have existing partitions where you wish to install Linux Mint, for example, a partition with an existing installation of another Linux Mint version installation or Linux distribution, simply ignore the partition creation steps, simply select the root, and swap partitions and set the properties.
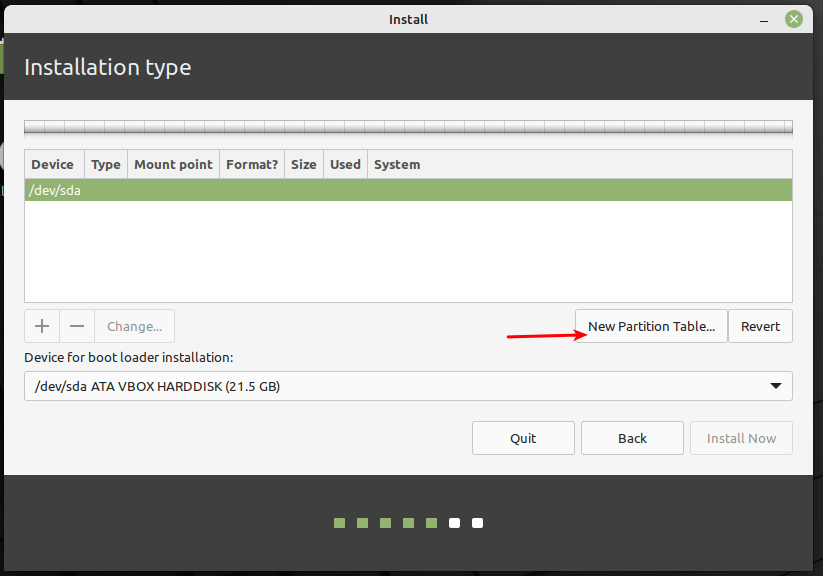
Next, in the partition setup window, click New Partition Table.
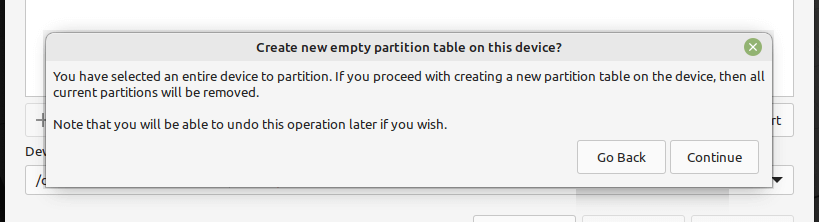
And confirm the new partition table creation step by clicking Continue in the pop-up window.
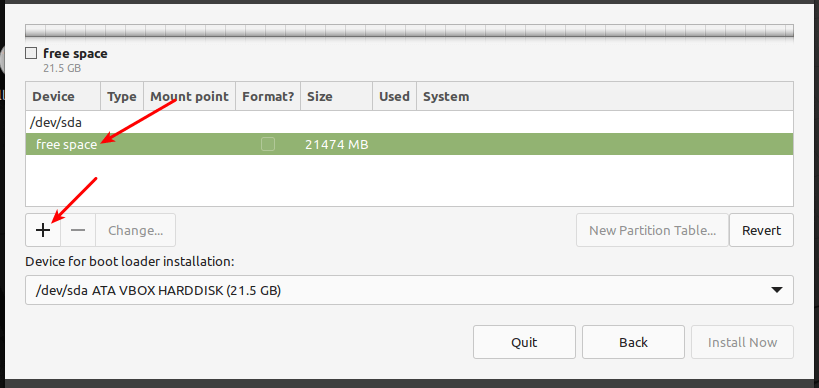
Next, you need to create the EFI system partition, a mandatory partition for UEFI systems. It will hold the EFI bootloaders and drivers to be launched by the UEFI firmware. Select the free space, and click the add (+) button to create a new partition.
And set the EFI partition properties:
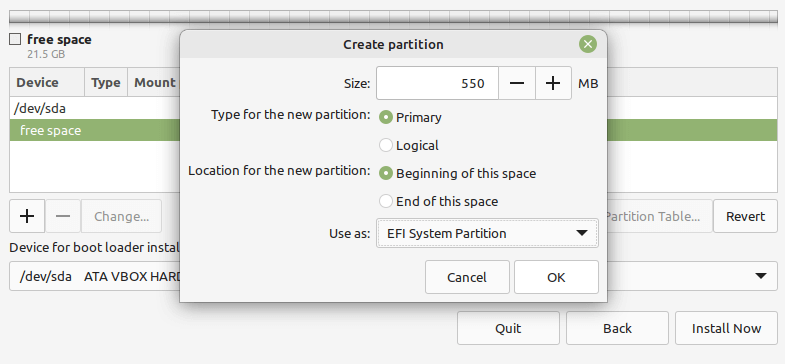
- Size – you can set a size between 100 to 550 MB, and
- Use as – set to EFI System Partition and click OK.
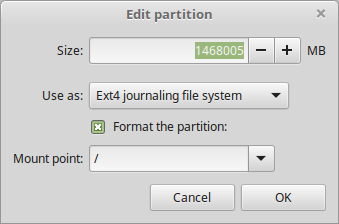
Next, create the root partition which will store the system files. Select the free space again, and click the add (+) button to create a new partition with the following properties:
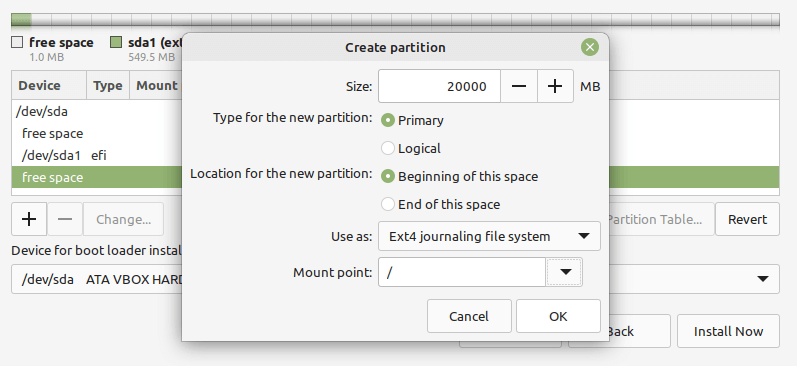
- Size – minimum size should be 20 GB but recommended is 100 or more GB
- Use as – file system type you wish the partition to use e.g EXT4, and
- Mount point – should be / (for root partition) and click OK.
Next, create the swap space by selecting the free space and clicking on the plus (+) sign to create a new partition with the following properties:
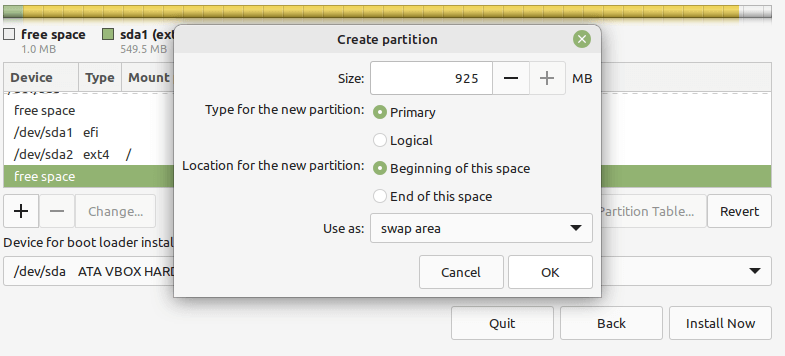
- Size – you can set a size of 500 MB or more if you have more free space, and
- Use as – set value to swap area.
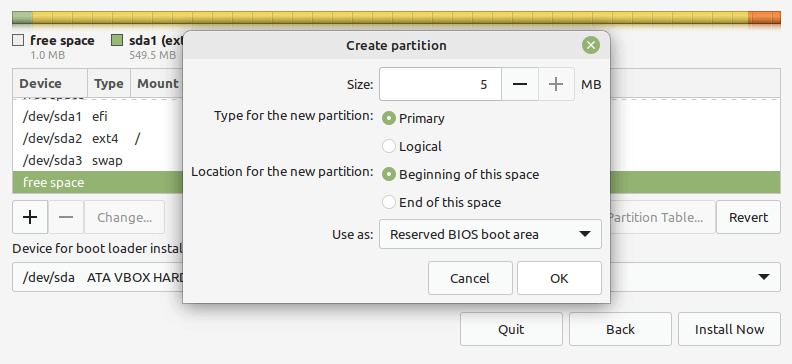
Finally, create a “Reserved BIOS Boot area” partition of at least 1 MB, which will store the boot loader code.
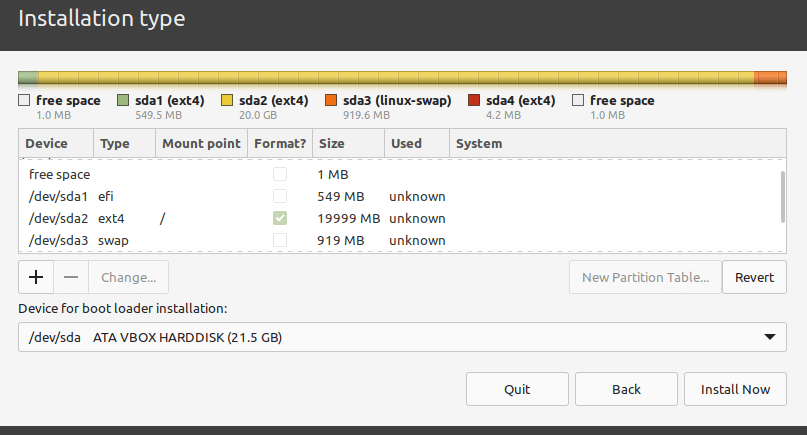
After creating all your partitions as shown in the following screenshot, click Install Now.
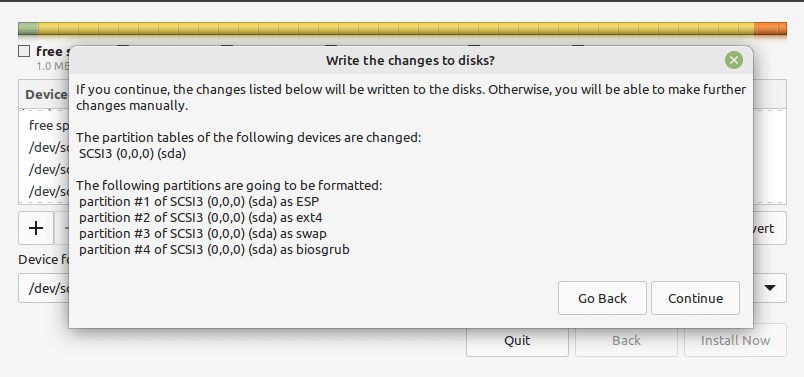
In the pop-up window, click Continue to accept the new partition table setup.
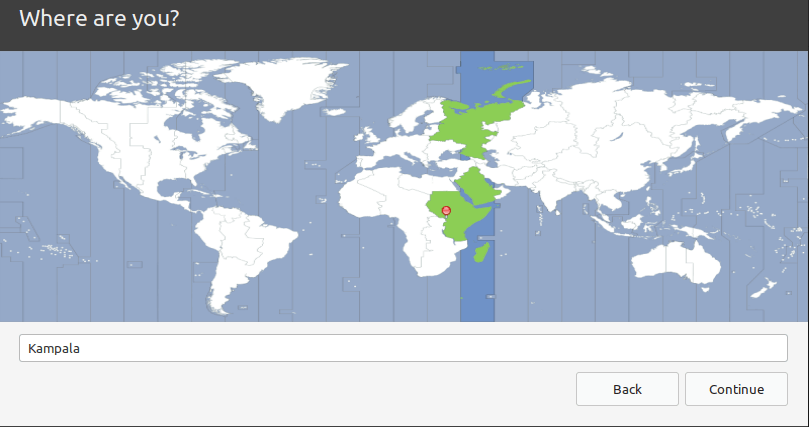
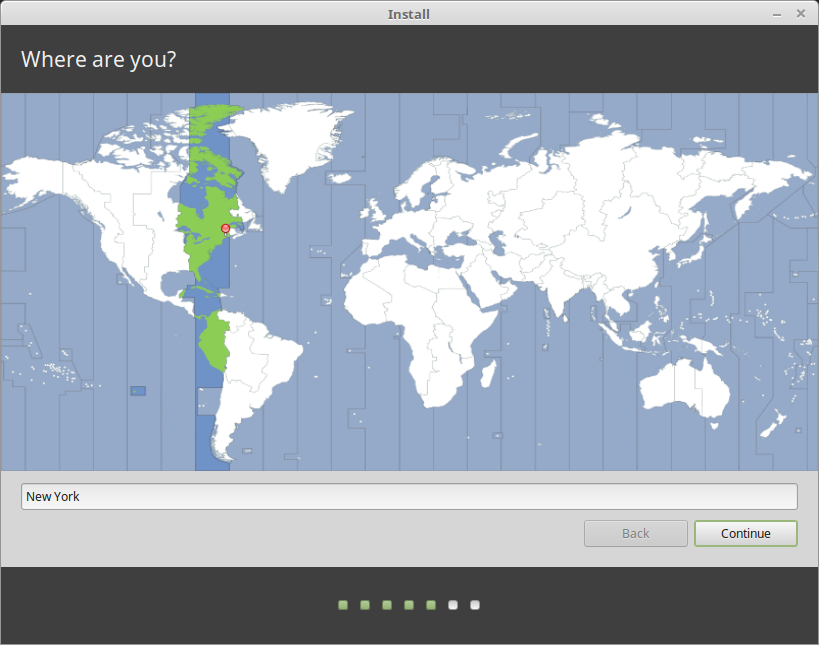
Now select your location and click Continue.
Next, create a user account with a password and set the computer name as shown in the following screenshot. Then click Continue to start the actual installation of system files and packages to the root partition.

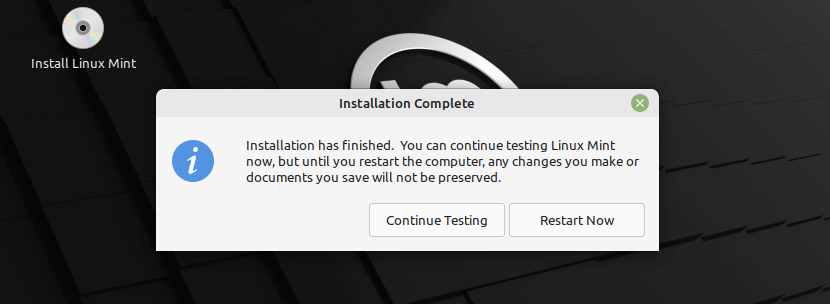
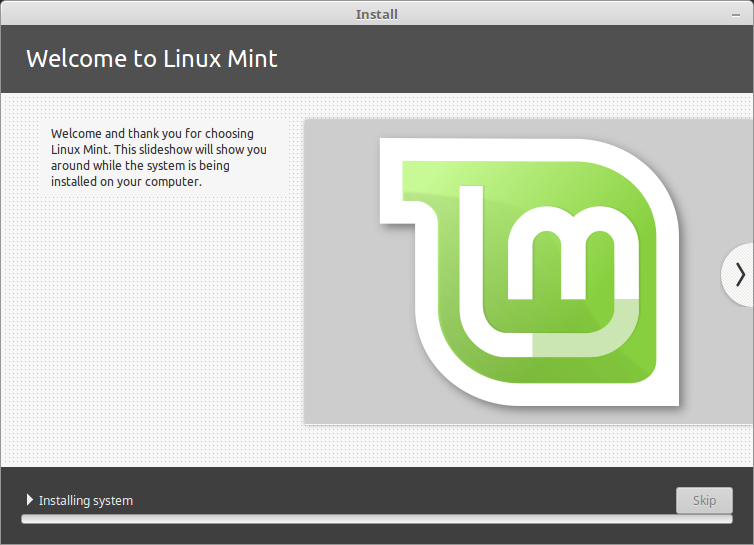
Wait for the installation of the system files and packages to complete. Once all is done, click on Restart Now.
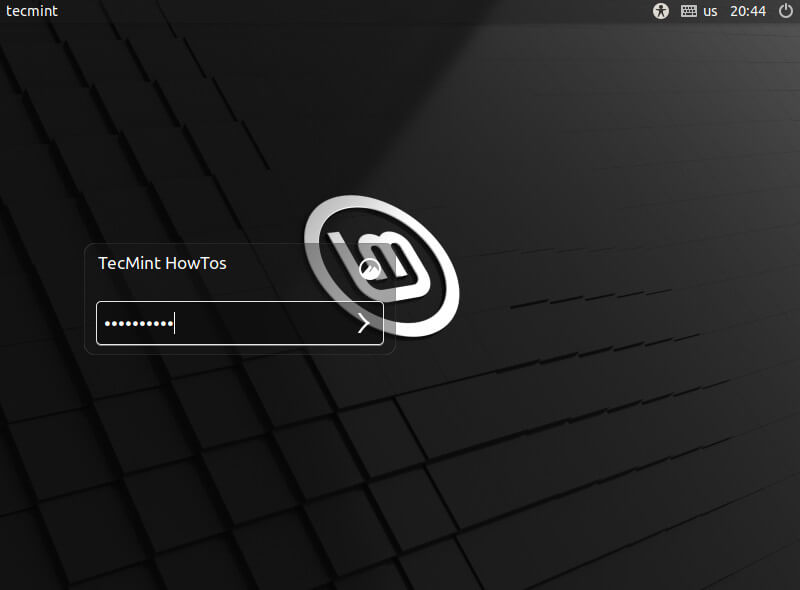
Once the system has rebooted, log into your new Linux Mint 21 Cinnamon edition installation.
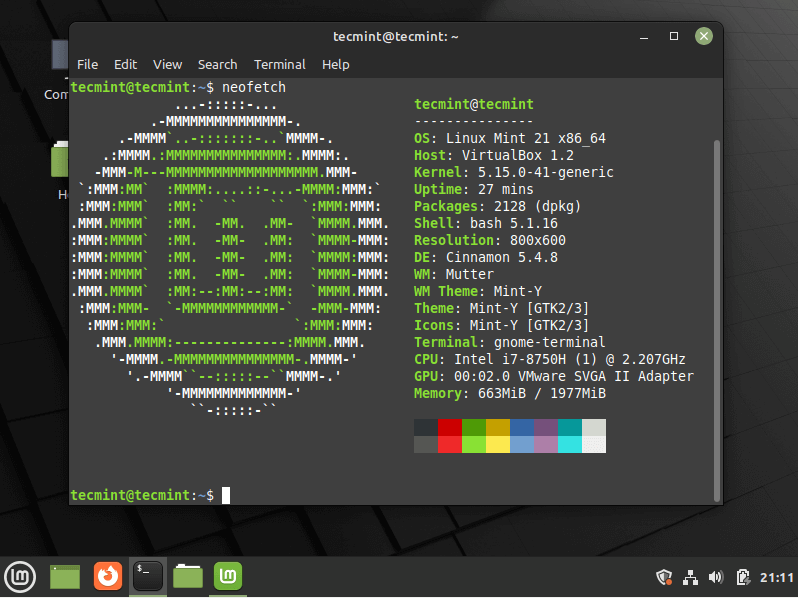
Congratulations! You have just successfully installed Linux Mint 21 Cinnamon edition on your computer. For any questions or additional information, you can use the comment section below.
Разметка дисков
Если вы не знакомы со схемой именования устройств и разделов в Linux, а также понятием файловых систем и точек монтирования, прочтите:
Отдельный раздел /home
В Linux каталог /home используется для хранения данных и настроек пользователя.
Этот каталог содержит по одному подкаталогу для каждой учётной записи пользователя. Например, если ваше имя пользователя john , то ваш домашний каталог будет /home/john , каталог загрузок — /home/john/Downloads , документов — /home/john/Documents , а закладки Firefox будут храниться где-то в /home/john/.mozilla и так далее…
Выделив для /home отдельный раздел, вы сможете отделить пользовательские данные от остальных данных операционной системы.
Преимущество такого подхода заключается в том, что в дальнейшем вы сможете удалить операционную систему и заменить её на другую, сохранив в целости пользовательские данные.
- Назначьте точку монтирования / разделу для операционной системы и укажите программе установки выполнить его форматирование.
- Назначьте точку монтирования /home разделу для пользовательских данных и, если в нём уже содержатся данные, убедитесь, что вы указали программе установки не форматировать этот раздел.
Это не рекомендуется начинающим пользователям. Ошибочные действия во время установки могут привести к уничтожению всех ваших данных. Всегда делайте резервные копии, убедитесь в правильном выборе разделов и внимательно проверьте, что вы форматируете только те разделы, для которых это необходимо.
Операционная система Linux Mint занимает примерно 15 ГБ на диске, и этот объём увеличивается при установке дополнительных приложений. Если на диске хватает места, выделите для неё 100 ГБ. Оставьте также достаточно свободного пространства для раздела home. Данные пользователя (загрузки, видео, изображения) обычно занимают гораздо больше места, чем сама система.
© Copyright 2017, Linux Mint Revision d8fbd844 .
Versions latest Downloads pdf html epub On Read the Docs Project Home Builds Free document hosting provided by Read the Docs.
Partitioning
If you are not familiar with the Linux naming scheme for devices and partitions, or the concept of filesystems and mount points, read:
Dedicated /home partition
In Linux, the /home directory is used to store user data and preferences.
This directory contains one subdirectoy for each user account. Say your username is john , your home directory is /home/john , your downloads are in /home/john/Downloads , your documents in /home/john/Documents , your Firefox bookmarks somewhere in /home/john/.mozilla and so on…
By giving /home its own dedicated partition, you separate the user data from the rest of the operating system.
The advantage is that you can wipe the operating system and replace it without affecting the user data.
When installing Linux Mint:
- Assign the / mount point to the partition dedicated to the operating system, and tell the installer to format it.
- Assign the /home mount point to the partition dedicated to the user data, and if it contains user data already, make sure to tell the installer not to format it.
This is not recommended for novice users. A misstep during the installation could wipe all your data. Always make backups, make sure to select the right partitions and to carefully review formatting options.
A Linux Mint operating system takes about 15GB and grows as you install additional software. If you can spare the size, give it 100GB. Keep most of your free space for the home partition. User data (downloads, videos, pictures) takes a lot more space.
© Copyright 2017, Linux Mint Revision d8fbd844 .
Versions latest Downloads pdf html epub On Read the Docs Project Home Builds Free document hosting provided by Read the Docs.
Install Linux Mint
When you boot the computer from the USB stick (or DVD), Linux Mint starts a live session . It logs you in automatically as a user called mint and shows you a desktop with the installer on it:
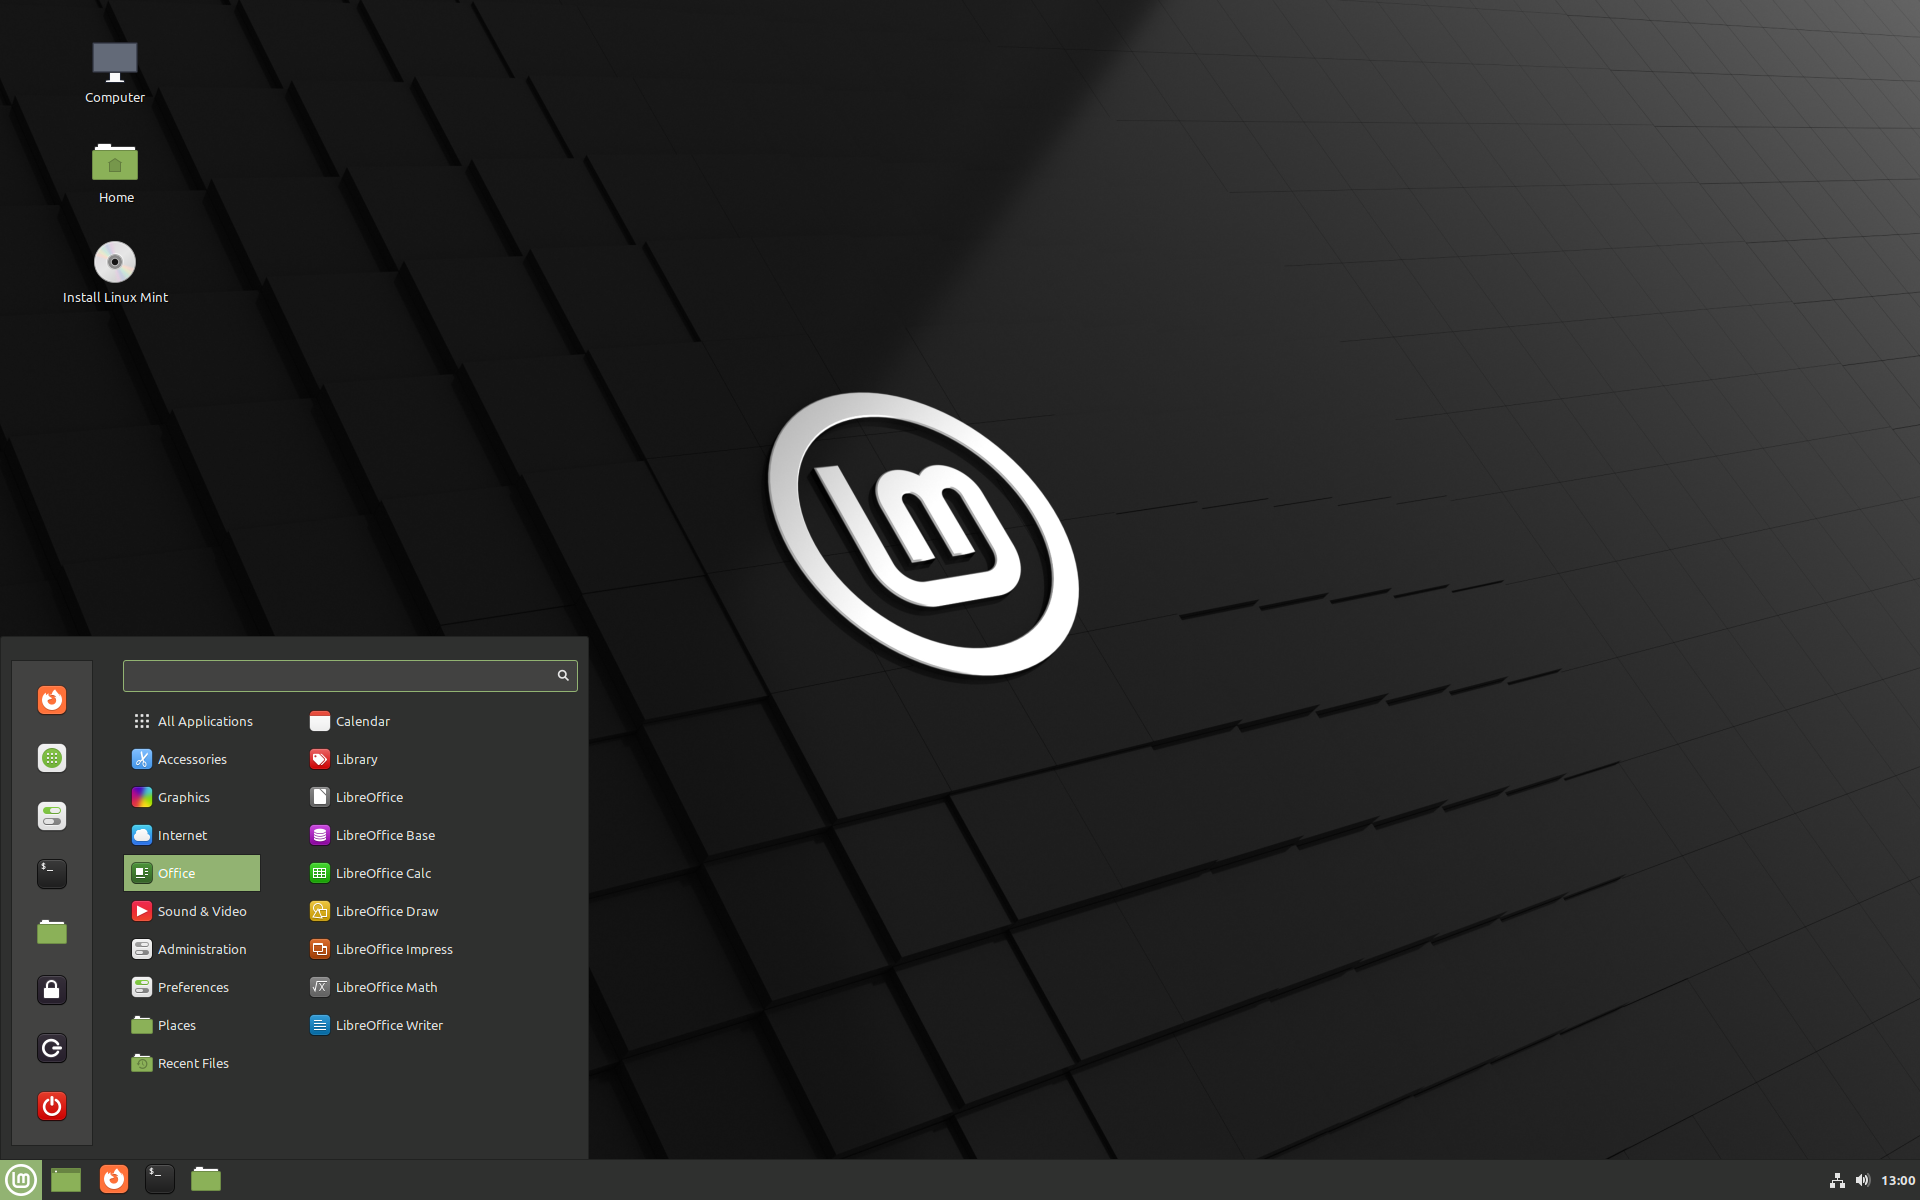
The Linux Mint live session
The live session is similar to a normal session (i.e. to Linux Mint once it is permanently installed on the computer), but with the following exceptions:
- The Live session is slower (it is loaded from a USB stick or DVD as opposed to a SSD or HDD).
- Changes you make in the live session are not permanent. They are not written to the USB stick (or DVD) and they do not impact the system installed by the installer.
- Some applications work differently (or not at all) in the live session (Timeshift, Flatpak, Update Manager, Welcome Screen..etc.).
The username for the live session is mint . If asked for a password press Enter .
Installing Linux Mint on the computer
To permanently install Linux Mint on your computer:
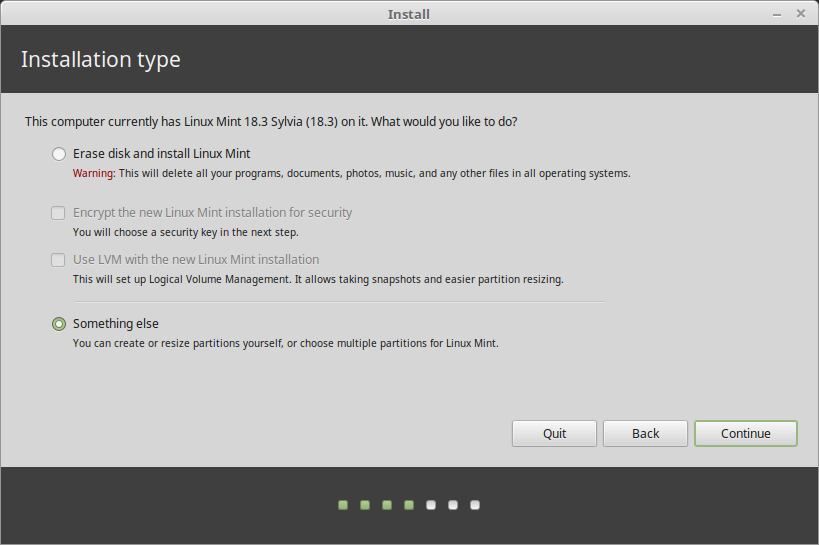
If Linux Mint is the only operating system you want to run on this computer and all data can be lost on the hard drive, choose Erase disk and install Linux Mint .
Encrypt the new Linux Mint installation for security refers to full disk encryption. At this stage of the installation your keyboard layout wasn’t yet selected so it is set to en_US. If you decide to use this option, keep this in mind when entering a password. Note that there are issues with this option and some NVIDIA drivers. If you are new to Linux use home directory encryption instead (you can select it later during the installation).
If another operating system is present on the computer, the installer shows you an option to install Linux Mint alongside it. If you choose this option, the installer automatically resizes your existing operating system, makes room and installs Linux Mint beside it. A boot menu is set up to choose between the two operating systems each time you start your computer.
If you want to manage the partitions or specify which partitions to use, select Something else .
Linux Mint requires one partition to be mounted on the root / directory.
The Linux Mint operating system (without additional software or personal data) takes roughly 15GB, so give this partition a decent size (100GB or more).
ext4 is recommended. It is the most popular Linux filesystem.
Also create a swap partition. This partition is used for hibernation and as a safety buffer in case your computer runs out of RAM. Give this partition a size equal to the amount of RAM in your computer.
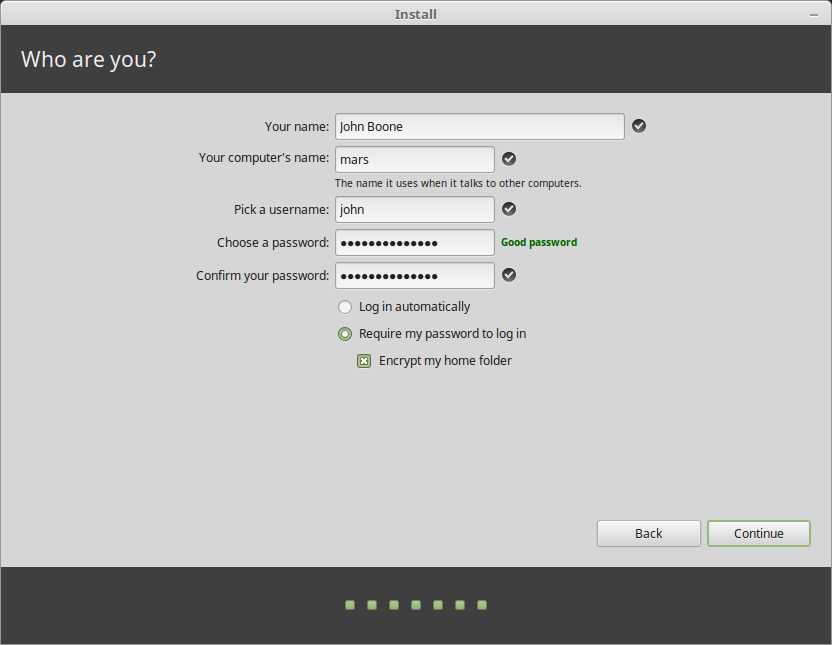
Your name can be your real name, but it doesn’t have to be. It is only used locally, in the screensaver and on the login screen.
Your username is what you log in as, and your hostname is the name of your computer on the network.
To prevent bugs only use lowercase characters, with no punctuation or accentuation.
To protect your personal data against local attacks (people around you, or in case your computer gets stolen), tick Encrypt my home folder .
When the installation is finished, click Restart Now .

The computer will then start to shut down and ask you to remove the USB disk (or DVD). Upon reboot, your computer should show you a boot menu or start your newly installed Linux Mint operating system.
© Copyright 2017, Linux Mint Revision d8fbd844 .
Versions latest Downloads pdf html epub On Read the Docs Project Home Builds Free document hosting provided by Read the Docs.