- How to Setup an L2TP/IPsec VPN Client on Linux
- How to Setup L2TP VPN Connection in Linux
- Как настроить VPN-клиент L2TP/IPsec в Linux
- Как настроить L2TP VPN-подключение в Linux
- 1denwin’s blog
- Популярные сообщения
- Linux: Как подружить Thunderbird и MS Exchange при помощи Davmail
- Linux Mint L2TP Manual Installation
How to Setup an L2TP/IPsec VPN Client on Linux
L2TP (which stands for Layer 2 Tunneling Protocol) is a tunneling protocol designed to support virtual private networks (VPN connections) over the internet. It is implemented in most if not all modern operating systems including Linux and VPN-capable devices.
The L2TP does not provide any authentication or encryption mechanisms directly to traffic that passes through it, it is usually implemented with the IPsec authentication suite (L2TP/IPsec) to provide encryption within the L2TP tunnel.
In this article, we will show how to set up an L2TP/IPSec VPN connection in Ubuntu and its derivatives and Fedora Linux.
This guide assumes that the L2TP/IPsec VPN server has been set up and that you have received the following VPN connection details from your organization’s or company’s system administrator.
Gateway IP address or hostname Username and Password Pre-shared Key (Secret)
How to Setup L2TP VPN Connection in Linux
To add an L2TP/IPsec option to the NetworkManager, you need to install the NetworkManager-l2tp VPN plugin which supports NetworkManager 1.8 and later. It provides support for L2TP and L2TP/IPsec.
To install the L2TP module on Ubuntu and Ubuntu-based Linux distributions, use the following PPA.
$ sudo add-apt-repository ppa:nm-l2tp/network-manager-l2tp $ sudo apt-get update $ sudo apt-get install network-manager-l2tp network-manager-l2tp-gnome
On RHEL/CentOS and Fedora Linux, use the following dnf command to install L2TP module.
# dnf install xl2tpd # dnf install NetworkManager-l2tp # dnf install NetworkManager-l2tp-gnome OR # yum install xl2tpd # yum install NetworkManager-l2tp # yum install NetworkManager-l2tp-gnome
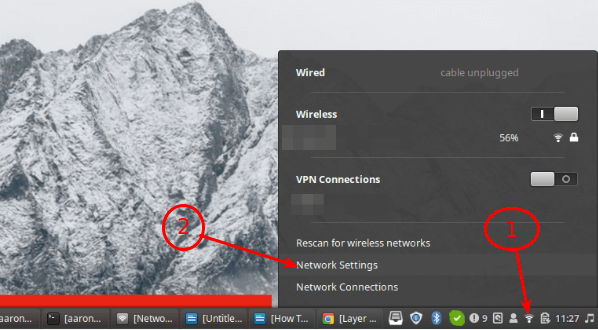
Once the package installation is complete, click on your Network Manager icon, then go to Network Settings.
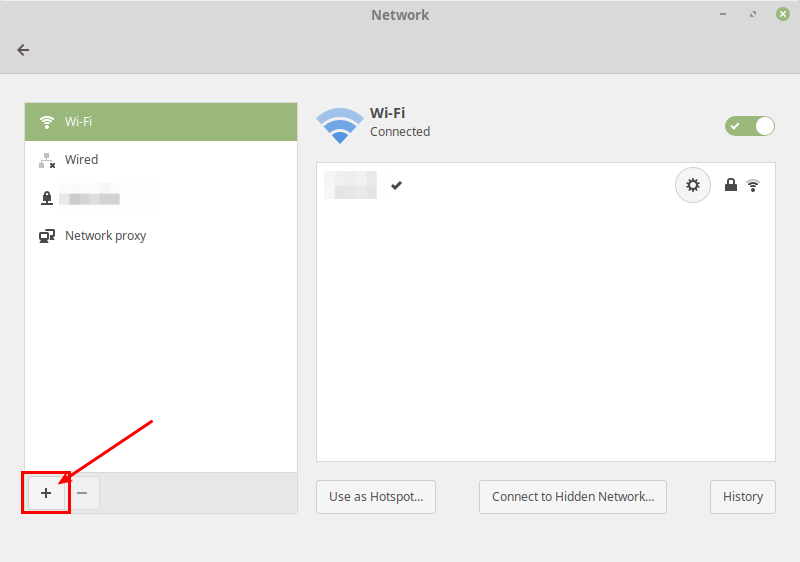
Next, add a new VPN connection by clicking on the (+) sign.
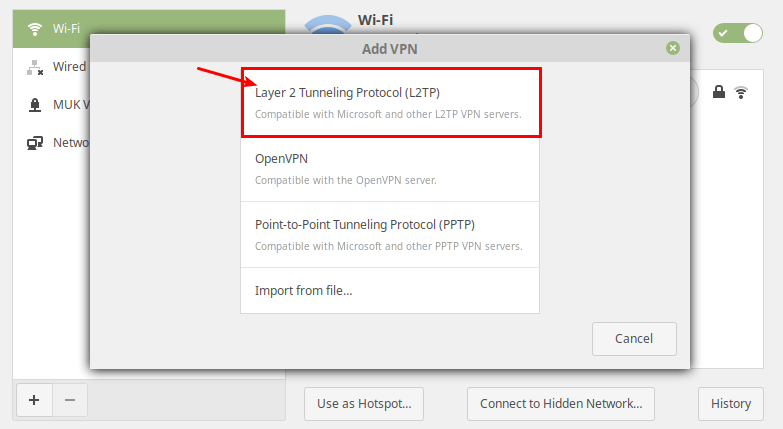
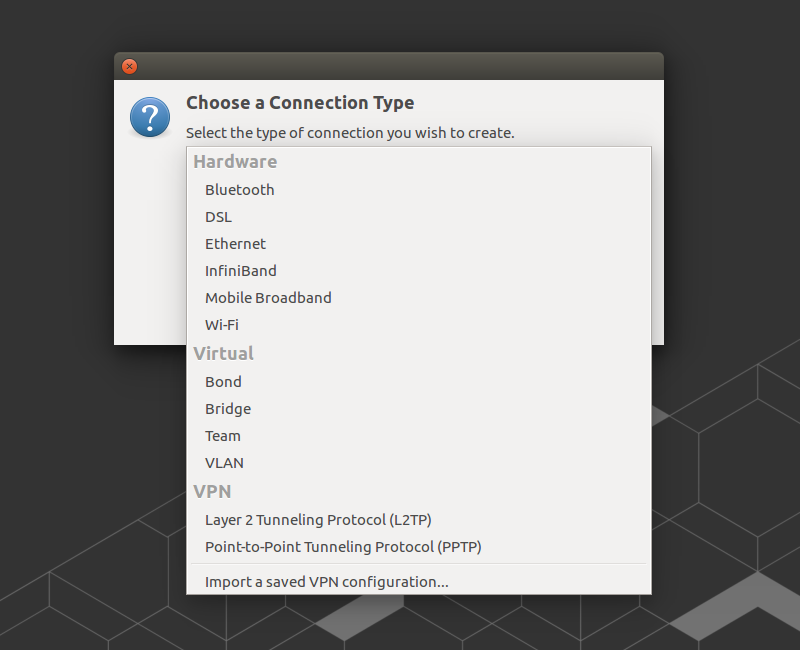
Then select Layer 2 Tunneling Protocol (L2TP) option from the pop-up window.
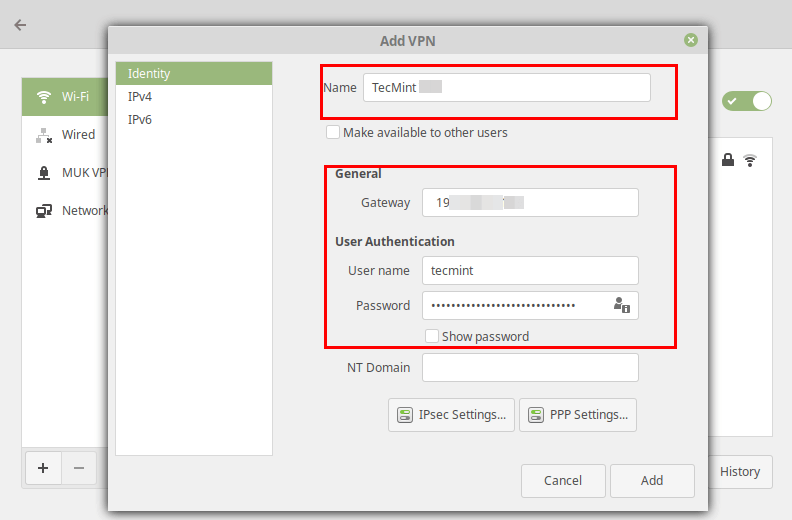
Next, enter the VPN connection details (gateway IP address or hostname, username and password) you received from the system administrator, in the following window.
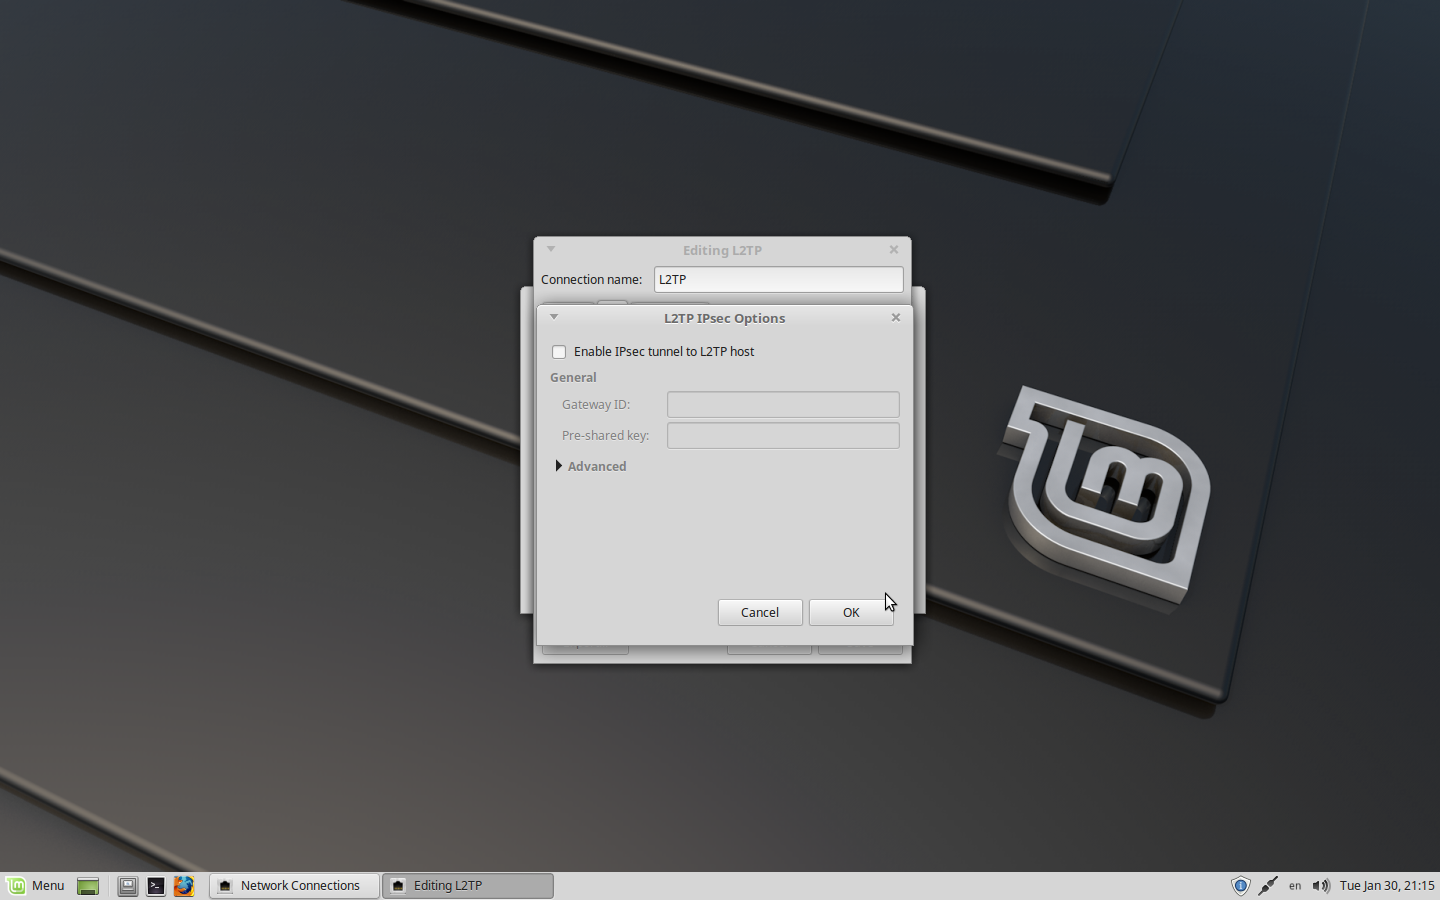
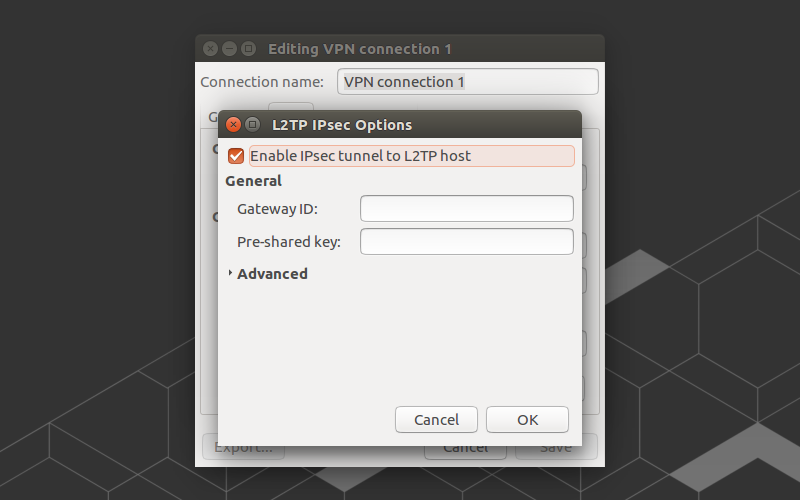
Next, click IPsec Settings to enter the pre-shared key for the connection. Then enable IPsec tunnel to L2TP host, enter (or copy and paste the) the Pre-shared key and click Ok.

After that, click Add. Now your new VPN connection should be added.
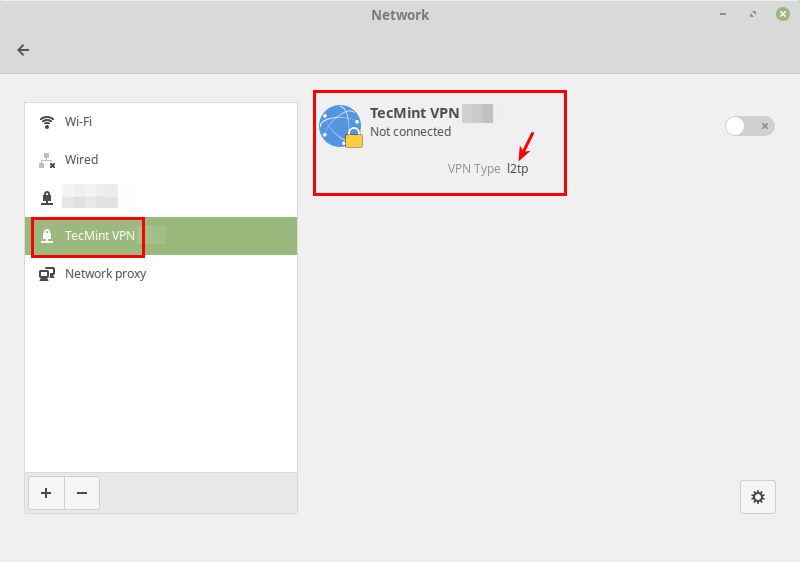
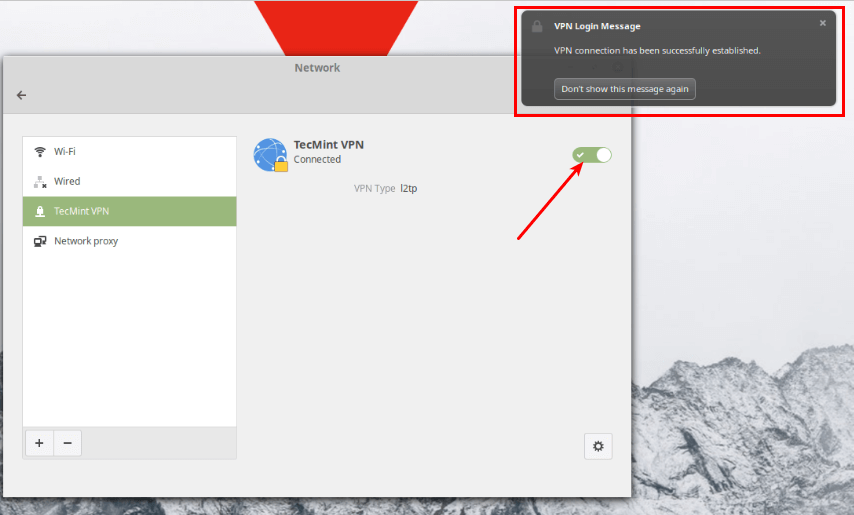
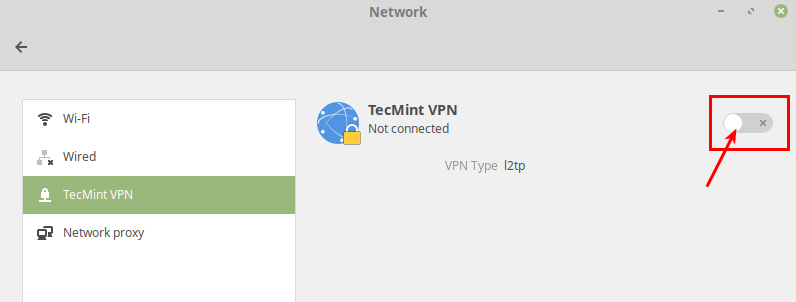
Next, turn on the VPN connection to start using it. If the connection details are correct, the connection should be established successfully.
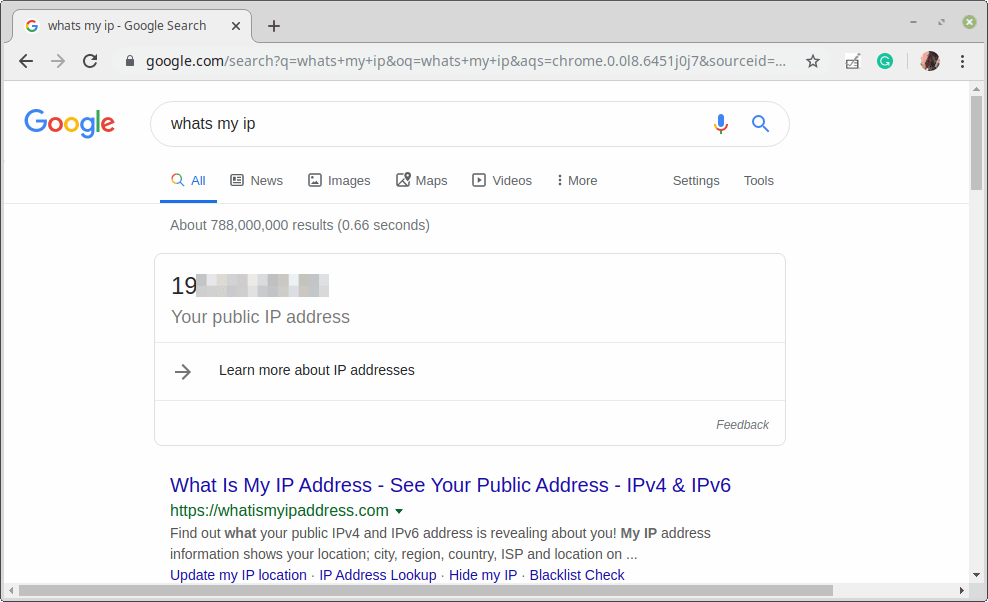
Last but not least, test if the VPN is working fine. You can check your computer’s public IP address to confirm this from a web browser: it should now point to the IP of the gateway.
That’s the end of this article. If you have any queries or thoughts to share, reach us via the feedback form below.
Как настроить VPN-клиент L2TP/IPsec в Linux
L2TP (расшифровывается как Протокол туннелирования уровня 2) – это протокол туннелирования, предназначенный для поддержки виртуальных частных сетей (подключений VPN) через Интернет. Он реализован в большинстве, если не во всех современных операционных системах, включая Linux и устройства с поддержкой VPN.
L2TP не предоставляет каких-либо механизмов аутентификации или шифрования непосредственно для проходящего через него трафика. Обычно он реализуется с помощью пакета аутентификации IPsec (L2TP/IPsec) для обеспечения шифрования внутри туннель L2TP.
В этой статье мы покажем, как настроить подключение L2TP/IPSec VPN в Ubuntu и ее производных, а также в Fedora Linux.
В этом руководстве предполагается, что сервер L2TP/IPsec VPN настроен и вы получили следующие сведения о VPN-подключении от системного администратора вашей организации или компании.
Gateway IP address or hostname Username and Password Pre-shared Key (Secret)
Как настроить L2TP VPN-подключение в Linux
Чтобы добавить параметр L2TP/IPsec в NetworkManager, необходимо установить подключаемый модуль NetworkManager-l2tp VPN, который поддерживает NetworkManager 1.8 и более поздние версии. Он обеспечивает поддержку L2TP и L2TP/IPsec.
Чтобы установить модуль L2TP в Ubuntu и дистрибутивах Linux на основе Ubuntu, используйте следующий PPA-репозиторий.
$ sudo add-apt-repository ppa:nm-l2tp/network-manager-l2tp $ sudo apt-get update $ sudo apt-get install network-manager-l2tp network-manager-l2tp-gnome
В RHEL/CentOS и Fedora Linux используйте следующую команду dnf для установки модуля L2TP.
# dnf install xl2tpd # dnf install NetworkManager-l2tp # dnf install NetworkManager-l2tp-gnome OR # yum install xl2tpd # yum install NetworkManager-l2tp # yum install NetworkManager-l2tp-gnome
После завершения установки пакета щелкните значок Диспетчер сети и перейдите в раздел Настройки сети.

Затем добавьте новое VPN-подключение, нажав на значок (+) .

Затем выберите параметр Протокол туннелирования уровня 2 (L2TP) во всплывающем окне.

Затем введите данные VPN-подключения (IP-адрес шлюза или имя хоста, имя пользователя и пароль), которые вы получили от системного администратора, в следующем окне.

Затем нажмите Настройки IPsec, чтобы ввести общий ключ для подключения. Затем включите туннель IPsec для хоста L2TP, введите (или скопируйте и вставьте) общий ключ и нажмите «ОК».

После этого нажмите Добавить. Теперь ваше новое VPN-подключение должно быть добавлено.

Затем включите VPN-подключение, чтобы начать его использовать. Если сведения о соединении верны, соединение должно быть установлено успешно.


И последнее, но не менее важное: проверьте, нормально ли работает VPN. Вы можете проверить общедоступный IP-адрес вашего компьютера, чтобы подтвердить это в веб-браузере: теперь он должен указывать на IP-адрес шлюза.

Это конец этой статьи. Если у вас есть какие-либо вопросы или мысли, чтобы поделиться, свяжитесь с нами через форму обратной связи ниже.
1denwin’s blog
L2TP — туннельный протокол, использующийся для поддержки виртуальных частных сетей. Главное достоинство L2TP состоит в том, что этот протокол позволяет создавать туннель не только в сетях IP, но и в таких, как ATM, X.25 и Frame Relay. Но компания Canonical почему-то решила не добавлять данный протокол в настройки VPN, поэтому в Ubuntu и Linux Mint по умолчанию с этим проблема, ну тогда добавляем L2TP/IPSec самостоятельно.

sudo add-apt-repository ppa:nm-l2tp/network-manager-l2tp sudo apt update sudo apt install network-manager-l2tp network-manager-l2tp-gnome
Как только дополнительные компоненты будут уставлены, следует перезагрузить компьютер, после чего у настройках VPN появится подключение L2TP.
- Получить ссылку
- Электронная почта
- Другие приложения
Популярные сообщения

Linux: Как подружить Thunderbird и MS Exchange при помощи Davmail
MS Office — один из тех комплектов ПО от Microsoft, с которого достаточно тяжело перейти на бесплатные аналоги, крайне тяжело перейти с доменной почты, с которой MS Outlook справляется на ура. Тут вы получайте и почту, и календари, и список контактов, в общем все, с чем может интернироваться Outlook. Очень долгое время, мне приходилось пользоваться Thunderbird , который забирал и отправлял почту через IMAP/SMTP, а так же не очень круто работающим календарем Lightning . Без поддержки Exchange, работать с почтой через данное ПО было крайне не удобно, приходилось пользоваться ресурсом OWA, что бы корректно пользоваться календарем и иметь доступ к контактам. Боль и страдания были не долгими, так как удалось случайно наткнуться на Davmail Gateway при помощи которого можно сделать нормальную поддержку календаря, контактов, работы с почтой и тд.. Для того. что бы подружить Thunderbird и Exchange, нужно сделать следующее: 01. Установить Thunderbird. sudo apt install thunderbird -y 02
Linux Mint L2TP Manual Installation
1 First, you need to install L2TP module. Open terminal and type the these 5 commands:
sudo add-apt-repository ppa:nm-l2tp/network-manager-l2tp
sudo apt-get install network-manager-l2tp network-manager-l2tp-gnome
2 Go to the «Network Connections«:

3 Choose «Layer 2 Tunneling Protocol (L2TP)» as your connection type and select «Create. «:


3 When new window appear, complete the fields as below:
- Connection name: RapidVPN
- Gateway: Your VPN server IP/address
Note: To see your server IP address, login here with your username and password. - User name: Your VPN username
- Password: Your VPN password
At the end click on «IPsec Settings. » button.
4 In L2TP IPsec Options, type «8870680» in «Pre-shared key» and leave Gateway ID empty, then click on OK:

5 In Editing RapidVPN L2TP window, click on «Save» button:

6 Now you are ready to use your connection. Click on network icon from tray area -> VPN Connections -> RapidVPN Connection. Now your connection will start and soon will be established. Enjoy!