Linux mint настройка mysql
thank you, that what i am searching for long time 😀
Thank you!! so straight forward to follow. The part with msql.so should be mysql.so on the machine I am running that worked.
Oops, Mint Mate 17.2 Rafaela is my distribution.
By the way, when you type «localhost» to test the apache installation, it will go to the file /var/www/html/index.html — only firefox does not show the complete url in the browser bar — that is why it is easy to overlook, where the root of the webserver is .
I guess it took me a two or three hours trying various other options, before I found the solution. My guess is that the apache directory for web root changed a while ago, and so this looks as if php install is not working, but it is. If the writer of this tutorial mysoomro could change it to the new root, that could be most useful .
HOW TO FIX «The requested URL /phpMyAdmin was not found on this server.»
I hit the obstacle, that in the above instruction the test file is not created in the directory, where the apache server has its root .
The root is not in /var/www — but in /var/www/html !!
This can be seen or set differently in the /etc/apache2/sites-available/000-default.conf file, where apache gets its directions from.
That cannot work, right? Either create the file in the test procedure above in the right directory, or copy it with sudo cp into the root directory /var/www/html .
Happily found that one out, so simple. Did not find that hint on the web, so I wanted to add it here. Maybe others can benefit from it. Go mint.
sudo gedit /var/www/html/testphp.php
Or copy the file testphp.php into the directory «html»
This is the root directory for the apache server — at least it was in my MATE 14.2 installation, when I had followed all of the above steps.
Thanks pal, nice topic. Works fine in Rafaela
Hi, good but needs to be updated and a number of changes for mine to work.
I’m not sure how or if I’m allowed to edit this walkthrough to correct it?
Isn’t it easier to just use the Software Manager to install the components. That just leaves testing that the install worked, setting the mySQL root password and any configuration file changes.
I’m not criticizing the tutorial, just suggesting that rather than using APT directly, it may be easier to use the Software Manager.
I’m so sorry guys for being absent for a long time.
actually I’m stuck somewhere else.
Only can see the notification when someone sends me a message.
@lhs182 about it. are you sure this has permanently changed for all mints??
I haven’t checked it. And if we change it we have to be positive that it has changed or it’ll create some problem for other people.
why is gksudo gedit /etc/mysql/my.cnf used instead of simply sudo vi /etc/mysql/my.cnf ? Is there a reason or they are interchangeable on this occasion? Thanks for the tutorial.
Check the permissions of the files in /etc/apache2 using «ls -l» from a terminal window (of course, you have to be *inside* the directory for that to help you! 🙂 )
If the «httpd.conf» file’s permissions are different, make them the same and then try again.
Another note that I discovered while trying to install WordPress, (and this may be the same for other installed apps in your web server’s «www» directory).
**You must change the user and group of all these files to be the default «apache2» user, or you will get strange and bizarre errors involving permissions.
The way you do this is:
First: Go to your /etc/apache2 directory and there should be an apache2.conf file there.
(Note that I do **NOT** have my box up or open right now, so I am doing this from memory!!)
Second: Somewhere in that file, down near the bottom I think, should be something that mentions the default user name. In my case it was something like «www_data» or «www_user» (or something like that, again, I’m doing this from memory)
Third: Once you discover what that default user is, chown everything in your /var/www directory — and all subdirectories — to that user.
Viz.: (as root, or «sudo» all these commands)
«cd /var/www» (or wherever your web root directory is.)
Note that before executing the next command, you **must** be within the /var/www directory, or wherever your web root directory is!
The «-R» tells chown (change owner) to recursively go into every sub-directory and make changes there too.
The «www_data:www_data» tells chown to change the user:group to www_data, or whatever your apache default user is, though my money’s on it being something like «www_data»
The «./*» part tells chown to start *in the current directory*, and change *everything there* If you remember, the «-R» tells it to keep going into all the sub-directories underneath «./» — the current directory — and change that stuff too.
Bottom line, if you run into weird issues, make sure you check ownership and permissions in each directory for all files you make, since «sudo» and root make files with «root:root» as the owner.
This was a very helpful set of notes, including the recent comments @jharris1993 which I also read through first before beginning the install.
I did not have any major problems with installing the following stack.
Linux Mint 16
Apache 2.4.6
MySQL 5.5
PHP 5.5.3-1ubuntu2.3
Here are a few notes, some reiterating what other commenters have already said but still current as of the above versions.
I’m very new to Linux, so I’d appreciate others correcting my misunderstandings of how things work under the hood.
——
(a) Enabling the PHP extension mysql.so
Installing MySQL 5.5 appears to take care of this through the *.ini files found in /etc/php5/apache2/conf.d so that there’s no need to hand edit the php.ini file to activate this extension as well as others.
——
(b) libapache2-mod-auth-mysql «is not available . «
While installing phpMyAdmin using the command,
# apt-get install libapache2-mod-auth-mysql php5-mysql phpmyadmin
got the error msg that libapache2-mod-auth-mysql «is not available . » etc etc.
So I installed without it. So far the stack seems to be working fine without that package.
——
(c) Browsing to the url http://localhost/phpmyadmin
Installing phpMyAdmin apparently created the file
which aliases the url to /usr/share/phpmyadmin
——
(d) Setting the MySQL root password.
During the install of MySQL, a keyboard-based dialog box popped up in the terminal window to prompt for a password for the root user. So there’s no need at all to set the password after the install by using the mysql command line utility.
——
A very nicely written tutorial with some good details and explanations.
First, I owe you, bigtime! I’ve been trying to bring up a LAMP server on Mint-13 (Mate, 64 bit) for about two days or so, and was getting nothing but grief. Then I found your tutorial and I accomplished more in two hours than I had in the previous two days!!
A couple of additional notes that you might want to include:
1. I did the steps in ths tutorial *before performing ANY updates* on my system after a fresh install, since I noticed that the update mamager wanted to update Apache2 — and I didn’t know if that would help or hinder. Maybe it does not matter, maybe it does, I don’t know. What I *DO* know is that it worked when I did it this way.
2. After installing Apache2, it’s a virtual certenty that you will get a «Could not reliably determine the server’s fully qualified domain name, using 127.0.0.1 for ServerName» error.
The fix is easy, just «sudo gedit /etc/apache2/httpd.conf», and add the one line «ServerName (whatever your hostname is)». Don’t include the quotes, (Doh!), and replace «(whatever your hostname is)» with the name you gave to your computer when you set it up. If you don’t remember, just type «hostname» in a terminal window, and it will tell you.
Restart Apache2 and this annoying warning goes away.
3. In my case, (Mint 13, Mate), there was no need to edit the /etc/php5/apache2/php.ini file. The commented line was not there, and apparently was not needed, since phpAdmin works anyway.
4. When you go to install phpMyAdmin, it will ask you to create a database for phpMyAdmin to play with, and I selected «Yes». It asks for the password for the «administrative user» — and it sounds like it wants to create another password for yet another user. What it *really* wants is the password you created for the root user when you installed MySQL. If you get this wrong, you get a really scary warning. If you get that warning, just allow it to «retry», and carefully type in the root password you created before.
5. I did not have to do anything to configure Apache2 to work with phpMyAdmin. It worked wonderfully right out of the box.
6. I noticed that phpMyAdmin *does not require any credentials* to access the MySQL databases! Maybe that’s a result of the database I created before, I don’t know. It *IS* scary!
In any event, I feel like I should send you a case of the finest Kentucky Sour-Mash Bourbon Wiskey — you saved me so much grief!
How to Install MySQL on Linux Mint 20 and Ubuntu 20.04?
![]()
MySQL is an open-source, simple, and relational database that uses SQL (Structured Query Language) to manage and manipulate the data. MySQL is an essential part of the LAMP (https://linuxhint.com/install-lamp-stack-ubuntu/) stack. As of the writing, the newest version of MySQL is 8.0.23.
This post explains the MySQL installation on Linux Mint 20 and Ubuntu 20.04.
Installing MySQL on Linux Mint 20 and Ubuntu 20.04
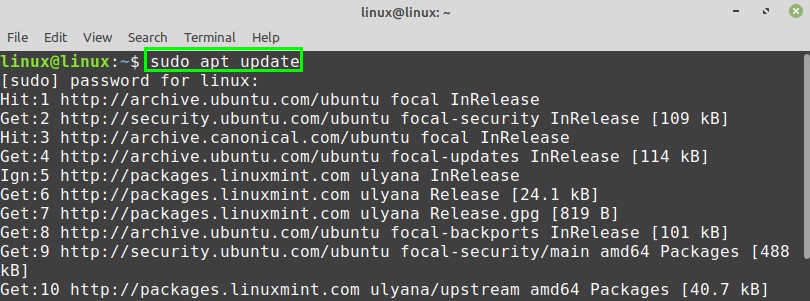
Fire up the terminal and update the apt repository cache before installing MySQL:
Next, install the MySQL server with the command:
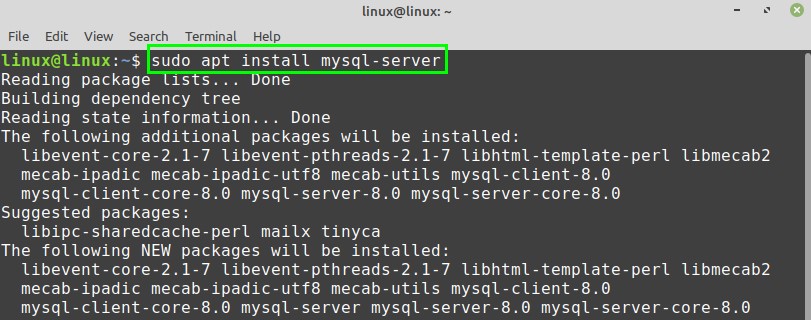
Press ‘y’ to continue installing the MySQL server.

Once the MySQL server is successfully installed, check the installed version and verify the installation using the command:

Upon successful installation, the MySQL service will start automatically. To check the status of the MySQL server, run the command:
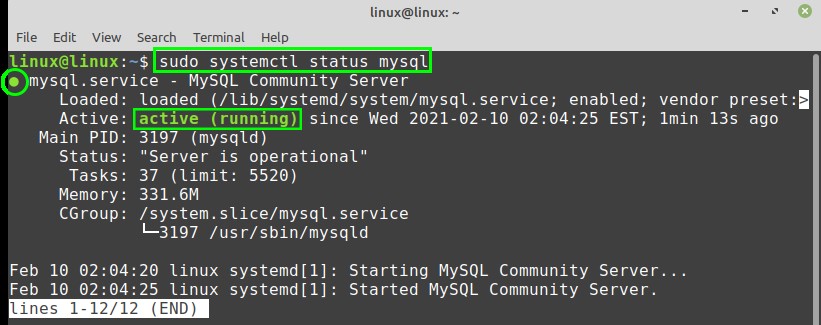
The output shows that the MySQL service is active and running.
Configuring the MySQL on Linux Mint 20 and Ubuntu 20.04
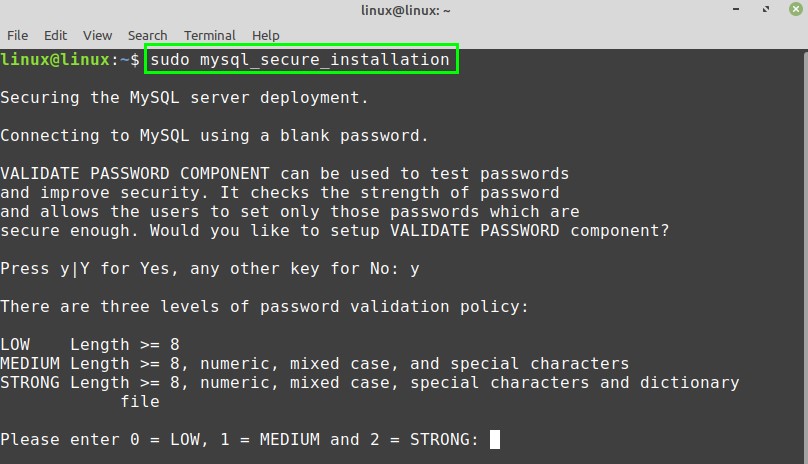
The mysql_secure_installation script, which comes by default with the MySQL installation, allows us to secure the MySQL security.
Run the mysql_secure_installation script with the command:
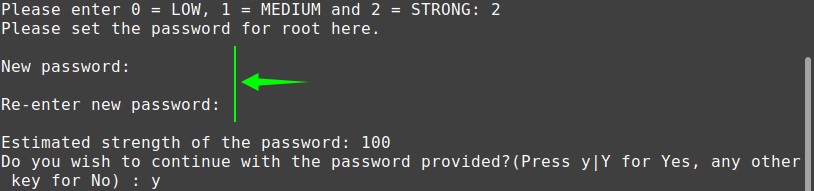
During the execution of the mysql_secure_installation script, you will be displayed various prompts. First, you will see three levels of a password validation policy. You are supposed to press ‘y’ to set up a password. Further, select the password level by entering the respective numeric digit.
Moreover, enter the password and re-enter the password for confirmation. The command line will display the estimated strength of the password.
Additionally, you will be prompted to remove the anonymous users, test databases, and reload the privileges table. Press’ y or n’ according to your choice, and the configuration will be performed successfully.


Creating new user
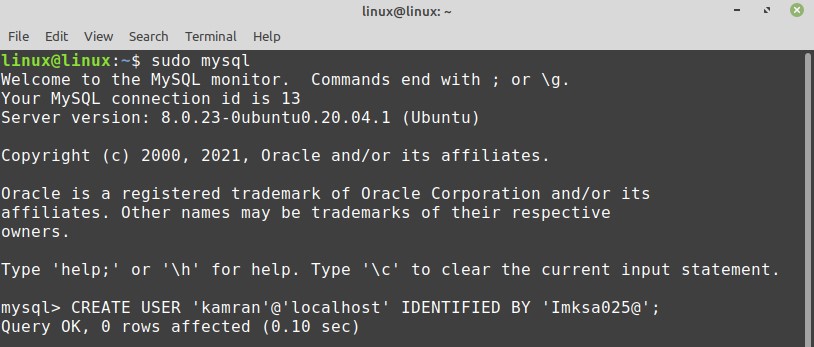
To start with MySQL server from the command line, use the command:

The MySQL interactive shell will start. Once the MySQL server is set up, the MySQL creates a root user that can manage the databases and perform various administrative actions.
Moreover, you can also create a new user in the MySQL server. While creating a new user, enter a username and password. Follow the below-given syntax to create a new user:
After successfully creating the new user, you can grant the privileges to the user as follows:

The *.* will grant all types of privileges to the newly created user.
It is advisable to flush the privileges. It will free up the extra memory that the server cached while creating a new user.

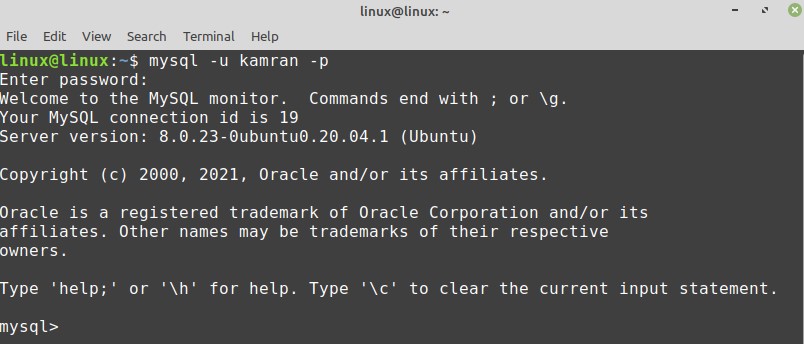
Logging into MySQL server and create a database
Now let’s login to the MySQL server and create a new database. To perform a login, use the command:
Enter the password that you have set before for this user, and MySQL interactive shell will start.
For creating a new database, execute the command:

To see the list of all available databases, type the command:

Conclusion
MySQL is a very popular and open-source relational database. The MySQL server is included in Linux Mint 20 and Ubuntu 20.04 standard repositories. This article explains the MySQL installation on two popular Linux distros, i.e., Linux Mint 20 and Ubuntu 20.04.
About the author
Kamran Sattar Awaisi
I am a software engineer and a research scholar. I like to write article and make tutorial on various IT topics including Python, Cloud Computing, Fog Computing and Deep Learning. I love to use Linux based operating systems.