Linux mint oem install
Are you spreading the joy of Linux Mint? Leave a solid impression on the end user — install like an OEM.
As of Linux Mint 18, the OEM installer is included with every ISO.
Press a key during the countdown when booting your Live DVD/USB installation media to show the menu. If you’ve had to use Compatibility mode to overcome driver issues (blank screen, can’t load the Live Session, etc), then you are probabl y familiar with this screen.
Here also is the option for OEM Install. It says it is for manufacturers, but don’t let that scare you. Here’s how it works:
- It goes directly to the installer. Proceed as normal, choosing to use the entire disk, encrypt, use LVM, or do something else. For the sake of simplicity I always name the batch «oem», name the temp user «oem», and use «oem» as the password. This account is automatically removed in step 3.
- The system reboots and goes right to the desktop. Here you have a chance to make system-wide changes. Take this time to install video/wifi drivers, apply system updates and add or remove software. I usually install Google Chrome, and sometimes TeamViewer, update kernel.
End user boots the system and the computer walks them through the first-boot sequence, setting up the computer name, their name and username including password, choosing to encrypt their home folder, etc. They feel like they purchased the computer from a store.
Fun Fact — You can press Quit to exit the OEM Installer and reach a functioning desktop. Double click the Install icon to launch the installer again.
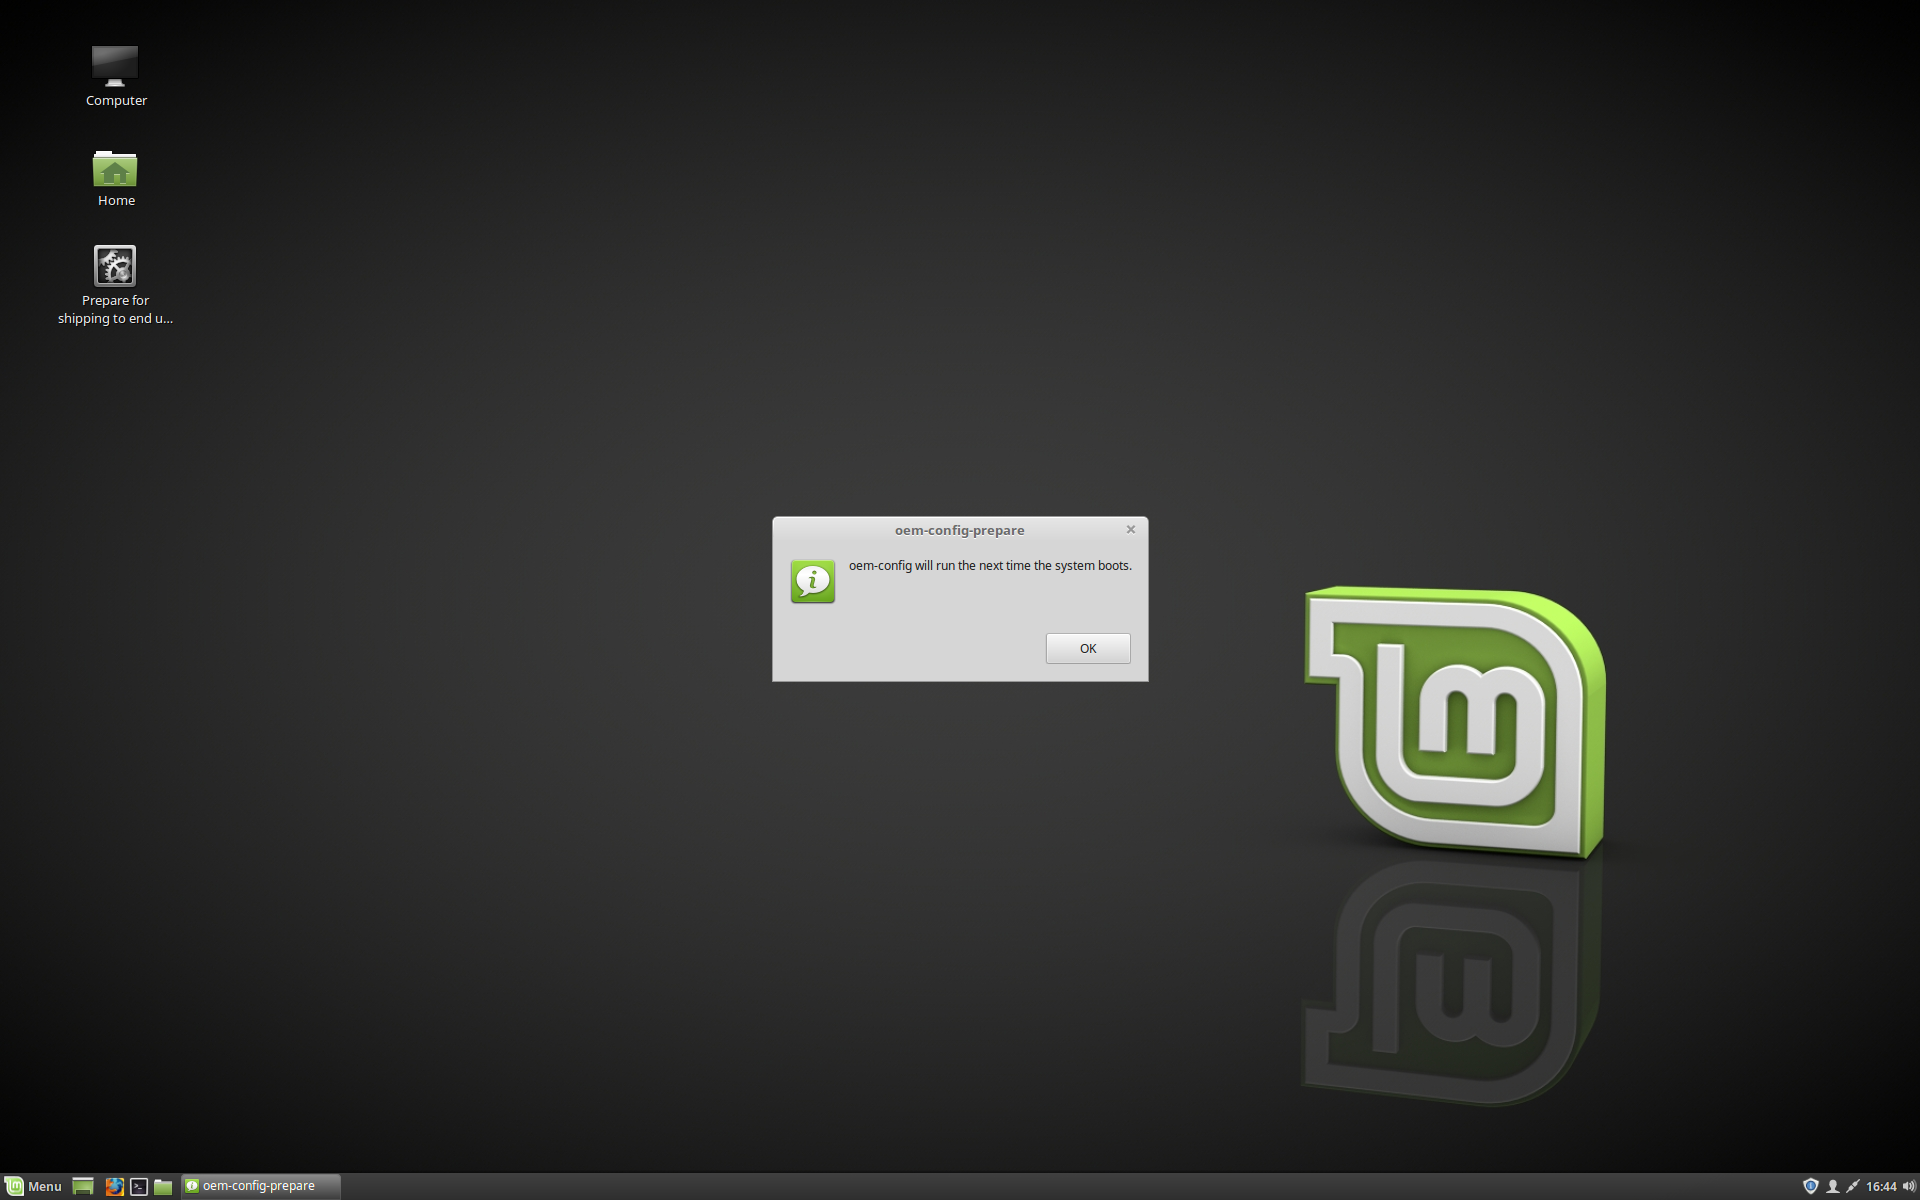
Fun Fact — You can reboot the computer as many times as needed, and it will stay in OEM Edit mode until you run the Prepare For Shipping.
Pre-installing Linux Mint (OEM Installation)
In the ISO boot menu, OEM install is used to preinstall Linux Mint.
- Manufacturers and resellers who want to install Linux Mint on computers they sell to their customers.
- People who want to sell or give their computer to somebody else.
When you install Linux Mint in OEM mode, the operating system is installed with a temporary user account and prepared for the computer’s future owner.
The user account is set up by the new owner.
To perform an OEM installation follow the steps below:
- Select OEM Install from the USB stick (or DVD) menu.
- Launch the installer and follow the installation instructions.
- Restart the computer.
- Change any system settings or install additional software if you want.
- When ready, click Prepare for shipping to end user , enter the password you chose during the installation, click OK and shut down the computer.

When the new owner of the computer boots the computer the following screen appears:
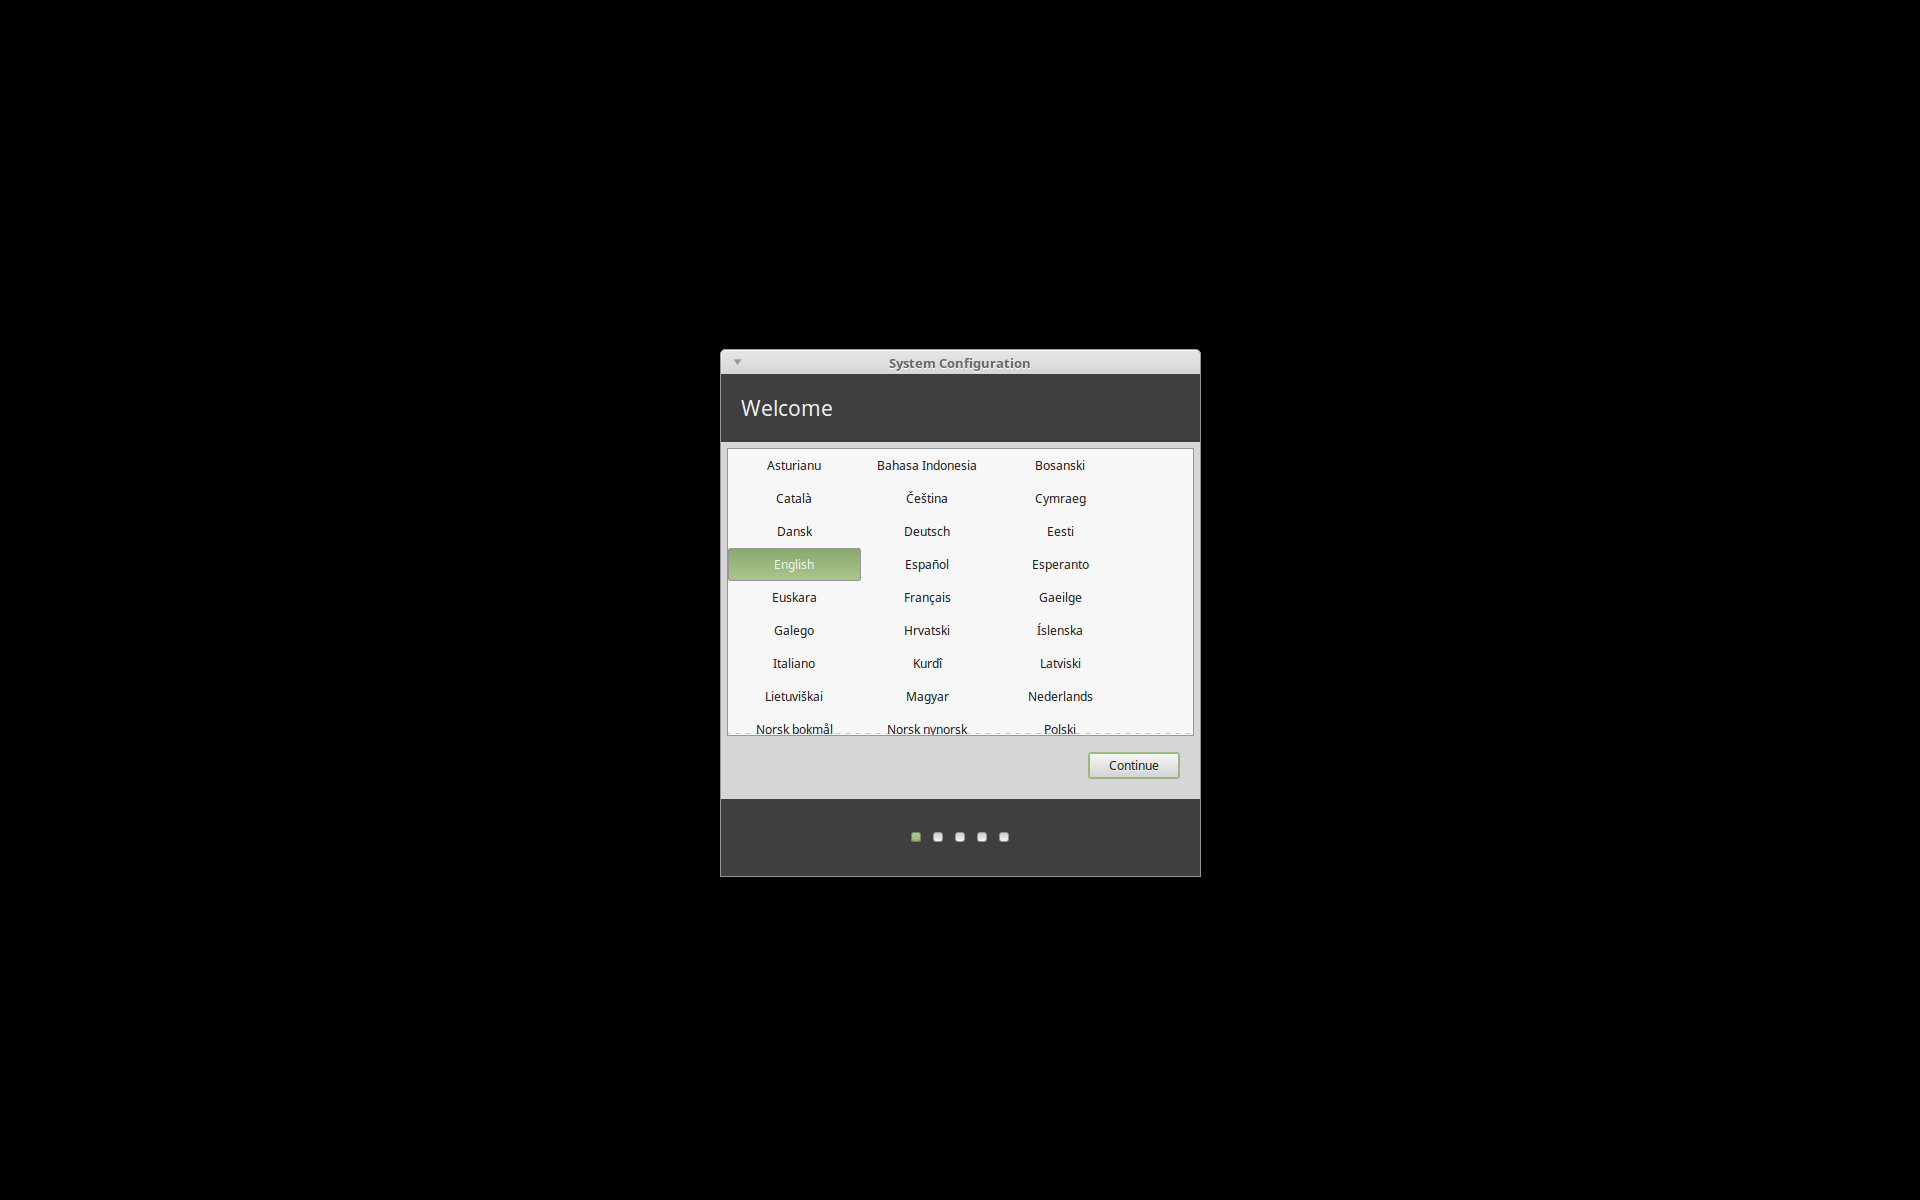
The new owner selects his or her username, password, keyboard layout, language, timezone and all the details relevant to create his or her user account.
© Copyright 2017, Linux Mint Revision d8fbd844 .
Versions latest Downloads pdf html epub On Read the Docs Project Home Builds Free document hosting provided by Read the Docs.
Предустановка Linux Mint (Установка для OEM)
При установке Linux Mint в режиме OEM операционная система устанавливается с учётной записью временного пользователя и подготавливается для будущего владельца компьютера.
Учётная запись пользователя настраивается новым владельцем.
Для того, чтобы выполнить OEM-установку, сделайте следующее:
- Выберите OEM Install в стартовом меню после загрузки с USB-носителя (или с DVD).
- Запустите установщик и следуйте инструкциям по установке.
- Перезагрузить компьютер.
- При необходимости измените настройки системы или установите дополнительные приложения.
- Когда будете готовы, нажмите Подготовка к отправке конечному пользователю , нажмите OK и выключите компьютер.

Когда новый владелец компьютера включит его, он увидит следующий экран:

Новый владелец выбирает для себя имя пользователя, пароль, раскладку клавиатуры, язык, часовой пояс и выполняет все другие настройки, требуемые для создания его учётной записи пользователя.
© Copyright 2017, Linux Mint Revision d8fbd844 .
Versions latest Downloads pdf html epub On Read the Docs Project Home Builds Free document hosting provided by Read the Docs.
Предустановка Linux Mint (Установка для OEM)
При установке Linux Mint в режиме OEM операционная система устанавливается с учётной записью временного пользователя и подготавливается для будущего владельца компьютера.
Учётная запись пользователя настраивается новым владельцем.
Для того, чтобы выполнить OEM-установку, сделайте следующее:
- Выберите OEM Install в стартовом меню после загрузки с USB-носителя (или с DVD).
- Запустите установщик и следуйте инструкциям по установке.
- Перезагрузить компьютер.
- При необходимости измените настройки системы или установите дополнительные приложения.
- Когда будете готовы, нажмите Подготовка к отправке конечному пользователю , нажмите OK и выключите компьютер.
Когда новый владелец компьютера включит его, он увидит следующий экран:

Новый владелец выбирает для себя имя пользователя, пароль, раскладку клавиатуры, язык, часовой пояс и выполняет все другие настройки, требуемые для создания его учётной записи пользователя.
© Copyright 2017, Linux Mint Revision d8fbd844 .
Versions latest Downloads pdf html epub On Read the Docs Project Home Builds Free document hosting provided by Read the Docs.