- Знакомимся с резервным копированием в Linux Mint при помощи Timeshift
- Важность резервного копирования
- Утилита Timeshift
- Подготовьте место для хранения резервных копий
- Запускаем Timeshift и настраиваем бэкап
- Как делать бекапы и восстанавливать Linux с помощью Timeshift
- B.Восстановление системы Linux
- 1. Из той же ОС
- 2.Восстановление, если нельзя зайти в Linux
- Подытожим
- How To Backup and Restore Ubuntu & Linux Mint With Timeshift
- Install Timeshift
- Take System Backup with Timeshift
- Snapshot Type
- Backup Location
- Scheduled Snapshots
- Include Home Directories
- Take First Backup
- Restore System With Timeshift
- Running System
- Non-Bootable System
- Conclusion
Знакомимся с резервным копированием в Linux Mint при помощи Timeshift
Как известно, важность резервного копирования пользователь не осознает ровно до момента, пока оно не понадобится. Поэтому разработчики некоторых дистрибутивов Linux позаботились о пользователях и «из коробки» предлагают решения для бэкапа системных и пользовательских данных. Linux Mint не исключение и в этой заметке поговорим про работе с программой Timeshift.
Больше полезных материалов для начинающих пользователей вы сможете найти в соответствующем разделе на канале Просто Код!
Важность резервного копирования
Если вы думали, что резервное копирование системы это необходимость только для каких-то крупных информационных систем или серверов, то спешу вас разубедить в обратном. Любая ошибка при обновлении, любой косяк со стороны пользователя или элементарный выход из строя жесткого диска — и ваш дистрибутив, словно в сказке, превращается в тыкву. Чтобы не начинать все с нуля нужно просто заранее озаботиться созданием резервных копий.
Утилита Timeshift
Программа резервного копирования Timeshift давно поставляется с каждым выпуском Linux Mint, а намек на важность ее использования поступает пользователю сразу после установки — при первом входе в установленную систему среди уведомлений будет то, в котором вам предложат создать резервную копию и настроить расписание для бэкапа. Если же вы проигнорировали это уведомление и закрыли его, то давайте вместе обезопасим вас и ваши нервы от риска потерять все данные на ПК или ноутбуке.
Подготовьте место для хранения резервных копий
Прежде чем создавать резервные копии нужно позаботиться о месте их хранения. Разумнее всего не сохранять бэкапы на тех же устройствах, которые, в случае, могут выйти из строя. Говоря проще — не сохраняйте копии на том же диске, где установлен дистрибутив.
Лучше завести отдельный жесткий диск (встраиваемый или портативный), чтобы он использовался только под бэкапы. Отформатировать жесткий диск лучше в файловую систему Linux, например, EXT4.
Запускаем Timeshift и настраиваем бэкап
В меню с приложениями перейдите в пункт «Администрирование», промотайте вниз и выберите программу Timeshift (либо введите название программы в поле поиска вверху меню с приложениями). При запуске утилита попросит ввести пароль суперпользователя.
Как делать бекапы и восстанавливать Linux с помощью Timeshift

Данный туториал расскажет как легко с помощью приложения Timeshift создавать бэкапы и восстанавливать Linux систему.
Какого бы уровня программистом вы ни были, если используешь Linux рано или поздно приходится заниматься резервным копированием. Всего одной неверной команды с sudo вполне хватит для того, чтобы отправиться обратно в каменный век. Linux беспощаден, особенно если не создал бэкап.

Можно поменять параметры резервного копирования, вроде места расположения копии, в соответствующем меню.
Даже можно настроить ежедневные и еженедельные бэкапы. Если что-то пойдет не так, всегда будешь уверен в отходных путях.
B.Восстановление системы Linux
1. Из той же ОС
Если все еще можно войти в OS и хочется вернуться к предыдущему состоянию ПК, просто запустите Timeshift из меню или dash и выберите “Restore Image” и нажмите “Restore”. Это все.
2.Восстановление, если нельзя зайти в Linux
Это часть касается систем, вход в графическую часть которых невозможен по причине ее форматирования или повреждения.
Понадобиться установочная USB. Я крайне рекомендую всегда иметь под рукой или флешку с Linux или DVD так как временами очень помогает. Для отсутствия таких вещей оправданий нет.
Так или иначе запускаем live сессию и скачиваем и устанавливаем Timeshift по вышеуказанным инструкциям (да, в ней можно устанавливать приложения).
После установки запускаем приложение и ищем расположение резервной копии. Далее жмем “Restore” (да, live сессия имеет доступ к жесткому диску).
Рекомендую позволить Timeshift переустановить загрузчик.
Подытожим
Можно ли проще создать резервную копию и восстановить Linux? Данная программа имеет возможность настройки, позволяет лажать и разбираться без страха за последствия. Это незаменимое средство для новообращенных пользователей Linux, еще не привыкших к суровой реальности системы. Ведь главное в использовании Linux что? Никогда не останавливаться в исследовании. Так что вам наверняка понадобится это средство, даже если вы эксперт по Пингвину.
Как вам Timeshift? Как вы бэкапите Linux?
Также просим поделиться случаями, когда вы оплошали так, что Timeshift бы не помешал. Не стесняйтесь! Возможно вы спасете кому-то жизнь. 😀
How To Backup and Restore Ubuntu & Linux Mint With Timeshift
Timeshift is a backup and system restoration utility for Linux operating systems similar to the System Restore feature in Windows operating system. This tool protects the system by taking incremental snapshots of a filesystem at regular intervals.
It uses RSYNC and BTRFS mode for taking the snapshots. These snapshots can be restored at a later point of time to revert the changes made to the system or to recover the unbootable operating system.
Timeshift is designed to protect only system files and settings, not user documents. However, you can enable the backup of the user documents if needed.
Install Timeshift
Timeshift packages are available in Launchpad PPA for Ubuntu & Linux Mint.
For Ubuntu 20.04 / Linux Mint 20/19.3, Timeshift is available in the base repository. So, you do not need to set up PPA.
Set up the PPA with the below command.
sudo add-apt-repository -y ppa:teejee2008/ppa Update the repository index.
Install Timeshift with the below command.
sudo apt install -y timeshift Take System Backup with Timeshift
Open the Timeshift from the respective graphical interface.
Ubuntu: Activities » Search for Timeshift.
Linux Mint: Menu » Administration » Timeshift.
Enter your password if you get an authentication window.
Follow the backup wizard to configure Timeshift.
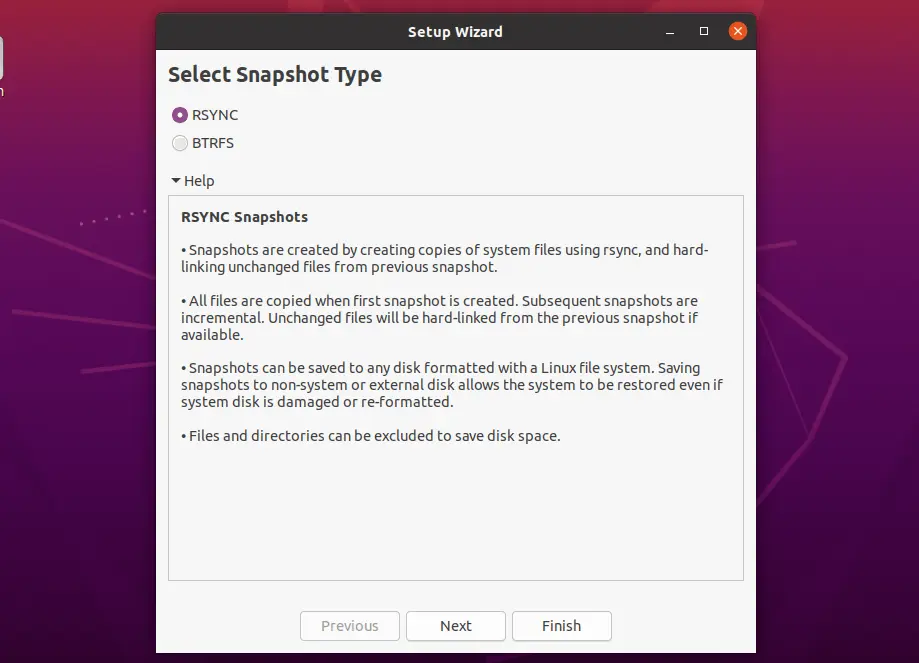
Snapshot Type
Select the Snapshot Type based on your system. RSYNC supports all the file system types and BTRFS supports only the backup of BTRFS filesystems.
In RCYNC mode, snapshots are taken by copying files using rsync and hard-linking unchanged files from the previous snapshots to save disk space. Each snapshot is a full system backup. Snapshots can be saved any disk formatted with a Linux file system. Saving snapshots on non-root disk or on the external disk which allows the system to be restored even if the operating system is not booting.
In BTRFS mode, snapshots are taken using the built-in features of the BTRFS file system. Snapshots are created and restored instantly without burdening the system. Snapshots are stored in on the same disk from which they are created (system disk). If the system disk fails then your snapshots will be lost.
Choose RSYNC and click Next.
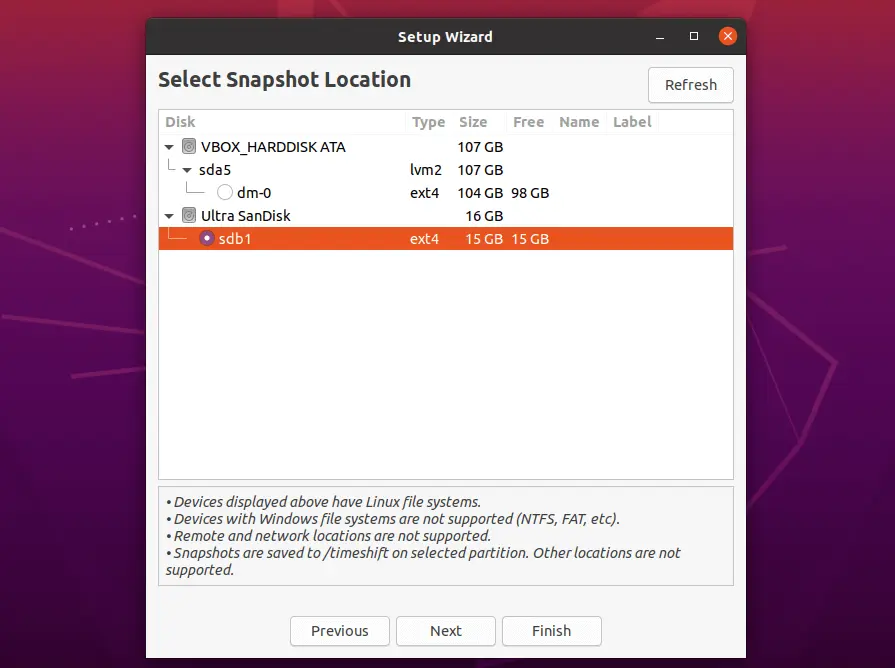
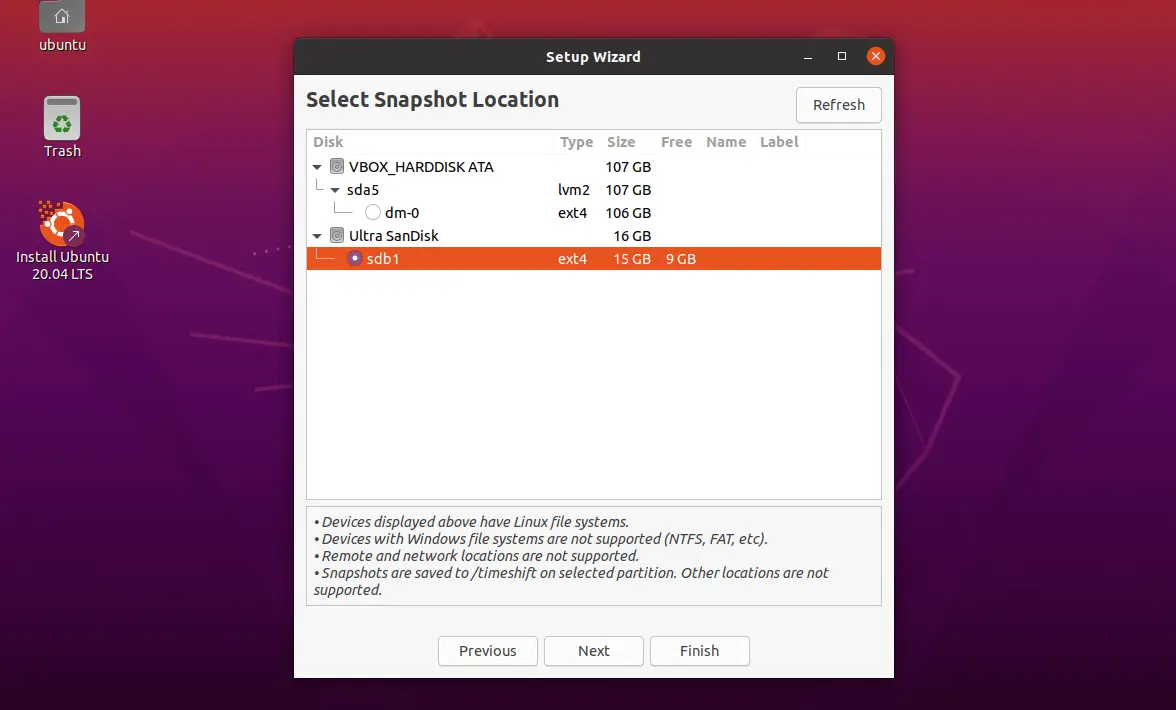
Backup Location
Timeshift supports storing snapshots only on Linux file systems. Windows file systems, remote and network storages are not supported.
Snapshots are stored in /timeshift of the selected partition. If /backup partition is selected for storing the snapshots then snapshots will be in /backup/timeshift .
During the initial setup, Timeshift will calculate the required space for storing snapshots and may show you a warning if the selected partition is short of the required space.
Choosing external storage for storing snapshots would be recommended as you can able to restore your system in case of system disk corruption or the system is not bootable.
Here, I am using a USB stick for storing snapshots.
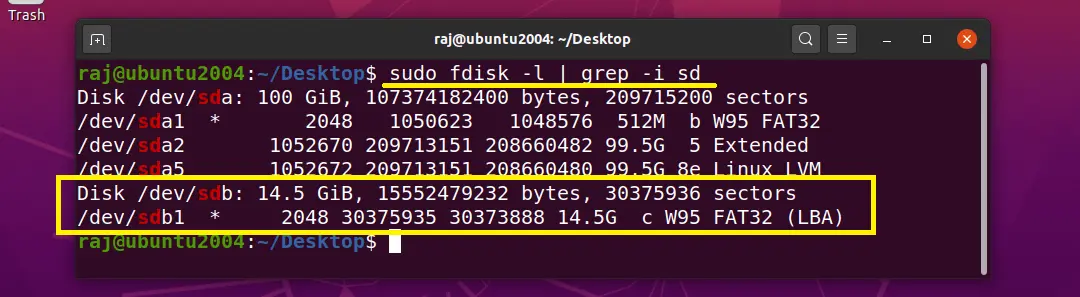
NOTE: You need to format the USB stick with ext4 or other Linux file system type.
sudo umount /dev/sdb1 sudo mkfs.ext4 -f /dev/sdb1 Choose the partition and click Next.
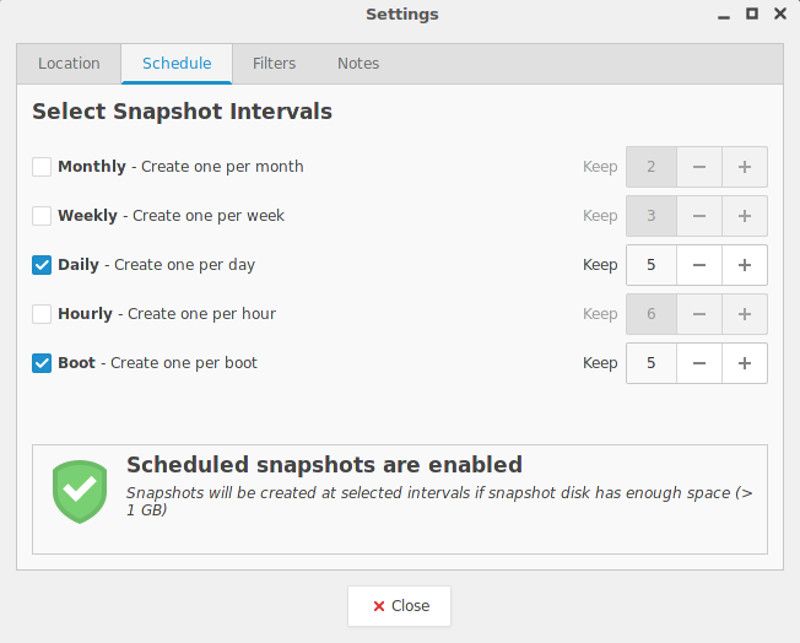
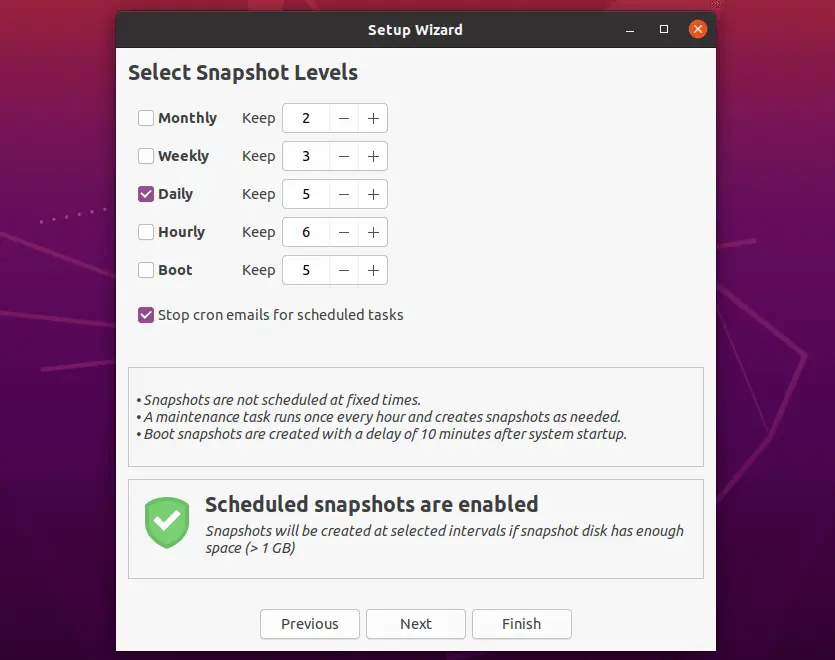
Scheduled Snapshots
You can schedule automated snapshots at a standard interval – Hourly, Daily, Weekly, Monthly, or at the system boot with a delay of 10 mins.
You can choose to retain a number of snapshots for a selected schedule.
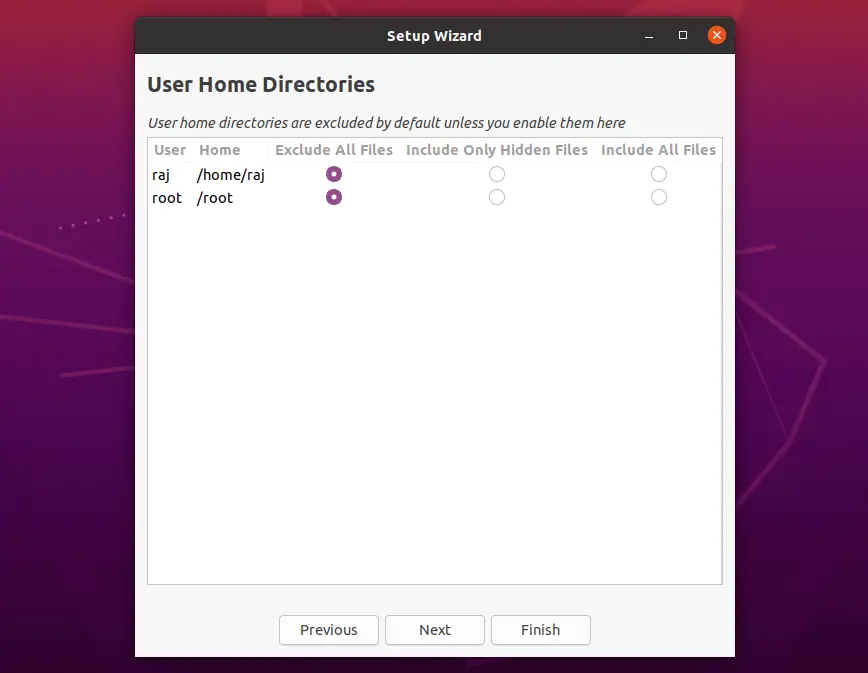
Include Home Directories
Timeshift is designed to protect only system files and settings, not user documents. However, you can enable the backup of /home directory (disabled by default) if needed.
If the home directories included in system backup, the data will be overwritten when you restore the snapshot.
Take First Backup
Click the Create button to start your first system snapshot.
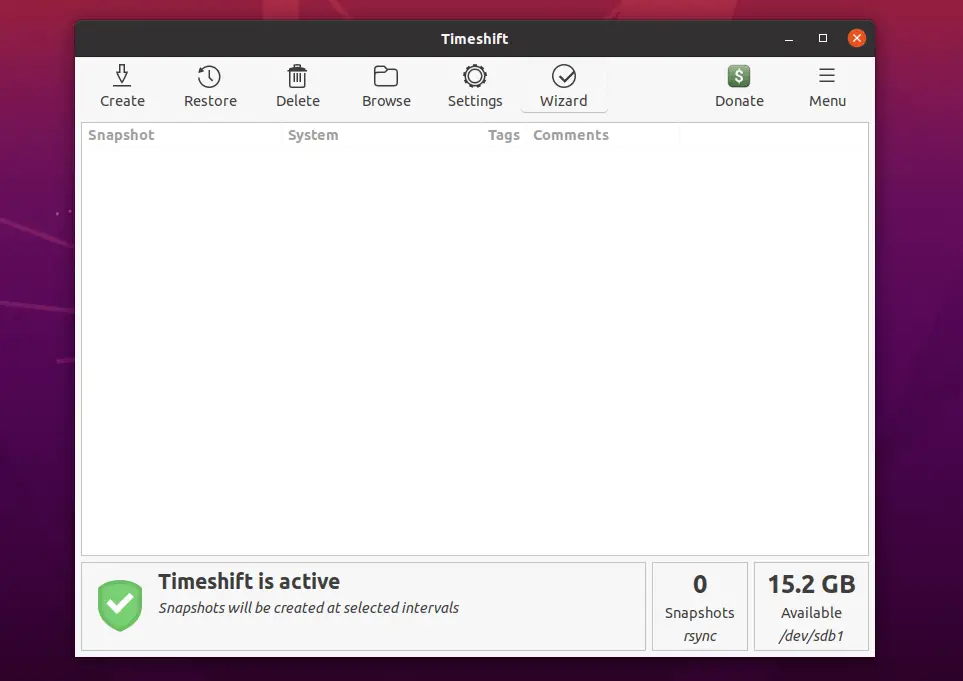
The snapshot creation would take time and it depends on the size of system data.
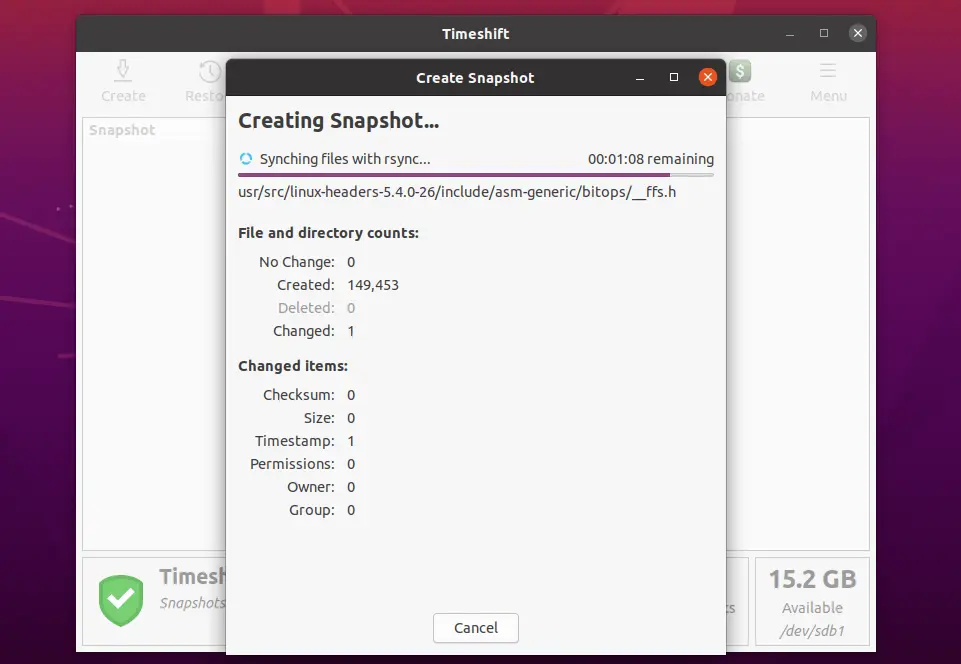
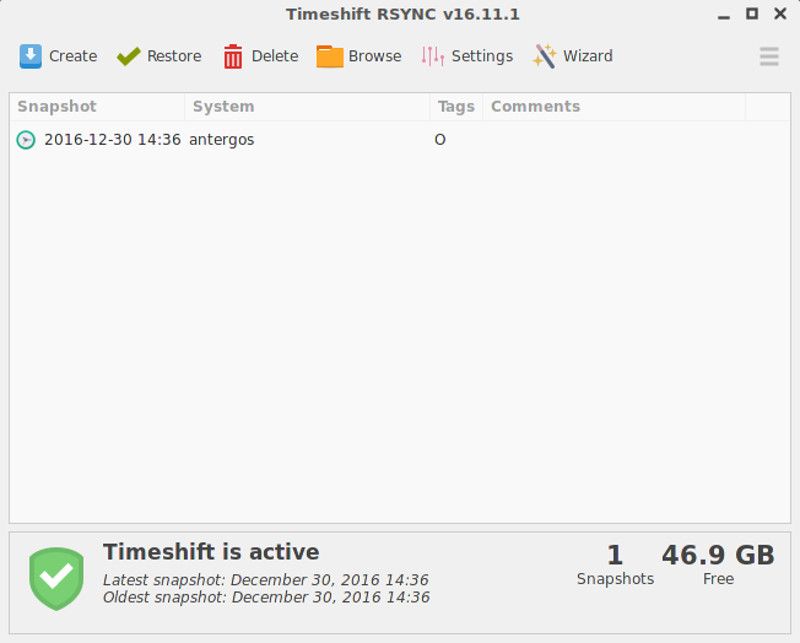
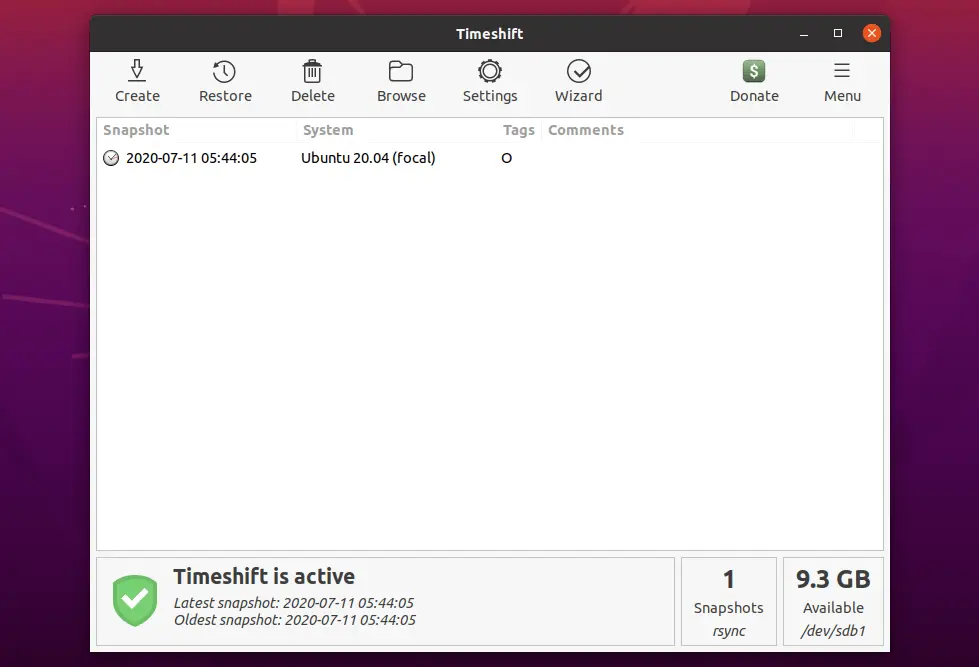
Once the snapshot is taken, you would see it in the snapshot list.
Restore System With Timeshift
Running System
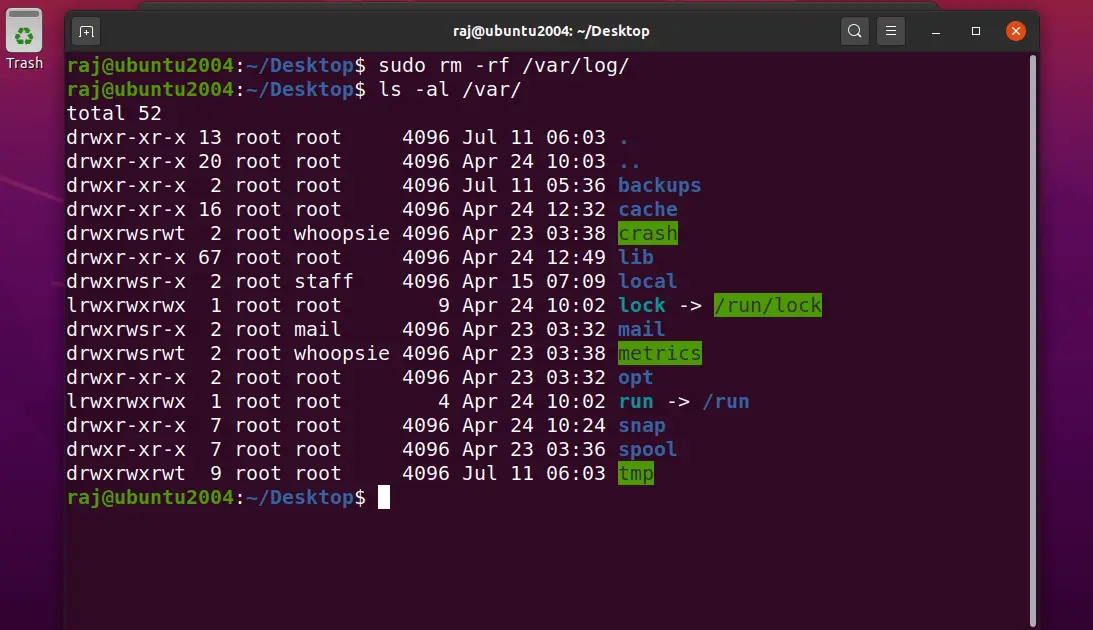
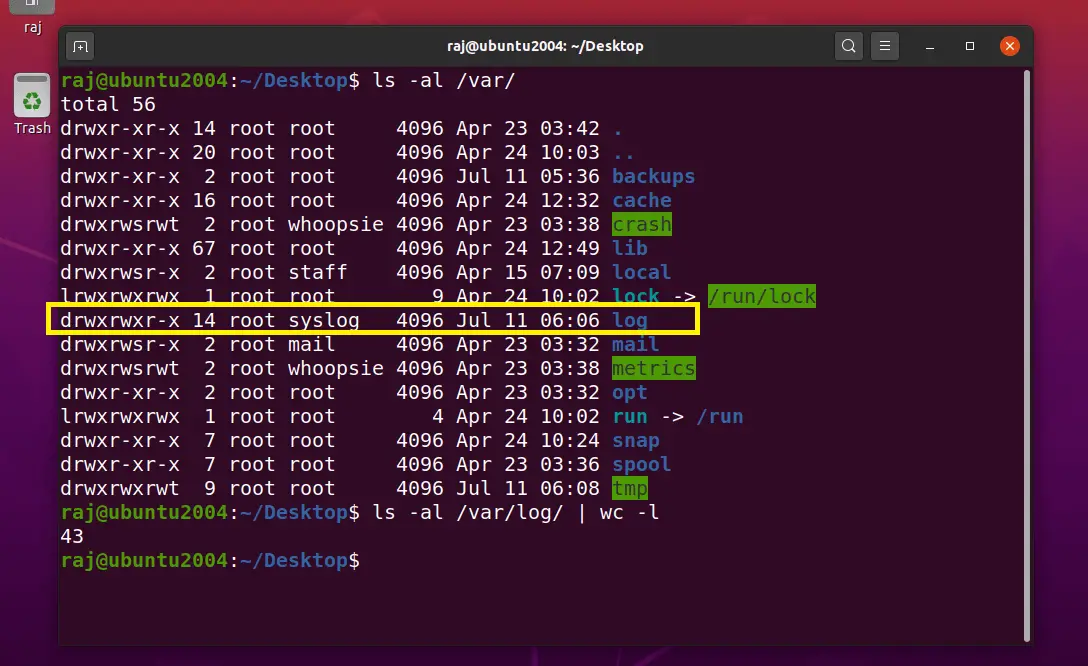
For testing the system restoration, I am deleting the /var/log directory and will restore the directory with the Timeshift.
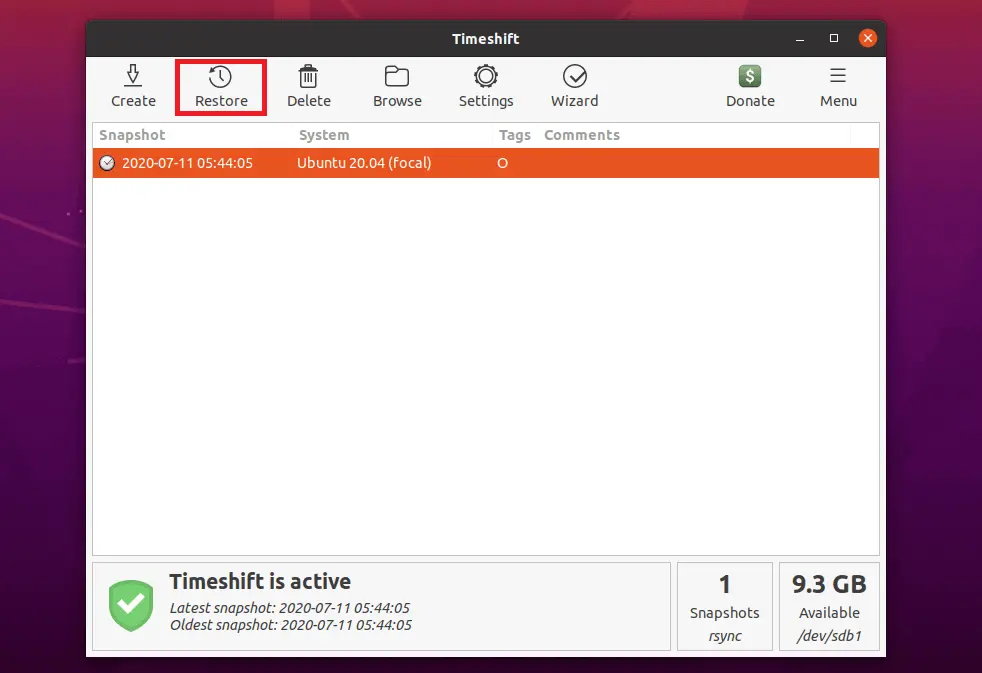
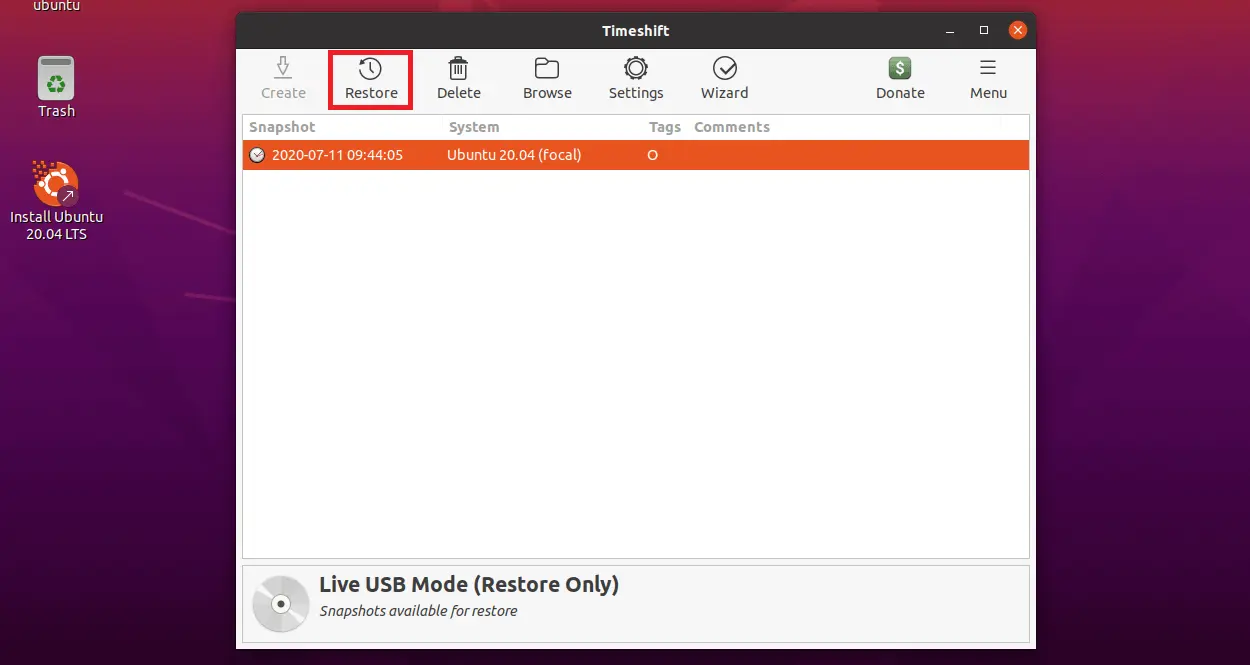
Snapshots can be restored by selecting a snapshot from the main window and clicking the Restore button on the toolbar.
Save your work and close any open applications before you begin restoring the system from snapshot as Timeshift will reboot the system during the restoration.
- Click Next on Select Target Device
- Review the Files that will be restored
- Click Next on the Warning page
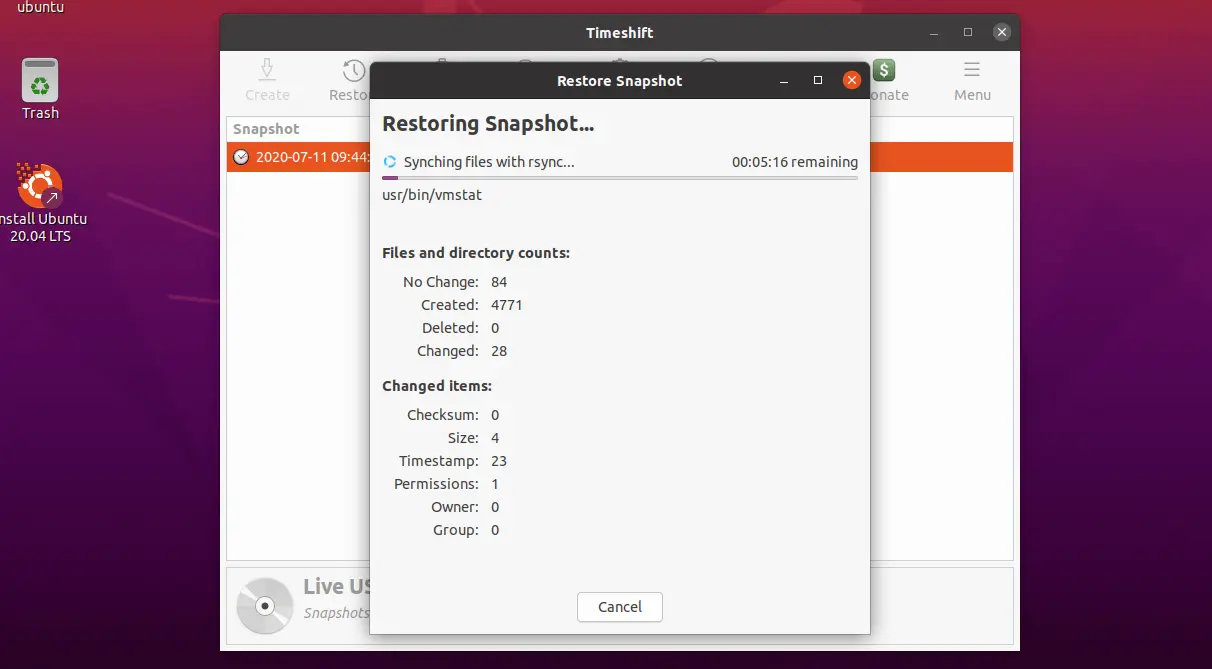
System restore is in progress and the system will be rebooted automatically.
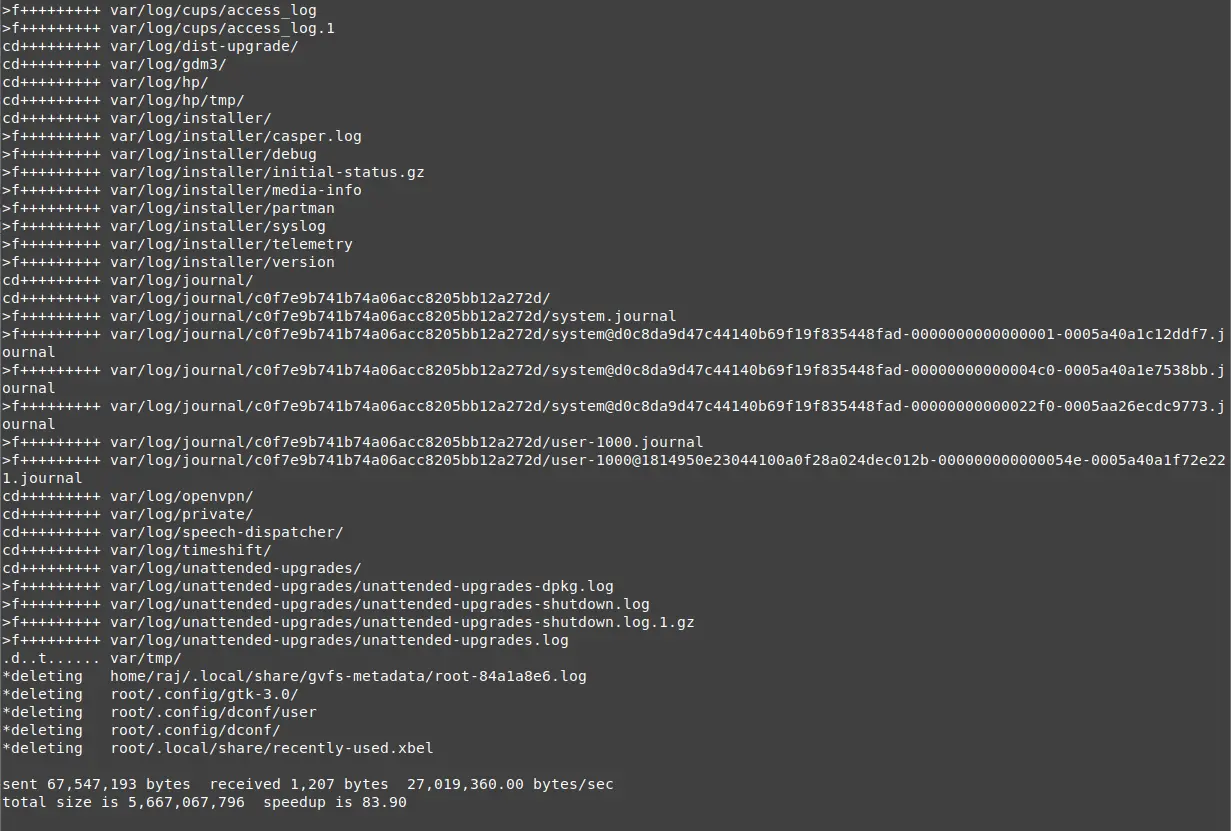
Upon system reboot, validate if the /var/log directory has been restored.
Non-Bootable System
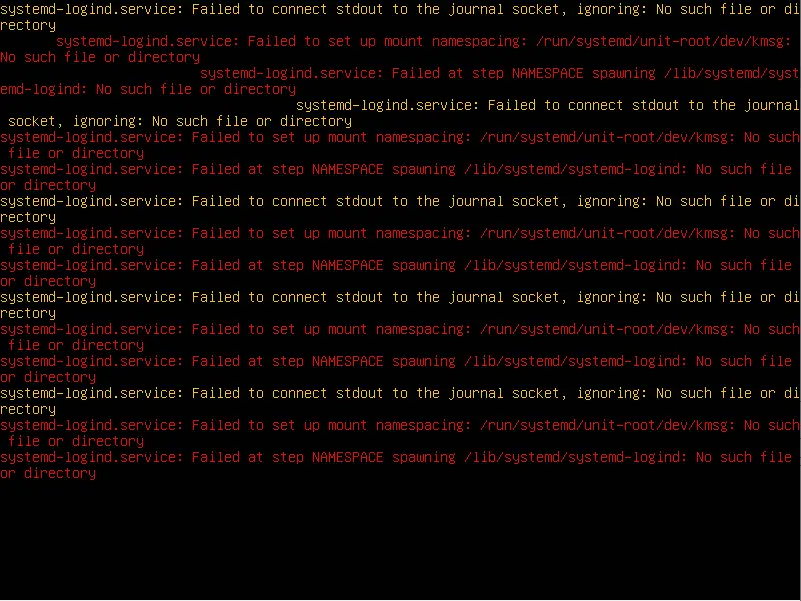
For testing the system restoration, I am deleting the / to make the system non-bootable and will restore the directory with the Timeshift.
You would get a screen similar to below when you delete / directory.
Boot your system with Ubuntu/Linux Mint live cd and install the Timeshift.
### Ubuntu 20.04 ### sudo add-apt-repository "deb http://us.archive.ubuntu.com/ubuntu/ focal universe" sudo apt install -y timeshift ### Other Ubuntu Versions & Ubuntu Derivatives ### sudo add-apt-repository -y ppa:teejee2008/ppa sudo apt update sudo apt install -y timeshift
Linux Mint live cd already has Timeshift installed. If Linux Mint live cd doesn’t have Timeshift installed, follow the above Ubuntu derivatives steps to install Timeshift.
Open the Timeshift and choose RSYNC and then click Next.
Select the partition where the snapshots are stored and then click Next.
Now, Timeshift will list the available snapshots to restore.
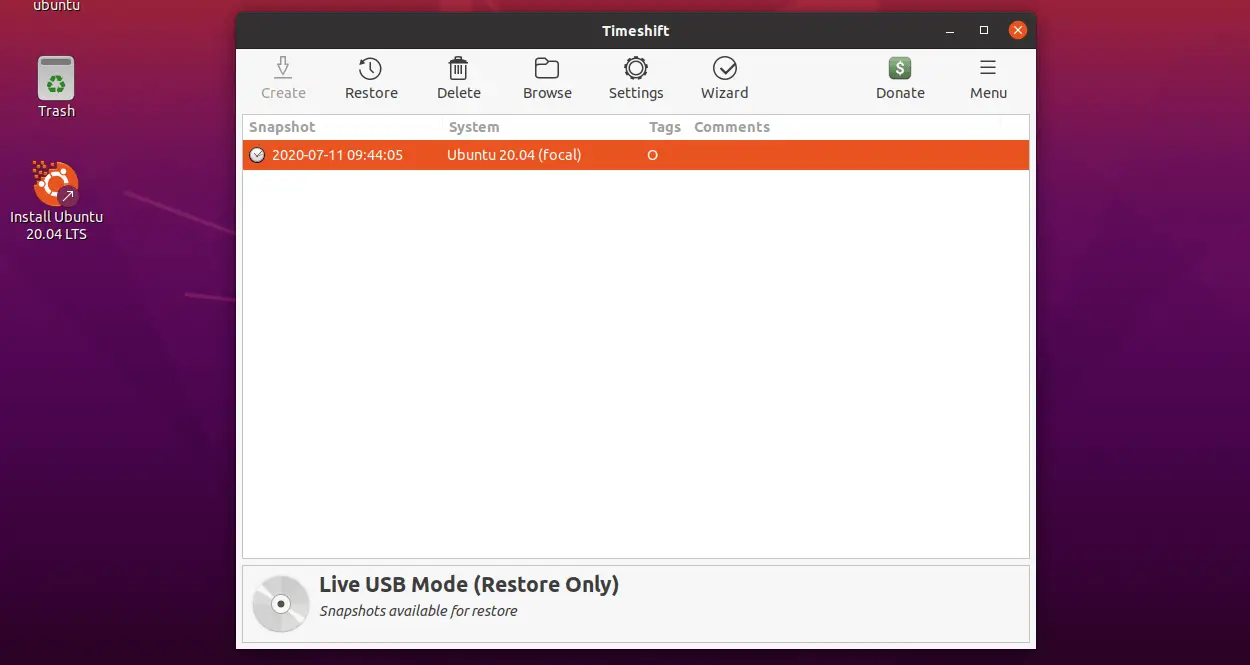
Select the snapshot you want to restore and then click Restore.
- Review the Files that will be restored
- Click Next on the Warning page
System restore is in progress.
Upon completion of the system restore, reboot your system.
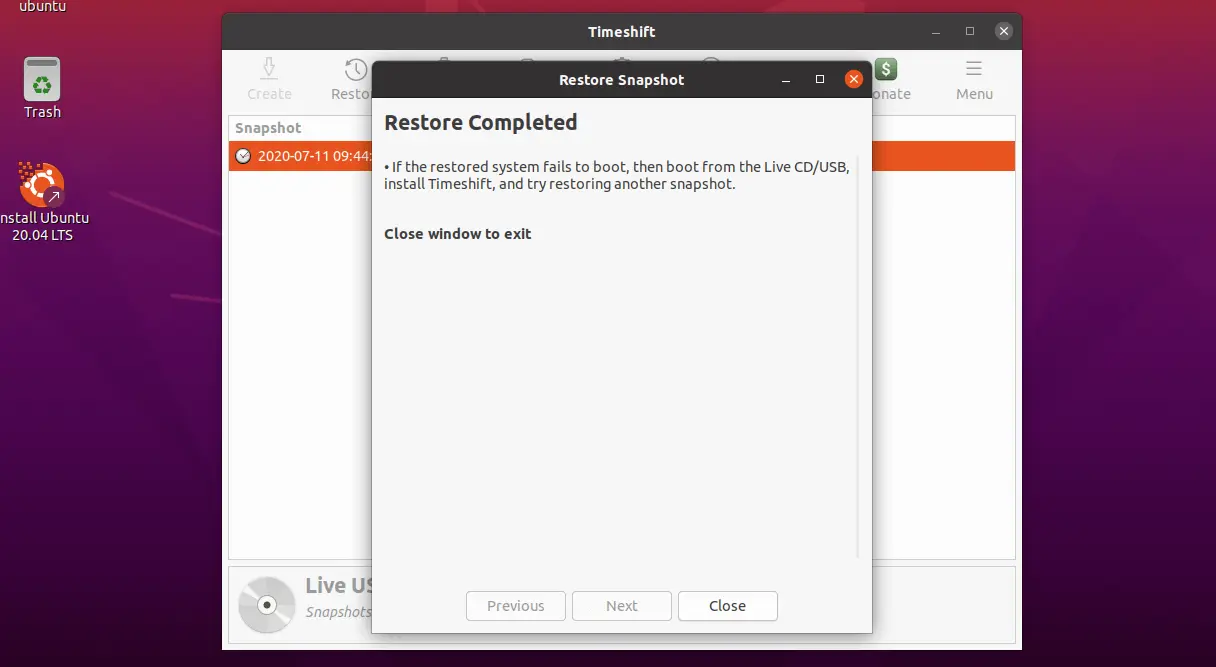
Your system should boot fine like earlier.
Conclusion
That’s All. I hope you have learned how to backup and restore the Ubuntu & Linux Mint systems with Timeshift. Please share your feedback in the comments section.