- Install Samba on Linux Mint to share files with Windows
- Install and Configure Samba Server on Linux Mint 20
- 1. Run system update
- 2. Install Samba on Linux Mint
- 3. Allow samba in Linux Mint Firewall
- 4. Add your user to the Samba group
- 5. Share some Linux Mint folder
- 6. Access the shared folder on Windows or Linux
- Extra tip- Linux Mint SambaShare User
- 8 thoughts on “Install Samba on Linux Mint to share files with Windows”
- How to install and enable Samba in Linux mint
Install Samba on Linux Mint to share files with Windows
Samba is a popular, open-source networking software that computers with a Unix or Linux – operating system allow the sharing of network resources from Windows -networks, such as files and printers. However, it is not limited to Windows only, we can install and use on Unix / Linux- based servers pr Desktop to share resources over the network. The common protocols Server Message Block (SMB) and Common Internet File System (CIFS, an open version of SMB) are the basis on which Samba is based. The name ” Samba ” is just a name given to represent “SMB”.
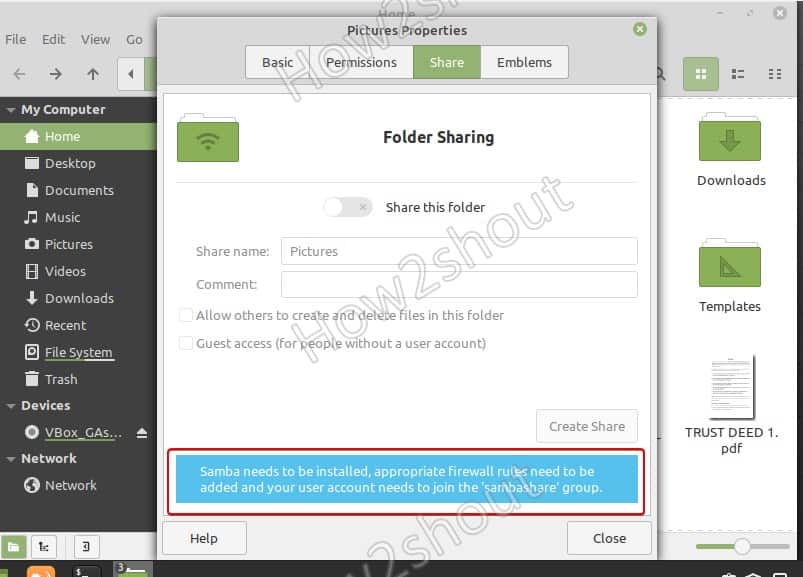
If you are using Linux Mint and want to share some folder, then right-click on it and select properties. And then the Share Tab. However, you will not able to enable this option because samba is not there yet. To confirm, you can see a message given at the bottom “Samba needs to be installed, appropriate firewall rules need to be added and your user account needs to join the ‘samba share group“.
To solve this let’s follow the given steps in this article…
Install and Configure Samba Server on Linux Mint 20
1. Run system update
Well, it is not a necessary step, however, run the system update command to rebuild the repo cache and make sure all the system installed packages are up to date.
2. Install Samba on Linux Mint
Next, in your command terminal use the APT package manager to install Samba on your Linux Mint. The packages to set it up are already there in the system repository, thus we don’t need to add anything extra.
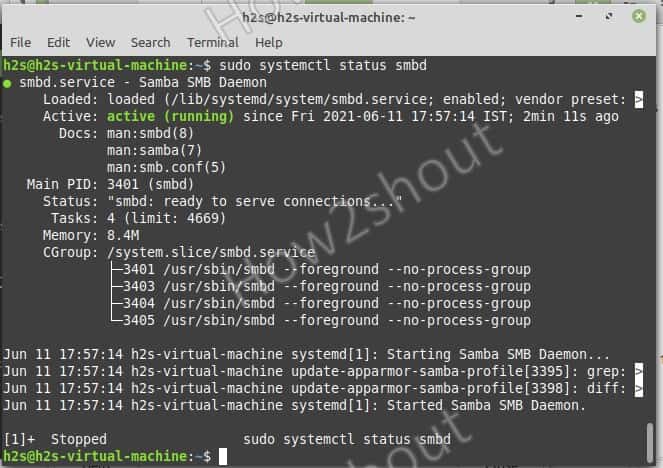
Check its service is active and running:
sudo systemctl status smbd
If it is not active then run:
sudo systemctl --enable now smbd
3. Allow samba in Linux Mint Firewall
To connect and access the shared files over SMB protocol, we have to first whitelist and allow its service to get accessed from the outside of the computer. Thus, allow it in the firewall
4. Add your user to the Samba group
Let’s add the current System user to the SambaShare group, so it can access all files and folders shared under it.
sudo usermod -aG sambashare $USER
set the password for share: This will be different from your system password.
Note: $USER means your current user, if you want to set some other user then change $USER with the particular user name. Also, the file or folder you want to share must be accessible to that particular user.
Alternatively, if you want to add some other users to the SAMBA group use:
sudo usermod -aG sambashare your-user
sudo smbpasswd -a your-user
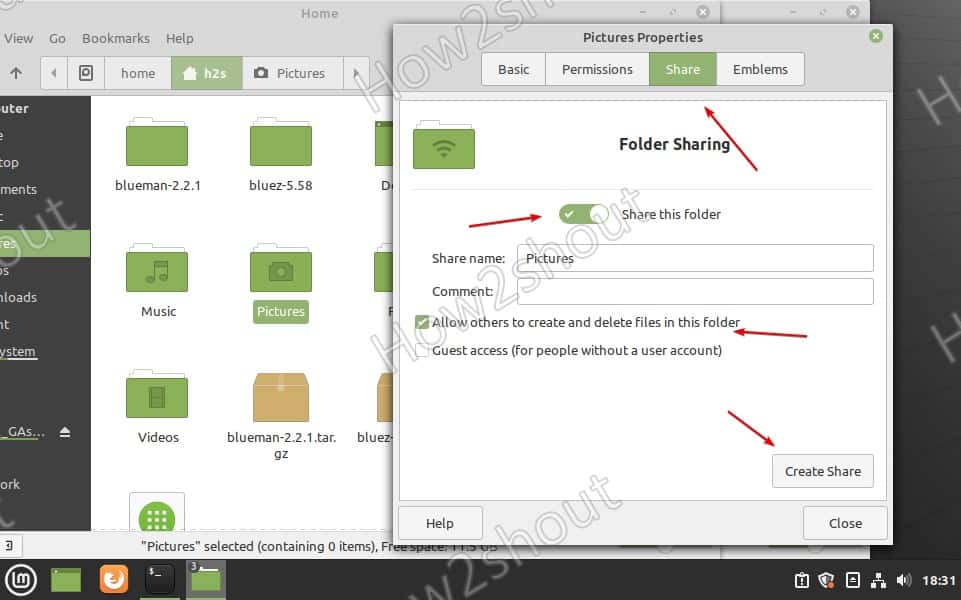
5. Share some Linux Mint folder
Lets’ say I want to share the Pictures folder or any other on my Linux Mint that is owned by my current user. So, for that simply go to that folder, right-click on it and select the Share tab.
6. Access the shared folder on Windows or Linux
Now, we can mount the Linux Mint shared folder on other Windows or Linux systems available in the same network or domain.
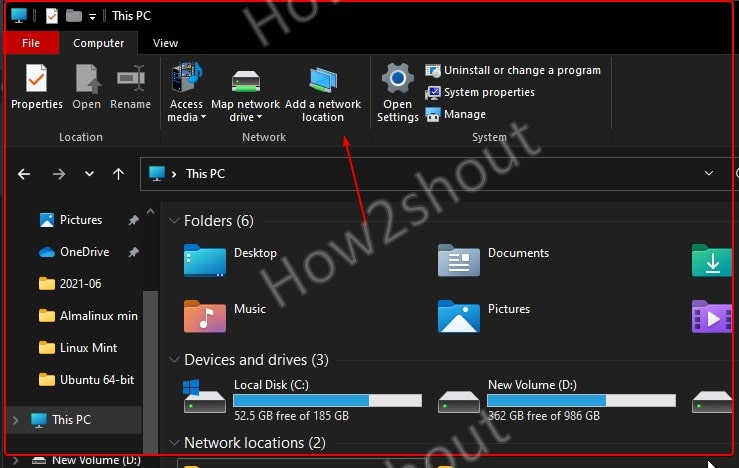
On Windows 10/8/7
- Open My Computer or This PC
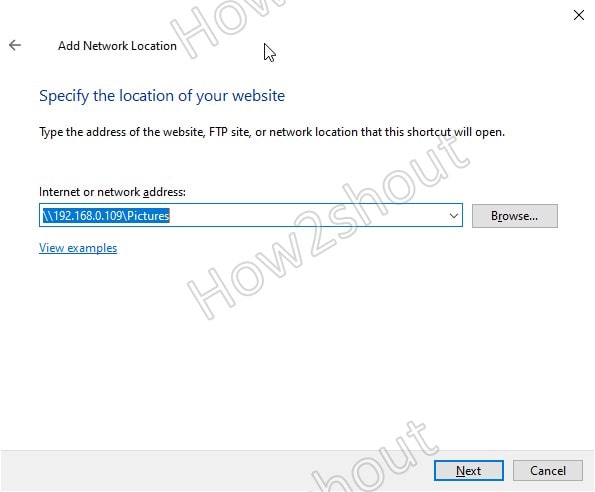
- Select Add network location icon given in the top menu.

- Add your Linux Mint \\server-ipaddress\shared -folder-path– For example, here we have shared the Pictures folder, the path will be like this- \\192.168.0.109\Pictures

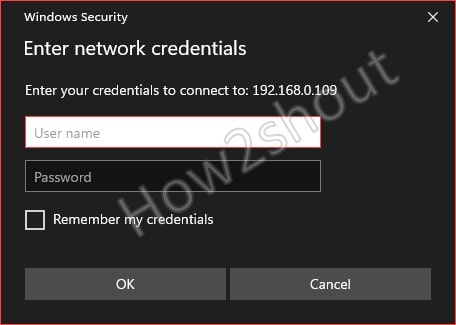
- Enter Samba User and password

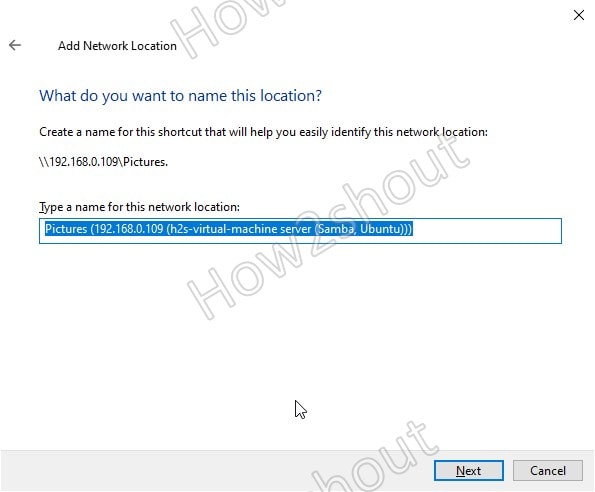
- The system will set a random name for your shared folder, however, you change to something easy to remember.
- Finally, you have the shared folder with read and write access.


On Linux systems such as Ubuntu, CentOS, and others…
The place to connect the samba server can be different from Linux to Linux, depending upon the desktop environment.
Here we are showing an example for Ubuntu and CentOS using GNOME.
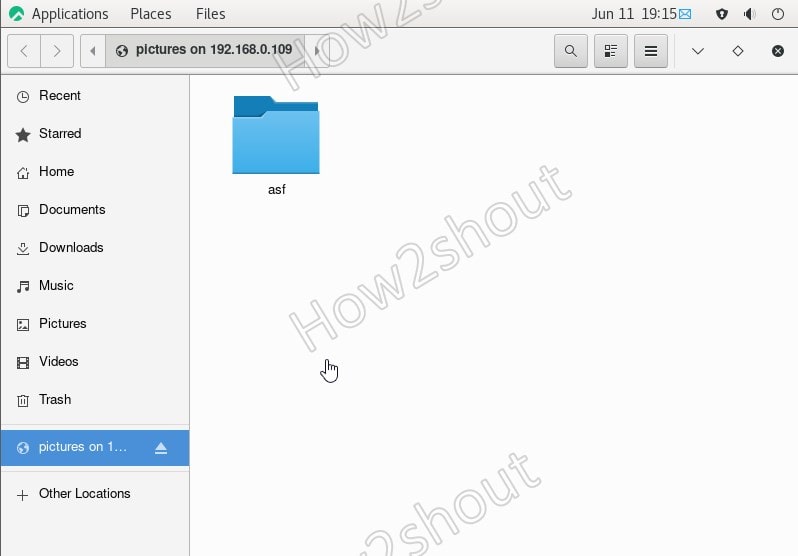
- Open File Manager
- Select Other Locations from the right side given panel.
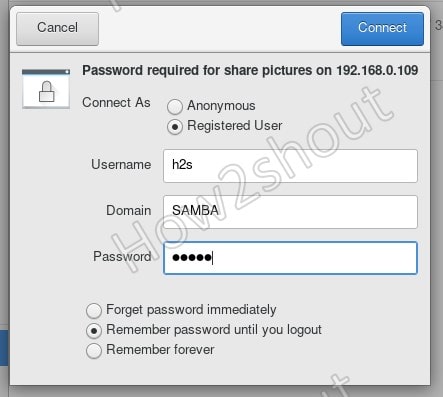
- At the bottom, in the “Connect Server” box type- smb://server-ip/shared-folder-path

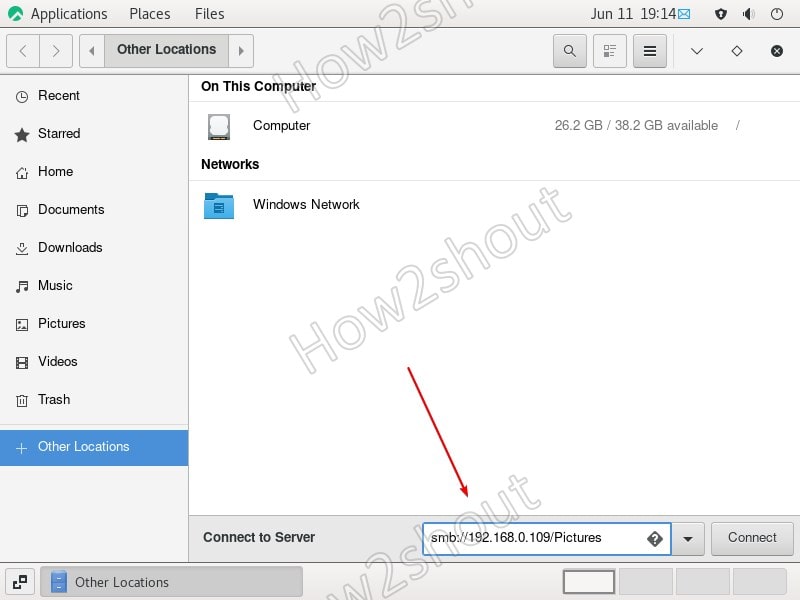
- Click on Connect.
- Select Registered User and enter that username and password


Extra tip- Linux Mint SambaShare User
If you want to create a new user to access the folder you want to share except it cannot access anything else then follow the below steps:
Create users:
Add user to Sambashare group
sudo usermode -aG new-user sambshare
Change the folder rights of a folder that you want to share to read and write for all users. So, that our new user can access that.
sudo chmod 777 folder-path
Now, you can access the shared folder using the new user and its password.
8 thoughts on “Install Samba on Linux Mint to share files with Windows”
I had to use “sudo smbpasswd -a $USER” otherwise I got the error “Failed to find the entry for user …”
Otherwise, a very straightforward setup. Many thanks. Reply
Awesome walkthrough, thank you!| One minor typo in the “Add user to Sambashare group” step:
Command should be `sudo usermod -aG sambashare new-user` …and then it might be good to set the password for that new user immediately following: `sudo smbpasswd -a new-user` Reply
For the command line “sudo systemctl –enable now smbd”
in my version – Linux Mint 17.3 “Rosa” Cinnamon – I had to shorton to “sudo enable now smbd” to work. Reply
Everything working fast, I have an old gateway DX4200 with 8 GB, and a tablet with Windows 10. Your tutorial was accurate and worked for me. Thanks so much, would please provide a xfer link and send you $ufficient grace. Reply
step 4 is missing instructions on how to create the user in the first place.
step 5 is bad. nemo sharing is terrible. it won’t let you specify who you share what with, it just shares it with everyone Reply
How to install and enable Samba in Linux mint
Samba is a free implementation of the Microsoft Windows file sharing protocol (formerly called SMB, later renamed to CIFS) for UNIX-like systems. Why is it important? By installing Samba on Linux Mint, you can share resources and folders with Windows computers. Best of all, it is integrated from the file browser.
Samba is an open-source project that implements the Windows file sharing protocol for UNIX-like operating systems, such as Linux. The main feature of this application is that Linux computers can interact in a stable and efficient way with Windows networks.
What do I mean by interacting? Well, with Samba you can:
- Share various file systems.
- Share printers, with installation on the server as well as on the clients.
- Provide or assist with a WINS name resolution server.
Linux Mint and Ubuntu, which are two of the most widely used distributions in all of Linux, provide packages and configurations, so you can install without too much hassle.
Installing and enabling a Samba server in Linux Mint
Before you begin, it’s a good idea to update the entire operating system.
Open a terminal by pressing the CTRL + ALT + T keys or from the main menu. Then, run
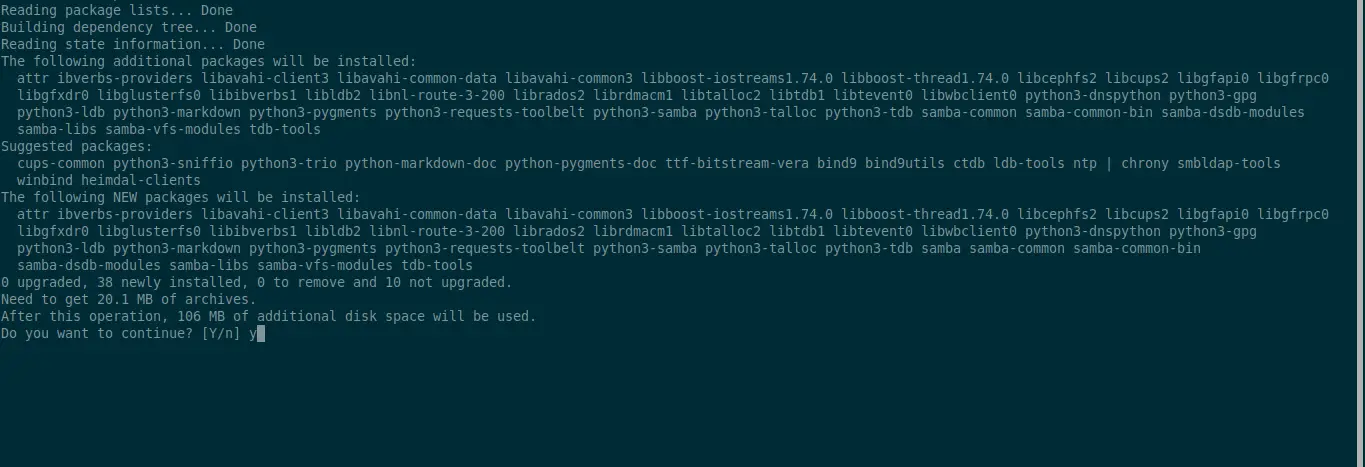
sudo apt update sudo apt upgradeAfter this, you can install the samba package, which is the main package of the protocol.
Samba runs as a system service, so you will need to enable it and run it to start up
sudo systemctl enable --now smbd Synchronizing state of smbd.service with SysV service script with /lib/systemd/systemd-sysv-install. Executing: /lib/systemd/systemd-sysv-install enable smbdIf you want to check that everything is OK, you can run
sudo systemctl status smbdThis command will check the status of the Samba service.
● smbd.service - Samba SMB Daemon Loaded: loaded (/lib/systemd/system/smbd.service; enabled; vendor preset: enabled) Active: active (running) since Fri 2022-12-16 22:36:11 UTC; 9s ago Docs: man:smbd(8) man:samba(7) man:smb.conf(5) Main PID: 2204 (smbd) Status: "smbd: ready to serve connections. " Tasks: 4 (limit: 2258) Memory: 10.4M CPU: 121ms CGroup: /system.slice/smbd.service ├─2204 /usr/sbin/smbd --foreground --no-process-group ├─2206 /usr/sbin/smbd --foreground --no-process-group ├─2207 /usr/sbin/smbd --foreground --no-process-group └─2208 /usr/lib/x86_64-linux-gnu/samba/samba-bgqd --ready-signal-fd=45 --parent-watch-fd=11 --debuglevel=0 -F Dec 16 22:36:11 imaginelinux systemd[1]: Starting Samba SMB Daemon. Dec 16 22:36:11 imaginelinux update-apparmor-samba-profile[2198]: grep: /etc/apparmor.d/samba/smbd-shares: No such file or directory Dec 16 22:36:11 imaginelinux update-apparmor-samba-profile[2201]: diff: /etc/apparmor.d/samba/smbd-shares: No such file or directory Dec 16 22:36:11 imaginelinux systemd[1]: Started Samba SMB Daemon.Configuring Samba to share a folder
The main goal of installing and configuring Samba is to make the machine able to interact with Windows machines by sharing files.
So first, it is necessary to back up the Samba configuration file. Because it is useful to have it in case there are problems with the new configuration.
This way it will be backed up.
Now you can create a public folder which, while not recommended, can be useful for quick sharing.
So, first create it and assign it the appropriate permissions
sudo mkdir -p /var/public/ sudo chmod -R 0777 /var/publicAs you can imagine, you can set the path and folder name to whatever values you prefer.
It is recommended that, as it is a public folder, it does not belong to any user on the system. To do this.
sudo chown -R nobody:nogroup /var/publicAnd configure it to be used by Samba.
sudo chgrp sambashare /var/publicFor testing purposes, you can create an empty file or something so that the process is noticeable
sudo touch /var/public/imaginelinux.txtThen, edit the Samba configuration file to add the new configuration related to this new folder.
sudo nano /etc/samba/smb.confAt the bottom of the file, you can add the following settings
[public] path = /var/public browseable = yes guest ok = yes guest only = yes read only = no force user = nobody force create mode = 0777 force directory mode = 0777- Sets the directory path
- Makes it navigable and will be used only by guest users
- It is editable
The rest are security settings that make the folder unusable with permissions besides those set and by different users.
Save the changes and close the editor.
To apply the changes, simply restart the server
sudo systemctl restart smbdRemember that you can check the status of the service
sudo systemctl status smbdFinally, using the Linux Mint file browser, you can make the connection
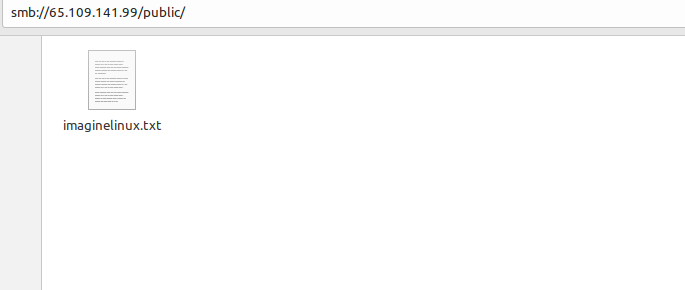
It is best to do this from the address bar.
Recommended: Creating a private folder in Samba
If you want to create a private folder to improve security and control access to it then there are a few more steps to take
First create a group for Samba
Then add the user to the group. You can also create it if it doesn’t exist.
sudo usermod -aG samba userOf course, you can choose a name besides user .
Now use samba to set a password for this user. Don’t confuse this password with the system password, you may want it to be a different one.
New SMB password: Retype new SMB password: Added user user.Now create the private folder with the required permissions
sudo mkdir -p /smb/private sudo chmod -R 0770 /smb/privateAgain, you can assign the path of your choice.
Change the owner of the folder
sudo chown -R root:samba /smb/privateAgain edit the Samba configuration file
sudo nano /etc/samba/smb.conf[Private] path = /smb/private valid users = @samba guest ok = no writable = yes browsable = yesSave the changes and close the editor.
To apply the changes, restart the Samba service
sudo systemctl restart smbdOpen your file browser, and you should see the changes made. For example, try to access the private folder.
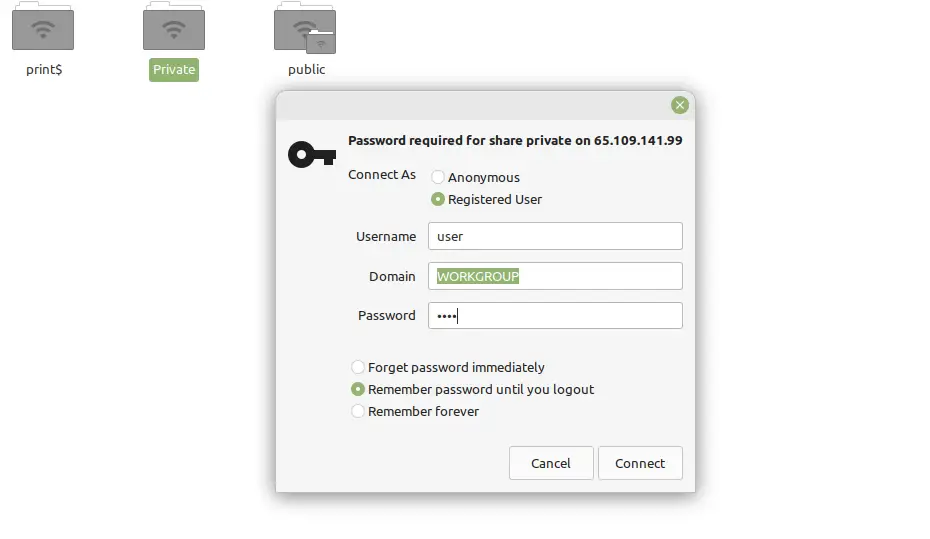
You will be prompted for a username and password. Enter them, and you should be able to quickly access them.
Samba is an important tool with which you can share files between Windows and Linux systems, but also between Linux clients only. Because it is so flexible, it has many options to increase security.
I hope you liked this post and can share it with friends.