- Linux mint ssh включить
- Как включить SSH в Linux Mint
- Возможно вам будет интересно:
- Как работает SSH
- Как установить сервер Openssh в Linux Mint
- Как разрешить ssh соединение в брандмауэре Linux Mint
- Заключение
- How to Install and Enable SSH on Linux Mint 21/20
- Prerequisites
- Step 1: Update System Packages
- Step 2: Install OpenSSH
- Step 3: Verify OpenSSH Installation
- Step 4: Configure OpenSSH
- Step 5: Restart OpenSSH
- Step 6: Connect to OpenSSH
- Conclusion
Linux mint ssh включить
How To Enable SSH in Linux Mint
By default OpenSSH server is not installed in Linux Mint. This quick guide will show you how to install and enable SSH in Linux Mint, allowing you to remotely access the operating system over the network through SSH.
1. Open Terminal
We’ll be doing this through command line, so begin by first opening up a terminal. You can find the terminal icon in the task bar in a default GUI installation, as shown below.
2. Install OpenSSH Server
Within the terminal, run the following command as root to install the OpenSSH server package.
apt-get install openssh-server -y
Note: You must do this with root privileges, otherwise you will receive the following error message:
E: Could not open lock file /var/lib/dpkg/lock — open (13: Permission denied)
E: Unable to lock the administration directory (/var/lib/dpkg/), are you root?
You can become root by running ‘sudo su’, followed by your password. By default the first account that you create when you install Linux Mint should be able to become root.
3. Check OpenSSH Status
Once installed SSH should be automatically configured to start on system boot, and be already running. We’ll of course check this though rather than just assuming!
We can use ‘systemctl is-enabled’ as shown below to check that ssh is enabled to start automatically on system boot. If it comes back with ‘enabled’ then SSH should automatically start up on boot. If it’s disabled, you can run ‘systemctl enable ssh’ to enable to to start up on system boot.
We can then use ‘systemctl is-active’ as shown below to check that ssh is currently active and running. If it comes back with ‘active’ then SSH is currently running. If it’s not running, you can run ‘systemctl start ssh’ to start it up.
We can also use ‘systemctl status’ to get a quick overview of all information, in the example below we can see that it’s actively running as well as various useful information about the service.
4. Testing SSH Access
In this example we have confirmed that SSH is configured to start up on system boot automatically and is currently running, so let’s try and SSH to it from an external Windows system! We’ll do this using PuTTY.
You can display the IP address of the Linux Mint machine by running ‘ip a’ from the terminal.
rootusers@rootusers-virtual-machine ~ $ ip a
2: ens33: mtu 1500 qdisc pfifo_fast state UP group default qlen 1000
link/ether 00:0c:29:d3:f5:b0 brd ff:ff:ff:ff:ff:ff
inet 192.168.1.20/24brd 192.168.1.255 scope global dynamic ens33
valid_lft 83316sec preferred_lft 83316sec
inet6 fe80::3286:aa53:7220:5fa7/64 scope link
valid_lft forever preferred_lft forever
We can see here that the IP address of our Linux Mint system is 192.168.1.20, so we’ll SSH to this using PuTTY from Windows. All you need to do is specify your username and password.
Note that by default the user ‘root’ will not have SSH access. This behaviour can be modified by editing the PermitRootLogin value in the ‘/etc/ssh/sshd_config’ file and then restarting SSH.
That’s all there is too it! We have now successfully established an SSH connection from Windows to Linux Mint, allowing us to remotely administer the Linux system over the network by running various commands via SSH.
Request a Login
Paul Allen maintains several publicly accessible historic computer systems, including an XKL TOAD-2 running TOPS-20. Request a login from Living Computers: Museum + Labs and try running TOPS-20 on a hardware emulated PDP-10.
Как включить SSH в Linux Mint
Включение SSH в Linux Mint— это одно из первых действий, которые вы должны сделать после установки операционной системы. Так как SSH предоставляет зашифрованный сетевой протокол для защиты удаленных учетных записей сервера и клиентов. Это позволяет вам удаленно получать доступ к вашей машине и безопасно выполнять операции сервером. SSH шифрует весь трафик между клиентом и сервером, чтобы предотвратить подслушивание, перехват соединений и другие типы атак.
Протокол Secure Shell (SSH) используется для управления или передачи данных между компьютерами через Интернет. Старые методы выполнения этих действий, такие как telnet, не обладают этими возможностями. Они небезопасны, так как передают пароль пользователя в виде открытого текста. А SSH предлагает безопасный маршрут по незащищенной сети, соединяющий клиентскую программу SSH с сервером SSH. В архитектуре клиент-сервер. Протокол Secure Shell в основном используется для связи с Unix-подобными операционными системами, хотя он также может использоваться в Windows.
Возможно вам будет интересно:
Как работает SSH
Клиент SSH по умолчанию позволяет подключаться к рабочим станциям Linux по защищенному каналу, и по умолчанию используется TCP-порт 22. SSH кодирует пакеты, делая невозможным для кого — либо наблюдение за вашей деятельностью. В отличие от telnet который не шифрует пакеты, так же telnet оставляет открытой возможность того, что кто-то прочитает, что вы делаете по SSH. В этой статье мы покажем вам, как включить безопасную оболочку (ssh) в Linux Mint.
Как установить сервер Openssh в Linux Mint
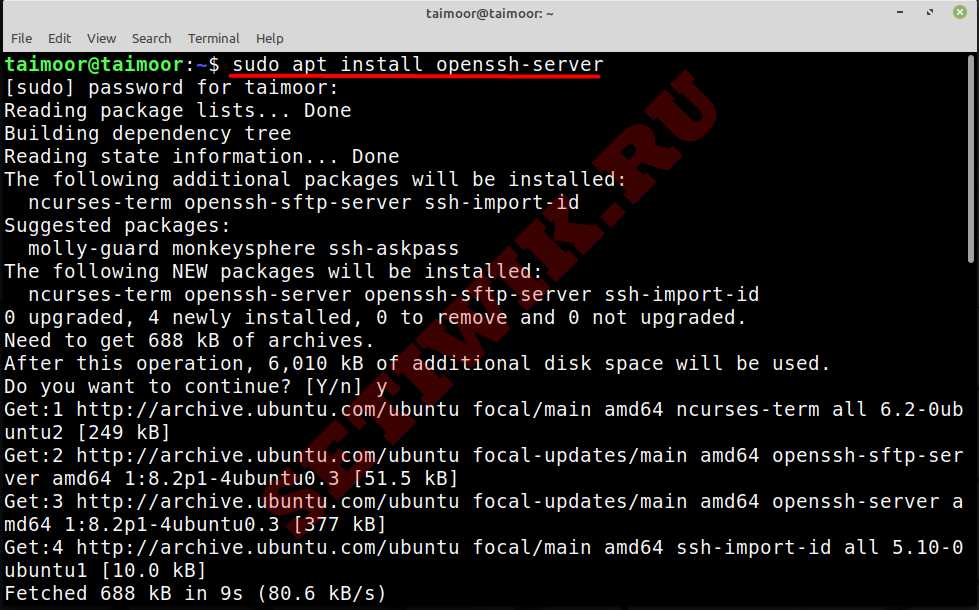
Вы можете установить сервер OpenSSH, открыв терминал и введя там следующую команду.
SSH должен автоматически запускаться при запуске системы и запускаться после установки. Однако вместо того, чтобы просто предполагать, мы перепроверим.
Чтобы проверить, включен ли SSH, и автоматически запуститься при запуске системы, выполните приведенную ниже команду.
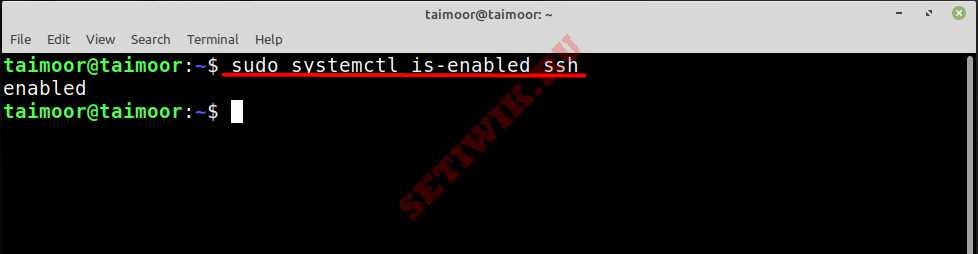
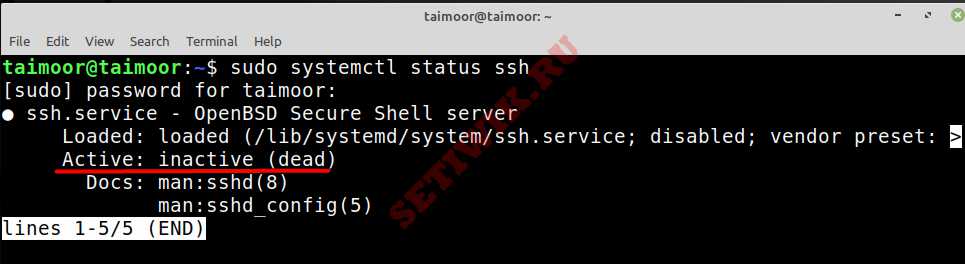
Если терминал возвращает «включено» (enabled), SSH должен запускаться сразу после загрузки компьютера. Если он отключен или если статус неактивен, как показано на следующем рисунке:
Исправьте это используя следующую команду:
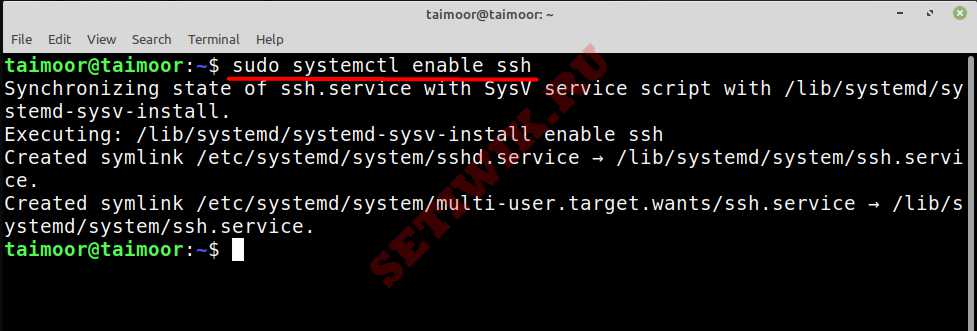
Теперь вы можете запустить службу SSH, набрав:
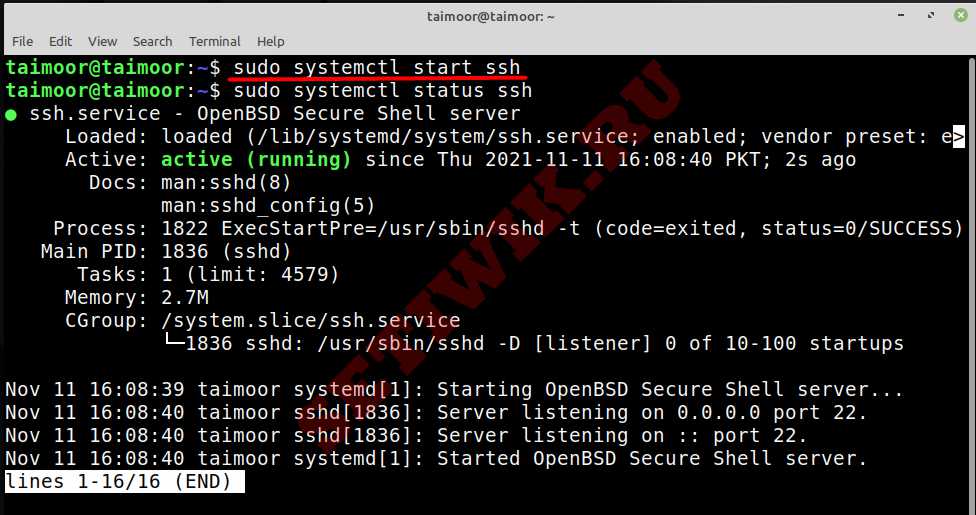
Мы также можем использовать «‘systemctl status» для получения краткой сводки всей информации. На приведенном выше изображении мы видим, что служба запущена и работает, а так же другие полезные сведения.
Как разрешить ssh соединение в брандмауэре Linux Mint
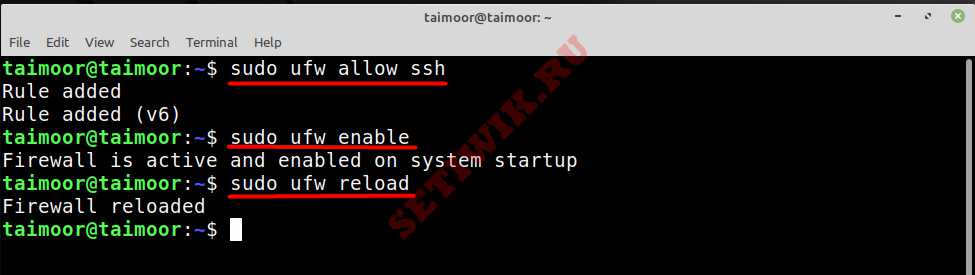
Иногда брандмауэр запрещает вам использовать соединение между клиентом и сервером. Итак, чтобы разрешить соединение, вам требуется ввести.
Это добавит правило в ваш брандмауэр, разрешающее подключение по ssh. Так же вы можете включить брандмауэр, если он в настоящее время отключен, введя.
Вам необходимо обновить вновь созданные настройки, чтобы реализовать их.Сделать это просто введите команду.
В приведенной выше команде UFW — это «простой брандмауэр» (uncomplicated firewall), который используется для управления брандмауэром Linux:
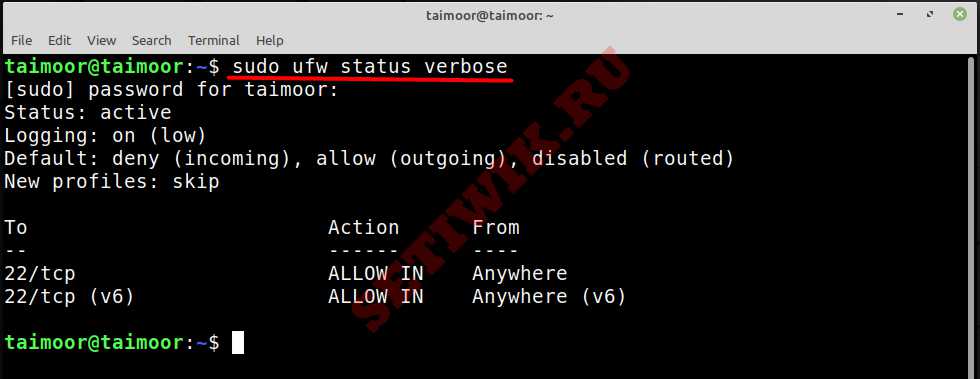
Вы также можете проверить состояние и полные сведения о брандмауэре ufw, введя команду.
Заключение
OpenSSH не установлен по умолчанию в Linux Mint, но его легко установить или включить. Это приложение устанавливает безопасное и зашифрованное соединение между сервером и клиентом. Мы продемонстрировали, как быстро настроить и использовать SSH в Linux Mint. После выполнения вышеупомянутого метода SSH будет активен автоматически при загрузке системы.
How to Install and Enable SSH on Linux Mint 21/20

Secure Shell (SSH) is a protocol used to connect and remotely manage systems over a network securely. It is a crucial tool for Linux Mint users who need to access their systems remotely, transfer files securely, and perform administrative tasks.
SSH provides a secure way to access a Linux Mint system from anywhere in the world using an encrypted connection, which is especially important for users who work remotely or need to manage systems from a different location. It is a powerful tool that can perform various tasks, such as transferring files, executing commands, and managing processes.
This guide will demonstrate how to install and enable SSH on Linux Mint 21 or Linux Mint 20 using the command line terminal and some basic configuration example options. By following these steps, you can ensure that your SSH connection is secure and protected from potential attacks while allowing you to access and manage your Linux Mint system easily.
Prerequisites
Before we proceed with the installation, make sure that you have the following:
- A running instance of Linux Mint 21 or Linux Mint 20
- Access to the terminal with administrative privileges
Step 1: Update System Packages
First, we must ensure that all our system packages are up-to-date. Open up your terminal and type the following command:
sudo apt update && sudo apt upgradeThis command will update your system’s package list and download the latest version of all packages installed.
Step 2: Install OpenSSH
To install OpenSSH on Linux Mint, we need to run the following command:
sudo apt install openssh-serverThis command will download and install OpenSSH on your machine. Once the installation is complete, OpenSSH will start automatically.
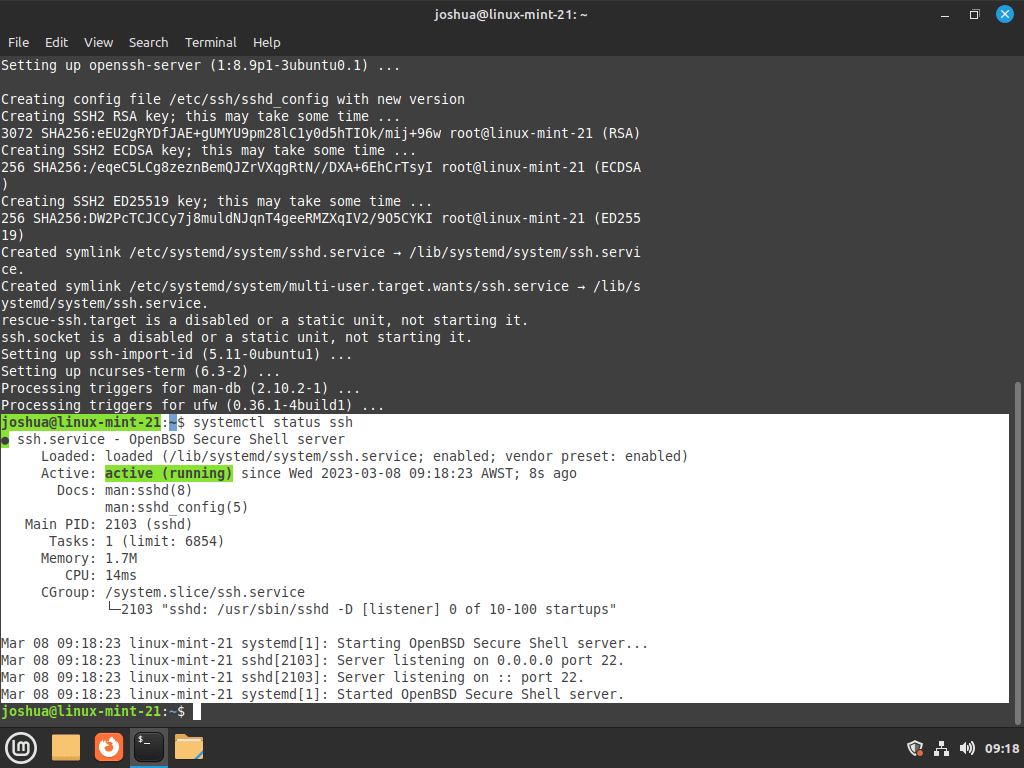
Step 3: Verify OpenSSH Installation
To verify that OpenSSH is installed and running on your machine, we can use the following command:
If OpenSSH is running, you should see output similar to the following:
Step 4: Configure OpenSSH
By default, OpenSSH is configured to allow remote access for all users. However, for security reasons, it is recommended to restrict access to specific users. To do this, we need to modify the OpenSSH configuration file.
Open the configuration file with your preferred text editor:
sudo nano /etc/ssh/sshd_configThen, locate the following line:
#PermitRootLogin prohibit-passwordUncomment it and set it to:
This will disable root login over SSH. Next, add the following lines to restrict access to specific users:
Replace your username with your desired username. You can add multiple usernames separated by a space.
To further enhance security, you can also disable password-based authentication and use public key authentication instead. Locate the line that reads:
#PasswordAuthentication yesUncomment this line by removing the “#” symbol at the beginning, and set it to:
PasswordAuthentication noThis disables password-based authentication and forces users to use public key authentication for SSH login.
To limit the number of failed login attempts, add the following line:
After making these changes, save the file by pressing “CTRL+X” and “Y.”
Step 5: Restart OpenSSH
To apply the changes we made to the configuration file, we need to restart the OpenSSH service:
sudo systemctl restart sshStep 6: Connect to OpenSSH
Now that OpenSSH is installed and configured on your machine, you can connect to it from another machine using an SSH client.
To connect to your machine, open your terminal and type:
ssh your_username@your_machine_ipReplace your_username with your desired username and your_machine_ip with your machine’s IP address.
Conclusion
In conclusion, installing and enabling SSH on Linux Mint is a straightforward process that requires a few simple steps. With SSH, you can remotely access your Linux Mint system and securely transfer files between systems. By following the best practices for using SSH, you can ensure that your connection is secure and protected from potential attacks.