- How to Run ‘sudo’ Command Without Entering a Password in Linux
- How to Disable the “Sudo” Password in Linux Mint 20 and Ubuntu Linux
- Disabling the “Sudo” Password in Linux Mint 20
- Step # 1: Access the Sudoers File:
- Step # 2: Add a No Password Entry to the Sudoers File:
- Step # 3: Test whether the “Sudo” Password is Disabled or not
- Pro-Tip
- Conclusion
- Search
- About This Site
- Latest Tutorials
- Как настроить пользователя Sudo без пароля в Linux Mint 20
- Способ настройки пользователя Sudo без пароля в Linux Mint 20:
- Шаг 1: Тестирование доступа к Sudo с паролем в Linux Mint 20:
- Шаг 2: Доступ к файлу Sudoers в Linux Mint 20:
- Шаг 3: Изменение файла Sudoers в Linux Mint 20:
- Шаг 4: Проверка того, был ли настроен Sudo без пароля:
- Вывод:
- How to configure a passwordless sudo in Linux Mint
- Configure a Password-less Sudo
- Conclusion
- About the author
- Taimoor Mohsin
How to Run ‘sudo’ Command Without Entering a Password in Linux
In case you are running Linux on a machine that you normally use alone, say on a laptop, entering a password each time you invoke sudo can become so boring in the long run. Therefore, in this guide, we will describe how to configure the sudo command to run without entering a password.
This setting is done in the /etc/sudoers file, which drives sudoers to use the default security policy plugin for the sudo command; under the user privilege specification section.
Important: In the sudeors file, the authenticate parameter which is turned on by default is used for authentication purposes. If it is set, users must authenticate themselves via a password (or other means of authentication) before they run commands with sudo.
However, this default value may be overridden using the NOPASSWD (require no password when the user invokes sudo command) tag.
The syntax to configure user privileges is as follows:
user_list host_list=effective_user_list tag_list command_list
- user_list – list of users or a user alias that has already been set.
- host_list – list of hosts or a host alias on which users can run sudo.
- effective_user_list – list of users they must be running as or a run as alias.
- tag_list – list of tags such as NOPASSWD.
- command_list – list of commands or a command alias to be run by user(s) using sudo.
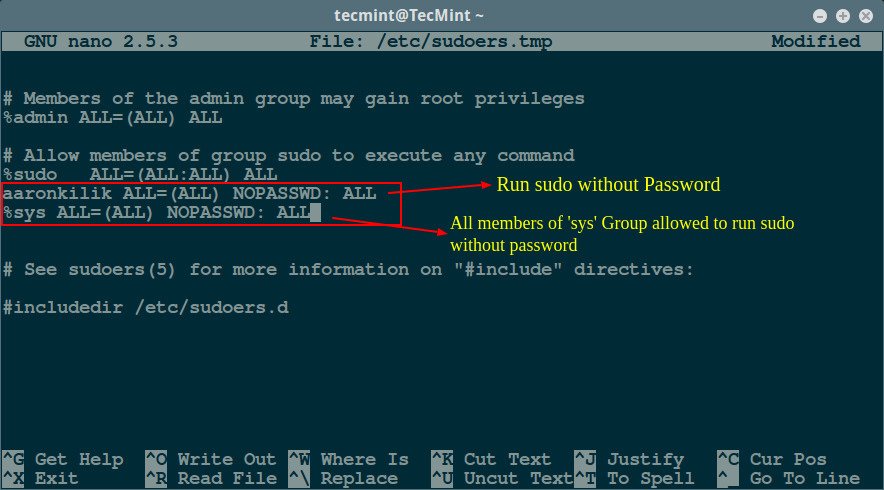
To allow a user ( aaronkilik in the example below) to run all commands using sudo without a password, open the sudoers file:
And add the following line:
aaronkilik ALL=(ALL) NOPASSWD: ALL
For the case of a group, use the % character before the group name as follows; this means that all members of the sys group will run all commands using sudo without a password.
To permit a user to run a given command ( /bin/kill ) using sudo without a password, add the following line:
aaronkilik ALL=(ALL) NOPASSWD: /bin/kill
The line below will enable members of the sys group to run the commands: /bin/kill, /bin/rm using sudo without a password:
%sys ALL=(ALL) NOPASSWD: /bin/kill, /bin/rm
For more sudo configuration and additional usage options, read our articles that describe more examples:
In this article, we described how to configure the sudo command to run without entering a password. Do not forget to offer us your thoughts about this guide or other useful sudeors configurations for Linux system administrators in the comments.
How to Disable the “Sudo” Password in Linux Mint 20 and Ubuntu Linux

Whenever we execute a command with “sudo” privileges, we are always asked to enter the “Sudo” password before its execution. However, at times, you want to get rid of this hassle by disabling the “Sudo” password. Therefore, we are here with this article that will guide you on how you can disable the “Sudo” password in Linux Mint 20 and Ubuntu 20.04.
Disabling the “Sudo” Password in Linux Mint 20
If you want to disable the “Sudo” password in Linux Mint 20, then you should perform the following three steps:
Step # 1: Access the Sudoers File:
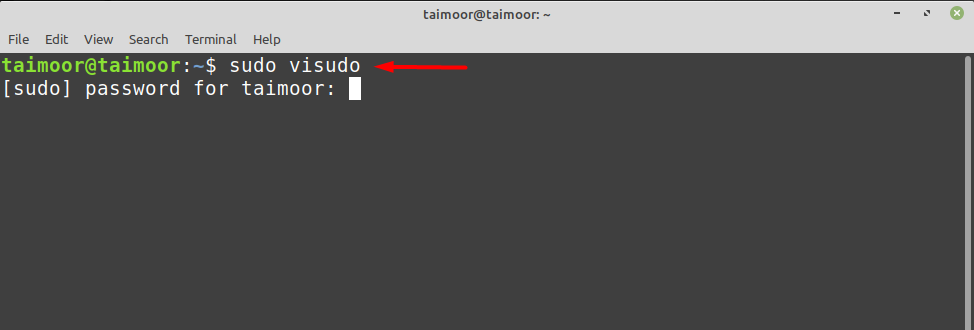
First, you need to access the Sudoers file. This can be done by executing the command that follows:
![]()
When you will execute this command, you will be asked to enter the “Sudo” password since we have used the “sudo” keyword with it. You need to type in your “Sudo” password and press the Enter key as shown in the image below:
![]()
Step # 2: Add a No Password Entry to the Sudoers File:
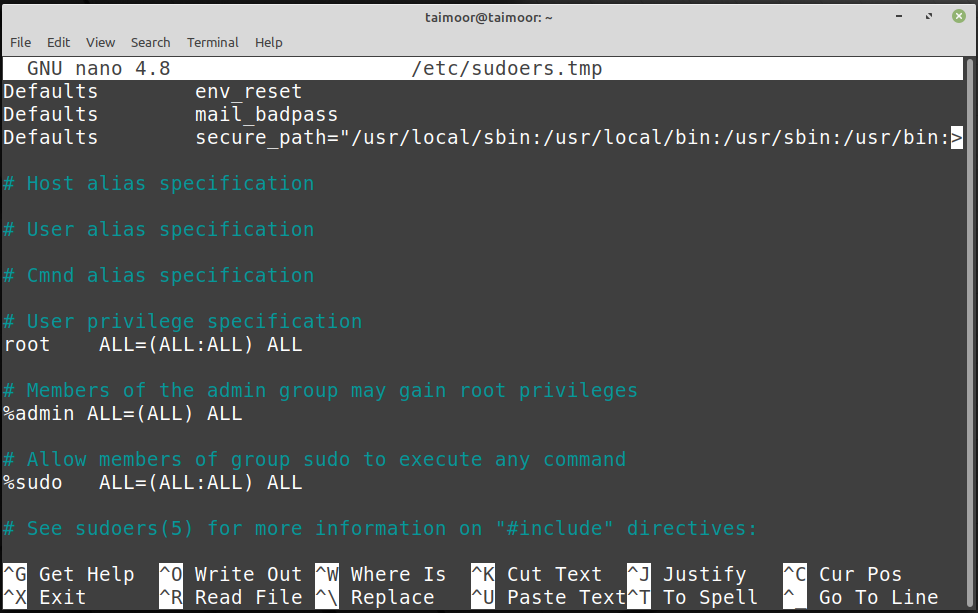
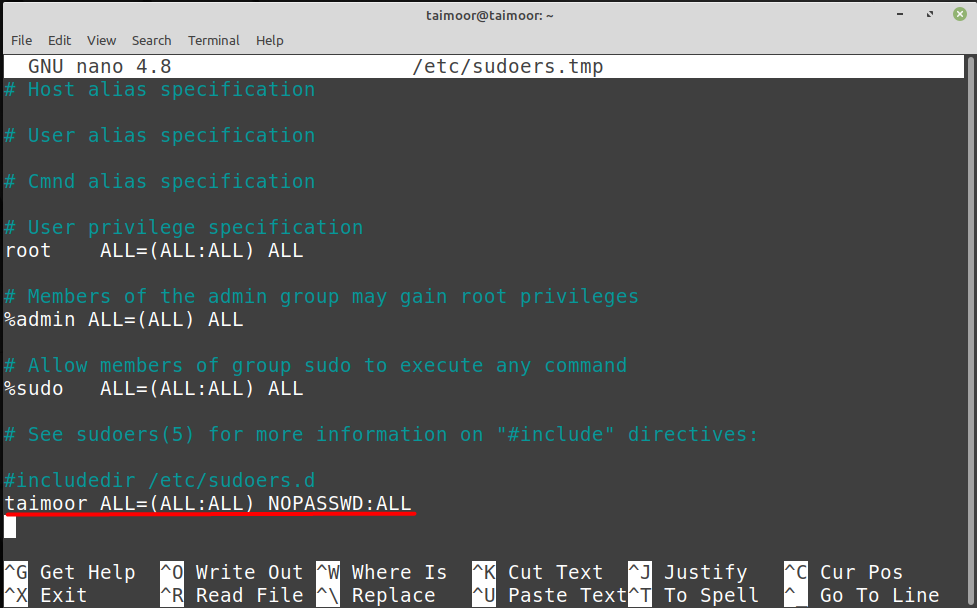
Once the Sudoers file is opened in the text editor, you need to scroll it all the way down to the “includedir /etc/sudoers.d” comment. Below this comment, you need to add the following entry:
kbuzdar ALL=(ALL) NOPASSWD:ALL

You can replace “kbuzdar” with your particular username. After that, you can close this file and exit from your text editor.
Step # 3: Test whether the “Sudo” Password is Disabled or not
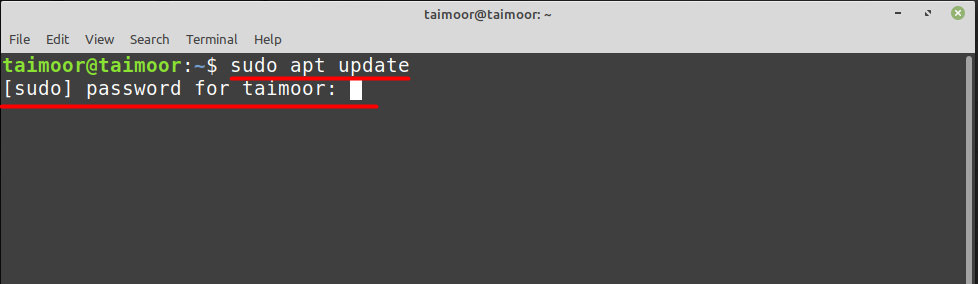
Now, you need to verify whether the “Sudo” password has been disabled or not. You can simply do this by executing any command of your choice with “sudo” privileges just like we did below:
![]()
This time, you will notice that the update process will immediately begin without even asking you for the “Sudo” password as shown in the following image:
![]()
Pro-Tip
If you want to enable the “Sudo” password again, you can simply remove the entry that you made in step # 2 of the method shown above. After removing that entry, you can simply save and close your file. Once you will do that, the “Sudo” password will be enabled again and you will be able to verify it by running any desired command with the “sudo” privileges.
Conclusion
This article provided you with a quick method of disabling the “Sudo” password in Linux Mint 20. Moreover, you can also re-enable it any time you want by following the pro-tip provided in this article.
Search
About This Site
Vitux.com aims to become a Linux compendium with lots of unique and up to date tutorials.
Latest Tutorials
Как настроить пользователя Sudo без пароля в Linux Mint 20

Всякий раз, когда вы пытаетесь запустить какую-либо команду в первый раз в терминале Linux при использовании ключевого слова «sudo» в новом сеансе терминала, вам всегда необходимо предоставить пароль sudo, прежде чем вы сможете выполнить эту команду. Однако могут быть такие ситуации, когда вам нужно запускать новую сессию терминала для выполнения каждой новой задачи. В таких ситуациях вам может показаться бременем каждый раз вводить пароль sudo. Поэтому вы можете почувствовать необходимость его отключения. В этом руководстве мы научим вас методу настройки пользователя sudo без пароля в Linux Mint 20.
Способ настройки пользователя Sudo без пароля в Linux Mint 20:
Для настройки sudo без пароля в Linux Mint 20 необходимо выполнить следующие шаги:
Шаг 1: Тестирование доступа к Sudo с паролем в Linux Mint 20:
Во-первых, мы хотели бы показать вам, что происходит, когда вы выполняете команду с ключевым словом «sudo» в первый раз после запуска нового сеанса терминала. Тестовая команда выглядит следующим образом:
$ sudo apt-get update
Вы можете видеть, что как только мы выполнили эту команду, нас попросили предоставить пароль sudo, прежде чем продолжить. Это показано на изображении ниже:
Шаг 2: Доступ к файлу Sudoers в Linux Mint 20:
Теперь, чтобы настроить sudo без пароля, нам сначала нужно получить доступ к файлу Sudoers с помощью следующей команды:
$ sudo visudo
Файл Sudoers показан на изображении ниже:

Шаг 3: Изменение файла Sudoers в Linux Mint 20:
После этого нам нужно добавить в наш файл Sodoers следующую строку:
username ALL=(ALL:ALL) NOPASSWD: ALL>
Замените «имя пользователя» на имя учетной записи пользователя, для которой вы хотите отключить пароль sudo. После добавления этой строки мы просто сохранили и закрыли наш файл с помощью «Ctrl + X».
Шаг 4: Проверка того, был ли настроен Sudo без пароля:
Теперь нам нужно проверить, был ли настроен sudo без пароля или нет. Для этого мы снова запустим команду «обновить» с ключевым словом «sudo». На изображении ниже вы можете видеть, что на этот раз наша система Linux Mint 20 не запрашивала пароль sudo, что означает, что sudo без пароля был успешно настроен.

Вывод:
В этом руководстве мы научили вас полной процедуре настройки sudo без пароля в системе Linux Mint 20. Однако, в конце концов, мы хотели бы порекомендовать снова включить пароль sudo, как только вы закончите задачу, для которой вы отключили его ранее. Это связано с тем, что отключение пароля sudo не считается безопасной практикой. Чтобы снова включить его, вам просто нужно удалить ту строку из файла Sudoers, которую вы добавили на третьем шаге этого метода.
How to configure a passwordless sudo in Linux Mint
![]()
Sudo, also known as superuser do, enables a system administrator to assign permission to certain users to execute the commands. This command increases privileges temporarily, allowing users to conduct critical operations without logging in as the root user. As a result, you need to input your login credentials into the system for authentication, verifying that you have the rights to conduct operations.
However, typing this information repeatedly is a time-consuming operation, but you can disable authentication in specific ways if you like to. So, this article will provide you with details on how you can configure a password-less sudo on Linux Mint. This is only recommended if you are a sole user on the system and no one else is using it except you; otherwise, the authentication feature should be enabled for security reasons.
Configure a Password-less Sudo
Because the sudoers file defines which users are allowed to do administrative operations needing superuser rights, it’s a good idea to take safeguards while modifying it, which visudo does. It locks the sudoers file so that no one else may modify it at the same time.
To configure a password-less sudo, you need to type.
This will open your sudoer file in the default editor, like nano in our case. After that, you need to add a line in the file, the general syntax is given below.
Replace the “” with the name of the user you want to give access.
So before permitting any specific user, you can see from the image below when I ran the command mentioned below, it was asking for a password, for example:
Now we can set the user to check if it’s still asking for a password or not by doing some changes on the sudoer file as shown below.
Here, username represents the name of the user to whom you want to give the rights for sudo less password. For example, in our case we can write:
So now we will run the same command again to verify if it’s asking for a password or not.

You can see from the above image that this time it did not ask for a password and started executing the command directly. You can test this on other applications as well. For example, we would like to install a java development kit.
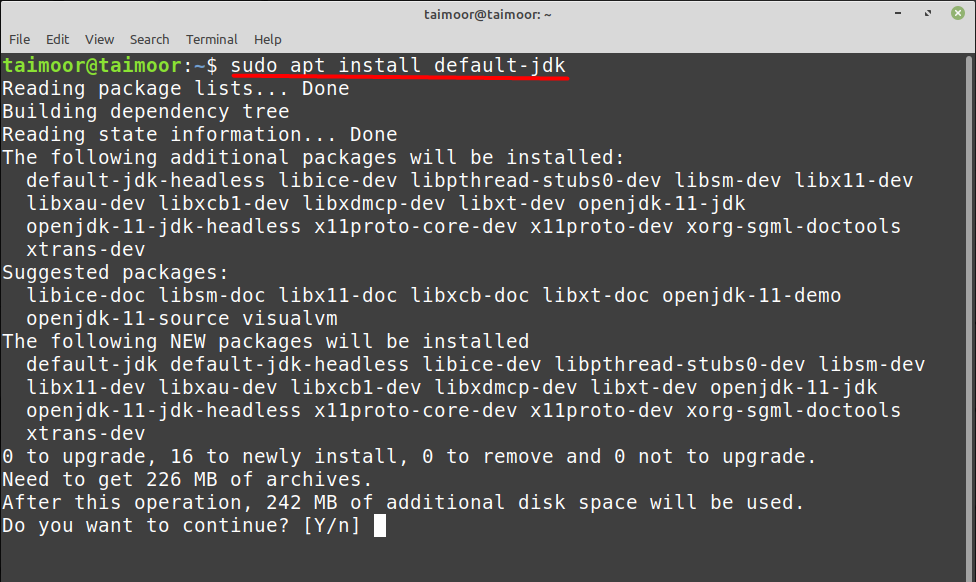
You can see that the application starts executing again without asking for a password, so you can install any application without providing your password every time.
Conclusion
Having credentials as a Linux Mint user is essential to save your system from security breaches. However, doing that every time can be tiresome for some users, so they look for a way to get rid of it. This is where this article comes in handy, as it has all of the necessary information to give you a passwordless method of installing various programs. Keep in mind that doing so isn’t a smart idea; it should only be permitted if you’re the only one utilizing your system.
About the author
Taimoor Mohsin
Hi there! I’m an avid writer who loves to help others in finding solutions by writing high-quality content about technology and gaming. In my spare time, I enjoy reading books and watching movies.