- Делаем установочную флешку с Linux Mint на macOS, Windows или Linux в три клика.
- How to create a Linux Mint bootable usb in macOS
- What do we need
- Steps to be made
- Create the bootable media
- How to make a bootable USB stick
- In Linux Mint
- In Windows, Mac OS, or other Linux distributions
- How to make a bootable DVD
- In Linux
- In Windows
- In Mac OS
- TechnoZeal
- Video and Wifi Driver
- Preparing USB Boot Drive
- Booting Up Linux Mint from USB
- Installing Linux Mint 19
- Install Wifi Driver
- Related Post
- Comments
- Post a Comment
- Popular posts from this blog
- Revive Old Mac Mini (2009) with Linux
- Install and Configure RealVNC in Linux Ubuntu 18.04 LTS
- Configure Unattended Upgrades on Raspberry Pi
Делаем установочную флешку с Linux Mint на macOS, Windows или Linux в три клика.


Понадобилось мне в очередной раз сделать установочную флешку с Linux Mint 19 на маке и решил попробовать новую бесплатную кроссплатформенную утилиту Etcher.
Я уже не раз касался темы создания установочных флешек с помощью утилит RUFUS или WinSetupFromUSB, был даже совсем экзотический случай подготовки такой флешки c FreeBSD в терминале macOS.
Ключевой особенностью Etcher является её кроссплатформенность, однако применить её удастся лишь для ограниченного числа сценариев, а именно установки дистрибутивов Linux (не только Linux Mint из заголовка). Возможно, в будущем появиться возможность записи образа Windows на флешку, но пока из этой затеи ничего путного не выйдет. Устанавливать таким образом macOS пока не пробовал, но мне больше нравится уже проверенный временем вариант с созданием установочной флешки из терминала macOS.
Саму работу с утилитой описывать не имеет смысла, всё и так понятно по скриншоту в начале обзора. Хотелось бы отметить, что поддерживается несколько форматов образов дисков — ISO, BIN, DMG, DSK и другие. В целом же, очень приятная утилита. Пользуйтесь.
Если считаете статью полезной,
не ленитесь ставить лайки и делиться с друзьями.
How to create a Linux Mint bootable usb in macOS

One of the many powerful features of Linux is the ability to start a distribution directly from a USB stick, without affecting your hard drive and the operating system on it. It is therefore not necessary to perform a complete installation to use or try out Linux. But even if you have made the decision to install Linux individually or next to Windows or OSX, a bootable Linux USB stick is the most practical and quick solution. This article will explain how a Linux USB stick can be created from a Mac environment, from which Linux can be started without installation. In an equivalent separate article, it is explained how this can be achieved from a Windows environment.
What do we need
USB stick
A FAT32 formatted, at least 4GB, but preferably 8GB USB memory stick.
Etcher
To write the ISO file on the USB stick, we use a free and open source application called Etcher.
Linux iso file
Besides Etcher we also need a Linux distribution that we want to put on the USB stick. For this article we choose the Linux Mint Cinnamon edition, but in the end this depends entirely on your own preference and you can also choose another distribution, such as Ubuntu, KDE Neon, or Solus.
Note: There are a few extra considerations when starting up the USB stick on Apple hardware. This is because Apple’s ‘Startup Manager’, called by holding the Option / alt (⌥) button during startup, will not detect the USB stick without a specific partition table and layout. This should be dealt with in a later step.
Steps to be made
In this article we assume an approach in which we download the iso file of a Linux distribution (in this case Linux Mint 19).
Download Linux Mint
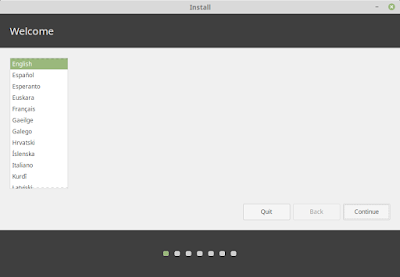
1) Go to https://linuxmint.com/download.php
2) Make a choice here for a desktop environment (eg Cinnamon).
3) Then choose a download mirror close to you for quick download.
4) The iso file is then downloaded to the standard download folder.
Download Etcher
5) Go to https://etcher.io/ and choose Etcher for macOS. The Etcher .dmg will then be found after downloading in the Downloads folder.
Create Linux USB stick
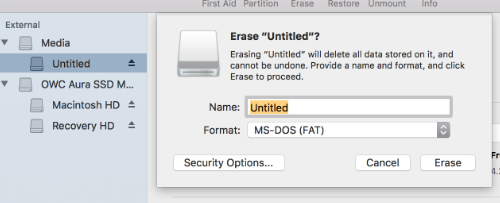
6) We start with the preparation of the USB stick. To ensure maximum compatibility with Apple hardware, we first completely empty the USB stick and reformat it using Apple’s “Disk Utility.” But this step can be skipped if you plan to use the USB stick with only generic PC hardware.
Start Disk Utility from Applications> Utilities.
Insert the USB stick and see that the new device has been added to the Disk Utility.
Select the USB stick and select Erase in the toolbar (or right-click).
Set the format to MS-DOS (FAT) and the schedule to GUID Partition Map. Check carefully that you have chosen the right device and click Erase.
7) After you have downloaded Etcher, double click the dmg file to mount the package. Then Etcher can be run at the current location or dragged to your Applications folder.
By default, recent versions of macOS block the execution of applications from unidentified developers. To solve this problem, enable ‘App Store andaped developers’ in the ‘Security & Privacy’ screen of System Preferences. If you are still being warned about running the application, click on ‘Open Anyway’ in the same screen.

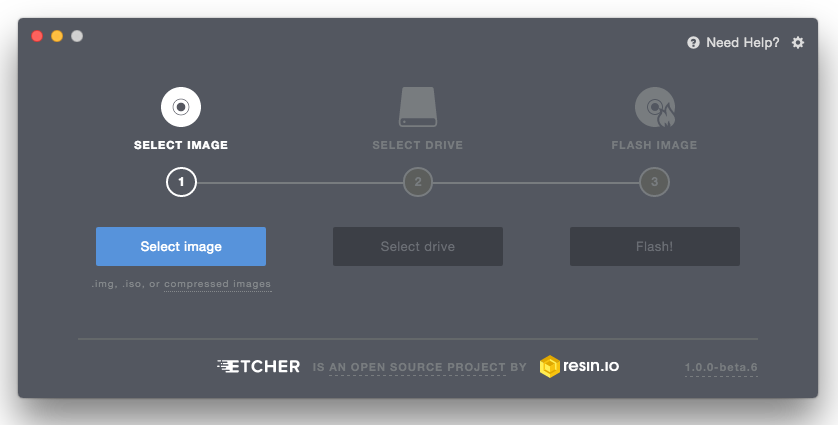
Etcher configures and writes to your USB stick in three steps, each of which must be selected sequentially:

Select Image >> Search the previously retrieved Linux iso file in the Downloads folder.
Select Drive >> Select the name of the USB stick here.
Flash! >> Activated when both the image and the drive are selected. Like Disk Utility, Etcher needs low-level access and will request your password after selection.
The USB Live stick will now be created.
That was all. The USB stick has been created. A follow-up article will explain how we can use this stick for a Linux Live session on a Mac computer.
Create the bootable media
The easiest way to install Linux Mint is with a USB stick.
If you cannot boot from USB, you can use a blank DVD.
How to make a bootable USB stick
In Linux Mint
Right-click the ISO file and select Make Bootable USB Stick , or launch Menu ‣ Accessories ‣ USB Image Writer .
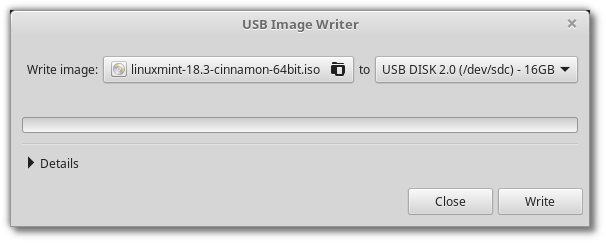
Select your USB device and click Write .
In Windows, Mac OS, or other Linux distributions
Download Etcher, install it and run it.
Click Select image and select your ISO file.
Click Select drive and select your USB stick.
How to make a bootable DVD
Optical discs are slow and burning to disc is prone to errors.
To prevent issues, burn at the lowest possible speed.
Burn the content of the ISO onto the DVD, not the ISO file itself. When finished, your DVD should contain directories such as boot and casper , it shouldn’t be an empty DVD containing an .iso file.
In Linux
In Windows
Right-click the ISO file and select Burn disk image .
To make sure the ISO was burned without any errors, select Verify disc after burning .
In Mac OS
Right-click the ISO file and select Burn Disk Image to Disc .
© Copyright 2017, Linux Mint Revision d8fbd844 .
Versions latest Downloads pdf html epub On Read the Docs Project Home Builds Free document hosting provided by Read the Docs.
TechnoZeal
This post is part of a series of installation guide to install Linux on Mac Mini (late 2009) version. For other Linux distribution, please refer to the list at the bottom of this post.
Video and Wifi Driver
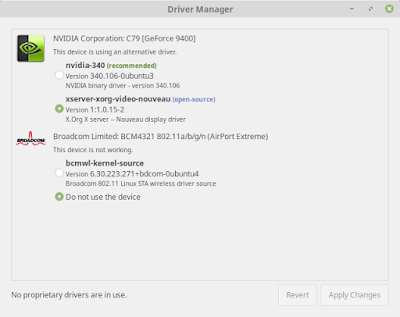
As we have mention in the main post, the video and wifi driver will be our main stumbling block. Based on our experience testing with various distribution, same driver can behave differently in different distribution. For Linux Mint, we find that third party driver will cause us more problem. The recommended Broadcom BCM4321 wifi driver does not work at all. We need to install another driver. If we install Nvidia display driver, the windows will not launch if we boot the system with monitor attached. The best solution is use the default nouveau video driver.
Preparing USB Boot Drive
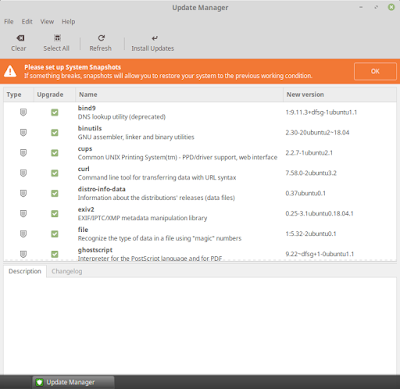
Preparing USB boot drive is quite straight forward. Please be aware that for Linux Mint 19, there are problem with the original installation image (linuxmint-19-cinnamon-64bit). The installer will crash unless we disable network connection. The developer did not remove the original image, instead they introduce another version (linuxmint-19-cinnamon-64bit-v2). Please download version 2 of Linux Mint 19 instead of the original one. Preparing USB driver is the same as Ubuntu, download Etcher and burn to USB driver using this tool.
Booting Up Linux Mint from USB
To boot up from Mac, press option key (Alt for windows keyboard) when the Mac chimes during startup. The boot menu will show various boot drive. Select the USB drive.
Please note that if the OS hang during boot up, we might need to clear SMC or reset PRAM. Please search the web on the shortcut or check out our main post here. If SMC and PRAM has been reset and you still encounter problem, you might need to check the package or change USB driver.
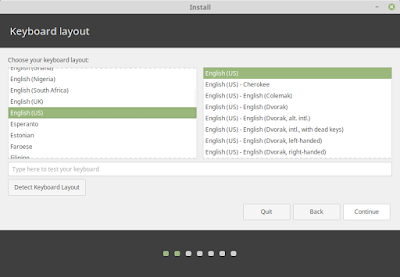
Installing Linux Mint 19
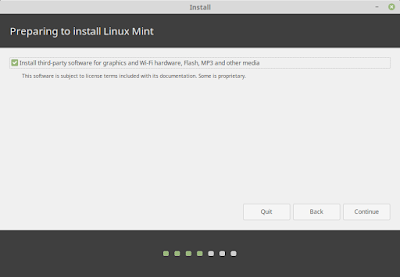
Make sure third party software are checked so that we can install other software such as vlc. Click Continue.

Select Erase data and install Linux Mint and click Install Now. The system will present to us how the system will partition the drive. Basically Linux Mint need 2 partition. The first partition is about 500MB formatted with FAT32. It will mount /boot/efi with boot flag as boot, esp. The rest of the dis space is use to mount the root system.

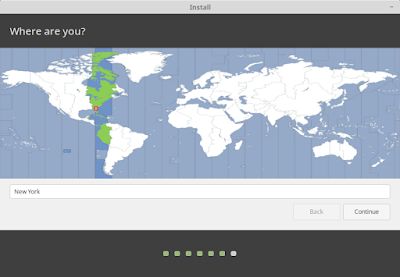
The location map is used to set your time zone. Select your appropriate time zone and click Continue.

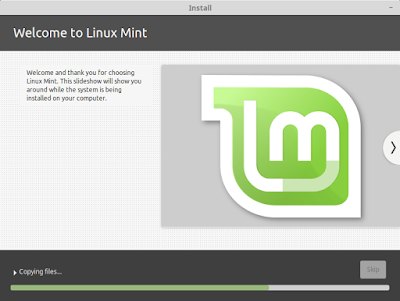
Enter host name, user name and password. Click Continue. The system will proceed to install the software.


Install Wifi Driver
As mention earlier, the driver recommended for us in Driver Manager is not good. Please make sure we do not install these driver.
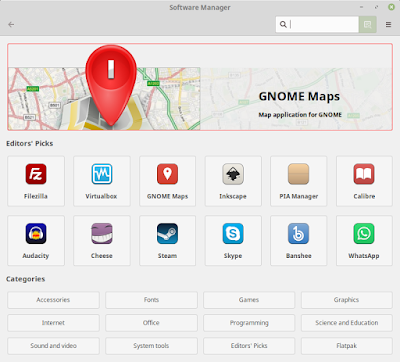
Since third party repository are included, we can install gparted or vlc from the app.
Related Post
Please also check out the main post on re-purposing old Mac Mini. This post also include the installation of Ubuntu on Mac Mini. We have also include hardware specification and other consideration in the main post.
Please also check out the summary result of testing various Linux distribution on Mac Mini (late 2009).
Install Linux on Mac Mini (late 2009) Result Summary
- Get link
- Other Apps
Comments
Post a Comment
Popular posts from this blog
Revive Old Mac Mini (2009) with Linux

We have an old Mac Mini (late 2009 version) lying around. The latest Mac OS X it could support was Mac OS X El Capitan. The machine is still good although the DVD drive does not worked anymore. Apple will drop security update for El Capitan very soon. Running OS X El Capitan without any security update is not an option. Instead of disposing a good piece of hardware, we can install Linux. However, before we start playing around with the Linux installation, we need to take stock of the hardware capability. We might need to upgrade some hardware so that we can run Linux smoothly. Mac Mini 2009 Specification This Mac has Core 2 Duo CPU (P8700) running at 2.53GHz. It support PC3-8500 DDR3 RAM running at 1066MHz. This Mac Mini has a Nvidia Geforce 9400M video card. It support 2 display output. Wifi specification is 802.11a/b/g/n. This is pretty high end at the time. However, this WiFi uses Broadcom chipset (BCM4321), which is not very well supported in Linux since it
Install and Configure RealVNC in Linux Ubuntu 18.04 LTS

RealVNC is a commercial company that sell VNC license for the enterprise market. However, the company allow home user to setup VNC server for personal use. The limitation is that you are only allow 5 connection. User must register an ID with the company. The configuration of your VNC will be stored on the company’s server. Since RealVNC is professionally produce, it is much better compare to the open source product in Linux. The main advantage is easy configuration although there are steps to install and start the server especially on Linux platform. We do not need to worry about ip address and port number. What the server and client required is our RealVNC ID which we have created. Unlike the default Vino server that comes with Ubuntu, RealVNC will start without user login. The system is created with security in mind. Encryption is done transparently without any intervention from user. We will be showing a simple guide on how to install and Configure RealVNC Connect (serv
Configure Unattended Upgrades on Raspberry Pi
If we were to run Raspberry Pi headless (without attached monitor), it would be nice if we can perform unattended system upgrades. In Debain/Ubuntu class of software, we can perform unattended upgrades using the software package unattended-upgrades. To install the software, use the command below: sudo apt-get install unattended-upgrades # Following are additional software required # we only need mailutils or bsd-mailx, choose 1 sudo apt-get install mailutils sudo apt-get install bsd-mailx sudo apt-get install update-notifier-common Next, we need to edit the configuration files: sudo nano /etc/apt/apt.conf.d/50unattended-upgrades The configuration should be similar as below: Unattended-Upgrade::Origins-Pattern < // Codename based matching: // This will follow the migration of a release through different // archives (e.g. from testing to stable and later oldstable). // "o=Debian,n=jessie"; // "o=Debian,n=jessie-update