- Как установить сервер VNC на Linux
- Install VNC Server on Linux Mint 20
- Step 1: Install the Desktop environment
- Step 2: Install VNC server
- Step 3: Configure VNC
- Step 4: Configure VNC as a service
- Step 5: Connect to VNC server
- About the author
- Karim Buzdar
- Linux mint vnc server настройка
- Install a vnc server
- MATE
- Cinnamon
Как установить сервер VNC на Linux
Virtual Network Computing (VNC) позволяет создавать совместный доступ другим удалённым пользователям к окружению рабочего стола локального хоста по сети. Для предоставления доступа к рабочему столу, на локальном хосте должен быть запущен VNC сервер, а удалённые пользователи подключаются к серверу VNC, используя какой-либо клиент просмотрщика VNC.
В этой инструкции объясним как настроить VNC сервер на Linux. Для этого будем использовать vino , программное обеспечение VNC сервера для окружения рабочего стола GNOME.
Для установки VNC сервера vino на машину с Debian, Ubuntu или Linux Mint:
$ sudo apt-get install vino
Для установки VNC сервера vino на машину с Fedora, CentOS или RHEL:
$ sudo yum install vino
После установки, вы можете запустить vino и включить сервер VNC введя команду vino-preferences.
$ vino-preferences
Вышеприведённая команда откроет окно настроек vino для доступа к рабочему столу как показано ниже. В окне там где «Совместный доступ» поставьте галочку, чтобы позволять другим пользователям видеть ваш рабочий стол. Также можете установить VNC пароль. Когда настройка сделана, это окно можно закрыть.
По идее, утилита vino-preferences сама должна запустить сервер VNC. Если VNC сервер не запущен по каким-то причинам, вы можете запустить VNC сервер вручную следующим образом:
$ /usr/lib/vino/vino-server &
На последних Linux Mint с рабочим столом Cinnamon, как известно, vino-preferences отсутствуют. Для включения настройки VNC сервера в Mint на рабочем столе Cinnamon, используйте вместо этого dconf-editor, как это описано здесь.
Вы можете проверить, запущен ли vino набрав следующую команду.
$ sudo netstat -pl | grep vino
tcp 0 0 *:5900 *:* LISTEN 3246/vino-server
tcp6 0 0 [::]:5800 [::]:* LISTEN 3246/vino-server
tcp6 0 0 [::]:5900 [::]:* LISTEN 3246/vino-server
Как видно выше, vino-server запущен на TCP порте с номерами 5800 и 5900. Вы можете использовать любое программное обеспечение с функцией VNC клиента для подключения к VNC серверу.
Если VNC сервер настроен так, что вы должны подтверждать каждый VNC доступ к вашему рабочему столу, то вы увидите следующее всплывающее сообщение каждый раз, когда получен запрос VNC соединения. Только после того, как вы разрешите VNC, клиент VNC будет способен получить доступ на ваш рабочий стол.
Install VNC Server on Linux Mint 20
Sometimes, you not only need to connect to remote systems but also need to access the entire GUI environment. In Linux, VNC is such a tool that allows you to log in to the Linux server graphically remotely. VNC (Stands for Virtual Network Computing) is similar to the remote desktop tool in Windows systems. It enables you to manage and control the remote server from your local system.
In this tutorial, we will describe how to install the VNC server on the Linux Mint 20 system. To test the connection to the VNC server, we will use the VNC viewer (VNC client) application. You can use any other VNC client application.
Before proceeding towards the article, make sure you are logged in as a sudo user.
Step 1: Install the Desktop environment
There are several desktop environments in Linux, such as Gnome, KDE, XFCE, Unity, etc. We will need to install any one of them for the VNC server to work properly. Here, we are going to install the XFCE desktop.
Open the command-line Terminal application using the Ctrl+Alt+T keyboard shortcut and then issue the following command in Terminal to install XFCE desktop.
After running the above command, the system might ask for confirmation that if you want to continue the installation or not. Press y to continue; after that, XFCE desktop will be installed on your system along with all dependencies.
Step 2: Install VNC server
There are different VNC servers available for Linux systems. Here, we are going to install “Tightvncserver”. It is pretty easy to set up and run Tightvncserver, and it is also reliable. Issue the following command in Terminal to install Tightvncserver.
After the installation is completed, issue the following command in Terminal:
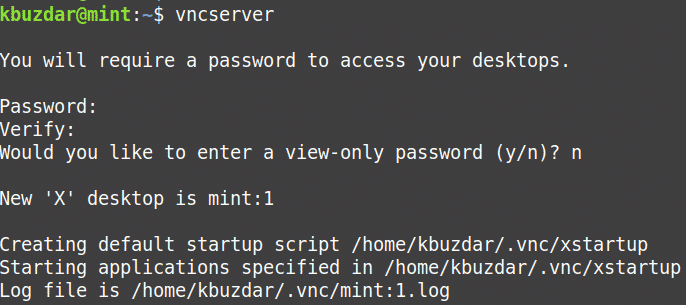
You will be prompted to set a password for the VNC server. Enter the password and then confirm it by entering it again. Then you will be asked that if you want to enter a view-only password, hit n. If you press y, you will not be able to use the mouse and keyboard for controlling the VNC instance.
When you run the “vncserver” command for the first time, it creates a new directory “.vnc” under your Home directory. To view this directory, you can issue the following command in Terminal:
To view the VNC server process, issue the following command in Terminal:
Step 3: Configure VNC
Now we will configure the VNC server. For that, first, kill the VNC session using the following command in Terminal:
The default configuration file of the VNC server is ~/ .vnc/xstartup. Before making any changes to this file, let’s create a backup copy of this file. Issue the following command in Terminal to do so:
Now edit the ~/.vnc/xstartup file using any text editor. Here, we are using Vim text editor:
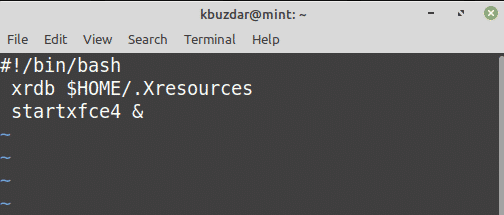
Insert the following lines in this file:
Now hit Esc key and press :wq to save and close the ~/.vnc/xstartup file.
Now you will need to make this file executable. Issue the following command in Terminal to do so:
Run VNC server using the following command in Terminal:
Step 4: Configure VNC as a service
Now you will need to create a service file for the VNC server. For this purpose, navigate to the /etc/systemd/system directory using the following command:
Then create a service file with the following command in Terminal:
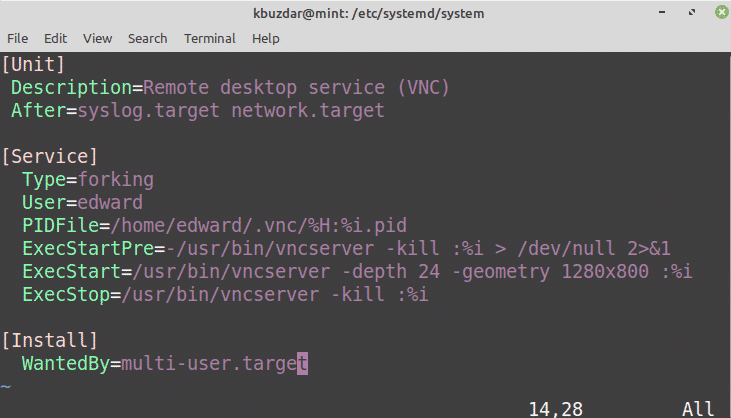
Insert the following lines in this file:
[ Unit ]
Description = Remote desktop service ( VNC )
After = syslog . target network. target
[ Service ]
Type = forking
User = edward
PIDFile = /home/edward/. vnc /%H:%i. pid
ExecStartPre = -/usr/bin/vncserver -kill :%i > /dev/null 2 > & 1
ExecStart = /usr/bin/vncserver -depth 24 -geometry 1280×800 :%i
ExecStop = /usr/bin/vncserver -kill :%i
[ Install ]
WantedBy = multi- user . target
Now hit Esc key and press :wq to save and close the file.
Now reload the systemd processes using the following command in Terminal:
Then start the VNC server services:
To enable the VNC server service to start at boot, use the following command:
To check the VNC service status, use the following command:
Step 5: Connect to VNC server
Now we will try to connect to the VNC server through an SSH tunnel as VNC itself is not an encrypted protocol. Issue the following command in Terminal to do so:
Replace the [user_name] and [server_ip] with the actual user name and the IP address of the VNC server. In our example, the command would be:
This command will set up a secure tunnel between your localhost and the VNC server.
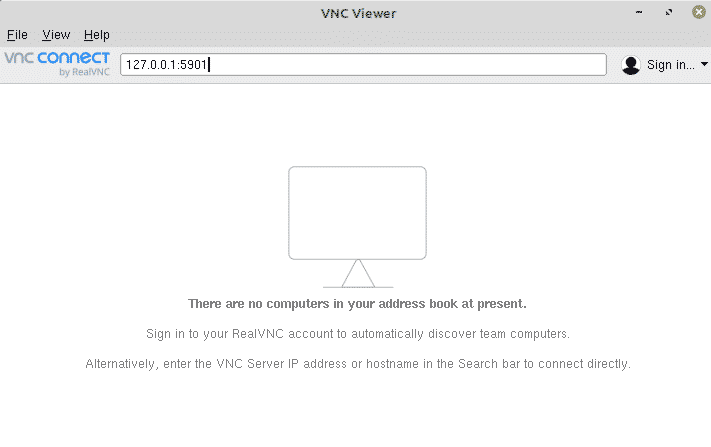
Now install VNC client application (VNC viewer )on your system and launch it. In the top bar of a VNC viewer, type 127.0.0.1:5901, and press Enter.
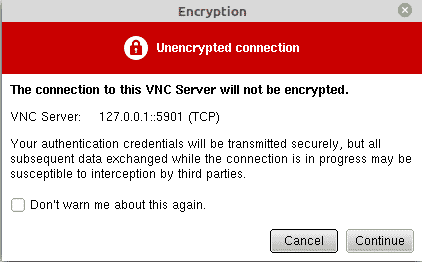
When the following dialog appears, click Continue.
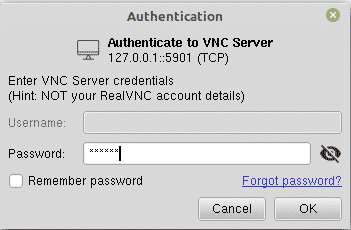
In the following Authentication dialog, type VNC server password and click OK.
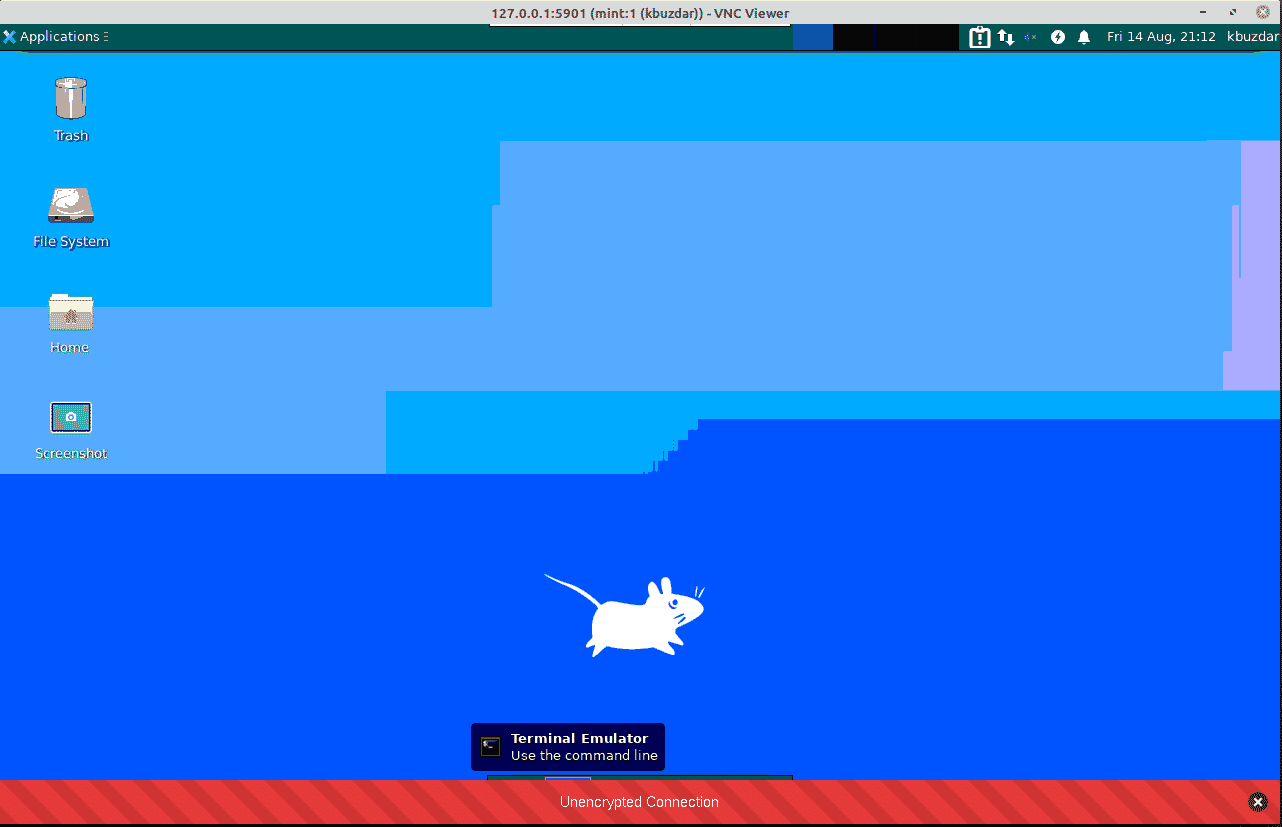
Now you will see the remote system’s desktop.
VNC server connection has successfully established now. Once you are finished, close the VNC viewer application and also kill the SSH tunnel by using the Ctrl+c in the Terminal window. If you need to connect to the VNC server again, first create the tunnel and then connect to the VNC server using the VNC viewer application.
In this article, you have learned how to install the VNC server on the Linux Mint 20 system. Now you can easily manage Linux Mint from your local system using the GUI interface. I hope you liked the article!
About the author
Karim Buzdar
Karim Buzdar holds a degree in telecommunication engineering and holds several sysadmin certifications. As an IT engineer and technical author, he writes for various web sites. He blogs at LinuxWays.
Linux mint vnc server настройка
This tutorial was adapted from here.
1. Remove the default Vino server:
sudo apt-get -y remove vino
2. Install x11vnc:
sudo apt-get -y install x11vnc
3. Create the directory for the password file:
4. Create the encrypted password file:
sudo x11vnc —storepasswd /etc/x11vnc/vncpwd
You will be asked to enter and verify the password. Then press Y to save the password file.
5. Create the systemd service file for the x11vnc service:
sudo xed /lib/systemd/system/x11vnc.service
Copy/Paste this code into the empty file:
[Unit]
Description=Start x11vnc at startup.
After=multi-user.target
[Service]
Type=simple
ExecStart=/usr/bin/x11vnc -auth guess -forever -noxdamage -repeat -rfbauth /etc/x11vnc/vncpwd -rfbport 5900 -shared
6: Reload the services:
sudo systemctl daemon-reload
7. Enable the x11vnc service at boot time:
sudo systemctl enable x11vnc.service
8. Start the service:
sudo systemctl start x11vnc.service
Comments
«I was blind but now I can see». My friend, you have snatched the pebble from my hand. You «are» the VNC Whisperer.. YOU ROCK! Cheers from So.CA,USA, 3rd House on the Left.
Muito obrigado por compartilhar este conhecimento.
Work like a charm on Linux Mint 20 MATE (& Jrwilmoth040707’s addon works too).
Thanks!
Perfect for a Linux freshman like me! worked a treat thank you!
I had to add a bit more to the one you developed to prevent the service from dying upon remote log off.
——————
[Unit]
Description=Start x11vnc at startup.
After=multi-user.target display-manager.service
[Service]
Type=simple
ExecStart=/usr/bin/x11vnc -auth guess -forever -noxdamage -repeat -rfbauth /etc/x11vnc/vncpwd -rfbport 5900 -shared
Restart=always
RestartSec=5
Hi — sorry ignore the last post — must learn to check my spelling — working thanks
Hi — just tried this on lmde 3 and I get the following when I try to enable at startup
sudo systemctl enable x11vnc.service
The unit files have no installation config (WantedBy, RequiredBy, Also, Alias
settings in the [Install] section, and DefaultInstance for template units).
This means they are not meant to be enabled using systemctl.
Possible reasons for having this kind of units are:
1) A unit may be statically enabled by being symlinked from another unit’s
.wants/ or .requires/ directory.
2) A unit’s purpose may be to act as a helper for some other unit which has
a requirement dependency on it.
3) A unit may be started when needed via activation (socket, path, timer,
D-Bus, udev, scripted systemctl call, . ).
4) In case of template units, the unit is meant to be enabled with some
instance name specified.
Install a vnc server
If you want to ‘see’ your own or someone else’s screen, install a viewer:
sudo apt-get install vncviewer
Start the server on «screen 1»:
vncserver -geometry 800×600 :1
You can change the «geometry» to whatever you like.
To stop the vnc server, remember the command:
where the «:1» is the ‘screen or display.’ It corresponds to port 5901. :2 would refer to 5902 and so on.
To check what’s running try:
To see your own shared screen, type:
This is quite unsatisfying, but now you can have multiple people look at the same screen. To let other people see your screen you can have them ssh in, or you can port forward port 5901 to that linux machine.
The default gives you kind of a nothing screen with just a terminal. If your screen looks «bad,» follow the instructions below based on what you’re running.
MATE
To get mate to show up use the follow text in your
# Uncomment the following two lines for normal desktop:
# unset SESSION_MANAGER
unset DBUS_SESSION_BUS_ADDRESS
# exec /etc/X11/xinit/xinitrc
[ -x /etc/vnc/xstartup ] && exec /etc/vnc/xstartup
[ -r $HOME/.Xresources ] && xrdb $HOME/.Xresources
xsetroot -solid grey
vncconfig -iconic &
x-terminal-emulator -geometry 80×24+10+10 -ls -title «$VNCDESKTOP Desktop» &
mate-session &
Restart your vnc server and retry to connect.
Cinnamon
If you’re running Cinnamon try this in your xstartup file:
# Uncomment the following two lines for normal desktop:
unset SESSION_MANAGER
unset DBUS_SESSION_BUS_ADDRESS
#sh /etc/X11/xinit/xinitrc
xrdb $HOME/.Xresources
#xsetroot -solid grey
x-terminal-emulator -geometry 80×24+10+10 -ls -title «$VNCDESKTOP Desktop» &
#x-window-manager &
# Fix to make GNOME work
export XKL_XMODMAP_DISABLE=1
#/etc/X11/Xsession
#exec /usr/bin/gnome-session —session=gnome-classic &
gnome-session —session=gnome-fallback &


