- Установка Wine Linux Mint
- Установка Wine в Linux Mint 20.2
- Установка Winetricks в Linux Mint 20
- Настройка Wine в Linux Mint 20.2
- Выводы
- Install Wine on Linux Mint 20.3
- How to Install Wine on Linux Mint 20.3?
- Step 1: Check the Architecture of Your System
- Step 2: Install the Appropriate Version of Wine for Your System
- Step 3: Confirm the Installation of Wine on Linux Mint 20.3
- How to Uninstall Wine From Linux Mint 20.3?
- Conclusion
- About the author
- Karim Buzdar
- How to Install Wine 8 on Linux Mint 21
- Table of Contents:
- Enable a 32-bit Architecture on Linux Mint 21
- Add the GPG Key of the Official Wine Repository on Linux Mint 21
- Add the Official Wine Repository on Linux Mint 21
- Install Wine 8 on Linux Mint 21
- Install the Notepad++ Windows App on Linux Mint 21 via Wine 8
- Conclusion
- References:
- About the author
- Shahriar Shovon
Установка Wine Linux Mint
Wine — это программа с открытым исходным кодом, которая позволяет запускать Windows-приложения, в том числе и игры в среде Linux и MacOS. Можно сказать, что это слой совместимости между операционной системой и Windows-программами. Вызовы процедур из библиотек Windows подменяются на системные вызовы Linux и с помощью этого появляется возможность запускать Windows-программы в Linux.
В этой статье мы рассмотрим как выполняется установка Wine Linux Mint 20, а также установка Winetricks (вспомогательный скрипт для загрузки и установки различных распространяемых библиотек, необходимых для запуска некоторых программ в Wine) и настройка программы.
Установка Wine в Linux Mint 20.2
За последнее время Wine очень сильно продвинулся в плане запуска игр. Благодаря библиотеке DXVK уже можно запускать и играть во многие игры для Windows без потери производительности.
Подробная установка Wine на разные ОС описана на официальном сайте. На сайте в разделе установки необходимо в качестве дистрибутива выбрать Ubuntu, так как Linux Mint основан на Ubuntu.
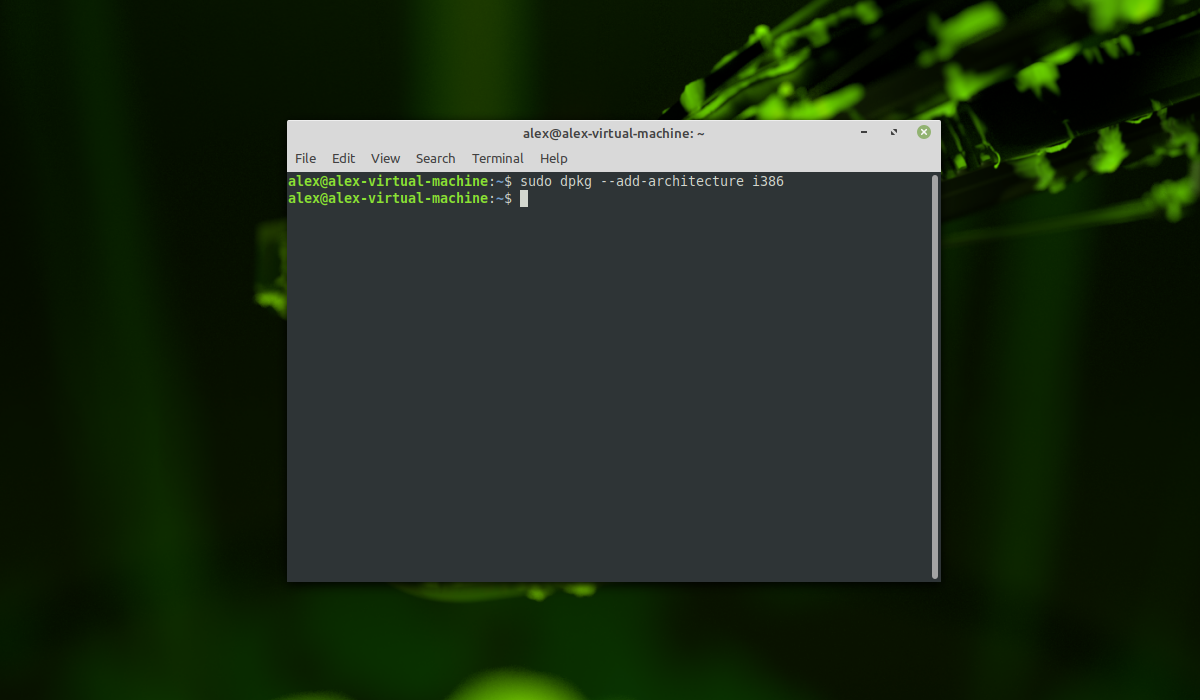
Сначала для 64 битных систем необходимо добавить поддержку архитектуры i386. Для этого необходимо выполнить команду:
sudo dpkg —add -architecture i386
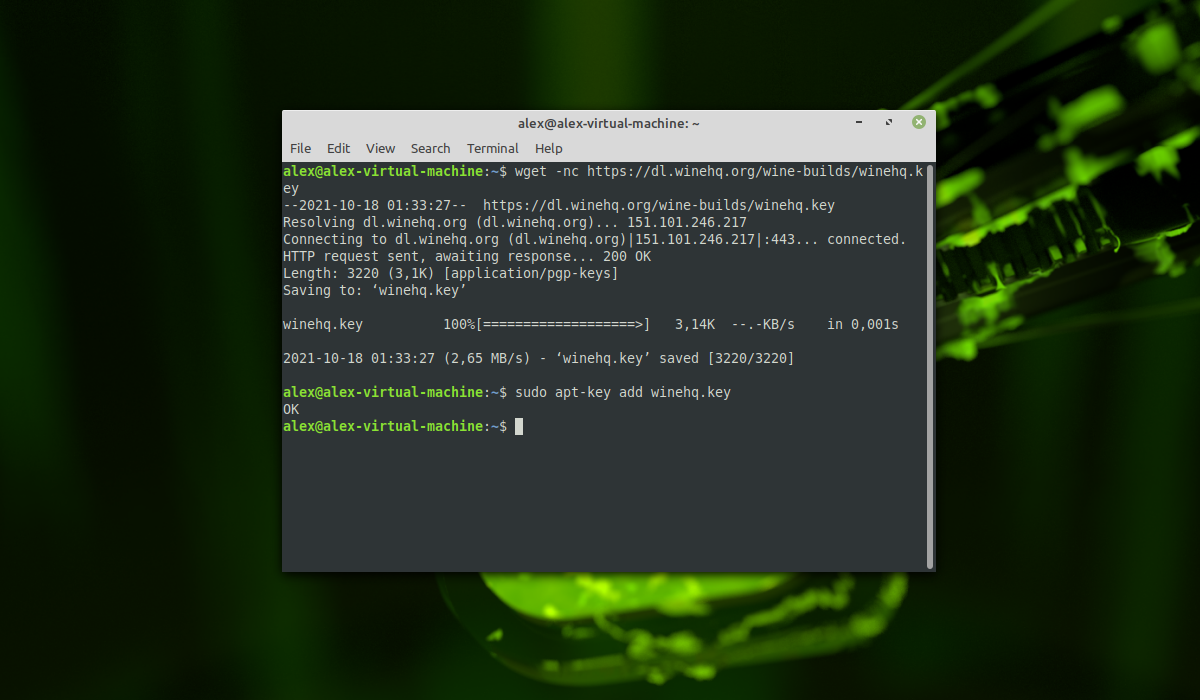
Далее необходимо добавить официальный ключ для репозитория Wine:
wget -nc https://dl.winehq.org/wine-builds/winehq.key
sudo apt-key add winehq.key
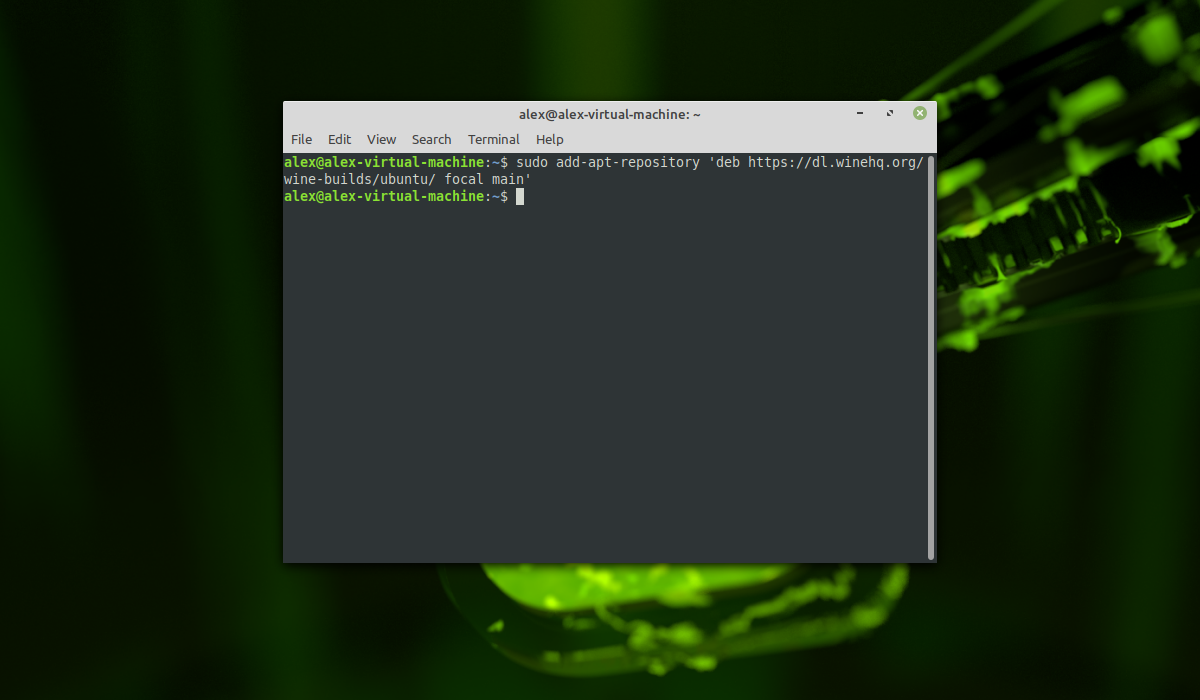
Подключаем официальный репозиторий:
sudo add-apt-repository ‘deb https://dl.winehq.org/wine-builds/ubuntu/ focal main’
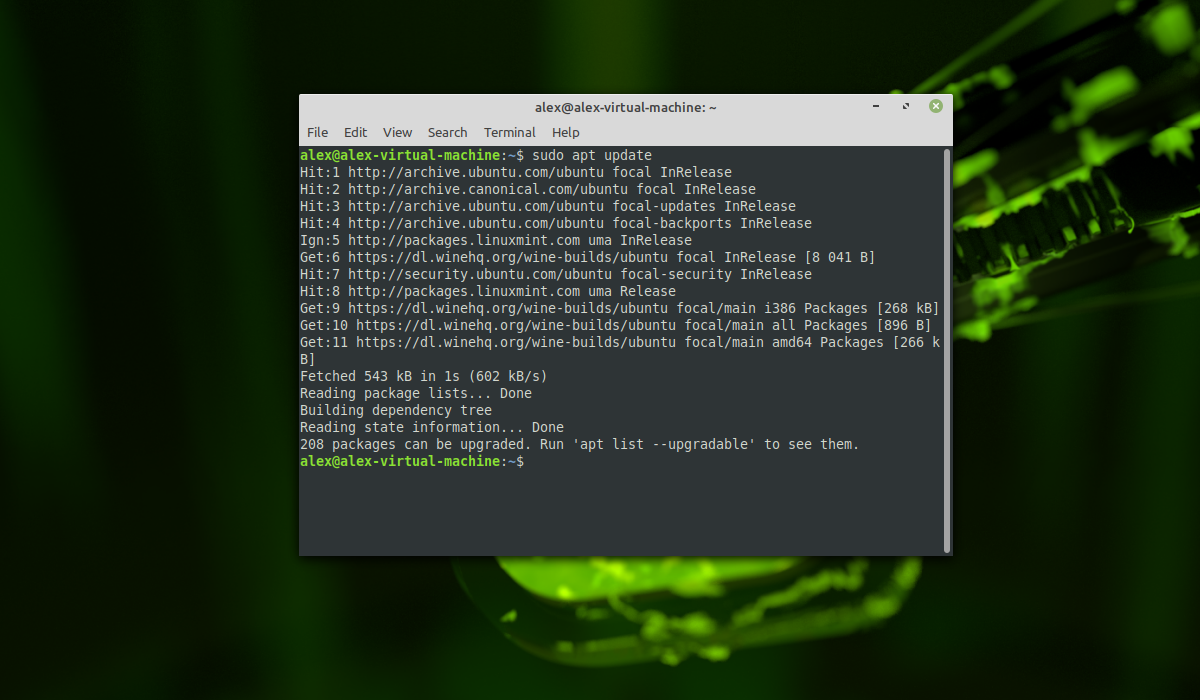
Далее необходимо обновить индексы пакетов:
Далее необходимо выбрать, какой релиз (стабильный или тестовый) необходимо установить. Для установки стабильного релиза необходимо выполнить команду:
sudo apt install —install-recommends winehq-stable
Для установки тестовой сборки необходимо выполнить команду:
sudo apt install —install-recommends winehq-devel
В качестве примера была выбрана стабильная версия:
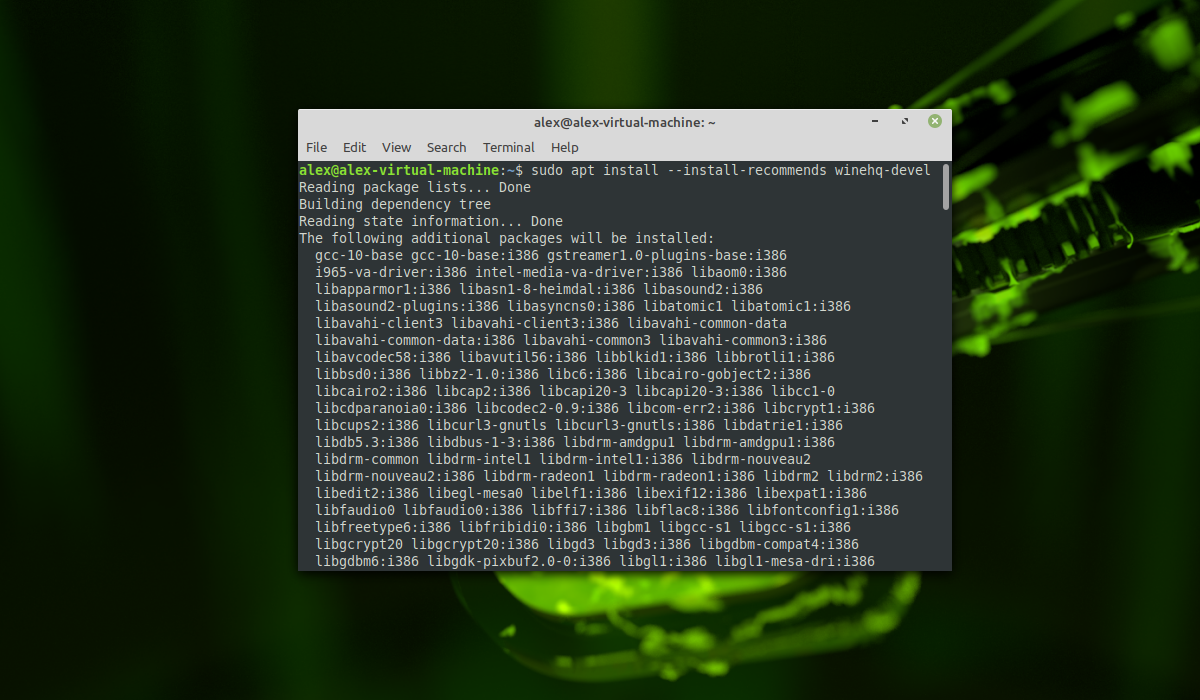
Установка Wine в Linux Mint 20.2 завершена. В следующем разделе будет рассмотрена установка Winetricks.
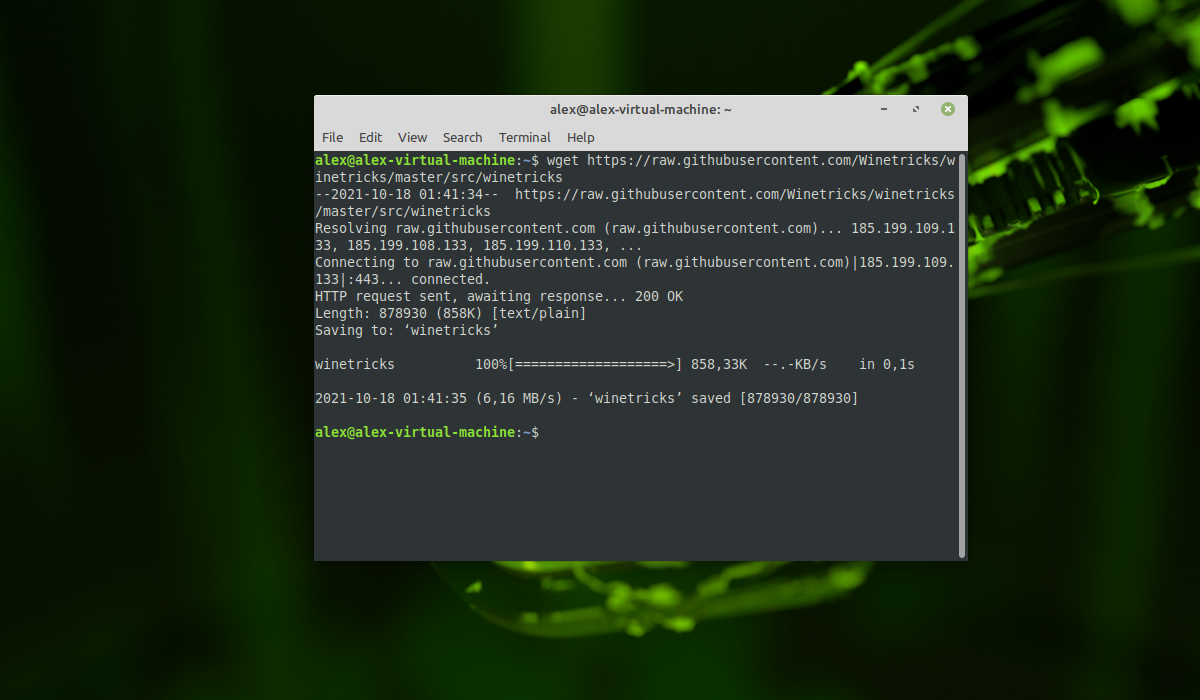
Установка Winetricks в Linux Mint 20
Скачиваем пакет Winetricks:
Делаем скачиваемый файл исполняемым:
Для удобства переместим Winetricks в директорию /usr/bin:
sudo mv -v winetricks /usr/bin
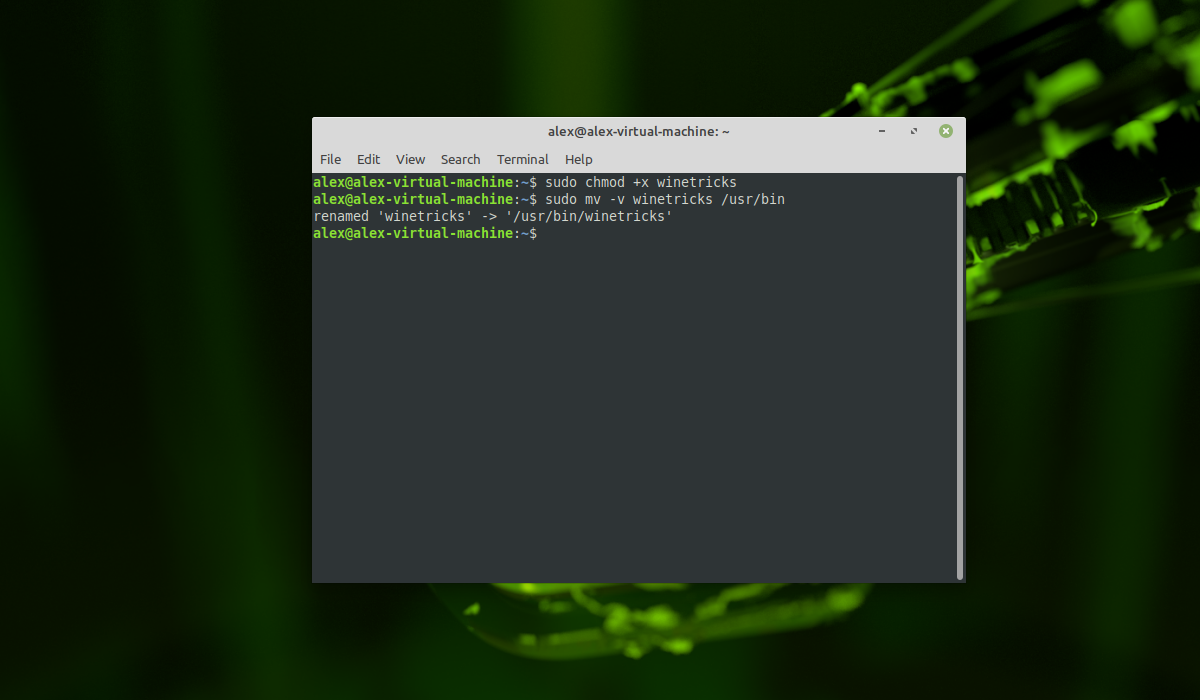
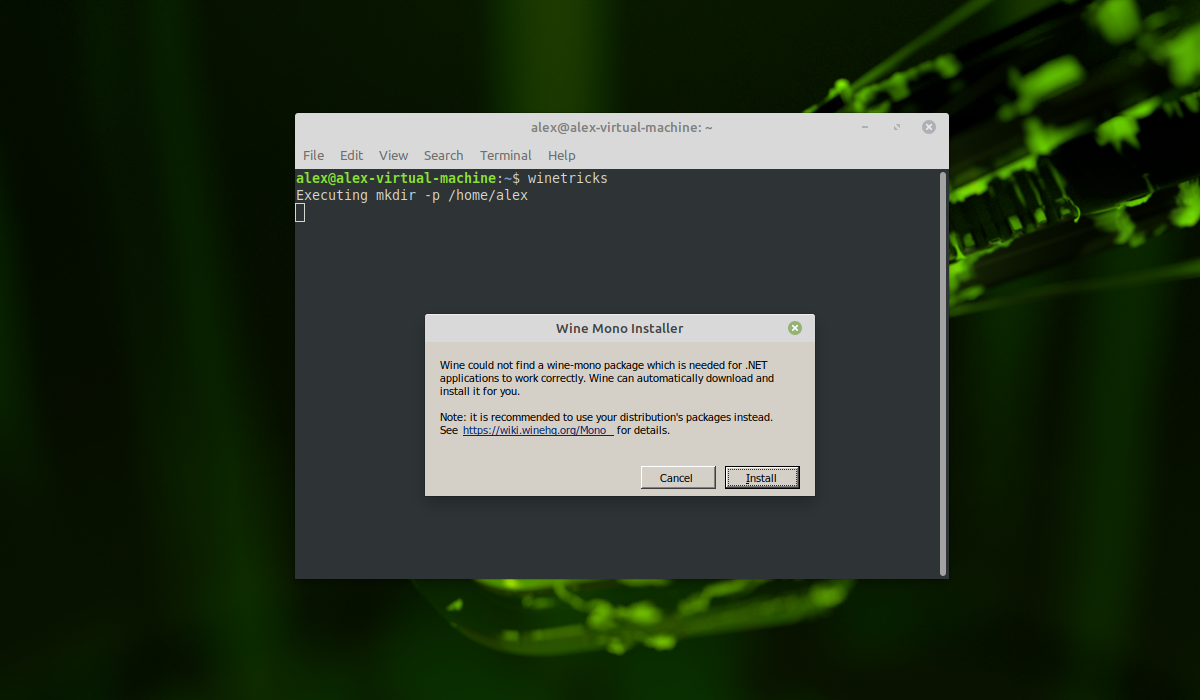
Теперь Winetricks можно запустить, просто выполнив в терминале команду:
При первом запуске программа сообщит что в системе отсутствует пакет wine-monoнеобходимый для запуска .NETприложений. Для установки пакета нажмите на Install.
Настройка Wine в Linux Mint 20.2
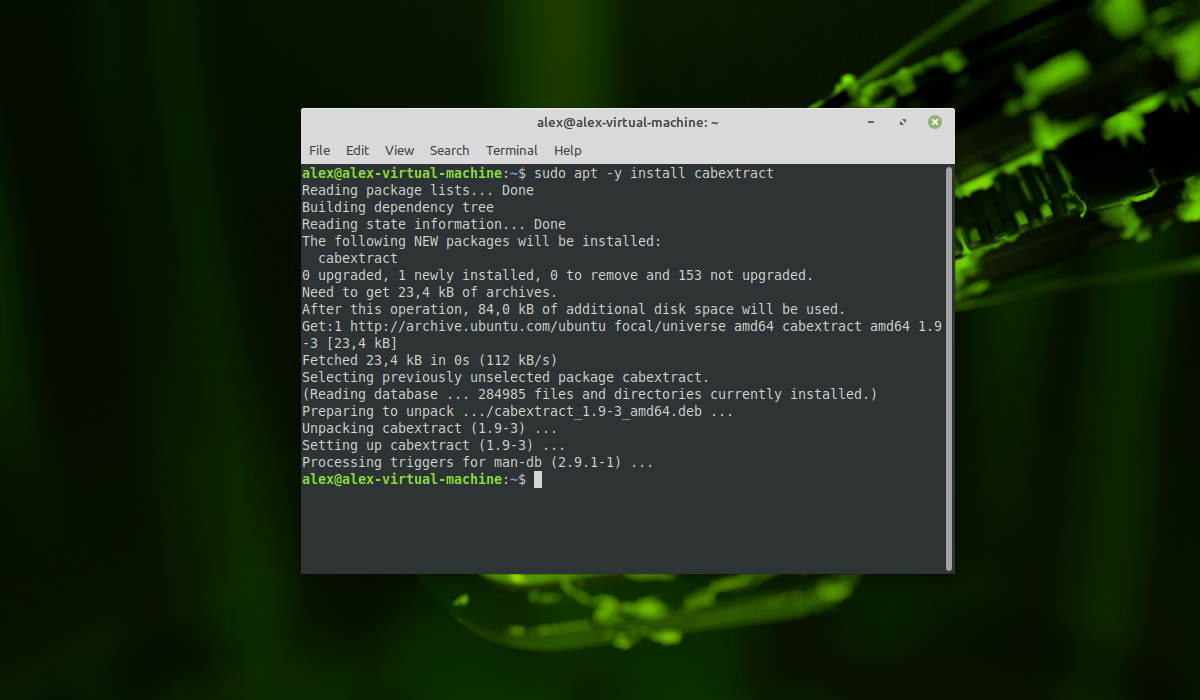
Для начала необходимо установить пакет cabextract. Данный пакет позволяет работать с типами файлов .cab. Формат используется в ОС семейства Windows и используется в различных технологиях установщиков Microsoft. Для установки выполните команду:
sudo apt -y install cabextract
Далее необходимо указать использование 32-битного префикса. Для этого в терминале необходимо выполнить команду:
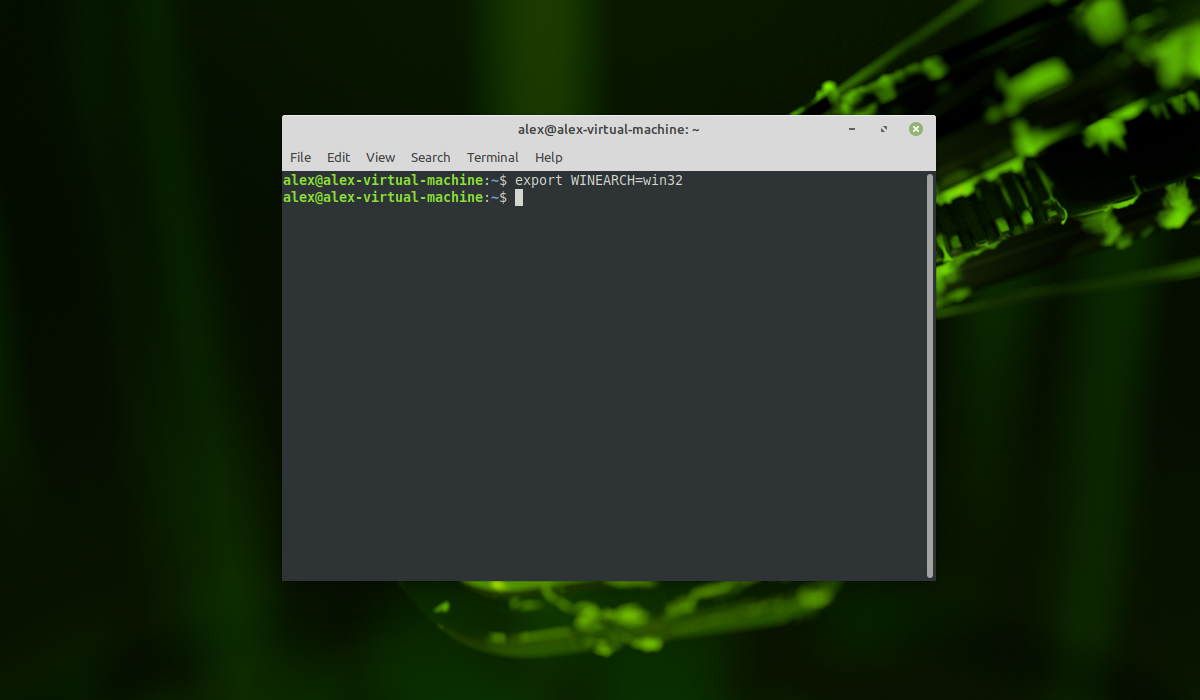
Для настройки Wine необходимо выполнить команду winecfg с правами root:
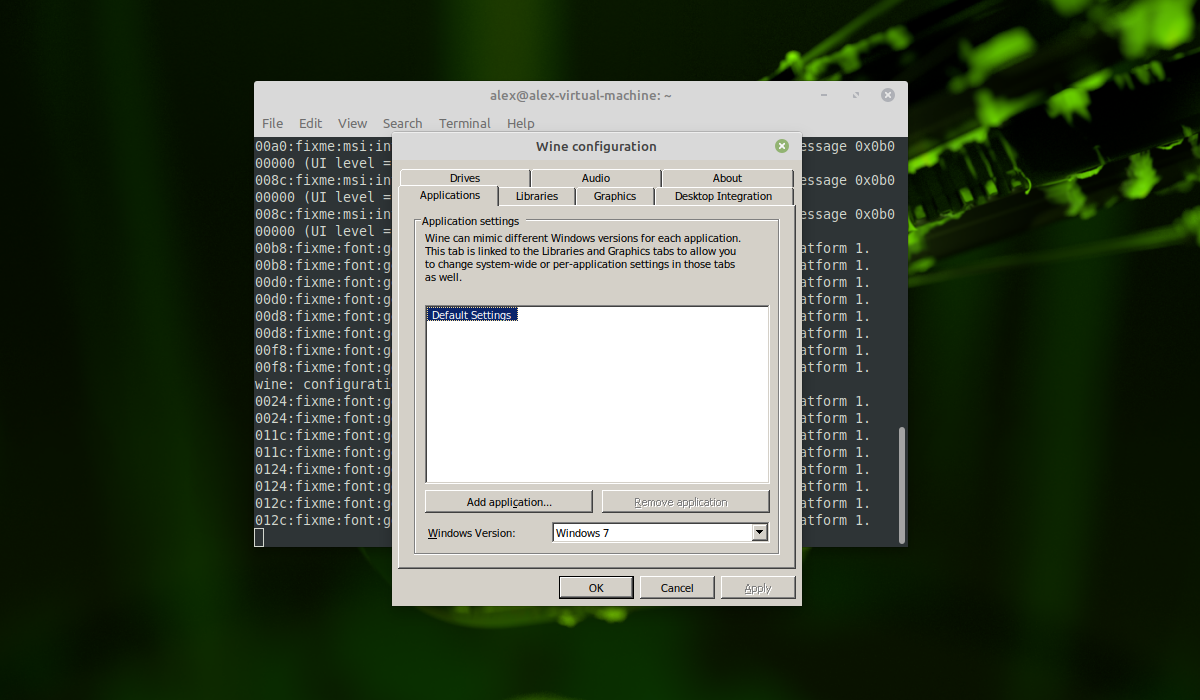
При первом запуске программа сообщит что в системе отсутствует пакет wine-mono необходимый для запуска .NET приложений. Для установки пакета нажмите на Install. Дождитесь установки.
В открывшемся окне в поле Windows Version необходимо указать желаемую версию Windows. Рекомендуется использовать Windows 7 или Windows 10. Нажмите на OK. Далее запустите Winetricks при помощи команды:
В появившемся окне выберите пункт Select the default wineprefix и нажмите ОK:

Далее выберите пункт Install a font:
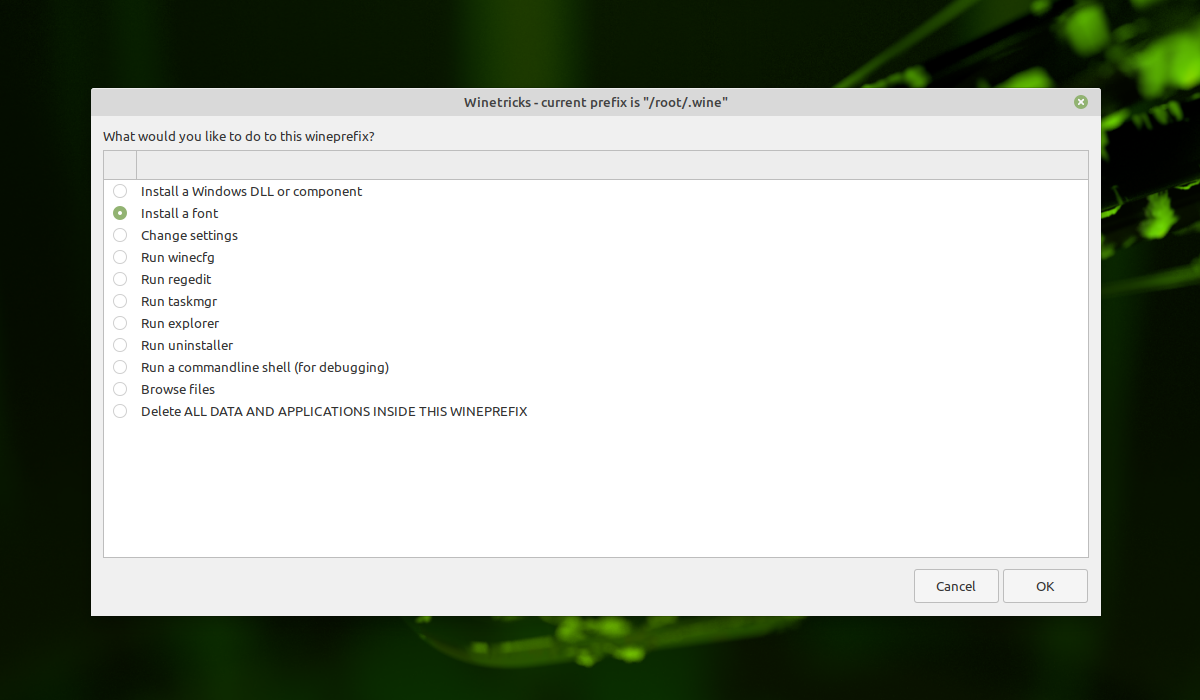
Необходимо выбрать пункт allfonts и нажать на ОК. Данная опция установит сразу все шрифты. Если в процессе установки шрифтов будут ошибки, тогда необходимо установить шрифты по одному или выбрать необходимые.
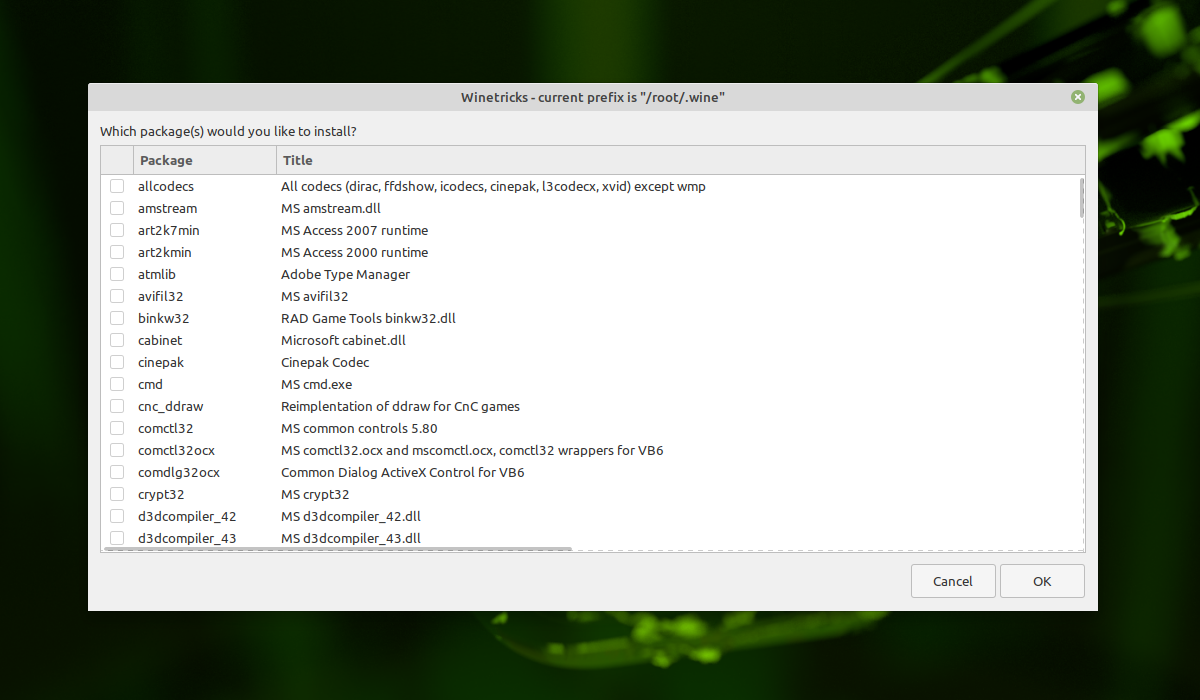
После завершения установки шрифтов откройте Winetricks еще раз и выберите пункт Install a Windows DLL or component для установки программ и библиотек. В открывшемся окне появится список всех доступных программ для установки. Рекомендуется сразу установить DirectX и .NET Framework. Отметьте галочками необходимые программы и нажмите на OK. Дождитесь установки программ.
Для запуска установленных программ необходимо ввести в терминале команду wine и имя установленной программы. Например, для запуска программы cmd (командная строка Windows) необходимо выполнить команду:
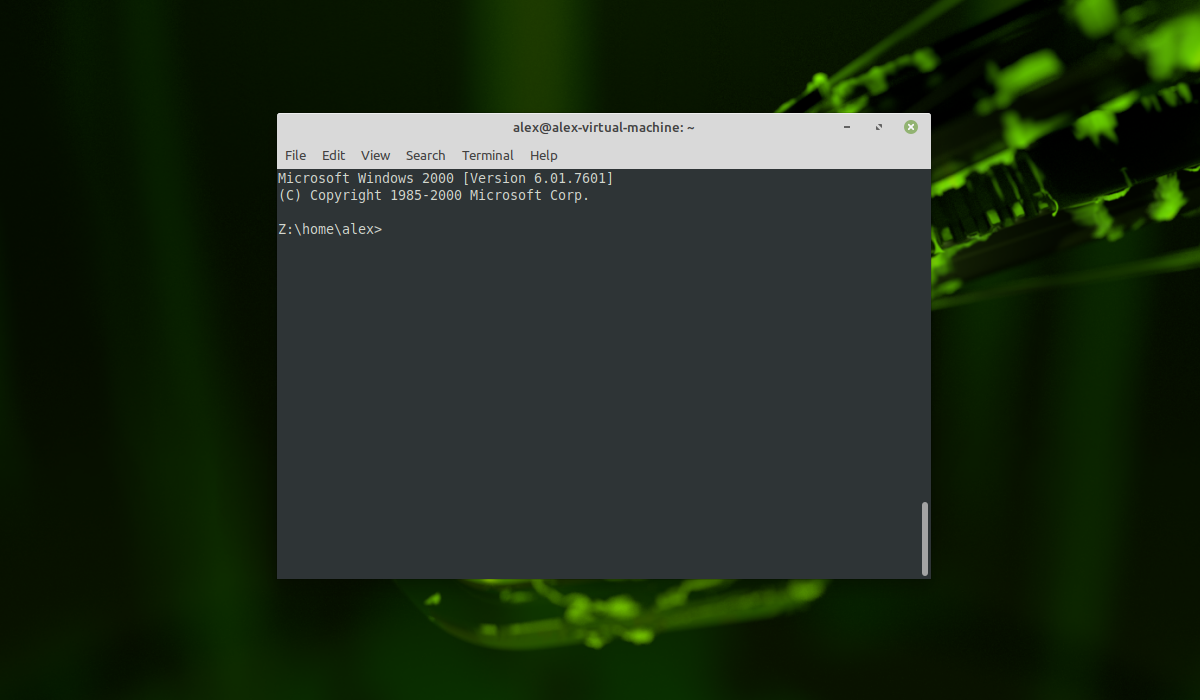
Для выхода необходимо ввести команду exit.
Выводы
В этой статье была рассмотрена установка Wine в Linux Mint 20.02. Если у вас остались вопросы, спрашивайте в комментариях!
Обнаружили ошибку в тексте? Сообщите мне об этом. Выделите текст с ошибкой и нажмите Ctrl+Enter.
Install Wine on Linux Mint 20.3
![]()
Wine is a helpful tool that allows you to run many Windows applications on Linux. Therefore, if you have just shifted from Windows to Linux, this tool can prove to be your best partner in helping you getting used to the Linux environment. This article is dedicated to the method of installing Wine on a Linux Mint 20.3 system.
How to Install Wine on Linux Mint 20.3?
To install Wine on Linux Mint 20.3, you need to proceed as follows:
Step 1: Check the Architecture of Your System
First, you should check the architecture of your system whether it is a 32-bit or a 64-bit system. This will later on help you in installing the appropriate version of Wine on your system. To check the architecture of your system, you can use the command shown below:

The architecture of our system is highlighted in the following image:
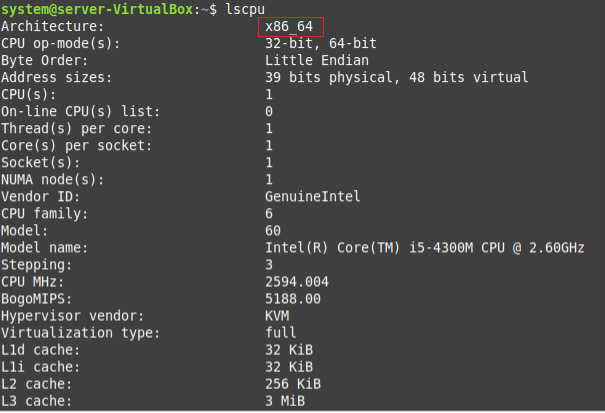
Step 2: Install the Appropriate Version of Wine for Your System
Since we are running a 64-bit Linux Mint 20.3 system, therefore, we will execute the command shown below for installing Wine on it:

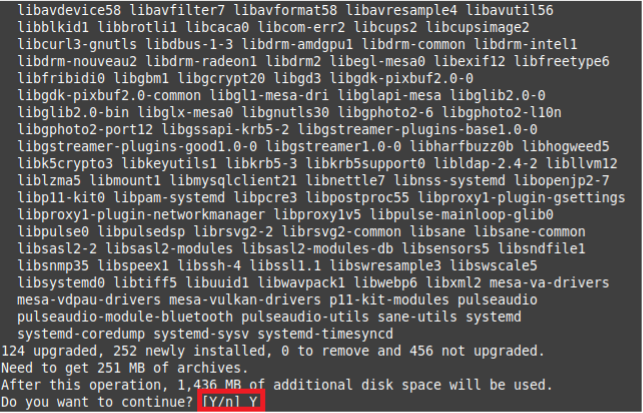
In the same manner, you can also install Wine for a 32-bit system simply by replacing “64” with “32” in the above-mentioned command. The installation of Wine will start right after the execution of this command. However, you will have to provide confirmation for proceeding further as shown in the following image:
Step 3: Confirm the Installation of Wine on Linux Mint 20.3
Once Wine is successfully installed on your Linux Mint 20.3 system, you can confirm this by running the command shown below:

This command will display the version of Wine that we have managed to install as shown in the following image:

How to Uninstall Wine From Linux Mint 20.3?
If you wish to uninstall Wine from your Linux Mint 20.3 system at any given time, then you can simply run the command given below:

Conclusion
This article was meant to convey the installation procedure of Wine on a Linux Mint 20.3 system. After having this tool installed on your Linux system, you can easily run your favorite applications on it.
About the author
Karim Buzdar
Karim Buzdar holds a degree in telecommunication engineering and holds several sysadmin certifications. As an IT engineer and technical author, he writes for various web sites. He blogs at LinuxWays.
How to Install Wine 8 on Linux Mint 21
![]()
Wine 8 is the most recently released version of Wine. As you know, Wine is used to install and run the Windows softwares on Linux. Wine 8 comes with a lot of new features and better compatibility for Windows softwares.
In this article, we will show you how to install Wine 8 on Linux Mint 21.
Table of Contents:
Enable a 32-bit Architecture on Linux Mint 21
Wine 8 requires a 32-bit architecture which is enabled on Linux Mint 21 for it to work.
To enable 32-bit architecture on Linux Mint 21, run the following command:
Add the GPG Key of the Official Wine Repository on Linux Mint 21
Before you can add the official Wine repository on Linux Mint 21, you have to install the GPG key of the official Wine repository on Linux Mint 21.
First, create the /etc/apt/keyrings directory with the following command:
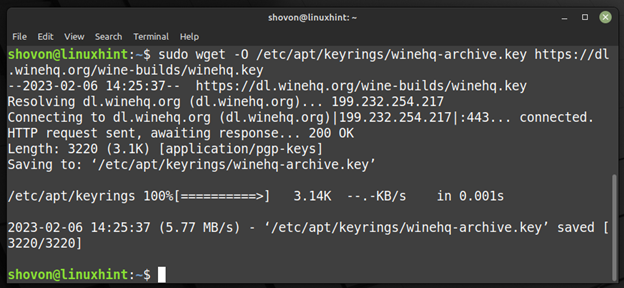
Download the GPG key of the official Wine repository and save it in the /etc/apt/keyrings directory with the following command:
$ sudo wget -O / etc / apt / keyrings / winehq-archive.key https: // dl.winehq.org / wine-builds / winehq.key
Add the Official Wine Repository on Linux Mint 21
To download the official Wine repository source file and add it to Linux Mint 21, run the following command:
$ sudo wget -NP / etc / apt / sources.list.d / https: // dl.winehq.org / wine-builds / ubuntu / dists / jammy / winehq-jammy.sources

For the changes to take effect, update the APT package repository cache with the following command:
The APT package repository cache should be updated.

Install Wine 8 on Linux Mint 21
To install Wine 8 and all the recommended tools on Linux Mint 21, run the following command:
To confirm the installation, press “Y” and then press .
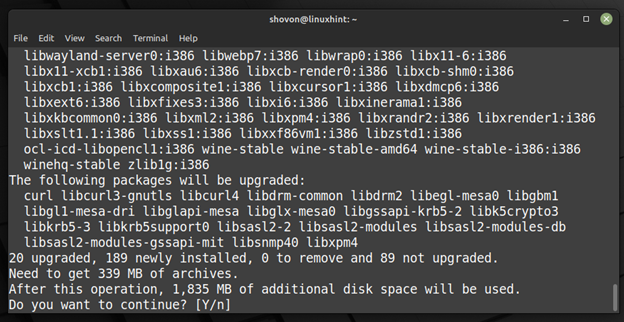
Wine 8 and all the required dependency packages are being downloaded. It takes a few seconds to complete.

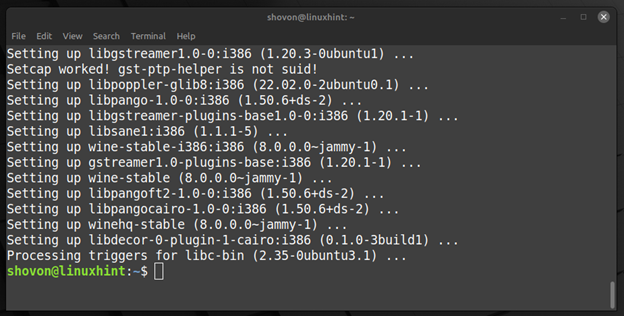
Wine 8 and all the required dependency packages are being installed. It takes a few seconds to complete.

Wine 8 and all the required dependency packages should be installed at this point.
Once Wine is installed, you can run the following command to check the version of Wine that you installed.
As you can see, you installed Wine 8 correctly.

Install the Notepad++ Windows App on Linux Mint 21 via Wine 8
In this section, we will show you how to install the Notepad++ Windows app on Linux Mint 21 to verify that Wine 8 is working correctly and to demonstrate the process of installing a Windows app on Linux Mint 21 via Wine 8.
We downloaded the setup file of Notepad++ on our Linux Mint 21 machine. If you haven’t done that and you want to follow along, you can download the Notepad++ from its official website.
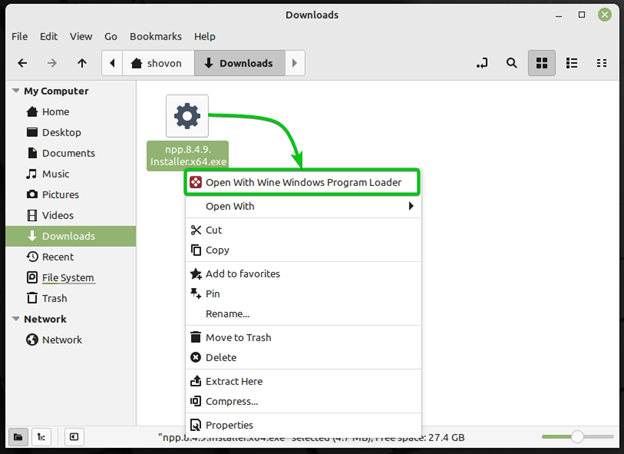
Once you downloaded the setup file of Notepad++, right-click (RMB) on it and click on “Open With Wine Windows Program Loader”.
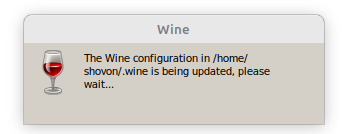
Wine is being configured to run the Notepad++ installer. It takes a few seconds to complete.
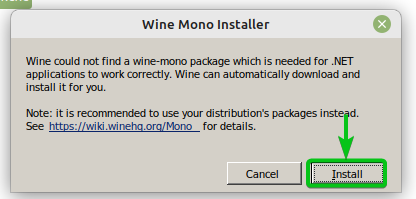
Wine requires the Mono Installer to run the Notepad++ installer. Click on “Install” to install it.
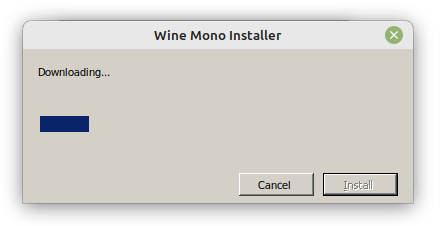
The Wine Mono Installer is being downloaded and installed. It takes a few seconds to complete.
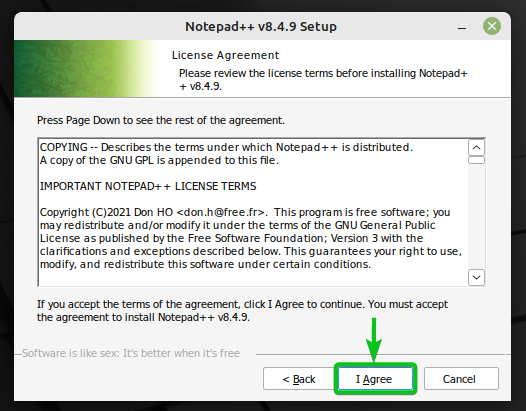
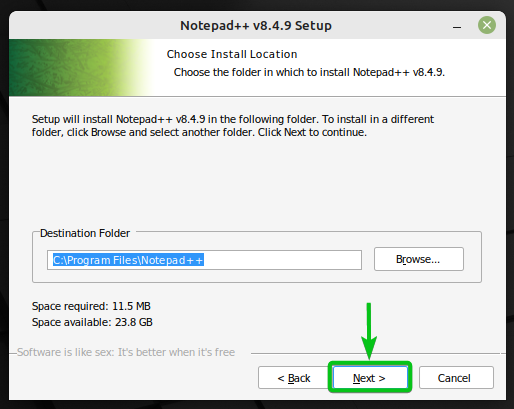
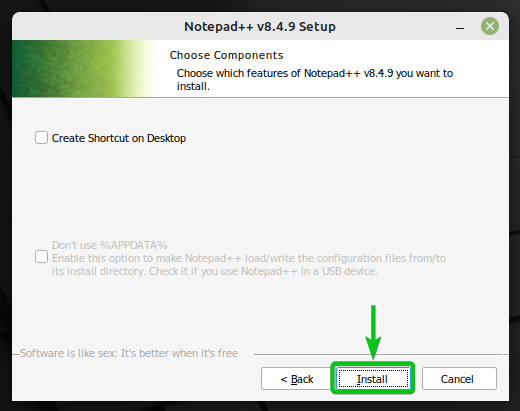
Once everything is ready, Wine should be able to run the Notepad++ installer. You can install the Notepad++ on Linux Mint 21 in the same way that you do on Windows.
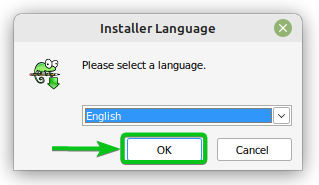
Select your language and click on “OK”.


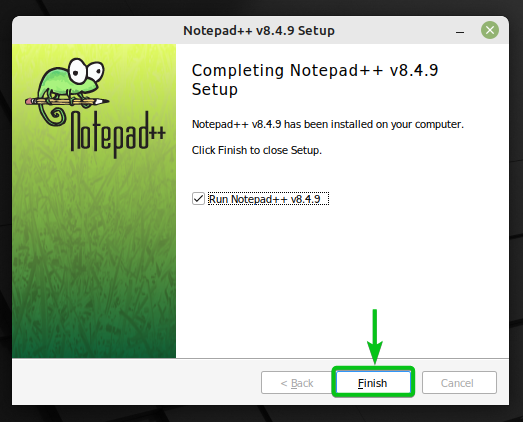
Notepad++ installer is installing Notepad++ on Linux Mint 21. It takes a few seconds to complete.

Once Notepad++ is installed, click on “Finish”.
Notepad++ should be running on Linux Mint 21 nicely as you can see in the following screenshot:
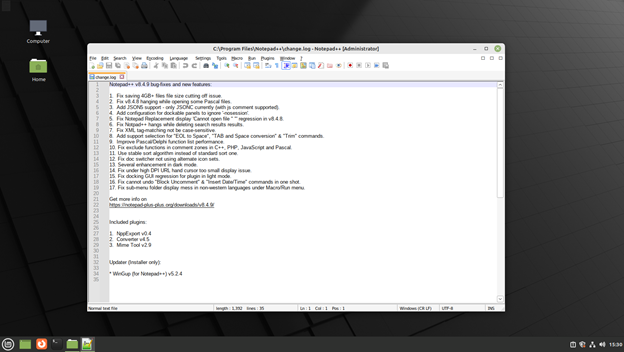
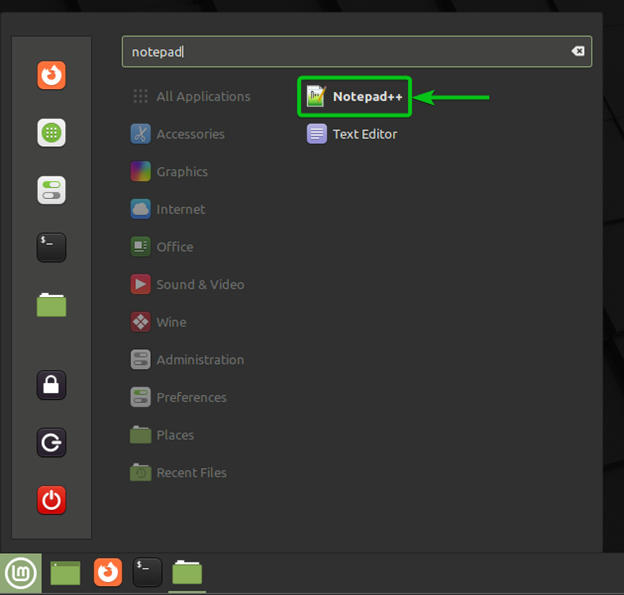
Once Notepad++ is installed on Linux Mint 21 via Wine 8, you can launch the Notepad++ from the “Application Menu” of Linux Mint 21 just like any other application.
Conclusion
We showed you how to install Wine 8 (the latest version of Wine at the time of this writing) on Linux Mint 21. We also showed you how to install a Windows app and run it on Linux Mint 21 via Wine 8.
References:
About the author
Shahriar Shovon
Freelancer & Linux System Administrator. Also loves Web API development with Node.js and JavaScript. I was born in Bangladesh. I am currently studying Electronics and Communication Engineering at Khulna University of Engineering & Technology (KUET), one of the demanding public engineering universities of Bangladesh.