- Questions on Loop Devices and Mounting a Disk Image
- 1 Answer 1
- Что такое Loop-устройство в Linux?
- Устройства Loop: обычные файлы, смонтированные как файловая система.
- Причины использования петлевых устройств
- Управление loop устройствами
- Размонтировать Loop-устройство
- Удалить loop устройство
- How to Create a Virtual Block or Loop Device in Linux
- How to Create A Loop Device
- 1. Create a File of Desired Size
- 2. Create the Loop Device
- 3. Mount the Loop device
- How to Remove loop device
- Final Words
Questions on Loop Devices and Mounting a Disk Image
The commands are from here: Mount single partition from image of entire disk (device) About the first command’ I need to «Calculate the offset from the start of the image to the partition start», but don’t know what the numbers quoted in ** mean (512 in this example):
$ sudo fdisk -lu sda.img . Units = sectors of 1 * **512** = **512** bytes Sector size (logical/physical): **512** bytes / **512** bytes . Device Boot Start End Blocks Id System sda.img1 * 56 6400000 3199972+ c W95 FAT32 (LBA) sudo losetup -o 28672 /dev/loop0 sda.img I looked there and it looked like a text file but it isn’t, it also not a folder. what is that file? Can I choose another name to it? If yes, should I create it before? How does the third command works? What does every part in it mean?:
I already successfully ran the commands to do what I wanted, it’s just important to me to understand it more for next time and for helping other. Thanks for your answers and teaching me (:
1 Answer 1
In the first command, the 512 number is referring to the block size of the image. When a file is written to a disk, it uses x amount of blocks. The remainder of any block not used is wasted space. This is why you sometimes see things listed as size (actual size of the file, folder, etc) and size on disk (amount of space actually taken up on disk, allowing for block size mismatch. Take, for example a 1234 byte file, if we were using 512 byte blocks, then it would actually take up 3 blocks, or 1536 bytes (512 * 3) and 302 bytes (1536 — 1234) bytes would be «wasted».
The loop0 is a loopback device. All files under /dev are actually devices (hence the name :-)). Linux treats devices as files which makes it very easy to accomplish some things when dealing with hardware. i.e. the following command will send an audio file directly to the soundcard to play (no software needed, neat!)
Loopback devices are special pseudo or fake devices that Linux uses in cases like yours. What you are saying in that command is that you want Linux to treat your image file as a hard drive. This allows you to run any command that you would normally run on a hard drive, on your image file.
For the last command, we are simply mounting the file system on your fake drive (your image file) to a location on the local filesystem. With Linux, we use a flat directory structure, which is why every file location (including devices, network drives and external hard drives, etc) begins with ‘/’, which is also referred to as the root of the filesystem. Mounting a filesystem simply puts it in a place accessible tot he rest of the system (somewhere under /).
Now, by default only a user called «root» can mount filesystems. The root user is basically the same as an administrator user on Windows. Someone who can do anything on the computer. In Ubuntu, the root user is hidden for security, so we need to use sudo . The sudo command, basically means «hey, make me the root user to run this one command».
mount here is the command that we are running as root (sudo), /dev/loop0 is our fake drive we created earlier, and /mnt is the location that we want the image to be accessible at. /mnt and /media are the standard locations in Linux where we mount filesystems, although this can be anywhere you want. It is best practice to create subfolder under /mnt or /media to mount to, instead of just /mnt. This is because you may have other filesystems mounted there, and if you mount over top of them, they will not be accessible! The only caveat to this, is that you need root privileges to create a folder here, so your last command should really be two commands, and look like this:
sudo mkdir /mnt/myimg sudo mount /dev/loop0 /mnt/myimg mkdir is just the command to make a directory.
Что такое Loop-устройство в Linux?
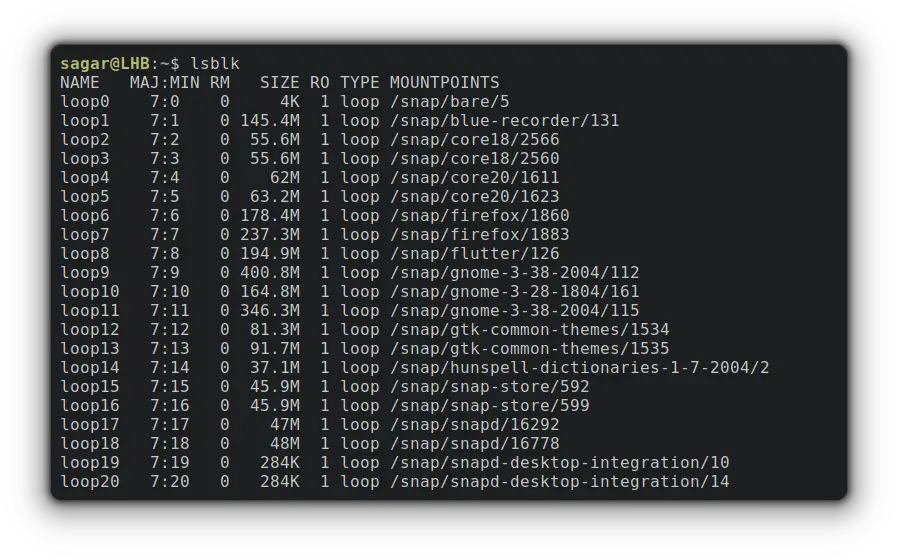
При выводе списка смонтированных дисков через терминал вы наверняка сталкивались с именами дисков, начинающимися с loop:
Если вы являетесь пользователем Linux Mint, вы получите длинный список loop устройств, как показано на снимке экрана выше.
Это из-за снимков, универсальной системы управления пакетами, разработанной Canonical. Приложения Snap монтируются как loop устройства.
Теперь это поднимает другой набор вопросов, например, что такое loop устройство и почему приложения моментальных снимков монтируются как раздел диска.
Позвольте мне пролить свет на тему
Устройства Loop: обычные файлы, смонтированные как файловая система.
Linux позволяет пользователям создавать специальное блочное устройство, с помощью которого они могут отображать обычный файл на виртуальное блочное устройство.
Кажется слишком сложным, верно?
Проще говоря, loop устройство может вести себя как виртуальная файловая система, что весьма полезно при работе с изолированными программами, такими как снимки.
Таким образом, вы получаете изолированную файловую систему, смонтированную в определенной точке монтирования. По которому разработчик/продвинутый пользователь упаковывает кучу файлов в одно место. Таким образом, операционная система может получить к нему доступ, и это поведение известно как циклическое монтирование.
Но работа с изолированными системами с использованием loop устройства — одна из многих причин, по которой используются loop устройства, и если вам интересно, вот еще примеры использования петлевых устройств.
Причины использования петлевых устройств
Будучи виртуальной файловой системой, возможности безграничны. Вот некоторые широко известные случаи использования петлевых устройств:
- Его можно использовать для установки операционной системы поверх файловой системы без переразметки диска.
- Удобный способ настройки образов системы (после их монтирования).
- Обеспечивает постоянное разделение данных.
- Его можно использовать для изолированных приложений, содержащих все необходимые зависимости.
И разработчики могут творить чудеса, когда у них есть изолированные файловые системы.
Loop устройствами можно легко управлять с помощью losetup утилиты. Позвольте мне показать вам, как это сделать.
Управление loop устройствами
Итак, давайте начнем с перечисления доступных петлевых устройств.
Чтобы перечислить их, все, что вам нужно сделать, это пара losetup с -a опцией:
Размонтировать Loop-устройство
Процесс отключения любого loop устройства довольно прост. Для этого я буду использовать команду umount.
Удалить loop устройство
Это только для демонстрационных целей. Не идите случайным образом удалять loop устройства.
Обязательно размонтируйте loop устройство, прежде чем продолжить удаление определенного loop устройства.
Вашим первым шагом будет отсоединение файлов от любого петлевого устройства с помощью -d опции. Для демонстрации я буду использовать loop9:
И теперь вы можете удалить loop9 устройство с помощью той же старой команды rm, которая используется для удаления файлов и каталогов:
И loop9 больше не числился в доступных петлевых устройствах:
How to Create a Virtual Block or Loop Device in Linux
Loop device is getting popular in Linux, specially for isolation. Here’s a quick guide on creating loop devices on Linux.
Linux users can have a virtual block device called a «loop device» that maps a normal file to a virtual block, making it ideal for tasks related to isolating processes.
And the best example for utilizing loop devices is snap packages, a sandboxed software solution containing every necessary dependency and mounted as a loop devices:
And if you’re interested in creating your own virtual block device, here’s a simple guide.
How to Create A Loop Device
For ease of understanding, I’ve decided the entire process in the form of simple steps so it can be easier to grasp.
And if you’re interested in learning more about loop device in Linux and its use, I’ll recommend the other guide of ours that covers the basics:
1. Create a File of Desired Size
In the first step, you’re required to create a file as per your needs. For this example, I’ll be creating a file of 3 Giga bytes:
dd if=/dev/zero of=VirtBlock.img bs=100M count=30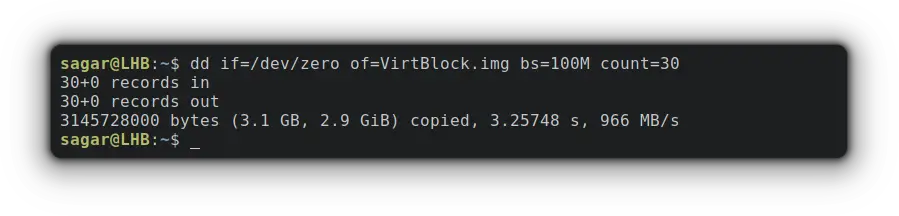
- if=/dev/zero will create a block of 0s to hold data.
- of=VirtBlock.img is where you’ll specify the name. I went with VirtBlock.img.
- bs=100M will set the size of a single block.
- count=30 will create copies of single blocks for given times. Meaning 100Mb * 30 times is about 3 GB in size.
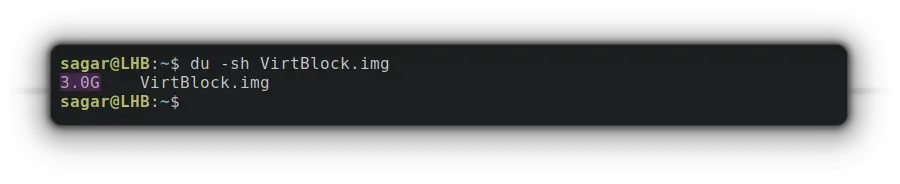
Now, let’s verify the size of the recently created block by the given command:
2. Create the Loop Device
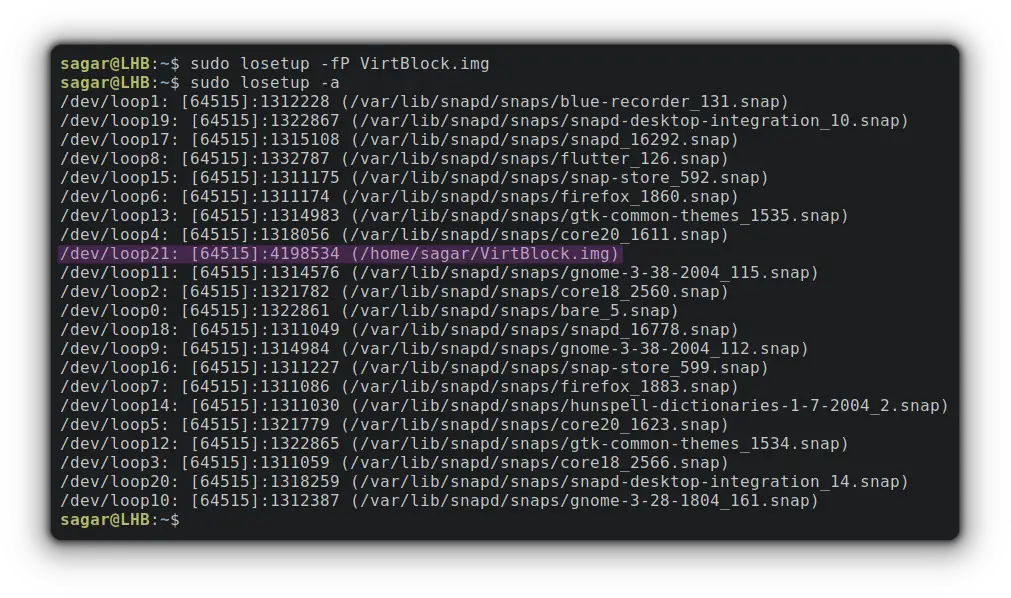
In this step, I’ll be utilizing the losetup utility to create a loop device mapping at a recently created file.
sudo losetup -fP VirtBlock.img- -f (find) will find us unused loop devices and save us from errors like «losetup: TO_BLOCK: failed to set up loop device: Device or resource busy”.
- -P will force the kernel to scan the partition table on the newly created loop device.
Now, its time for us to print all the loop devices using the -a option with losetup as given:
But your block needs to have a file system to create, store and configure files to that block and I’ll be going with ext4:
sudo mkfs.ext4 /home/sagar/VirtBlock.img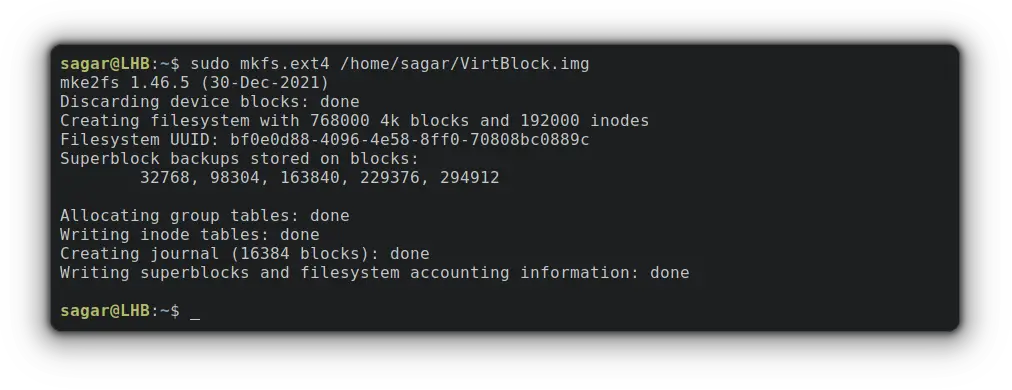
Make sure to use the exact path or it will throw an error. Use the reference from sudo losetup -a command.
3. Mount the Loop device
To mount created loop device, the first step should be creating a mounting directory which can be done through the given command:
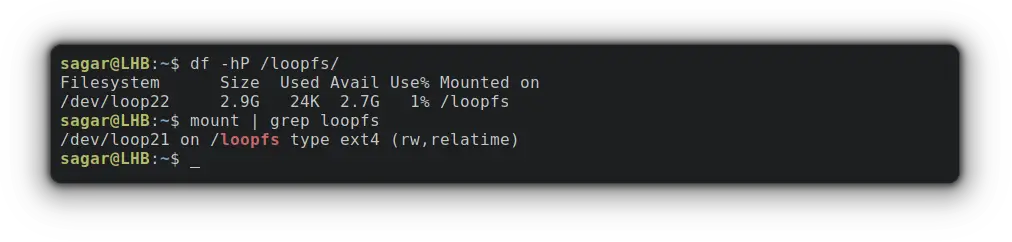
To mount the loop device (mine is loop21), I’ll be using the -o loop option as given:
sudo mount -o loop /dev/loop21 /loopfsNow, you can verify the mounting point and size of the recently mounted loop device:
To verify the file system, you can go with the given command:
How to Remove loop device
Removing a piece of software is always easy than installation/configuration and that’s the same case here!
First, you’ll have to unmount and remove the mounting directory:
sudo umount /loopfs sudo rmdir /loopfsNow, you’ll have to detach the loop device (mine is loop21) which was created by «losetup -d» command:
Finally, you have to remove the file (VirtBlock.img) by the given command:
sudo rm /home/sagar/VirtBlock.imgFinal Words
Using a loop device for isolation is a handy Linux feature.
This guide went through the configuration and removal process in an easy manner. If you encounter any issues, leave a comment and I’ll try to help you out.