- How to Mount SMB Share on Linux or Windows
- Why It May Not Work?
- How to Access Samba Share in Linux
- How to Open Samba Shared Folder in Windows
- Wrapping Up
- How to Mount SMB Shares on Ubuntu?
- Step1: Updating and upgrading apt-cache repository
- Step2: Cifs-utils Package installation
- Step3: Creating Directory
- Step4: Creating Credentials file
- Step5: Mount samba share
- Step6: Automount on system reboot
- Conclusion
- About the author
- Shehroz Azam
How to Mount SMB Share on Linux or Windows
In the previous article, I explained how to mount a Windows shared folder in Linux. There were certain issues due to the fact that Microsoft uses the WS-Discovery protocol, and Linux still poorly supports this protocol. However, if you need to mount a Samba shared folder, the issues will be roughly the same.
In this article, we will look at how to mount a SMB share in Linux or Windows using a graphical interface.
Why It May Not Work?
In the past, the SMB1 protocol had a built-in network discovery feature. Starting with Samba 4.11.0, it is disabled by default and is not recommended for use due to security issues. Now the Zeroconf protocol and Avahi service are used in Linux for that purposes. Recent versions of Samba can publish themselves into the local network using Avahi. So that, in most cases, you will see Samba share on another Linux PC without any troubles.
However, Windows will not see your Linux shares. Microsoft uses the WS-Discovery protocol for network discovery, but the developers of Samba decided not to add support for this protocol. There is already a separate service written in Python that can announce a computer through WS-Discovery, which is called WSDD.
In the next sections, we will look at how to ensure that your Samba server is announced using Avahi, and how to configure the announcement manually. This may be relevant for older versions of Samba. Also, we will configure WSDD so that everything works in Windows as well.
How to Access Samba Share in Linux
In this article, I won’t go into detail about setting up a Samba file server because there are already many instructions on the internet. Let’s focus on how to ensure that it is visible to other Linux machines and troubleshoot if it is not. As I mentioned earlier, this is done using the Avahi service. You need to install it if it is not already installed. The command for Ubuntu is:
sudo apt install avahi-daemon avahi-utils
sudo dnf install avahi avahi-tools
This may be enough for your network folder to be found on another computer because newer versions of Samba can announce themselves via Avahi if they are compiled with this support. This feature can be configured using the multicast dns register option in the global section:
/etc/samba/smb.conf [global] multicast dns register = yes
Usually, it is enabled by default, so no additional settings are needed here and it makes file sharing between Linux systems easier. You can check whether your server is discovered by Avahi using this command:
avahi-browse —all —terminate —resolve
You will see your server’s IP and port 445, in the list. If the automatic announcement does not work, you can configure Avahi to announce Samba service permanently by creating the /etc/avahi/services/samba.service file with the following content:
Here, the Samba service is published, along with the computer name LOSST-PC, which will make it easier for users to understand that this is the computer they need. Then you need to set the correct permissions for this file and restart Avahi:
sudo chmod 644 /etc/avahi/services/samba.service sudo systemctl restart avahi-daemon
After this, you will be able to find SMB shares on network. Ensure that you can see smb shares on another PC. If you use GNOME and Nautilus, open Other Locations, and your remote share will appear right here in the Networks list:
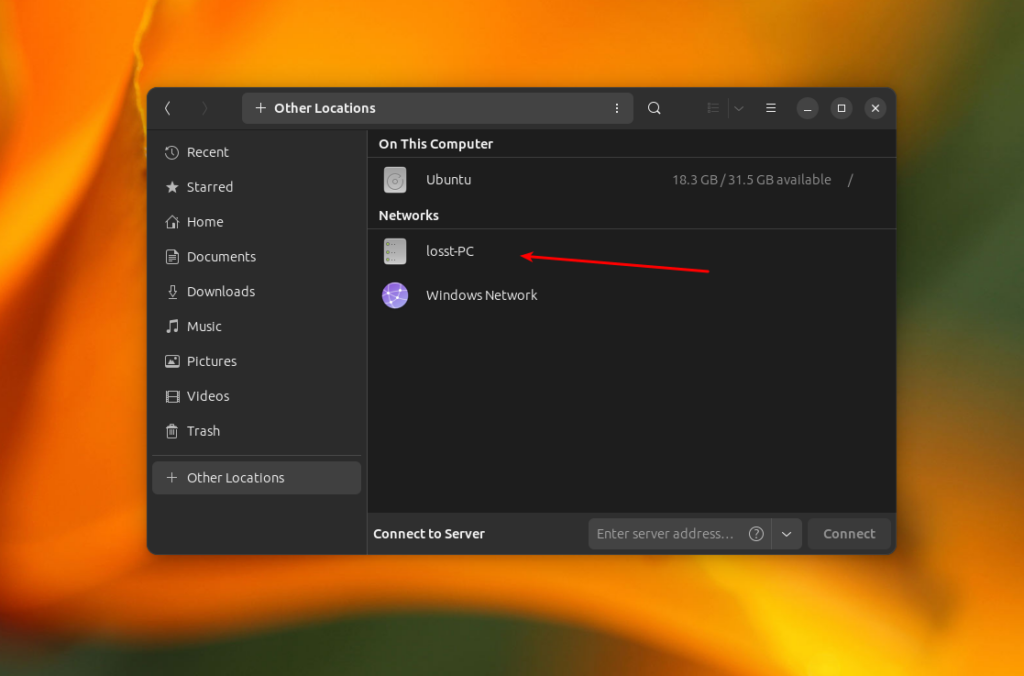
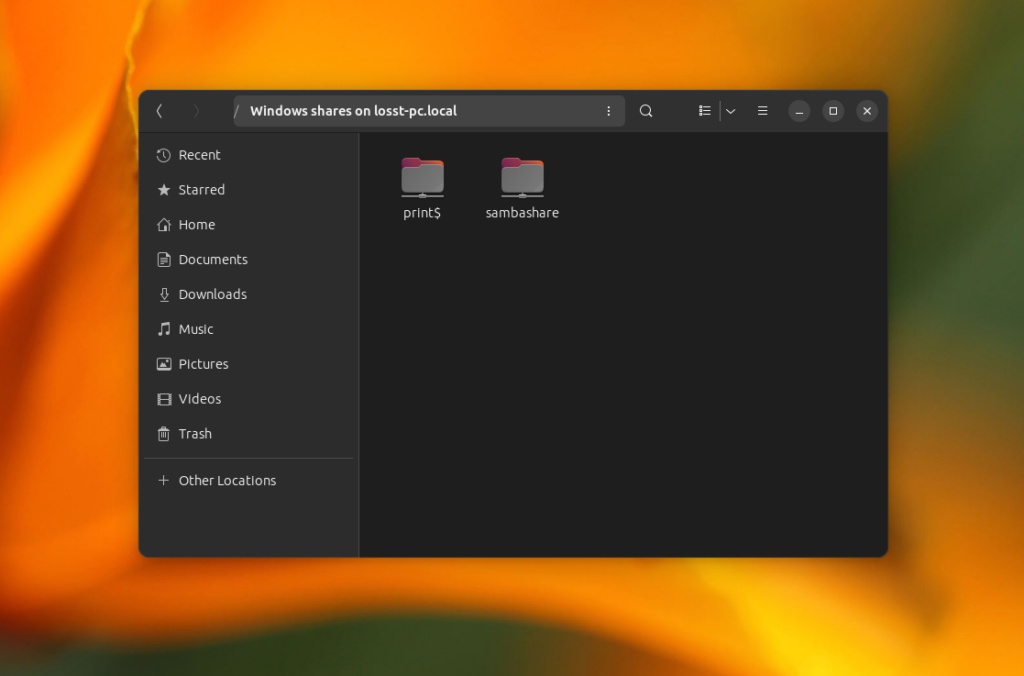
You just need to enter the password for it, and after this, you will see shared files:
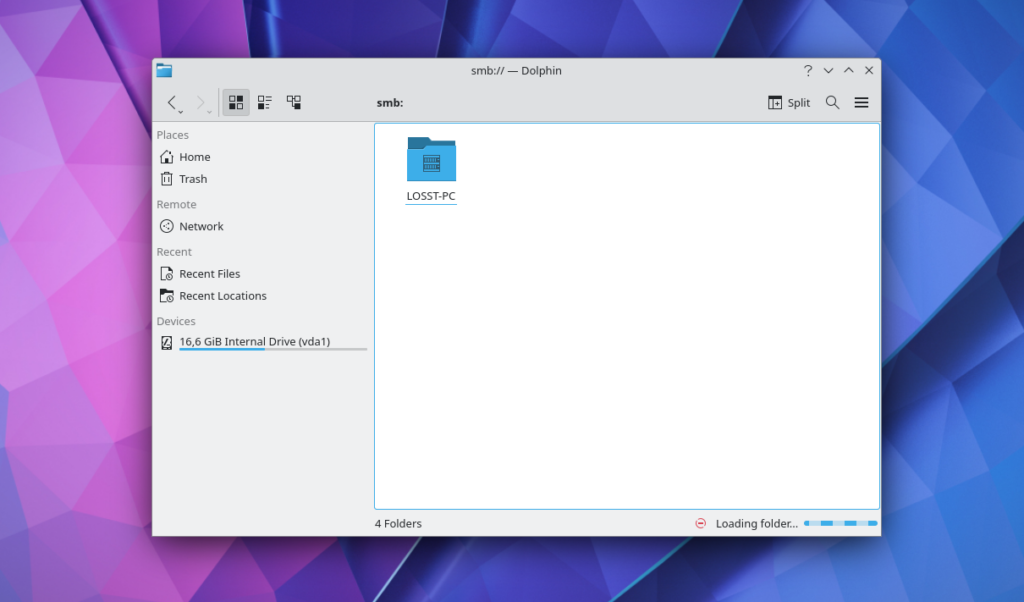
In the Dolphin file manager you can open the Shared Folders Item in the Network section:
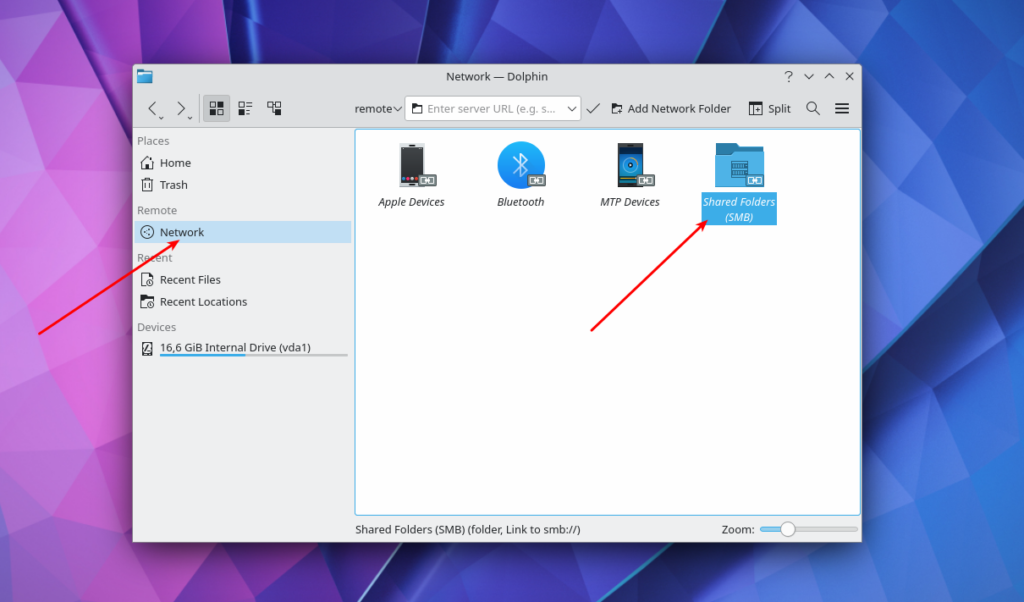
There you will see your share:
How to Open Samba Shared Folder in Windows
If you want your Samba network share to be visible and accessible in Windows, Avahi won’t help. You need to install and start the WSDD service. Execute the following command for its installation in Ubuntu:
Before starting the service, you should disable IPv6 support, as this can cause connection problems with Windows in the future. To do this, open the file /etc/default/wsdd and add the —ipv4only option to the WSDD_PARAMS variable:
/etc/default/wsdd WSDD_PARAMS=»—ipv4only»
Note, that you need root privileges to edit files in the /etc/ directory. Then start the wsdd service and add it to the autoload:
sudo systemctl enable —now wsdd
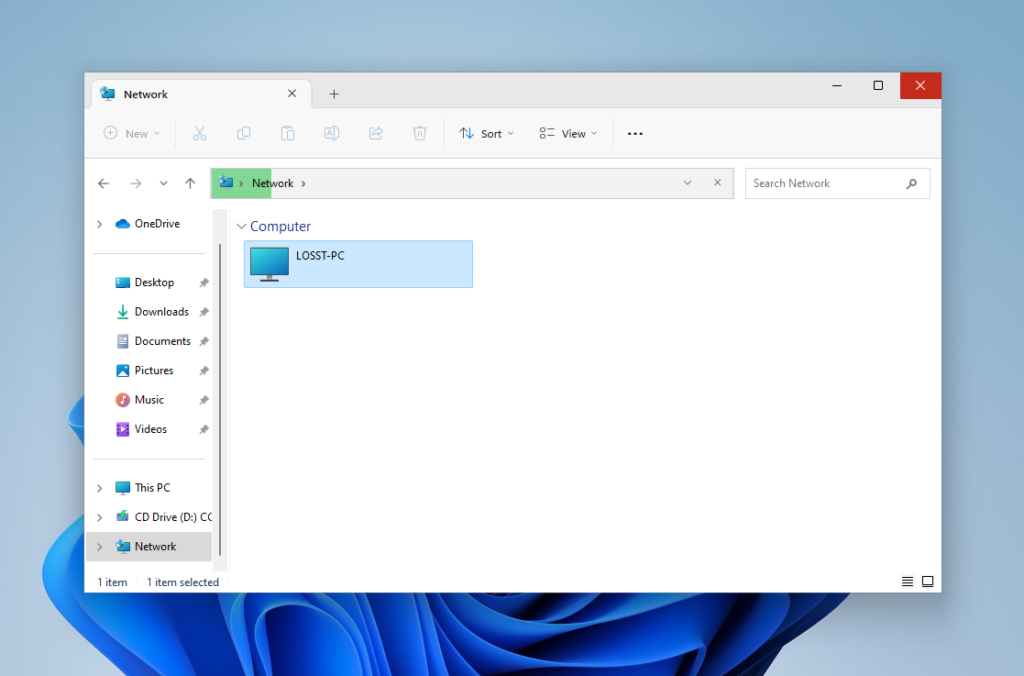
After this, open the Network section in the Explorer on windows machine and make sure everything works:
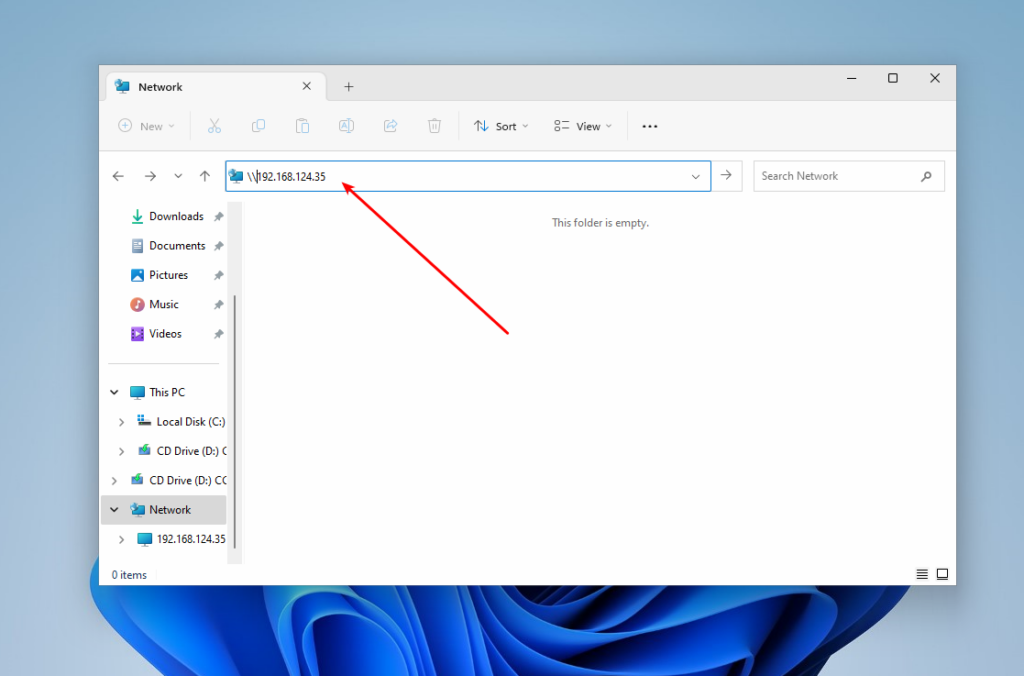
If despite these settings you still can’t find your SMB server in Windows, or you get an error, you can try to connect to remote host directly. To do this, type two slashes and its IP address in the address bar. For example, //192.168.124.35:
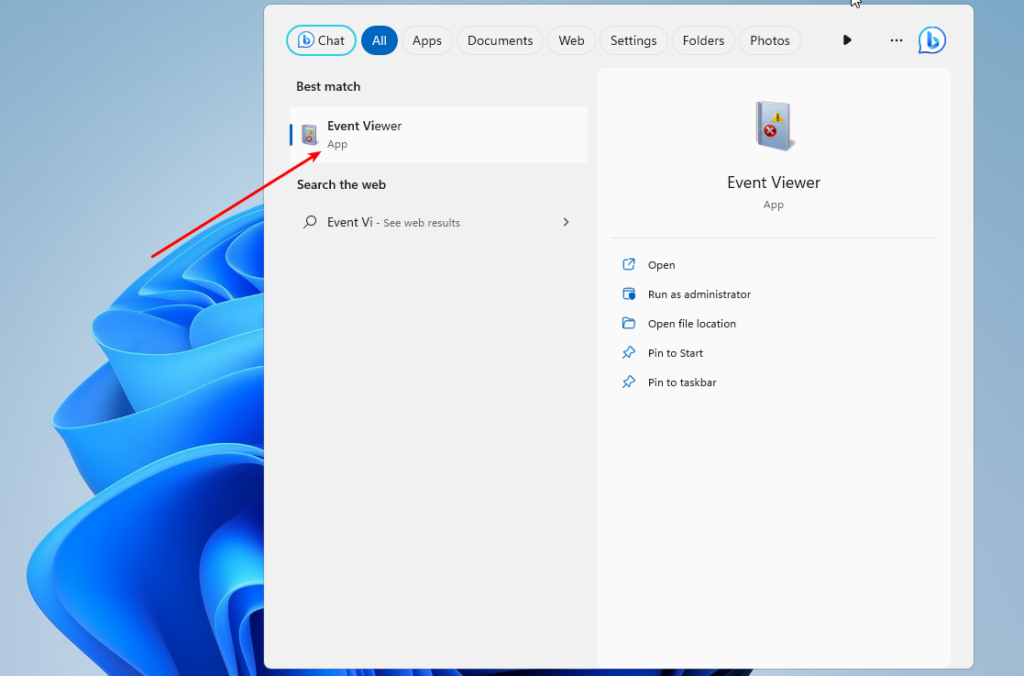
If for some reason something still doesn’t work, you can check what went wrong using the Event Viewer utility in Windows. It can be launched from the main menu:
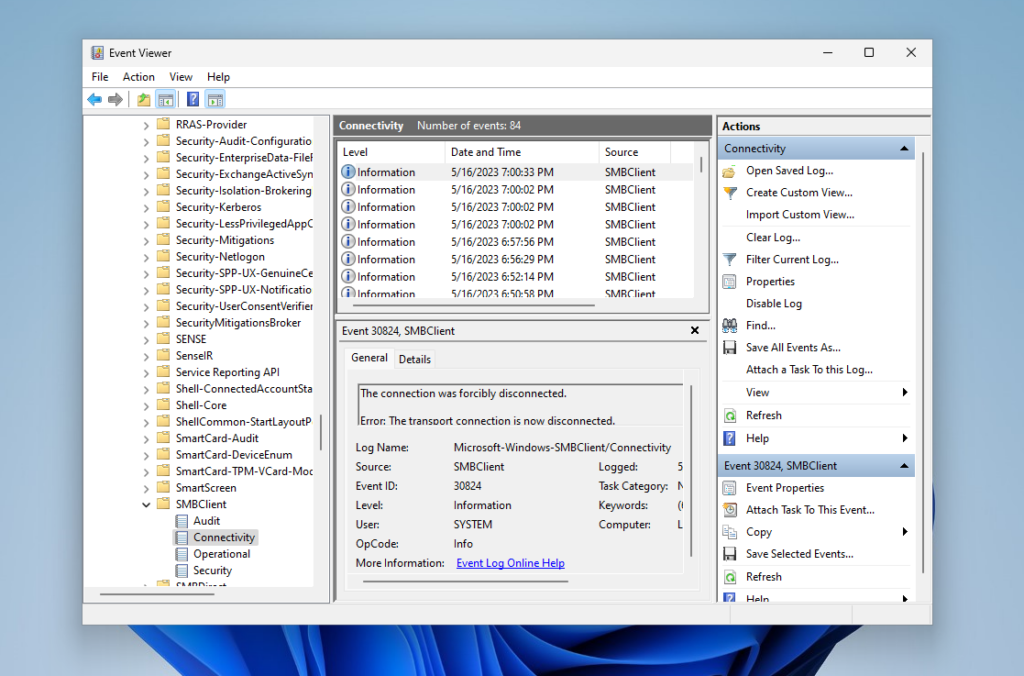
Here you need to open Applications and Services Logs, then Microsoft, then Windows, and in this list, find SMBClient. Here are the SMB client logs, by analyzing which you can understand what went wrong:
Wrapping Up
In this article, we looked at how to mount a Samba share in Linux and Windows. If you want to mount such a folder permanently, look at the article on mounting Windows folders, everything works similarly there as there is used the same SMB protocol.
Found a mistake in the text? Let me know about that. Highlight the text with the mistake and press Ctrl+Enter.
How to Mount SMB Shares on Ubuntu?
![]()
SMB is a client-server, file-sharing protocol that stands for Server Message Block which was invented by IBM in 1984 for the purpose of allowing computers to access files for reading or writing on a remote host using the LAN (Local area network). The SMB protocol that makes available the files or directories that are accessed on the remote host are called shares. This means that we can mount a shared file or directory to our system using the local area network.
SMB was previously known as CIFS and is the old version or dialect of SMB which stands for Common Internet File System which was created by Microsoft and is a particular implementation of the Server Message Block protocol.
In this article, we will provide you with each and every little step on how to mount SMB shares on Ubuntu using the Samba file server. Samba uses the SMB protocol and has the same function as SMB i-e enabling file sharing on Local area networks with other systems. But before going forward let me highlight a point that this article assumes that you have already shared a directory on a remote system and you will access that directory in this article.
Step1: Updating and upgrading apt-cache repository
The first step is to update our apt packages by using the update command in our Ubuntu 20.04 terminal:

All our packages are up to date however if our packages are not up to date then we have to run the following command to upgrade:

Step2: Cifs-utils Package installation
Execute the command that is given below to install the cifs-utils package on Ubuntu system:


Step3: Creating Directory
Let us now create a directory where we will mount the shared drive:
Step4: Creating Credentials file
This step involves creating the credentials file in our home directory and with the use of .(dot) which is needed for security reasons that will make our file hidden. For this purpose execute the below command which will open the file in the nano editor:
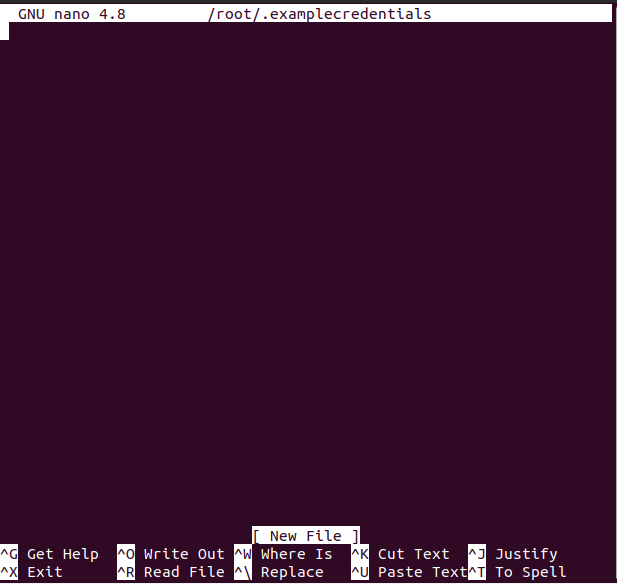
You can replace the name of the file with whatever you want the file name to be:
Now that the file is opened type the following two lines in the file which will be our samba username and password:
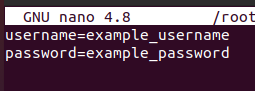
You can replace the username and password to your preferred username and password and then press CTRL+S to save the file and CTRL+X to exit the file.
Next, we will make the /root/.examplecredentials file readable only and only for the root account hence will put restriction on all non-root accounts by executing the following command in our Ubuntu 20.04 terminal:

Step5: Mount samba share
In this step we will execute the command which will mount the remote samba shared directory on our Ubuntu system:
$ sudo mount -t cifs -o rw, vers = 3.0 , credentials = / root / .examplecredentials // 192.168.18.112 / sharedDir / media / share
Replace the IP Address in the above command where you have already shared a directory or folder on the remote system and if that is Ubuntu system then you can find the IP address with ip a command:
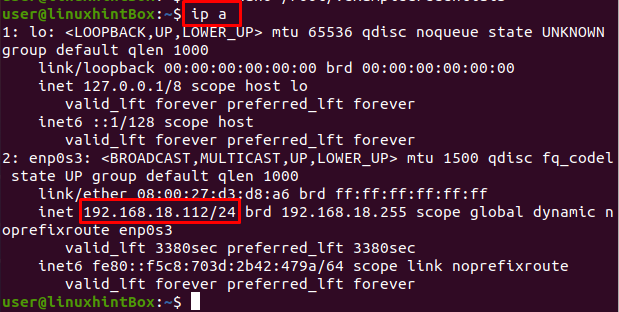
The IP address of the remote Ubuntu system from where sharedDir was shared is “192.168.18.112” which was provided in the above mount command.
Step6: Automount on system reboot
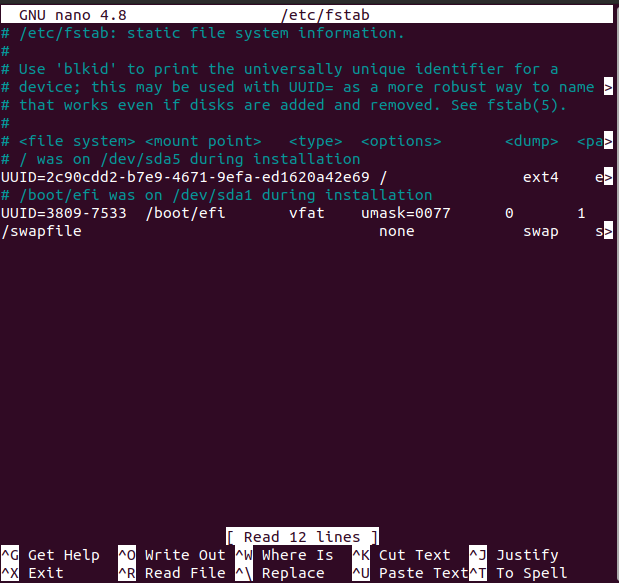
The manually mounted file system in the above step will not be mounted once our Ubuntu/system reboots, hence to solve this problem first we will open the /etc/fstab file in nano editor and then add some configuration to that file. To open the /etc/fstab file in the nano editor execute the following command:
The above command will open /etc/fstab file and you will see something like shown below on your system screen:
Now add the following line in the file that was opened with the nano editor:

Remember that you have to replace the IP Address with your IP Address after which press CTRL+S to save the above file and then press CTRL+X to close the file.
Conclusion
SMB is a file-sharing protocol created for the purpose of allowing computers to access remote systems files over a LAN network and CIFS is a particular dialect of SMB having almost the same functionality.
In this article, we showed you how to mount SMB share on Ubuntu 20.04 using the samba file server; however, the commands used were generic and can be applied on any Linux distribution.
About the author
Shehroz Azam
A Javascript Developer & Linux enthusiast with 4 years of industrial experience and proven know-how to combine creative and usability viewpoints resulting in world-class web applications. I have experience working with Vue, React & Node.js & currently working on article writing and video creation.