- 2 Ways to Install Nvidia Driver on Ubuntu 22.04/20.04 (GUI & Command Line)
- How to Install Nvidia Graphics Driver on Ubuntu 22.04/20.04 From Graphical User Interface
- How to Install Nvidia Driver on Ubuntu 22.04/20.04 From the Command Line
- Install the Latest Version Of Nvidia Drivers via PPA
- Help Files
- How to Automatically Update Nvidia Driver
- Can’t Change Screen Resolution?
- How to Uninstall the Proprietary Nvidia Driver on Ubuntu 22.04/20.04
- How to Use Ubuntu Nvidia PPA
- Checking NVIDIA Graphics Card Availability:
- Adding NVIDIA PPA:
- Installing NVIDIA Drivers using Software & Updates App:
- Installing NVIDIA Graphics Drivers from the Command Line:
- Installing NVIDIA Drivers on Headless Servers:
- Installing NVIDIA Drivers using ubuntu-drivers:
- About the author
- Shahriar Shovon
2 Ways to Install Nvidia Driver on Ubuntu 22.04/20.04 (GUI & Command Line)
This tutorial will be showing you 2 ways to install Nvidia graphics card driver on Ubuntu 22.04/20.04. The first method uses graphical user interface (GUI); The second method is done from the command-line interface (CLI). Ubuntu comes with the open-source nouveau driver which is included in the Linux kernel for Nvidia cards. However, this driver lacks 3D acceleration support. If you are a gamer or need to work with 3D graphics, then you will benefit from the better performance of the proprietary Nvidia driver.
Note: Before installing the proprietary driver, I recommend disabling secure boot if you are using UEFI firmware. If secure boot is enabled, you might encounter problems after installing Nvidia driver. This tutorial also assumes that you are running Ubuntu 22.04/20.04 with x.org display server.
This tutorial also works for Linux Mint.
How to Install Nvidia Graphics Driver on Ubuntu 22.04/20.04 From Graphical User Interface
First, go to Settings > About and check what graphics card your computer is using. As you can see, my computer is using Nvidia graphics card and the Nouveau driver (NV132). On some computers, the integrated graphics card (Intel HD Graphics) might be used.
Then open the softare & updates program from your application menu. Click the additional drivers tab. You can see what driver is being used for Nvidia card (Nouveau by default) and a list of proprietary drivers.
As you can see, the following Nvidia drivers are available for my GeForce GTX 1080 Ti card.
If you read this article at a later time, you might have newer version of Nvidia drivers. Since nvidia-driver-470 is a tested version, so I select the first option to install nvidia-driver-470 . Click the Apply Changes button to install the driver.
After it’s installed, reboot your computer for the change to take effect. After that, go to Settings > About , you will see Ubuntu is using Nvidia graphics card.
If you want Ubuntu to use Intel graphics card, open Nvidia X Server Settings from the application menu. Click PRIME Profiles tab on the left pane, and then select Intel card on the right pane.
To switch back to Nvidia card, simply select NVIDIA in PRIME Profiles . In the Thermal Settings , you can check your GPU temperature.
How to Install Nvidia Driver on Ubuntu 22.04/20.04 From the Command Line
First, open up a terminal window and check which driver is being used for Nvidia card with the following command.
You can also use video instead of display as the class name.
By default, the open-source nouveau driver is being used for Nvidia card.
Next, run the following command to list available drivers for your Nvidia card from the default Ubuntu repository.
sudo ubuntu-drivers devices
As you can see, there are 3 drivers available for my GeForce GTX 1080 Ti card.
- nvidia-driver-470 (recommended)
- nvidia-driver-390
- nvidia-driver-460
- nvidia-driver-495
- xserver-xorg-video-nouveau
If you read this article at a later time, you might have newer versions of Nvidia driver. To install the recommended driver, run the following command.
sudo ubuntu-drivers autoinstall
This will install some 32-bit packages as indicated by the i386 suffix. If you want to install a particular driver, run the following command.
sudo apt install nvidia-driver-version-number sudo apt install nvidia-driver-495
After the driver is installed, we need to run the following command to reboot the computer, in order to enable nvidia-prime , which is technology to switch between Intel and Nvidia graphics cards.
Now the proprietary Nvidia driver is being used.
You can check which card is being used now with the following command:
If you want to use Intel graphics card, run the following command:
To switch back to Nvidia card, run
Notice that you may need a reboot for the change to take effect.
Install the Latest Version Of Nvidia Drivers via PPA
Update: Canonical now includes the latest version of Nvidia drivers in Ubuntu LTS repository. The information in this section is for archive purpose only. You can ignore it.
Nvidia website maintains a page for its latest driver for Unix/Linux platforms. On this page, you can see the latest version of Nvidia drivers. At the time of this writing, the latest version is 430.40. Clicking the version number will take you to a page where you can see changelogs and whether your card is supported or not.
The driver included in the default Ubuntu repository can be outdated but more stable. If you would like to install the latest version, you can add a PPA maintained by Ubuntu Team.
sudo add-apt-repository ppa:graphics-drivers/ppa
Notice that you don’t need to manually run sudo apt update after adding PPA on Ubuntu 22.04/20.04. This operation becomes automatic on Ubuntu 22.04/20.04. Now you can run:
sudo ubuntu-drivers devices
The newest version becomes the recommended driver.
Now you can run the following command to install the newest version.
sudo ubuntu-drivers autoinstall
This PPA is still considered testing. Sometimes you might encounter dependency problems like below.
If you prefer stability over bleeding-edge, you can quit installing it. But if you are willing to take risks, you can upgrade the libraries by running the following command.
Then re-run the install command.
sudo ubuntu-drivers autoinstall
If there are still dependency problems, you can manually install them. For example, I saw the following error message.
The following packages have unmet dependencies: nvidia-driver-396 : Depends: xserver-xorg-video-nvidia-396 (= 396.24.02-0ubuntu0~gpu22.04/20.04.1) but it is not going to be installed Depends: libnvidia-cfg1-396 (= 396.24.02-0ubuntu0~gpu22.04/20.04.1) but it is not going to be installed
I ran this command to fix the issue.
sudo apt install libnvidia-cfg1-396 xserver-xorg-video-nvidia-396 nvidia-driver-396
Once the newest version is installed, reboot your computer.
Help Files
You can find the help files by running the following command.
Replace 390 with your driver version number.
How to Automatically Update Nvidia Driver
It’s important to keep the Nvidia driver up to date. If you use an outdated driver, then your desktop environment (like GNOME) might become sluggish. I once had the gnome-shell process consuming 30% of CPU.
To update Nvidia driver, simply run sudo ubuntu-drivers install command. You can automate it by creating a systemd service with the Nano command-line text editor.
sudo nano /etc/systemd/system/update-nvidia.service
Add the following lines in this file.
[Unit] Description= Update Nvidia Driver After=network-online.target [Service] Type=oneshot ExecStart=/usr/bin/ubuntu-drivers install [Install] WantedBy=multi-user.target
In the Nano text editor, press Ctrl+O and Enter to save this file. Then press Ctrl+X to exit. Next, run the following command, so this systemd service will automatically start at boot time.
sudo systemctl enable update-nvidia.service
Can’t Change Screen Resolution?
If you find your screen resolution automatically changed to 1024 x 768, but you can’t set it to a higher resolution, that might be an indicator your Nvidia driver is outdated. You should install the latest version of Nvidia driver, then reboot your system. Also, be sure to update the Linux kernel to the latest available in the software repository.
How to Uninstall the Proprietary Nvidia Driver on Ubuntu 22.04/20.04
If for some reason you don’t want the proprietary driver anymore, you can remove it by running the following command.
sudo apt purge nvidia-* sudo apt autoremove
To remove Nvidia driver PPA, run:
sudo add-apt-repository --remove ppa:graphics-drivers/ppa
I hope this tutorial helped you install Nvidia driver on Ubuntu 22.04/20.04 desktop, either from GUI or from the command line. As always, if you found this post useful, then subscribe to our free newsletter to get more tips and tricks. Take care.
How to Use Ubuntu Nvidia PPA
Ubuntu has official package repository for NVIDIA drivers. From there, you can download any of the supported NVIDIA graphics drivers for your NVIDIA installed graphics card.
In this article, I am going to show you how to install NVIDIA graphics drivers on Ubuntu from the NVIDIA PPA. I will be using Ubuntu 19.04 for the demonstration in this article. But, it should work on any supported version of Ubuntu. So, let’s get started.
Checking NVIDIA Graphics Card Availability:
First, you should check whether Ubuntu detected your installed graphics card correctly.
To do that, go to System Settings > Details > About, you should be able to see NVXXX or something in the Graphics section as shown in the screenshot below. It means, you don’t have any NVIDIA graphics drivers installed yet. The open source nouveau drivers are used instead.
You can also check whether you have any NVIDIA PCIE graphics cards installed on your computer with the following command:
As you can see, the NVIDIA 1050Ti graphics card installed on my Ryzen 5 2400G is displayed. So, I can install the NVIDIA graphics driver on my Ubuntu operating system.
Adding NVIDIA PPA:
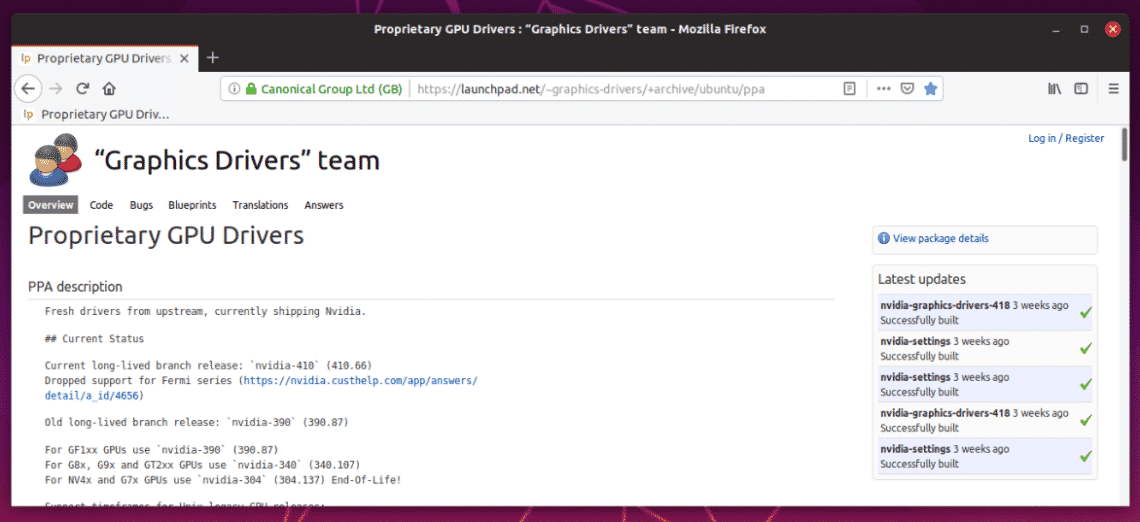
You can find what latest drivers are available in this page as you can see in the screenshot below.
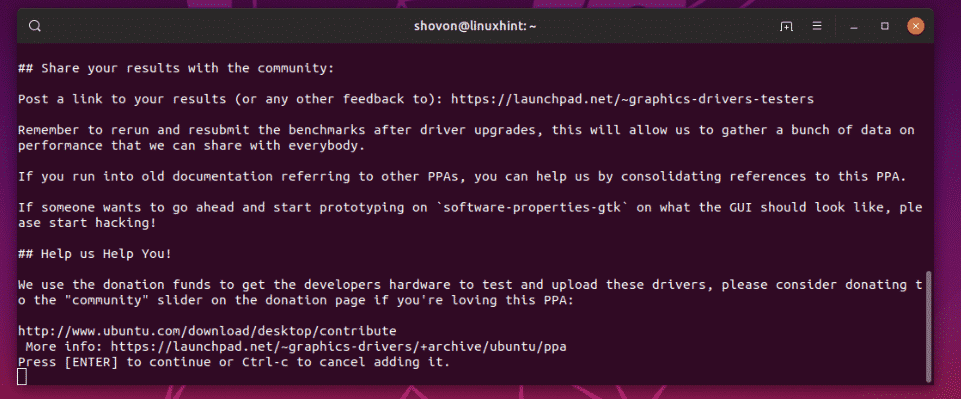
To add the NVIDIA PPA, run the following command:
Now, press to continue.
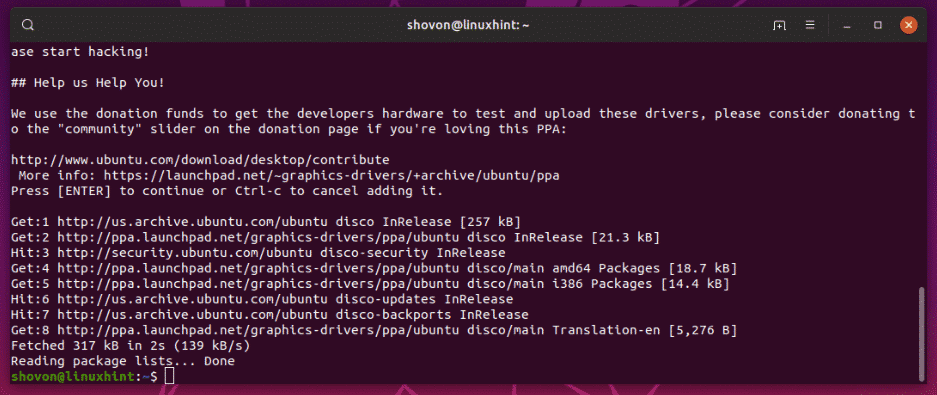
NVIDIA PPA should be added and the APT package repository cache should be updated.
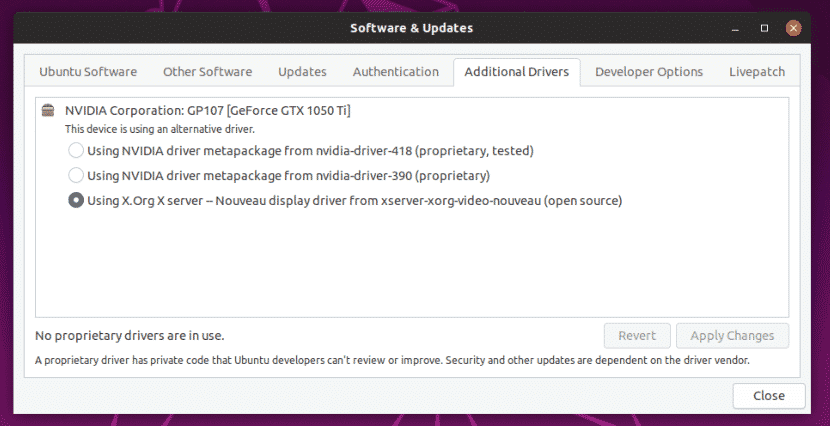
As you can see, before I added the NVIDIA PPA, only nvidia-driver-418 and nvidia-driver-390 NVIDIA drivers were available for installation. These are proprietary NVIDIA graphics drivers.
After I added the NVIDIA PPA, nvidia-driver-396 and nvidia-driver-415 open source NVIDIA drivers are listed as well. Now, you can easily install NVIDIA drivers for your installed graphics card on Ubuntu.
Installing NVIDIA Drivers using Software & Updates App:
You can install NVIDIA graphics drivers using the Software & Updates app on your Ubuntu operating system graphically.
First, open the Software & Updates app from the Application Menu of Ubuntu.
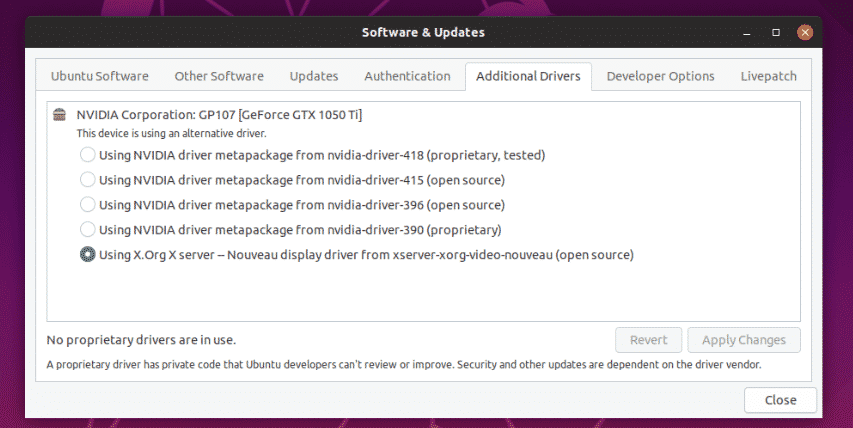
Then, from the Additional Drivers tab, select the NVIDIA graphics driver that you want to install and click on Apply Changes as marked in the screenshot below.
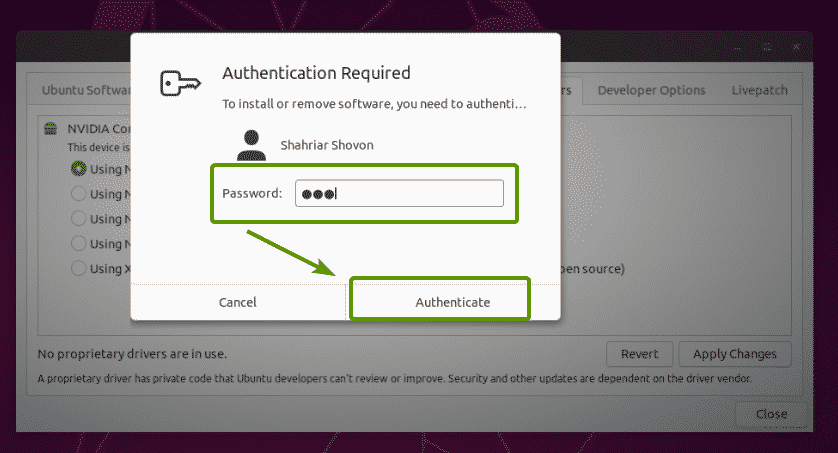
Now, type in the password of your login user and click on Authenticate.
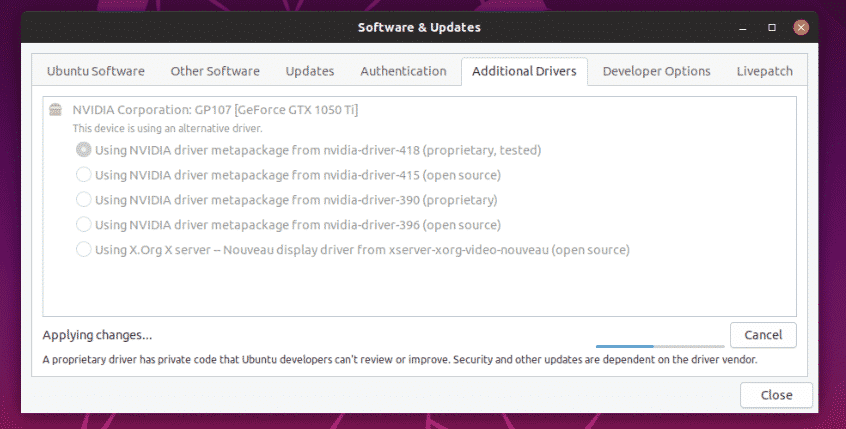
As you can see, NVIDIA graphics driver is being installed.
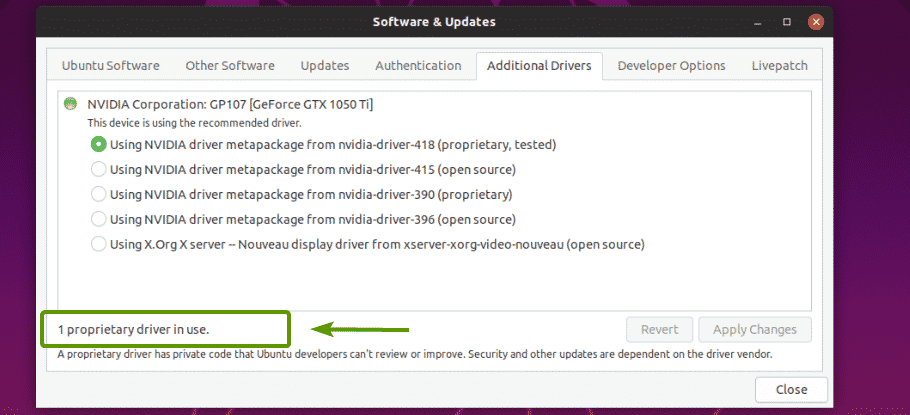
Once the driver is installed, you should see the following message. Now, restart your computer.
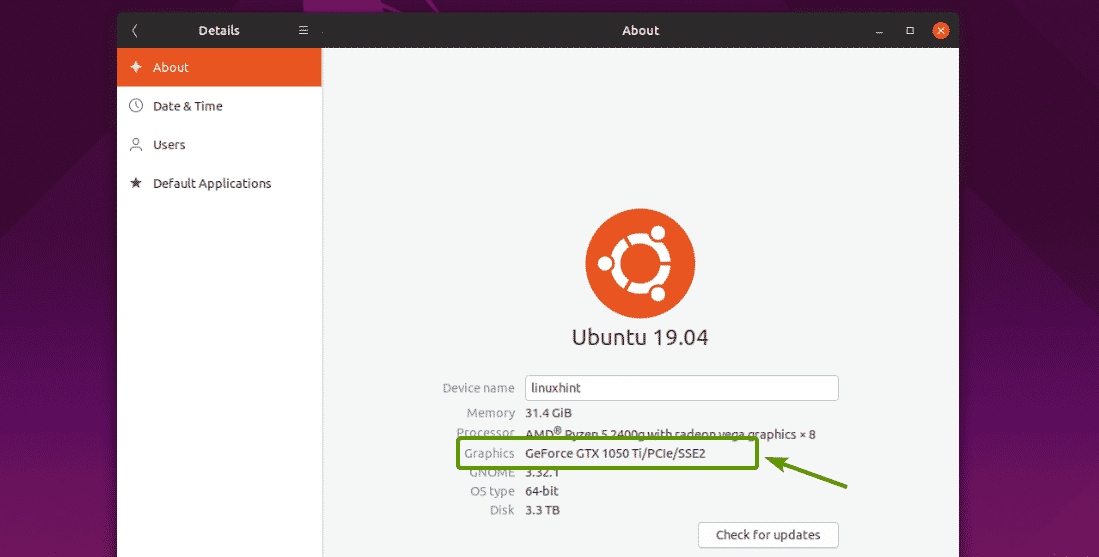
As you can see, now GeForce GTX 1050 Ti is in the Graphics section of System Settings > Details > About.
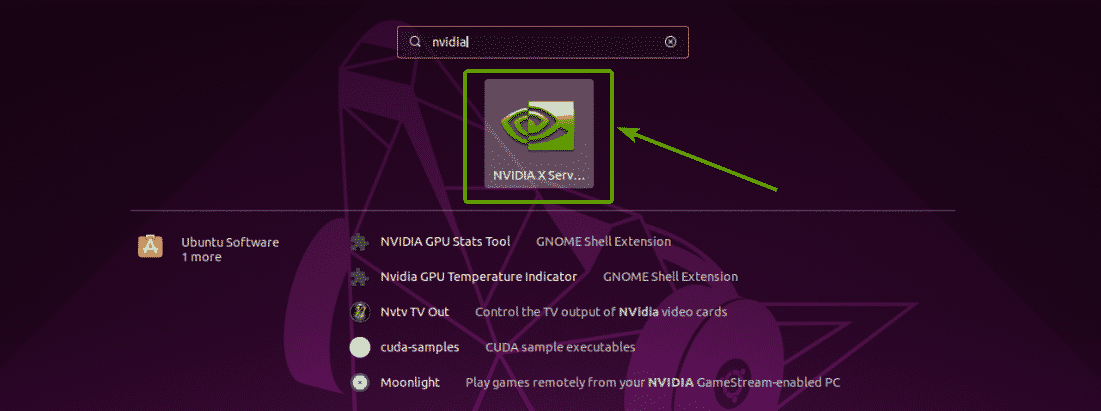
You should also find the NVIDIA X Server Settings app in the Application Menu of Ubuntu.
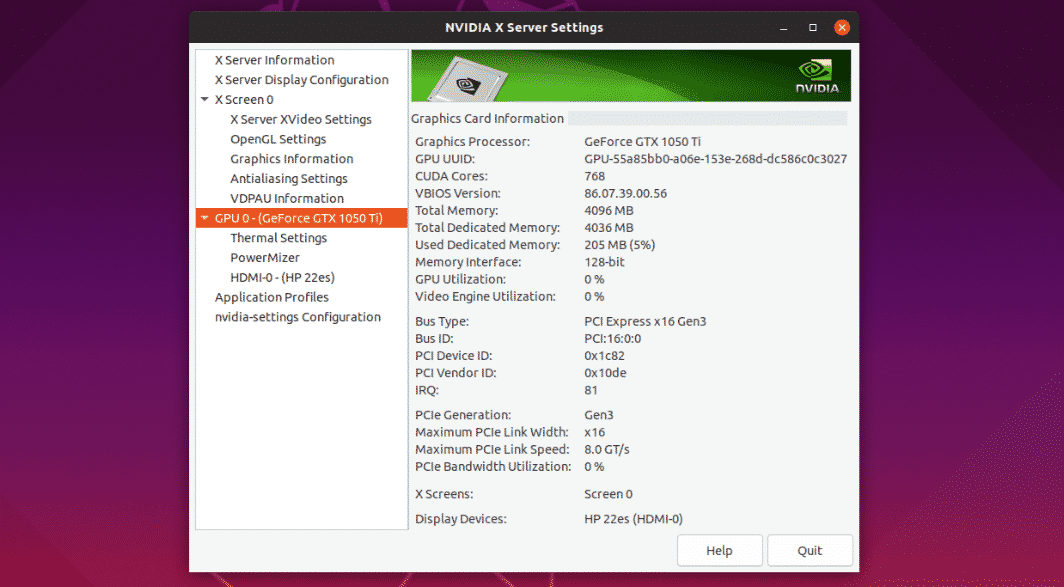
As you can see, NVIDIA X Server Settings says the graphics driver is being used is 418.56.
It also lists all the properties of my NVIDIA 1050 Ti Graphics card.
So, NVIDIA drivers are installed correctly and working.
Installing NVIDIA Graphics Drivers from the Command Line:
You can also use the package manager APT to install the NVIDIA graphics drivers from the command line.
First, type in the following command and press .
You should see all the NVIDIA driver packages as tab competition. You can install any NVIDIA driver package from here.
Let’s say, you want to install the NVIDIA graphics driver 418 (nvidia-driver-418). To do that, run the following command:
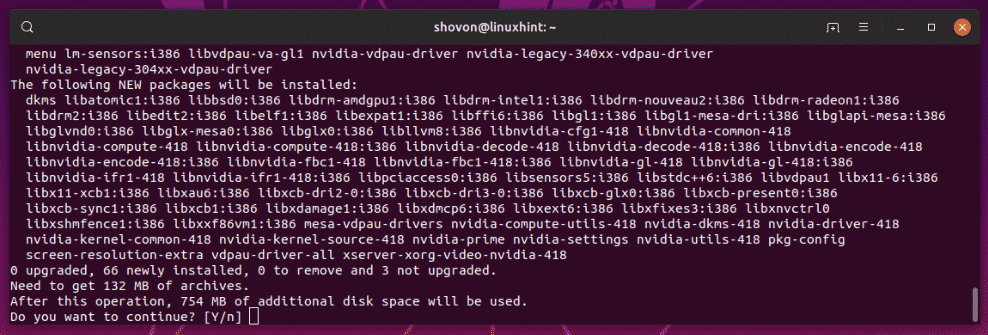
Now, press y and then press to continue.
NVIDIA driver packages are being downloaded and installed.
The NVIDIA driver packages are installed.
Now, reboot your computer with the following command:
Once your computer boots, NVIDIA graphics drivers should be used instead of Nouveau drivers.
Installing NVIDIA Drivers on Headless Servers:
NVIDIA also has headless drivers. If you want to install NVIDIA drivers on a headless server, then these are the NVIDIA packages for you.
As you can see, the NVIDIA drivers has a lot of headless versions. You can install any one of them using the APT package manager.
Installing NVIDIA Drivers using ubuntu-drivers:
You can use ubuntu-drivers to easily install NVIDIA drivers on your Ubuntu operating system.
To see whether you have any NVIDIA graphics card installed on your computer, run the following command:
As you can see, my NVIDIA 1050ti graphics card is detected and all the available drivers are listed.
Now, to install a suitable NVIDIA graphics driver for your graphics card, run the following command:
NVIDIA graphics drivers should be installed. Once it is, reboot your computer and enjoy.
So, that’s how you use NVIDIA PPA on Ubuntu and install NVIDIA graphics drivers on Ubuntu. Thanks for reading this article.
About the author
Shahriar Shovon
Freelancer & Linux System Administrator. Also loves Web API development with Node.js and JavaScript. I was born in Bangladesh. I am currently studying Electronics and Communication Engineering at Khulna University of Engineering & Technology (KUET), one of the demanding public engineering universities of Bangladesh.


