- How to mount smb share on ubuntu 18.04
- 8 Answers 8
- How to Mount SMB Shares on Ubuntu 22.04
- How to Mount SMB Shares on Ubuntu 22.04
- Conclusion
- About the author
- Hammad Zahid
- How to Mount SMB Shares on Ubuntu?
- Step1: Updating and upgrading apt-cache repository
- Step2: Cifs-utils Package installation
- Step3: Creating Directory
- Step4: Creating Credentials file
- Step5: Mount samba share
- Step6: Automount on system reboot
- Conclusion
- About the author
- Shehroz Azam
How to mount smb share on ubuntu 18.04
I mounted a shared server on my local network using the GUI connect to server and the address I entered was smb://myServer/myFolder . Then i tried to add the shared folder to the /mnt directory so I can access to it through my IDE but I failed even though I tried unmount the server and use the CLI with the command
gio mount smb://myServer/myFolder**. wiki.ubuntu.com/MountWindowsSharesPermanently The above was something I found and though I cannot confirm that it works with 18.04 it definitely works with 20.04LTS. Hopefully, this will be of use to others.
8 Answers 8
I opened the server i shared and typed ifconfig to get the ip adress. Then I typed this command to list of shares
smbclient -L //myServerIpAdress Then to mount it I typed these 2 commands: first to create a folder under the /mnt and then to do the mount
sudo mkdir /mnt/myFolder sudo mount -t cifs -o username=serverUserName //myServerIpAdress/sharename /mnt/myFolder/ Then enter the server’s password when asked and your mount is done under /mnt/myFolder
I kept seeing this error: mount: /mnt/my-mount-name: cannot mount //
I had to add few things: sudo mount -t cifs -o uid=
thanks @Wizard79 , after install cifs-utils and use @MiroJanosik command, I’ve successfully mount SMB folder to my ubuntu
I just followed the Ubuntu wiki smb guide and it worked for me with Ubuntu 18.04.1
Specifically: I first creating the directory for the mount
I added the following line to my fstab
//192.168.1.209/public /media/NAS cifs guest,uid=1000,iocharset=utf8 0 0 From then my NAS drive was mounted. I have rebooted my machine several times and confirmed that it now mounted and start up for me. For what its worth I’m using an Ethernet connection so it could be configured and up and running quicker than a wi-fi connection would be.
This worked for me I just needed to make sure that cifs-utils was installed for. sudo apt-get install cifs-utils .
mount error: cifs filesystem not supported by the system on Windows Subsystem for Linux (not strictly speaking Ubuntu)
Note, that you might better add the SMB protocol version (e.g.vers=1.0) to the mount options. The mount.cifs states to use vers=1.0 as default, but it doesn’t and you are trapped with a «host down» error when trying to mount to an older NAS. The above solution then reads
sudo mount -t cifs -o username=serverUserName,vers=1.0 //myServerIpAdress/sharename /mnt/myFolder/ If you have installed gvfs-bin you can run:
Also you can read official wiki Samba/SambaClientGuide
I always wanted to use stored passwords from my keyring for accessing SMB shares in scripts (backups) on my laptop. My aim was not to expose the passwords in files and use anacron to run the backups. After some testing I came up with this:
- Mount your share once via Nautilus and store the password in the keyring
- try gio mount smb:/// , what should work without password in your GNOME session
- Use the following code in backup scripts:
Example tested on Ubuntu 19.04:
# set the dbus address DBUS_SESSION_BUS_ADDRESS="unix:path=/run/user/$(id -u)/bus" # export dbus address to get access to user space keyring export DBUS_SESSION_BUS_ADDRESS # use new gnome user space mount tool (gvfs-mount is deprecated) gio mount smb:/// #sync from gvfs created mount point to home dir rsync -rav /var/run/user/$(id -u)/gvfs/smb-share\:server\=\,share\=// ~// When running the script via anacron from /etc/cron.daily you need to use the user that has access to the keyring, e.g.:
su -c /home/user/scripts/rsync_sript.sh user
How to Mount SMB Shares on Ubuntu 22.04
![]()
SMB (Server Message Block) is known as the client-server and is used to transfer files and also manage the other machines connected in the same network using the Local Area Network. In the SMB, the shares are those files and folders that are shared and can be accessed by the other machines connected to the same network.
In this blog, a method has been discovered by which we can mount the SMB shares on Ubuntu 22.04.
How to Mount SMB Shares on Ubuntu 22.04
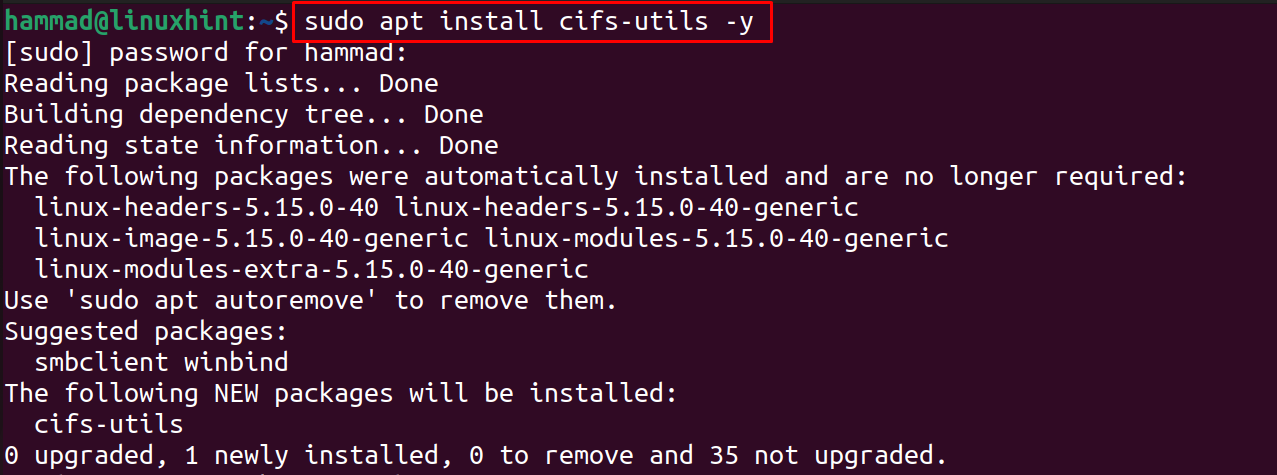
To mount the SMB Shares on Ubuntu, we have to make sure the other utilities and dependencies of SMB shares are installed by using the command:
Now, create a directory in which you shared the files and folders which should be accessed by the other machines in the same network:

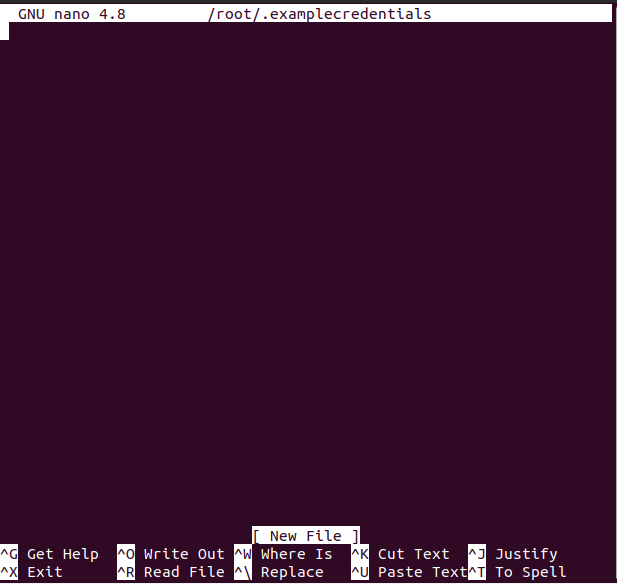
Next step is to create the credential file but to keep it secure, hide it using the “.” command:

Copy and paste the below script in the newly opened file:

Save the file by using the CTRL+S and exit the editor using the shortcut with CTRL+X and then change its access permissions using the command:

Next step is to find out the IP address of the machine using the command:
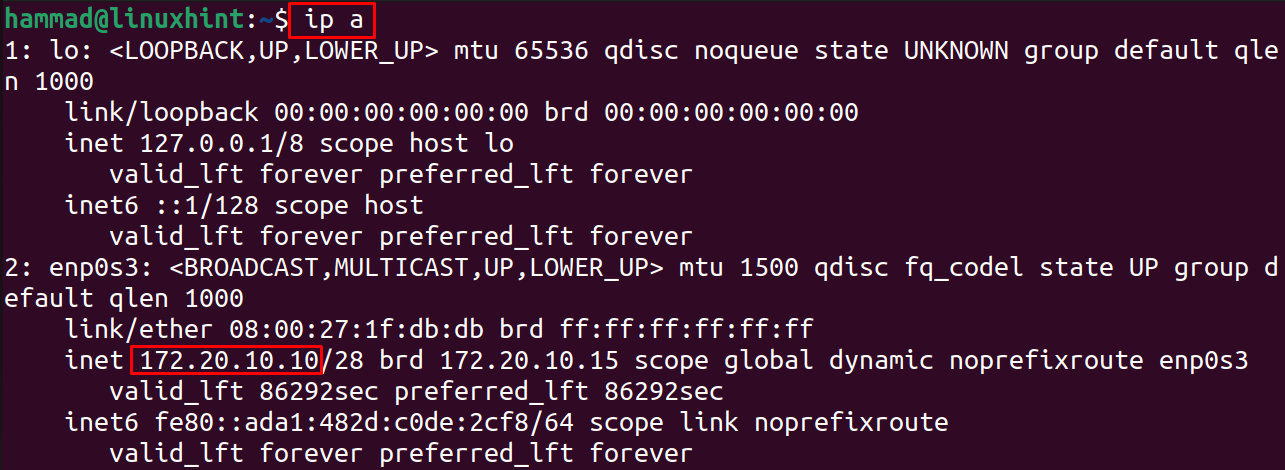
Now run the below-mentioned command by replacing the IP address of the machine:
$ sudo mount -t cifs -o rw, vers = 3.0 , credentials = / root / .examplecredentials // 172.20.10.10 / sharedDir / media / share

Another method to mount the SMB share is by manually, and for this, we have to open the file using the nano text editor:

A file will be opened, at the end, copy and paste the below-mentioned line by replacing the IP address:
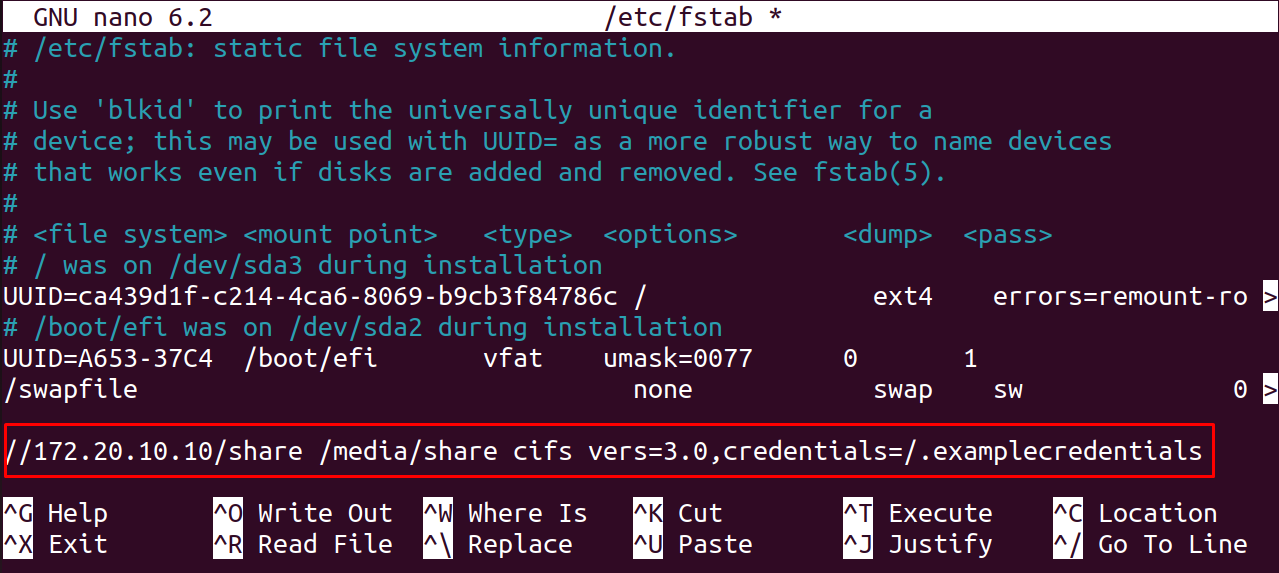
Exit the editor by saving the changes made in the file /etc/fstab.
Conclusion
With the help of the cifs utilities, SMB Shares can be mounted on Ubuntu by installing them with the command “sudo apt install cifs-utils -y”. In this blog, two different methods have been explored of mounting the SMB Shares on Ubuntu 22.04.
About the author
Hammad Zahid
I’m an Engineering graduate and my passion for IT has brought me to Linux. Now here I’m learning and sharing my knowledge with the world.
How to Mount SMB Shares on Ubuntu?
![]()
SMB is a client-server, file-sharing protocol that stands for Server Message Block which was invented by IBM in 1984 for the purpose of allowing computers to access files for reading or writing on a remote host using the LAN (Local area network). The SMB protocol that makes available the files or directories that are accessed on the remote host are called shares. This means that we can mount a shared file or directory to our system using the local area network.
SMB was previously known as CIFS and is the old version or dialect of SMB which stands for Common Internet File System which was created by Microsoft and is a particular implementation of the Server Message Block protocol.
In this article, we will provide you with each and every little step on how to mount SMB shares on Ubuntu using the Samba file server. Samba uses the SMB protocol and has the same function as SMB i-e enabling file sharing on Local area networks with other systems. But before going forward let me highlight a point that this article assumes that you have already shared a directory on a remote system and you will access that directory in this article.
Step1: Updating and upgrading apt-cache repository
The first step is to update our apt packages by using the update command in our Ubuntu 20.04 terminal:

All our packages are up to date however if our packages are not up to date then we have to run the following command to upgrade:

Step2: Cifs-utils Package installation
Execute the command that is given below to install the cifs-utils package on Ubuntu system:


Step3: Creating Directory
Let us now create a directory where we will mount the shared drive:
Step4: Creating Credentials file
This step involves creating the credentials file in our home directory and with the use of .(dot) which is needed for security reasons that will make our file hidden. For this purpose execute the below command which will open the file in the nano editor:
You can replace the name of the file with whatever you want the file name to be:
Now that the file is opened type the following two lines in the file which will be our samba username and password:
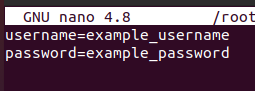
You can replace the username and password to your preferred username and password and then press CTRL+S to save the file and CTRL+X to exit the file.
Next, we will make the /root/.examplecredentials file readable only and only for the root account hence will put restriction on all non-root accounts by executing the following command in our Ubuntu 20.04 terminal:

Step5: Mount samba share
In this step we will execute the command which will mount the remote samba shared directory on our Ubuntu system:
$ sudo mount -t cifs -o rw, vers = 3.0 , credentials = / root / .examplecredentials // 192.168.18.112 / sharedDir / media / share
Replace the IP Address in the above command where you have already shared a directory or folder on the remote system and if that is Ubuntu system then you can find the IP address with ip a command:
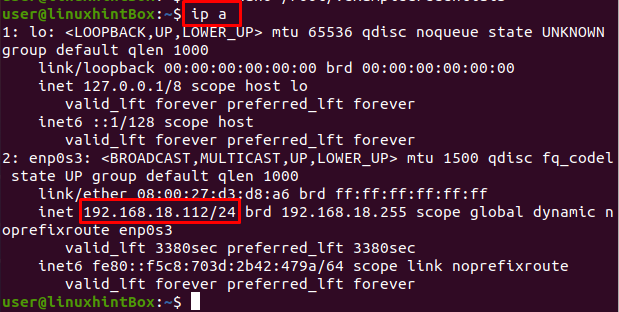
The IP address of the remote Ubuntu system from where sharedDir was shared is “192.168.18.112” which was provided in the above mount command.
Step6: Automount on system reboot
The manually mounted file system in the above step will not be mounted once our Ubuntu/system reboots, hence to solve this problem first we will open the /etc/fstab file in nano editor and then add some configuration to that file. To open the /etc/fstab file in the nano editor execute the following command:
The above command will open /etc/fstab file and you will see something like shown below on your system screen:
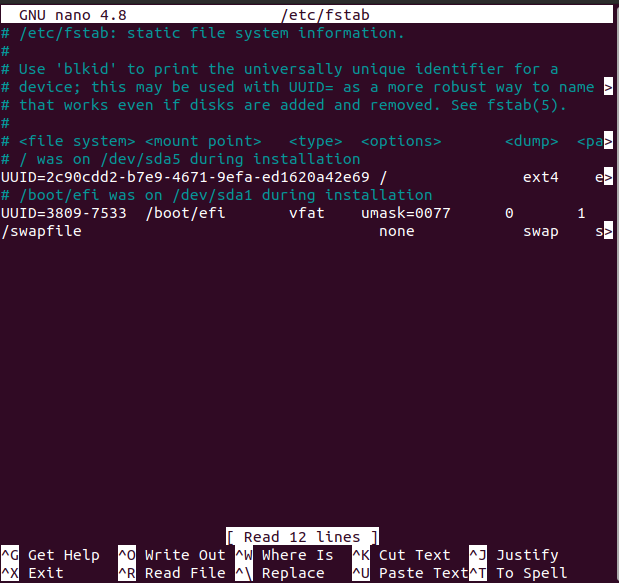
Now add the following line in the file that was opened with the nano editor:

Remember that you have to replace the IP Address with your IP Address after which press CTRL+S to save the above file and then press CTRL+X to close the file.
Conclusion
SMB is a file-sharing protocol created for the purpose of allowing computers to access remote systems files over a LAN network and CIFS is a particular dialect of SMB having almost the same functionality.
In this article, we showed you how to mount SMB share on Ubuntu 20.04 using the samba file server; however, the commands used were generic and can be applied on any Linux distribution.
About the author
Shehroz Azam
A Javascript Developer & Linux enthusiast with 4 years of industrial experience and proven know-how to combine creative and usability viewpoints resulting in world-class web applications. I have experience working with Vue, React & Node.js & currently working on article writing and video creation.