How to access another user’s folder from another user account
I have some downloads in my root user /root/Downloads folder. How can I access them from another not-root-user account?
5 Answers 5
It would be possible to access the root’s files/directories by simply changing the permissions. However I don’t recommend to do so because this would be a big security hole. However on personal computer, it won’t be such a big issue. Still, if you want to achieve this, you would need to add the following permissions flags to the /root directory:
x — this means that you can open/access the directory ( cd to dir) but you can’t read it’s contents
r — this will allow you to read the directory contents
Note: You need to be root ( su root ) when running this command.
The directories inside /root should already have read/execute permissions for other users so you shouldn’t encounter further issues.
In order to access the files, only read permissions on the files themselves and x permission on all parent directories are required. The example here doesn’t grant x access to the /root/Downloads directory. The r on /root or /root/Downloads isn’t strictly speaking required if the user already knows the pathname for the files to access.
By non-root-user you mean user that is not in sudoers file or just other user that can execute command as root with sudo ?
In a former occasion — there is no way you can access root’s home folder.
In the later, you can sudo su and you’re effectively a root user now (if sudo doesn’t restrict user’s priveleges in any way explicitly).
This is a good point. I like sudo su — , though nowadays I use sudo -i . There are issues if you want to run GUI apps though.
Assign the files to a group to which the non-root user belongs to.
In most modern Linux systems, each user have their own group corresponding to their username.
You can change the group ownership of a file or directory with the chgrp command:
chgrp group_name pathname However, note that the non-root user also needs directory access for all parent directories, including /root itself, to access files under /root/Downloads , which is usually not allowed. Without read priviledges for the parent directories, there’s still restrictions on listing the contents of the directory contents for directories under /root . In your particular case you would need to give x permissions for /root and /root/Downloads to regular users:
$ chmod o+x /root /root/Downloads $ chgrp user /root/Downloads/file-non-root-user-needs-to-access I strongly suggest you want to move them somewhere outside the directory /root . This will help avoid breaking the conventions on security, as others have warned about.
Moving files can be much faster than copying them. Provided they stay on the same filesystem, all that needs to be written is new file metadata (example: selinux).
E.g. you can create /shared-readonly/ and move files there with mv . You don’t need to change access modes at all :). This specific setup (or using /home/shared-readonly ) is very nice and simple. I’ve used it several times myself. (Directories which can be written by multiple users are inherently a bit more complex; sadly they’re not as robust on Linux as they could be).
You could additionally limit this sharing to not-root-user , e.g. to avoid exposing personal data to arbitrary non-root daemons. Create a group as follows, e.g. here I name it conspiracy :
groupadd conspiracy usermod -a -G conspiracy not-root-user chgrp conspiracy /shared-readonly chmod o-rx /shared-readonly not-root-user will need to log out and back in, before they are recognized as a member of conspiracy . Use id -a to check their membership.
If you like to have convenient, visible access to the files as the root user, you can also create a symbolic link to them. E.g. ln -s /shared-readonly .
Команда chown Linux
Основа философии Linux — все объекты операционной системы — это файлы, для предоставления доступа к тем или иным возможностям системы мы просто даем доступ пользователю к нужным файлам или убираем. Я более подробно рассказывал обо всех правах в статье права доступа к файлам в Linux, здесь же скажу только что у каждого файла есть три группы прав: для владельца, группы и всех остальных.
При создании файла ему тот пользователь, от имени которого он был создан становится его владельцем, а группой устанавливается основная группа владельца. Но владельца файла и группу можно менять, для этого используются команды chown и chgrp. В этой статье будет рассмотрена команда chown linux, а также основные примеры её использования.
Команда chown Linux
1. Синтаксис и опции
Синтаксис chown, как и других подобных команд linux очень прост:
$ chown пользователь опции /путь/к/файлу
В поле пользователь надо указать пользователя, которому мы хотим передать файл. Также можно указать через двоеточие группу, например, пользователь:группа. Тогда изменится не только пользователь, но и группа. Вот основные опции, которые могут вам понадобиться:
- -c, —changes — подробный вывод всех выполняемых изменений;
- -f, —silent, —quiet — минимум информации, скрыть сообщения об ошибках;
- —dereference — изменять права для файла к которому ведет символическая ссылка вместо самой ссылки (поведение по умолчанию);
- -h, —no-dereference — изменять права символических ссылок и не трогать файлы, к которым они ведут;
- —from — изменять пользователя только для тех файлов, владельцем которых является указанный пользователь и группа;
- -R, —recursive — рекурсивная обработка всех подкаталогов;
- -H — если передана символическая ссылка на директорию — перейти по ней;
- -L — переходить по всем символическим ссылкам на директории;
- -P — не переходить по символическим ссылкам на директории (по умолчанию).
Утилита имеет ещё несколько опций, но это самые основные и то большинство из них вам не понадобится. А теперь давайте посмотрим как пользоваться chown.
2. Использование chown
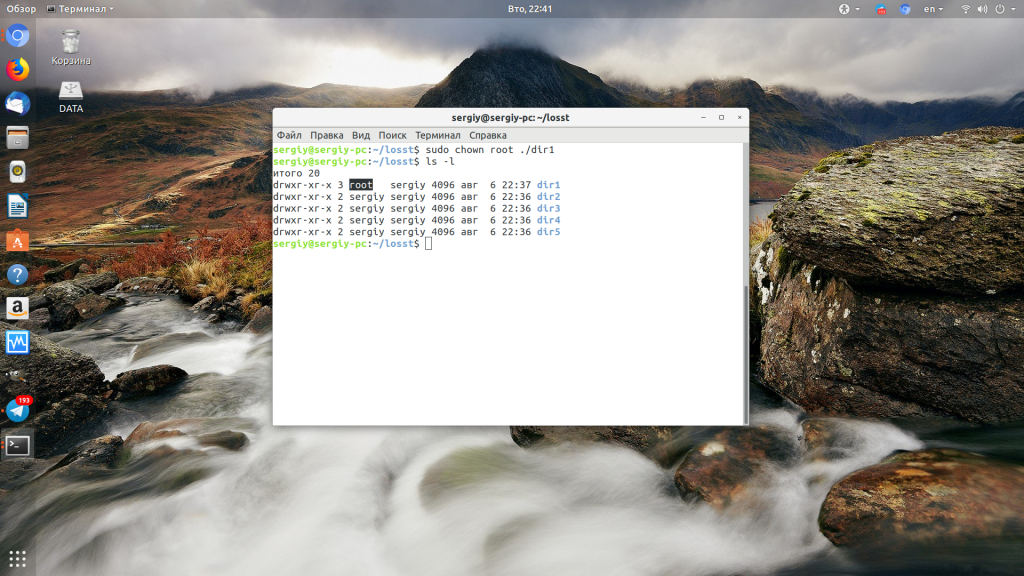
Например, у нас есть несколько папок dir и их владелец пользователь sergiy:

Давайте изменим владельца папки dir1 на root:
Если вы хотите поменять сразу владельца и группу каталога или файла запишите их через двоеточие, например, изменим пользователя и группу для каталога dir2 на root:

Если вы хотите чтобы изменения применялись не только к этому каталогу, но и ко всем его подкаталогам, добавьте опцию -R:
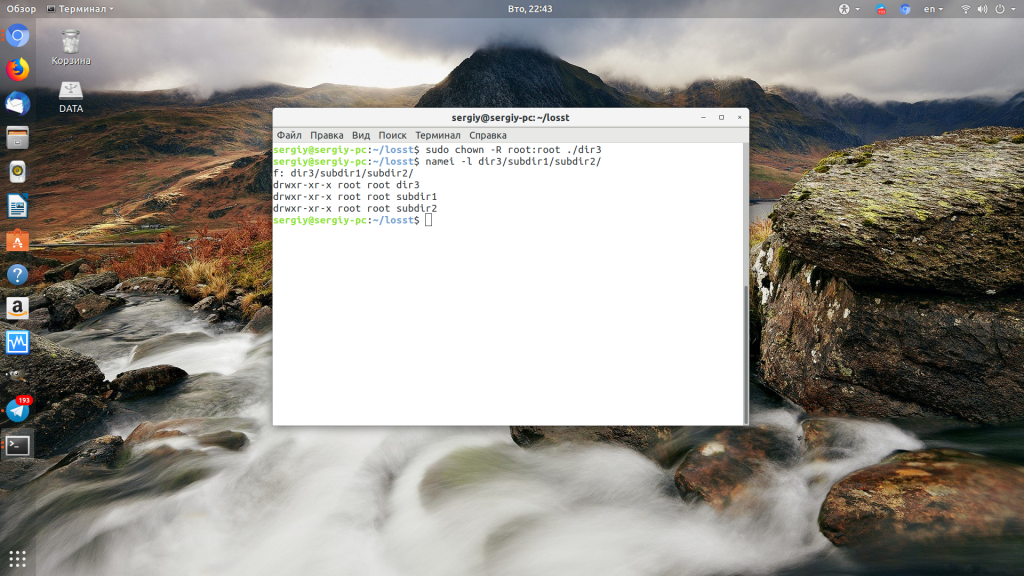
Дальше давайте изменим группу и владельца на www-data только для тех каталогов и файлов, у которых владелец и группа root в каталоге /dir3:
chown —from=root:root www-data:www-data -cR ./
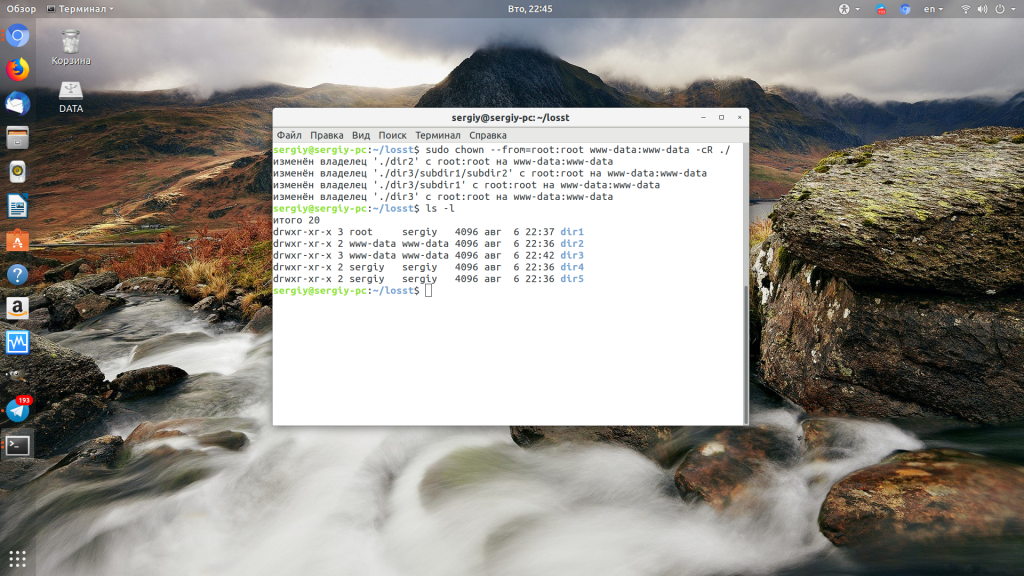
Для обращения к текущему каталогу используйте путь ./. Мы его использовали и выше. Далее указываем нужную группу с помощью опции —from и просим утилиту выводить изменения, которые она делает в файловой системе с помощью опции -c.
Выводы
Команда chown очень простая и позволяет только менять владельца и группу. Если вы хотите более подробно настроить права для владельца, группы и всех остальных, вам понадобится команда chmod. Права — довольно частая проблема при настройке работы различных программ, знание двух этих команд плюс ls и namei может помочь исправить много ошибок.
Обнаружили ошибку в тексте? Сообщите мне об этом. Выделите текст с ошибкой и нажмите Ctrl+Enter.
Share a Folder between two Local Users
I and my brother have User Accounts on this machine. I want to share the Documents directory with him. Is there a STRAIGHTFORWARD way to do it? I am not a power user so I am looking for a way to do this using nautilus, rather than a script or a way that requires creating symlinks. I can download an application if i have to. Last time I wanted to do this I just copied the contents to /home for both of us to use. Something I can do in System Settings would be appreciated
Once you created the shared directory with the right permission, you can just access by smb://127.0.0.1
Is «Documents Director» the name of the folder or is Director the name of the folder that resides in your Documents folder? Why no symlink creation? It can be done by drag and drop.
maybe i put the question in a wrong way.. but i want an easy way out.. methods already available give out scripts to achieve this.
@Achu i tried you method.. i get an error saying «unable to mount location, failed to mount windows share». am i missing something really obvious?
3 Answers 3
There are three steps to this process
Step One: Make your brother a member of your group.
Your group-name is same as your user-id. Say, if your user-ID is akumar your group name is also akumar . If your brother’s ID is bkumar , then you want to make bkumar a member of the group akumar . See How to manage users and groups? for how to add your brother’s user-ID to your group.
Step Two: Change the permission of the folder you want to share.
Open Nautilus. Right click on the folder you want to share. Go to permissions tab. look for the group permissions and change it into «Read and Write.» Check the box for allowing the same permissions to the files and folders inside.
Step Three: Verify that your brother can create delete files in the shared folder.
Let your brother login to the computer. Open Nautilus. It will open to your brother’s home folder. Navigate to your home folder and open the shared folder by:
click on Computer or System Files (depends on the version of Ubuntu) on the left panel.
Double click on home folder, double click on folder named akumar inside home.
Create a file in the folder. Delete the new file.
Step Four: (optional) Make a link of this folder to your brother’s home folder.
while logged in as your brother, open another window of Nautilus next to the first one, by middle-click or Ctrl +Left click. In your own home folder where the shared folder resides, hold down Ctrl + Shift and drag the shared folder to your brother’s home folder.
How can I share a directory with an another user?
I don’t want the shared folder to be accessible by anyone on the system, I want it to be accessible just to a restricted set of users. How to I do that?
1 Answer 1
Taken from this excellent post on Ubuntu Forums by Morbius1.
The classic Linux way of doing this sort of thing goes something like this:
sudo chown :newgroup /home/Shared sudo adduser user1 newgroup Now you have some decisions to make about what you want those users to be able to do:
- [a] All group users can add to and delete from the folder and can read and but not write to each others files:
sudo chmod 0770 /home/Shared sudo chmod 1770 /home/Shared sudo chmod 2770 /home/Shared sudo chmod 3770 /home/Shared A 1 in the first position of the chmod command is the sticky bit which prevents deletion of a file to anyone other than the owner.
A 2 in the first position of the chmod command is the setgid bit which forces all new or copied files to have the group of that folder.
A 3 in the first position of the chmod command is the combination of the sticky ( 1 ) & setgid ( +2 ) bits.
There is one caveat to all this as far as the setgid bit is concerned. All new files created in and any files copied to that folder will in fact inherit the group of the folder. But not files moved to that folder. Moved files retain the ownership from wherever they were moved from. One way to get past this problem is to use bindfs.
Finally if you want others outside the group to be able to see the files but not change them change the final 0 in the chmod command to a 5 eg:
sudo chmod 0775 /home/Shared