- Parted
- Installation
- Usage
- Command line mode
- Interactive mode
- Rounding
- Partitioning
- Create new partition table
- Partition schemes
- UEFI/GPT examples
- BIOS/MBR examples
- Resizing partitions
- Growing partitions
- Shrinking partitions
- Warnings
- Alignment
- Tips and tricks
- Check alignment
- Troubleshooting
- gparted on Wayland fails with «cannot open display: :0»
- See also
- Расширение дискового пространства в Ubuntu Linux
- Расширение дискового пространства в операционной системе Linux
Parted
GNU Parted is a program for creating and manipulating partition tables. GParted is a GUI frontend.
Installation
Install the parted package. For a graphical interface, install the gparted package, the graphical frontend to parted.
Usage
Parted has two modes: command line and interactive. Parted should always be started with:
where device is block device name like /dev/sda , /dev/nvme0n1 , /dev/mmcblk0 , etc. If you omit the device argument, parted will attempt to guess which device you want.
Command line mode
In command line mode, this is followed by one or more commands. For example:
# parted /dev/sda mklabel gpt mkpart P1 ext3 1MiB 8MiB
Interactive mode
Interactive mode simplifies the partitioning process and reduces unnecessary repetition by automatically applying all partitioning commands to the specified device.
In order to start operating on a device, execute:
You will notice that the command-line prompt changes from a hash ( # ) to (parted) : this also means that the new prompt is not a command to be manually entered when running the commands in the examples.
To see a list of the available commands, enter:
When finished, or if wishing to implement a partition table or scheme for another device, exit from parted with:
After exiting, the command-line prompt will change back to # .
If you do not give a parameter to a command, Parted will prompt you for it. For example:
(parted) mklabel New disk label type? gpt
Rounding
Since many partitioning systems have complicated constraints, Parted will usually do something slightly different to what you asked. (For example, create a partition starting at 10.352Mb, not 10.4Mb) If the calculated values differ too much, Parted will ask you for confirmation. If you know exactly what you want, or to see exactly what Parted is doing, it helps to specify partition endpoints in sectors (with the «s» suffix) and give the «unit s» command so that the partition endpoints are displayed in sectors.
As of parted-2.4, when you specify start and/or end values using IEC binary units like “MiB”, “GiB”, “TiB”, etc., parted treats those values as exact, and equivalent to the same number specified in bytes (i.e., with the “B” suffix), in that it provides no “helpful” range of sloppiness. Contrast that with a partition start request of “4GB”, which may actually resolve to some sector up to 500MB before or after that point. Thus, when creating a partition, you should prefer to specify units of bytes (“B”), sectors (“s”), or IEC binary units like “MiB”, but not “MB”, “GB”, etc.
Partitioning
Create new partition table
Warning: If you create a new partition table on a disk with data on it, it will erase all the data on the disk. Make sure this is what you want to do.
Tip: Check that your NVMe drives and Advanced Format hard disk drives are using the optimal logical sector size before partitioning.
You need to (re)create the partition table of a device when it has never been partitioned before, or when you want to change the type of its partition table. Recreating the partition table of a device is also useful when the partition scheme needs to be restructured from scratch.
Open each device whose partition table must be (re)created with:
To then create a new GUID Partition Table, use the following command:
To create a new Master Boot Record/MS-DOS partition table instead, use:
Partition schemes
This article or section needs expansion.
Reason: Replace all percentages with explicit MiB aligned sizes to prevent alignment issues. Also warn about the issues. (Discuss in Talk:Installation guide#Remove parted)
You can decide the number and size of the partitions the devices should be split into, and which directories will be used to mount the partitions in the installed system (also known as mount points). See Partitioning#Partition scheme for the required partitions.
The following command will be used to create partitions:
(parted) mkpart part-type-or-part-label fs-type start end
- part-type-or-part-label is interpreted differently based on the partition table:
- MBR: the parameter is interpreted as part-type , which can be one of primary , extended or logical .
- GPT: the parameter is interpreted as part-label , which sets the PARTLABEL attribute of the partition. To avoid setting a partition label, pass an empty quoted string ( «» ).
Note: Many tutorials on the web use commands which start with mkpart primary even for GPT. They are wrong, this would set «primary» as the partition label.
Tip: parted maps types named after Linux native file systems to the same «Linux filesystem» partition type (GUID 0FC63DAF-8483-4772-8E79-3D69D8477DE4 or ID 0x83 ), so it is perfectly safe to e.g. use ext2 for an ext4-formatted partition.
- On a disk with a MBR partition table leave at least 33 512-byte sectors (16.5 KiB) of free unpartitioned space at the end of the disk to allow converting between MBR and GPT.
- If you do not want to leave unused space in the device, make sure that each partition starts where the previous one ends.
Warning: The resulting partition is not properly aligned for best performance. Ignore/Cancel?
The following command will be used to flag the partition that contains the /boot directory as bootable:
(parted) set partition boot on
- partition is the number of the partition to be flagged (see the output of the print command).
- esp is an alias for boot on GPT. [1]
This article or section needs expansion.
Reason: Explain the boot , legacy_boot and esp flags and their different usage on MBR and GPT. (Discuss in Talk:Parted)
UEFI/GPT examples
In every instance, a special bootable EFI system partition is required.
If creating a new EFI system partition, use the following commands (the recommended size is at least 300 MiB):
(parted) mkpart "EFI system partition" fat32 1MiB 301MiB (parted) set 1 esp on
The remaining partition scheme is entirely up to you. For one other partition using 100% of remaining space:
(parted) mkpart "my partition label" ext4 301MiB 100%
For separate / (20 GiB) and /home (all remaining space) partitions:
(parted) mkpart "root partition" ext4 301MiB 20.5GiB (parted) mkpart "home partition" ext4 20.5GiB 100%
And for separate / (20 GiB), swap (4 GiB), and /home (all remaining space) partitions:
(parted) mkpart "root partition" ext4 301MiB 20.5GiB (parted) mkpart "swap partition" linux-swap 20.5GiB 24.5GiB (parted) mkpart "home partition" ext4 24.5GiB 100%
BIOS/MBR examples
For a minimum single primary partition using all available disk space, the following command would be used:
(parted) mkpart primary ext4 1MiB 100% (parted) set 1 boot on
In the following instance, a 20 GiB / partition will be created, followed by a /home partition using all the remaining space:
(parted) mkpart primary ext4 1MiB 20GiB (parted) set 1 boot on (parted) mkpart primary ext4 20GiB 100%
In the final example below, separate /boot (100 MiB), / (20 GiB), swap (4 GiB), and /home (all remaining space) partitions will be created:
(parted) mkpart primary ext3 1MiB 100MiB (parted) set 1 boot on (parted) mkpart primary ext3 100MiB 20GiB (parted) mkpart primary linux-swap 20GiB 24GiB (parted) mkpart primary ext3 24GiB 100%
Resizing partitions
Warning: ext2/3/4 partitions that are being resized must be unmounted and not in use. It is difficult and hazardous to try to edit the root filesystem on a running OS; use a live media/rescue system instead.
- You can only move the end of the partition with parted .
- As of parted v4.2 resizepart may need the use of #Interactive mode.[2]
- These instructions apply to partitions that have ext2, ext3, ext4, or btrfs filesystems.
If you are growing a partition, you have to first resize the partition and then resize the filesystem on it, while for shrinking the filesystem must be resized before the partition to avoid data loss.
Growing partitions
To grow a partition (in parted interactive mode):
(parted) resizepart number end
Where number is the number of the partition you are growing, and end is the new end of the partition (which needs to be larger than the old end).
Then, to grow the (ext2/3/4) filesystem on the partition (if size is not specified, it will default to the size of the partition):
# resize2fs /dev/sdaX size
Or to grow a Btrfs filesystem:
# btrfs filesystem resize size /path/to/mount/point
Where /path/to/mount/point stands for the mount point of the partition you are growing, and size in the form 16G or +1G is the new size or modification of the partition. Use max to fill the remaining space on the partition.
Shrinking partitions
To shrink an ext2/3/4 filesystem on the partition:
# resize2fs /dev/sdaX size
Note: In contrast to parted, resize2fs(8) uses K, M, G and T to mean KiB, MiB, GiB and TiB. Be aware that e2fsprogs documentation misrefers to kibibytes, mebibytes, gibibytes and tebibytes as «power-of-two kilobytes, megabytes, gigabytes, terabytes».
To shrink a Btrfs filesystem:
# btrfs filesystem resize size /path/to/mount/point
Where /path/to/mount/point stands for the mount point of the partition you are shrinking, and size is the new size of the partition.
Then shrink the partition (in parted interactive mode):
(parted) resizepart number end
Where number is the number of the partition you are shrinking, and end is the new end of the partition (which needs to be smaller than the old end).
When done, use the resizepart command from util-linux to tell the kernel about the new size:
# resizepart device number size
Where device is the device that holds the partition, number is the number of the partition and size is the new size of the partition, in 512-byte sectors.
Warnings
Parted will always warn you before doing something that is potentially dangerous, unless the command is one of those that is inherently dangerous (e.g. rm, mklabel and mkpart).
Alignment
Warning: parted only aligns the partition start, but not the size. This is not enough for dm-crypt/LUKS, see Advanced Format#Partition alignment.
When creating a partition, parted might warn about improper partition alignment but does not hint about proper alignment. For example:
(parted) mkpart primary fat16 0 32M Warning: The resulting partition is not properly aligned for best performance. Ignore/Cancel?
The warning means the partition start is not aligned. Enter «Ignore» to go ahead anyway, print the partition table in sectors to see where it starts, and remove/recreate the partition with the start sector rounded up to increasing powers of 2 until the warning stops. As one example, on a flash drive with 512B sectors, Parted wanted partitions to start on sectors that were a multiple of 2048, which is 1 MiB alignment.
If you want parted to attempt to calculate the correct alignment for you, specify the start position as 0% instead of some concrete value. To make one large ext4 partition, your command would look like this:
(parted) mkpart primary ext4 0% 100%
Tips and tricks
Check alignment
Warning: parted only verifies the alignment of a partition start, but not the size. This is not enough for dm-crypt/LUKS, see Advanced Format#Partition alignment.
On an already partitioned disk, you can use parted to verify the alignment of a partition on a device. For instance, to verify alignment of partition 1 on /dev/sda :
# parted /dev/sda (parted) align-check optimal 1 1 aligned
Troubleshooting
gparted on Wayland fails with «cannot open display: :0»
This issue is caused by xwayland refusing access to gparted running as root . gparted developers implemented [3] a small workaround which temporarily adds root to the list of users allowed to connect to xwayland while the application is running.
See also
Расширение дискового пространства в Ubuntu Linux
Часто бывает необходимо расширить имеющееся дисковое пространство без потери места и данных. Данная инструкция описывает весь процесс расширения — от добавления дополнительного файлового пространства в панели администрирования до настройки операционной системы и того, как выполнить увеличение размера диска в Ubuntu.
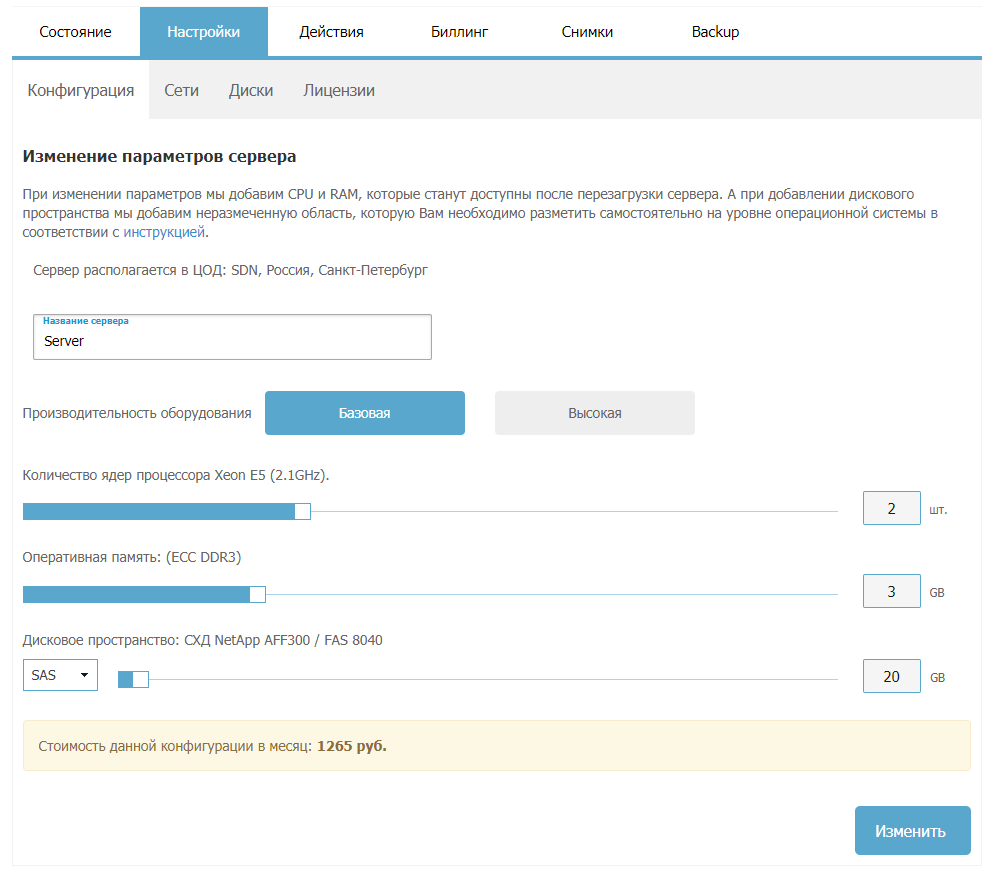
Перейдите в панель управления, выберите ваш сервер, перейдите на вкладку Действия, выберите Выключить средствами ОС и нажмите кнопку Выключить. После этого перейдите на вкладку Настройки, Конфигурация, увеличьте величину диска и нажмите кнопку Изменить (рис. 1).

Рис. 1. Конфигурация виртуального сервера
В нашем примере величина дискового пространства в корневом каталоге составляла 20 Гб. Сделаем жесткий диск виртуальной машины равным 40 Гб.
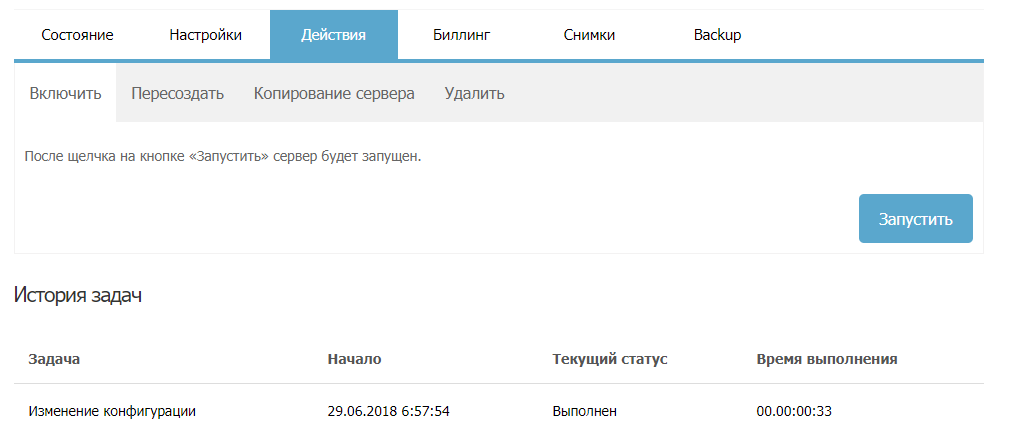
После нажатия на кнопку Изменить нужно дождаться выполнения операции и можно будет снова запускать сервер.

Рис. 2. Изменение конфигурации выполнено
Расширение дискового пространства в операционной системе Linux
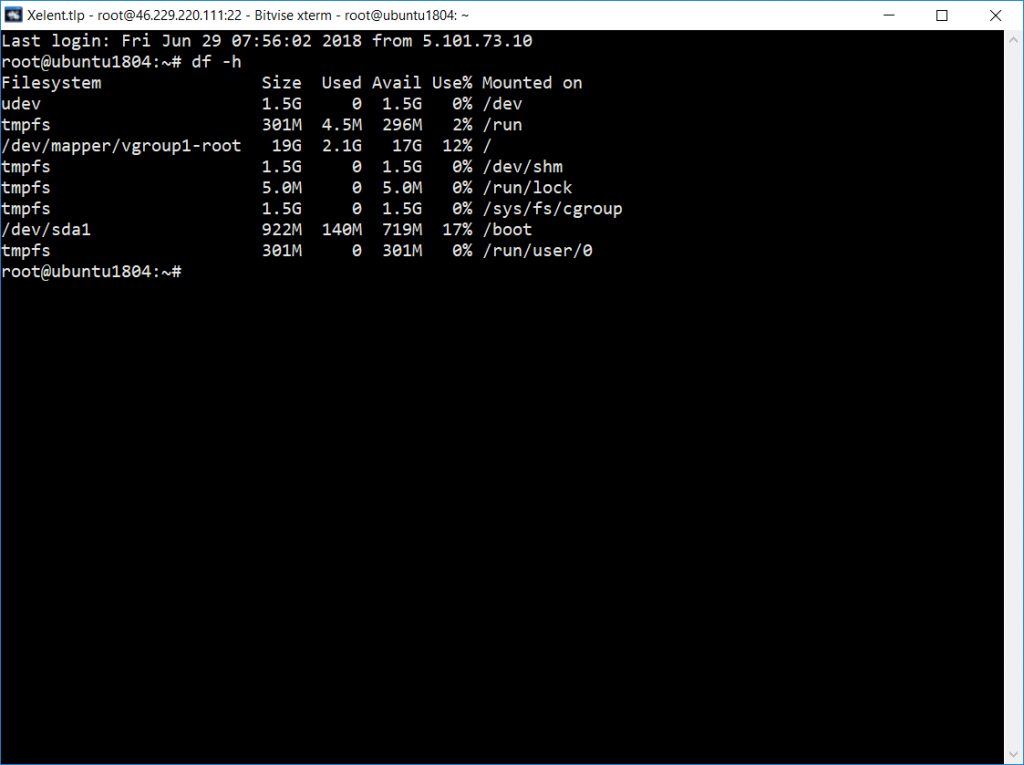
Перед тем как в Ubuntu увеличить диск, посмотрим, как выполнена разметка и сколько сейчас дискового пространства доступно:

Как видите, общая величина группы томов /dev/mapper/ составляет 19 Гб. Наша задача — расширить размер этой группы томов до полной величины диска.