- 4 способа просмотра дисков и разделов в Linux
- 1. Список дисков Linux с помощью команды fdisk
- 2. Просмотр разделов диска Linux с помощью команды lsblk
- 3. Просмотр дисков Linux с помощью команды hwinfo
- 4. Найдите информацию о разделах Linux с помощью Disk Tool
- List Disks on Ubuntu
- Using fdisk Command:
- Using parted Command:
- Using GNOME Disks App:
- Using GParted App:
- About the author
- Shahriar Shovon
4 способа просмотра дисков и разделов в Linux
В этом руководстве мы покажем, как составить список дисков и разделов хранилища в системах Linux. Мы рассмотрим как инструменты командной строки, так и утилиты с графическим интерфейсом. К концу этого руководства вы узнаете, как просматривать или сообщать информацию о дисках и разделах на вашем сервере Linux, настольном компьютере или рабочей станции.
[Вам также может понравиться: 3 полезных инструмента для сканирования дисков Linux с графическим интерфейсом и терминалом]
1. Список дисков Linux с помощью команды fdisk
fdisk — широко используемый инструмент командной строки для работы с таблицами разделов диска. Вы можете использовать его для просмотра дисков и разделов на вашем сервере Linux следующим образом.
Флаг -l подразумевает список разделов, если устройство не указано, fdisk отобразит разделы со всех дисков. Для его вызова требуются привилегии root, поэтому при необходимости используйте команду sudo:

2. Просмотр разделов диска Linux с помощью команды lsblk
lsblk — это утилита для просмотра блочных устройств. Вы можете использовать его для просмотра дисков и разделов на вашем компьютере с Linux следующим образом. Он хорошо работает без команды sudo:

Чтобы просмотреть дополнительную информацию о дисках, используйте параметр командной строки -f , как показано ниже:

3. Просмотр дисков Linux с помощью команды hwinfo
hwinfo — еще одна полезная утилита для просмотра информации о вашем оборудовании, особенно о дисках. Если вы не можете найти команду hwinfo в своей системе, выполните следующую команду, чтобы установить ее:
$ sudo apt install hwinfo [On Debian, Ubuntu and Mint] $ sudo yum install hwinfo [On RHEL/CentOS/Fedora and Rocky Linux/AlmaLinux] $ sudo emerge -a sys-apps/hwinfo [On Gentoo Linux] $ sudo pacman -S hwinfo [On Arch Linux] $ sudo zypper install hwinfo [On OpenSUSE]
После установки пакета hwinfo запустите команду с параметром командной строки —disk , как показано ниже:

В выводе предыдущей команды есть много информации о диске или его разделах, которые отображает hwinfo. Если вы хотите просмотреть обзор блочных устройств, выполните эту команду:

Чтобы показать сводку по всем дискам, выполните команду:

4. Найдите информацию о разделах Linux с помощью Disk Tool
На настольном компьютере Linux вы также можете использовать приложение с графическим интерфейсом пользователя (GUI) для просмотра списка дисков, подключенных к вашему компьютеру. Сначала найдите приложение disks в системном меню. Затем откройте его, чтобы просмотреть свои диски и их разделы.

Это все на данный момент. Для получения дополнительной информации о командах, используемых в этом руководстве, посетите их справочные страницы. Вы также можете поделиться своими мыслями с нами через форму комментариев ниже.
List Disks on Ubuntu
![]()
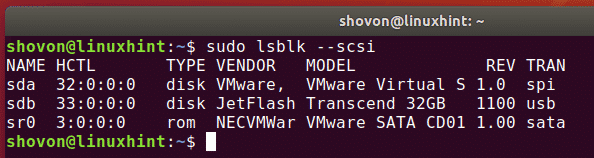
You can list all the attached disks on your computer from Ubuntu using the lsblk command as follows:

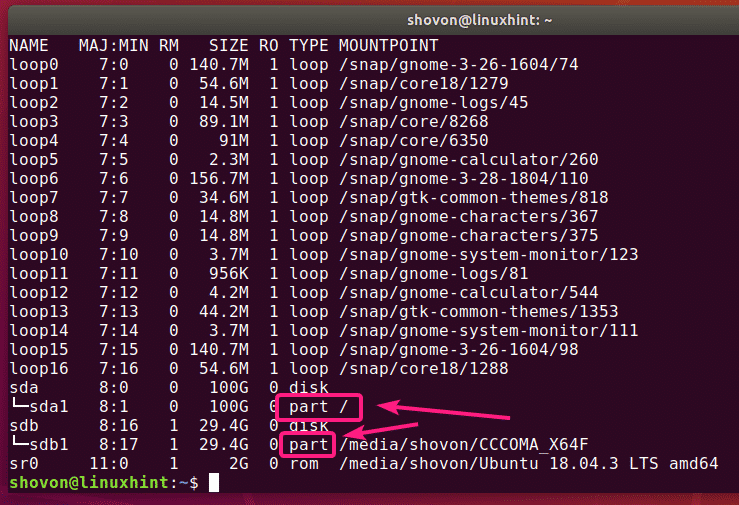
The ones with the TYPE disk are the physically attached disks on your computer.
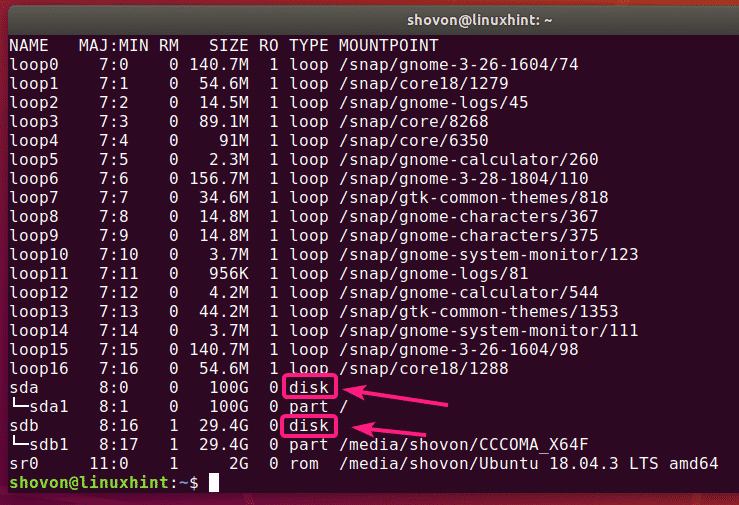
The ones with the TYPE part are the partitions of the disks.
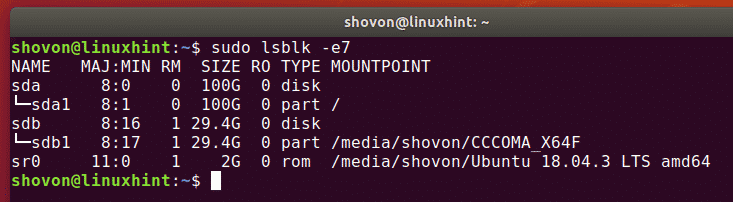
The lsblk command without any filter shows a lot of loop devices that are used by the Ubuntu snap apps. It is annoying I know. Luckily, you can easily get rid of them from the list.
You can use the -e7 option with lsblk to hide the loop devices.

Now that the loop devices are gone, the list looks much clearer now.
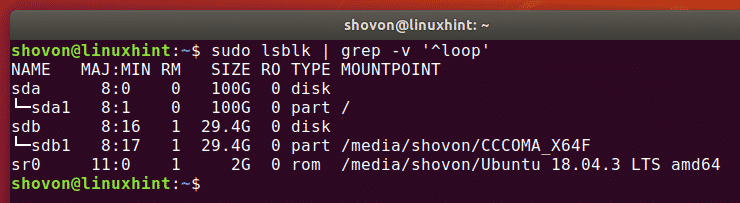
You can also do the same thing with grep.
You can also hide the CD/DVD rom device from the list. Just add the -e11 option along with -e7 option.

You can also list the attached disks on your computer, and their vendor and model information using lsblk as follows:

As you can see, all the attached disks on my computer are listed. Their vendor and model information are also listed.
Using fdisk Command:
You can also list all the attached disks on your computer from Ubuntu using the fdisk command as follows:

fdisk shows all the disks, their total size, their partitions, size of each partitions etc. But sadly, the list is too long and there is no easy way to hide the loop devices.


But if you know the device name (i.e. sda, sdb) of your disk, you can find more information about it very easily with fdisk.

You can also find information about more than one disk at the same time with fdisk. Just put the disks paths as fdisk arguments one after the other.

Using parted Command:
You can use parted to do the same thing. parted may not be installed by default on Ubuntu. But you can easily install it with the following command:

You can get a fdisk like output for all the storage disks attached on your computer with parted as follows:

As you can see, the output format is the same as in fdisk, but parted does not list the annoying loop devices. That’s a good thing.

Using GNOME Disks App:
If you don’t like to use the command line, then there are many graphical programs you can use to list disks on Ubuntu.
GNOME Disks is the default partitioning app on GNOME desktop environment. You can use it to list the disks attached on your computer.
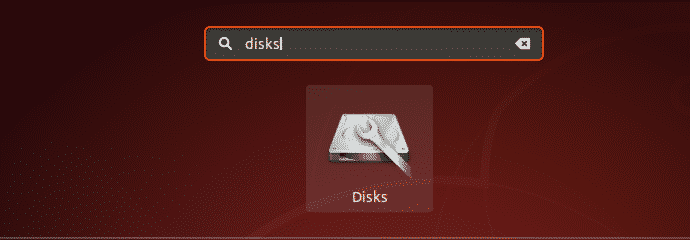
First, open GNOME Disks from the Application Menu.
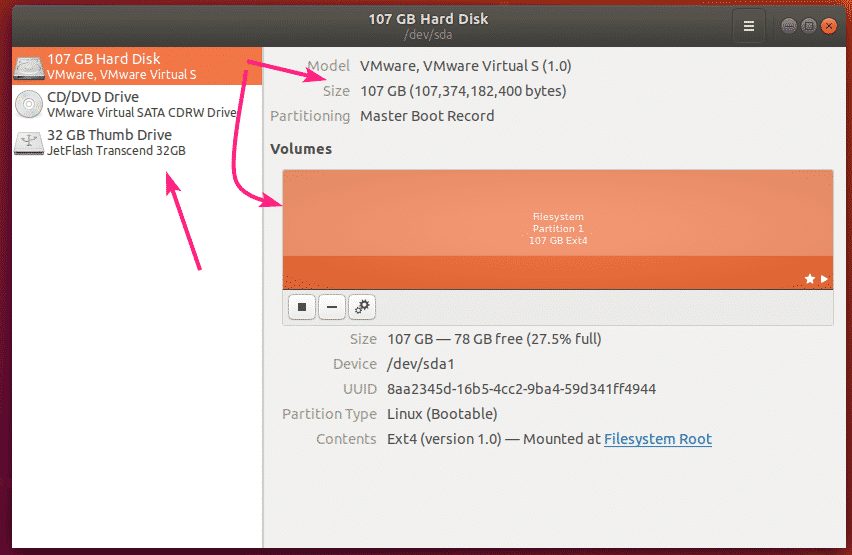
GNOME Disks should be opened. On the left side, you will see all the attached storage devices/disks on your computer. To find more information about the disk, click to select the disk. The disk size, partitions and other information about the disk should be listed on the right side.
Using GParted App:
If you don’t like the command line, then you can also use the GParted Partition Editor app to list all the attached disks on your computer.
GParted is not installed by default on Ubuntu. But you can easily install GParted with the following command:

GParted should be installed.
Now, you can start GParted from the Application Menu.

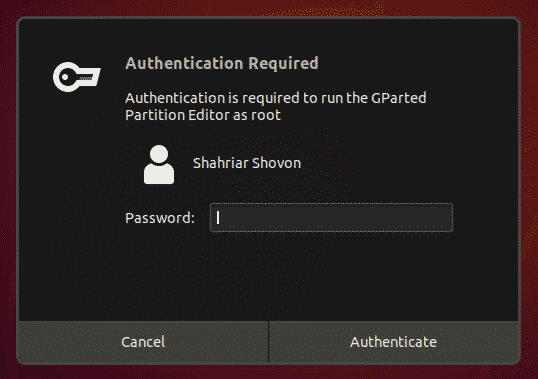
In order to use GParted, you will need superuser privileges. Type in your login password and click on Authenticate.
GParted should start. You can select a disk from the dropdown menu at the top right corner of GParted.
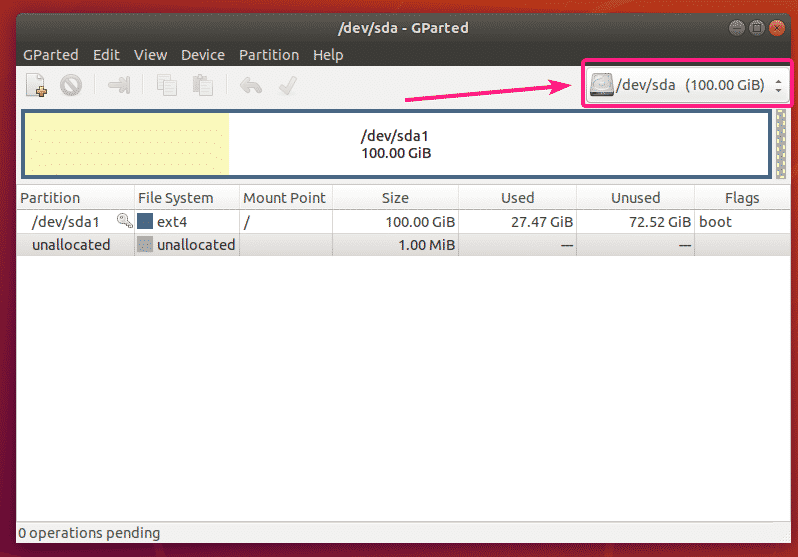
As you can see, all the disks attached on my computer is listed in the dropdown menu. Just select a disk from the list.

The partitions of your selected disk should be displayed.

So, that’s how you list all the disks attached on your computer from Ubuntu.
I’ve shown some of the common methods in this article. If you know of listing disks any other way on Ubuntu, be sure to let me know.
Thanks for reading this article.
About the author
Shahriar Shovon
Freelancer & Linux System Administrator. Also loves Web API development with Node.js and JavaScript. I was born in Bangladesh. I am currently studying Electronics and Communication Engineering at Khulna University of Engineering & Technology (KUET), one of the demanding public engineering universities of Bangladesh.