- Where to find SSH Login log files on centos
- 5 Answers 5
- How to view authentication logs on Ubuntu 20.04
- BitLaunch
- BitLaunch
- How to check system logins
- View the most recent logins
- See when users last logged in
- What to look for in authentication logs
- How to fix the ssh permission denied (publickey) error
- How to install and use PostgreSQL on Ubuntu 20.04
- Как найти все неудачные попытки входа по SSH в Linux
- Читайте также: Fail2ban: установка и настройка.
- Курсы Cisco, Linux, кибербезопасность, DevOps / DevNet, Python с трудоустройством!
Where to find SSH Login log files on centos
I have shared a .pem file with few a developers and now something went wrong on the server. I would like to track logins in a log so that I can see who (IP) made changes and when (if even possible) what all change happened in that session. I tried looking /var/logs/auth.log, I cannot find such file in my machine. Few more details: Hosted on AWS Created and shared .pem file CentOS — centos-release-7-2.1511.el7.centos.2.10.x86_64 EC2 instance I have not set flow log Can someone help to track SSH login details ?
5 Answers 5
On CentOS login information is logged in /var/log/secure , not /var/logs/auth.log .
In Centos 7 the SSH logs are located at «/var/log/secure«
If you want to monitoring in real time, you may use the tail command as shown below:
tail -f -n 50 /var/log/secure | grep sshd lastlog(8) will report the most recent information from the /var/log/lastlog facility, if you have pam_lastlog(8) configured.
aulastlog(8) will make a similar report, but from the audit logs in /var/log/audit/audit.log . (Recommended, as auditd(8) records are harder to tamper with than syslog(3) records.)
ausearch -c sshd will search your audit logs for reports from the sshd process.
last(8) will search through /var/log/wtmp for the most recent logins. lastb(8) will show bad login attempts .
/root/.bash_history might contain some details, assuming the goober who fiddled with your system was incompetent enough to not remove it before logging out.
Make sure you check ~/.ssh/authorized_keys files for all users on the system, check crontab s to make sure no new ports are scheduled to be opened at some point in the future, etc.
Note that all logs stored on the local machine are suspect; the only logs you can realistically trust are forwarded to another machine that wasn’t compromised. Perhaps it would be worth investigating centralized log handling via rsyslog(8) or auditd(8) remote machine handling.
grep sshd /var/log/audit/audit.log How to view authentication logs on Ubuntu 20.04
Authentication logs form a vital part of server security. If you suspect a breach, they can provide a full list of every remote login attempt on your server, alongside the account, date, and timestamp.
BitLaunch
BitLaunch

Authentication logs form a vital part of server security. If you suspect a breach, they can provide a full list of every remote login attempt on your server, alongside the account, date, and timestamp. They also list each prompt that asks for a user password, such as the sudo command, and whether or not the authentication was successful.
How to check system logins
The majority of Linux systems keep these logs at /var/log/auth.log or /var/log/secure . For Ubuntu, it’s the former. We can view these with nano or vim like we would any other text file, but the following command will give us faster load times and let us easily view the file page-by-page:
OUTPUT: Jan 8 15:07:22 5ff8750c7437d20001bb84c5 passwd[395]: password for 'root' changed by 'root' Jan 8 15:07:42 5ff8750c7437d20001bb84c5 sshd[546]: Received signal 15; terminating. Jan 8 15:07:42 5ff8750c7437d20001bb84c5 sshd[1321]: Server listening on 0.0.0.0 port 22. Jan 8 15:07:42 5ff8750c7437d20001bb84c5 sshd[1321]: Server listening on :: port 22. Jan 8 15:08:01 5ff8750c7437d20001bb84c5 sshd[1321]: Received signal 15; terminating. Jan 8 15:08:01 5ff8750c7437d20001bb84c5 sshd[1727]: Server listening on 0.0.0.0 port 22. Jan 8 15:08:01 5ff8750c7437d20001bb84c5 sshd[1727]: Server listening on :: port 22. Jan 8 15:09:41 5ff8750c7437d20001bb84c5 sshd[1738]: error: kex_exchange_identification: read: Connection reset by peer Jan 8 15:09:46 5ff8750c7437d20001bb84c5 sshd[1739]: pam_unix(sshd:auth): authentication failure; logname= uid=0 euid=0 tty=ssh ruser= rhost=81.161.63.100 user=root Jan 8 15:09:49 5ff8750c7437d20001bb84c5 sshd[1739]: Failed password for root from 81.161.63.100 port 54150 ssh2 Jan 8 15:14:36 5ff8750c7437d20001bb84c5 sshd[1896]: pam_unix(sshd:auth): authentication failure; logname= uid=0 euid=0 tty=ssh ruser= rhost=71.221.154.110 user=root Jan 8 15:14:37 5ff8750c7437d20001bb84c5 sudo: root : TTY=pts/0 ; PWD=/root ; USER=root ; COMMAND=/usr/bin/less /var/log/auth.log Jan 8 15:14:37 5ff8750c7437d20001bb84c5 sudo: pam_unix(sudo:session): session opened for user root by root(uid=0) (END) Above is a cut-down example from a server that was just created. You can see that it also lists the initial password change when the server was programmatically created.
Once you’re ready, press q to quit the document.
View the most recent logins
If you just want to check the most recent logins, it’s even simpler. Back in the command-line, type last and press Enter.
The output will look something like this:
root pts/0 12.34.567.89 Fri Jan 8 15:30 still logged in root pts/0 12.34.567.89 Fri Jan 8 15:13 - 15:29 (00:16) reboot system boot 5.4.0-1009-kvm Fri Jan 8 15:07 still running The last tool pulls its data from /var/log/wtmp , which is written to each time a user logs in. It’ll show username, tty, IP address, date and time, and session start/stop times.
If that’s too verbose, you can apply filters to the command with the following syntax:
Let’s look at an example. If we wanted to view all of the logins from the root user, we could run:
OUTPUT: root pts/0 12.345.678.90 Fri Jan 8 15:30 still logged in root pts/0 12.345.678.90 Fri Jan 8 15:13 - 15:29 (00:16)Or, if we want to restrict it to a specific user and TTY:
See when users last logged in
If you notice an unauthorized change to the system, it’s often useful to see when each user last logged in. This way, you can determine who made the adjustment. We can do this via the lastlog command, which pulls data from /etc/log/lastlog and sorts them by /etc/password entries:
Username Port From Latest root pts/0 12.345.678.90 Fri Jan 8 15:30:06 +0000 2021 daemon **Never logged in** bin **Never logged in** sys **Never logged in** sync **Never logged in** bitlaunch pts/1 83.253.230.46 Fri Jan 8 16:09:53 +0000 2021 hack0r pts/1 83.253.230.46 Fri Jan 8 16:10:20 +0000 2021 You’ll notice quite a few users with a **Never logged in** entry in the Latest column. This is normal on account of them being system users.
But what if you just found out about a historical incursion or are looking for more specific information? lastlog has several options that can be of use.
| Option | Description |
|---|---|
| -u, —user [LOGIN] | Print logs for a specific user with a specified login |
| -b, —before [DAYS] | Print records older than a specified number of days |
| -t, —time [DAYS] | Print records that are more recent than a specified number of days |
This is particularly useful if we want to get the last time a specific user logged in:
OUTPUT: root pts/0 12.345.678.90 Fri Jan 8 15:30:06 +0000 2021What to look for in authentication logs
Now you know how to view authentication logs, it’s important to develop a pro-active mindset. Don’t just run these commands if you notice something strange – make it a habit to check regularly.
When you do so, look out out for the following:
- Users who are requesting sudo privileges to perform tasks that are outside their scope of work
- Is one user attempting to access or modify the content of another? Was a password changed unexpectedly?
- Attackers often create a new account so that they can perform actions without as much oversight
Of course, there’s one issue with all this. If an attacker gains access to your root account, they will be able to modify or delete your authentication log. An absence of authentication logs can be very telling, but it also doesn’t leave you with much information about the incursion.
As a result, it’s vital that you keep your root account secure and make regular backups of your log files and full server. Though they can help in the case of a breach, authentication logs are far from a replacement for basic security.

How to fix the ssh permission denied (publickey) error
The SSH permission denied (publickey) error is a frustrating one. Here’s how to fix it in a few simple steps.
How to install and use PostgreSQL on Ubuntu 20.04
In today’s guide we’re going to focus on how to install PostgreSQL on Ubuntu 20.04 as quickly as possible. For those unfamiliar, PostgreSQL, or Postgres, is a free, open-source database management system with high extensibility and compliance.
Как найти все неудачные попытки входа по SSH в Linux


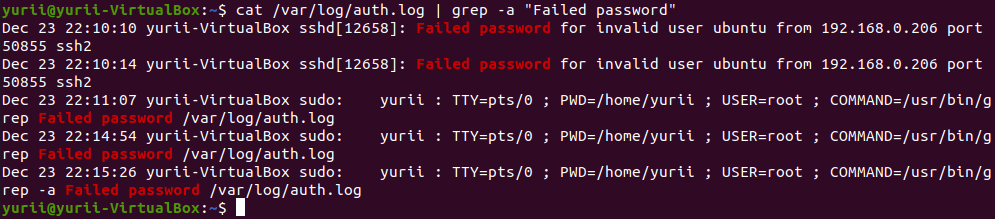
Каждая попытка входа на SSH-сервер отслеживается и записывается в файл журнала демоном rsyslog в Linux. Самый простой механизм, позволяющий найти все неудачные попытки входа в систему по SSH в Linux — это комбинация отображения и фильтрации файлов журнала с помощью команды cat или grep.
Чтобы отобразить список неудавшихся подключений по SSH в Linux, выполните некоторые из команд, представленных в этом руководстве. Убедитесь, что эти команды выполняются с правами root.
Самая простая команда для перечисления всех неудачных подключений по SSH показана ниже:

Тот же результат может быть достигнут путем использования команды cat.
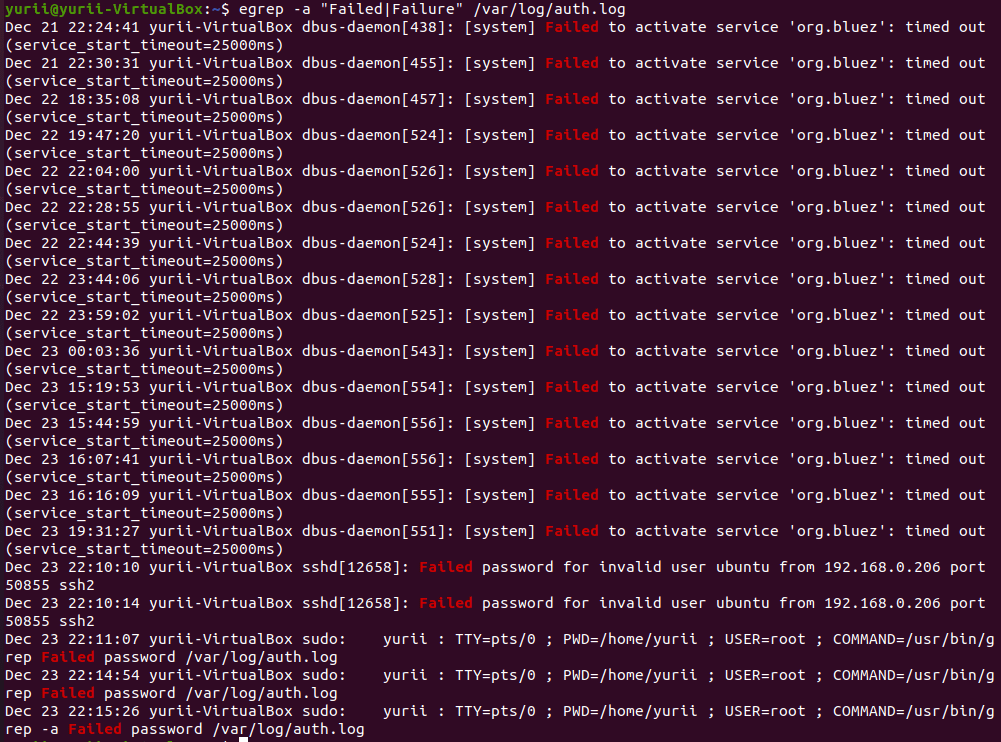
Чтобы отобразить дополнительную информацию о неудавшихся входах по SSH, выполните команду, как показано в приведенном ниже примере.

В CentOS или RHEL неудачные сеансы входа по SSH записываются в файл /var/log/secure. Выполните нижеприведенную команду в для этого файла журнала, чтобы идентифицировать неудавшиеся попытки подключения по SSH.
Немного измененная версия вышеуказанной команды для отображения неудачных SSH попыток в CentOS или RHEL выглядит следующим образом:
Чтобы отобразить список всех IP-адресов, которые пытались и не могли войти на сервер SSH наряду с количеством неудачных попыток каждого IP-адреса, выполните приведенную ниже команду:
В новых дистрибутивах Linux вы можете запросить файл журнала, поддерживаемый демоном Systemd, с помощью команды journalctl. Чтобы отобразить все неудачные попытки входа через SSH, вы должны передать результат через фильтр grep, как показано в приведенных ниже примерах команд:

В CentOS или RHEL замените службу SSH на sshd.service, как показано в приведенных ниже примерах команд.
После того, как вы определили IP-адреса, которые часто пытались зайти на ваш SSH-сервер, вы можете ограничить им доступ. Чтобы заблокировать неудачные попытки входа по SSH для таких IP-адресов вам необходимо обновить правила брандмауэра системы, или использовать специализированные программное обеспечение, такое как fail2ban для защиты от возможных атак.
Читайте также: Fail2ban: установка и настройка.
Спасибо за уделенное время на прочтение статьи!
Если возникли вопросы, задавайте их в комментариях.
Подписывайтесь на обновления нашего блога и оставайтесь в курсе новостей мира инфокоммуникаций!
Чтобы знать больше и выделяться знаниями среди толпы IT-шников, записывайтесь на курсы Cisco от Академии Cisco, курсы Linux от Linux Professional Institute на платформе SEDICOMM University.
Курсы Cisco, Linux, кибербезопасность, DevOps / DevNet, Python с трудоустройством!
Спешите подать заявку! Группы стартуют 25 января, 26 февраля, 22 марта, 26 апреля, 24 мая, 21 июня, 26 июля, 23 августа, 20 сентября, 25 октября, 22 ноября, 20 декабря.
- Поможем стать экспертом по сетевой инженерии, кибербезопасности, программируемым сетям и системам и получить международные сертификаты Cisco, Linux LPI, Python Institute.
- Предлагаем проверенную программу с лучшими учебниками от экспертов из Cisco Networking Academy, Linux Professional Institute и Python Institute, помощь сертифицированных инструкторов и личного куратора.
- Поможем с трудоустройством и стартом карьеры в сфере IT — 100% наших выпускников трудоустраиваются.
- Проведем вечерние онлайн-лекции на нашей платформе.
- Согласуем с вами удобное время для практик.
- Если хотите индивидуальный график — обсудим и реализуем.
- Личный куратор будет на связи, чтобы ответить на вопросы, проконсультировать и мотивировать придерживаться сроков сдачи экзаменов.
- Всем, кто боится потерять мотивацию и не закончить обучение, предложим общение с профессиональным коучем.
- отредактировать или создать с нуля резюме;
- подготовиться к техническим интервью;
- подготовиться к конкурсу на понравившуюся вакансию;
- устроиться на работу в Cisco по специальной программе. Наши студенты, которые уже работают там: жмите на #НашиВCisco Вконтакте, #НашиВCisco Facebook.
Чтобы учиться на курсах Cisco, Linux LPI, кибербезопасность, DevOps / DevNet, Python, подайте заявку или получите бесплатную консультацию.