Как быстро проверить Linux сервер на предмет взлома
Примерно два года назад я арендовал у одного немецкого хостера не очень мощный сервер на базе Centos 5.2. На нём живут несколько вебпроектов, приносящих некоторую прибыль, и поэтому, я стараюсь присматривать за ним по мере возможности.
На Centos есть стандартный анализатор логов Logwatch, который запускается ежедневно по крону, анализирует содержимое /var/log, делает сводный отчет и присылает его по электропочте. В один прекрасный день я обнаружил в этом отчете запись:
--------------------- yum Begin ------------------------ Packages Installed: lzo2 - 2.02-3.el5.rf.i386 dnstracer - 1.8-1.2.el5.rf.i386 openvpn - 2.0.9-1.el5.rf.i386 ---------------------- yum End -------------------------
В тот момент меня она очень смутила, так как в предыдущий день на сервер я не логинился и тем более ничего не устанавливал. Первое, что пришло в голову — сервер был скомпроментирован. Себя я считал уверенным пользователем Linux, однако я растерялся. Благо в тот момент в icq был мой бывший коллега, лучший системный администратор, которого я знаю, и просто очень хороший человек.
Он помог быстро проверить систему. В результате у меня сформировалось краткое HowTo о том, как быстро проверить свой сервер на предмет взлома. Уверен, что многим Храброчитателям оно будет полезно. Предполагается, что пользователь знаком с консолью Linux/Unix.
Итак, первым делом меняем рутовый пароль:
[root@myhost etc]# passwd Changing password for user root. New UNIX password: .
Далее сканируем хост на предмет подозрительных открытых портов. Сделать это можно, например, с другой юниксовой машины с помощью утилиты nmap:
[root@myhost ~]# nmap -P0 123.123.123.123 Starting Nmap 4.11 ( http://www.insecure.org/nmap/ ) at 2011-01-23 11:47 MSK Interesting ports on myhost.myprovider.net (123.123.123.123): Not shown: 1679 filtered ports PORT STATE SERVICE 21/tcp open ftp 22/tcp open ssh 25/tcp open smtp 53/tcp open domain 80/tcp open http 106/tcp open pop3pw 110/tcp open pop3 111/tcp open rpcbind 135/tcp filtered msrpc 136/tcp filtered profile 137/tcp filtered netbios-ns 138/tcp filtered netbios-dgm 139/tcp filtered netbios-ssn 143/tcp open imap 443/tcp open https 445/tcp filtered microsoft-ds 465/tcp open smtps 620/tcp open unknown 993/tcp open imaps 995/tcp open pop3s 3306/tcp open mysql 8443/tcp open https-alt
В этом списке подозрительно выглядели 111 и 620 порты, поэтому далее смотрим, кто их слушает:
[root@myhost ~]# netstat -anp | grep LISTEN | grep 620 tcp 0 0 0.0.0.0:620 0.0.0.0:* LISTEN 1710/rpc.statd
[root@myhost ~]# netstat -anp | grep LISTEN | grep 111 tcp 0 0 0.0.0.0:111 0.0.0.0:* LISTEN 1685/portmap
Тут оказалось всё в порядке, так как это были компоненты nfs. Далее проверяем UDP соединения:
[root@myhost ~]# netstat –anp | grep udp udp 0 0 0.0.0.0:32773 0.0.0.0:* 2345/named udp 0 0 127.0.0.1:32780 127.0.0.1:32780 ESTABLISHED 2539/postmaster udp 0 0 0.0.0.0:32783 0.0.0.0:* 2790/avahi-daemon: udp 0 0 123.123.123.123:53 0.0.0.0:* 2345/named udp 0 0 123.123.123.123:53 0.0.0.0:* 2345/named udp 0 0 127.0.0.1:53 0.0.0.0:* 2345/named udp 0 0 0.0.0.0:614 0.0.0.0:* 1710/rpc.statd udp 0 0 0.0.0.0:5353 0.0.0.0:* 2790/avahi-daemon: udp 0 0 0.0.0.0:617 0.0.0.0:* 1710/rpc.statd udp 0 0 0.0.0.0:111 0.0.0.0:* 1685/portmap udp 0 0 0.0.0.0:631 0.0.0.0:* 2069/cupsd udp 0 0 . 32774 . * 2345/named udp 0 0 . 32784 . * 2790/avahi-daemon: udp 0 0 . 5353 . * 2790/avahi-daemon:
Тут тоже всё оказалось в порядке. Попасть на сервер, скорее всего могли не через консоль, так как при логине на сервер Centos писал, что последний логин был с моего IP. Поэтому следующим пунктом нужно проверить фолдер /root/.ssh, туда могли положить ключ для ssh-клиента каким-либо образом.
[root@myhost ~]# dir /root/.ssh authorized_keys_
Здесь оказался только файл с ключами, который я переименовал сразу после передачи хоста провайдером. Далее нужно проверить файл /etc/passwd. В нём не должно быть пользователей с uid=0, кроме root:
[root@myhost ~]# cat /etc/passwd | more root:x:0:0:root:/root:/bin/bash bin:x:1:1:bin:/bin:/sbin/nologin daemon:x:2:2:daemon:/sbin:/sbin/nologin adm:x:3:4:adm:/var/adm:/sbin/nologin lp:x:4:7:lp:/var/spool/lpd:/sbin/nologin sync:x:5:0:sync:/sbin:/bin/sync …
И тут тоже было всё окей. Финальным аккордом являлась проверка хоста на установленные руткиты. Для этого можно использовать бесплатную утилиту rkhunter. Скачиваем архив с последней версией, распаковываем его и запускаем инсталлер. Далее делаем его обновление и запускаем проверку:
[root@myhost ~]# ./installer.sh --install --layout /usr/local [root@myhost ~]# /usr/local/bin/rkhunter –-update [root@myhost ~]# /usr/local/bin/rkhunter –-check
Rkhunter в начале проверят важные системные файлы, затем ищет руткиты. После происходит проверка на различные vulnerabilities. В конце программа проверяет версии популярных продуктов, таких как Apache, OpenSSH и т.п. на предмет последних версий.
Результаты своей работы rkhunter выдает в консоль, а также формирует консолидированный лог /var/log/rkhunter.log. Можно запускать данный антируткит каждый день по крону и получать отчет о сканировании по электронной почте.
К счастью, rkhunter не обнаружил на моём сервере никаких зловредов, это позволило успокоиться и подумать, что же за странные инсталлы произошли на сервере. И тут я вспомнил, что сразу после получения сервера, я установил и сконфигурировал на этом сервере VPN сервер. Видимо, произошла какая-то ошибка в Logwatch и он добавил в отчёт данные двухлетней давности.
Разумеется, если злоумышленники всё сделают грамотно, то Logwatch никаких следов не обнаружит и хозяин сервера долго ни о чём не будет подозревать. Однако, шаги, описанные в данном HowTo, если проводить их регулярно, помогут уберечь ваши сервера от компроментации.
5 Tools to Scan a Linux Server for Malware and Rootkits
There are constant level of high attacks and port scans on Linux servers all the time, while a properly configured firewall and regular security system updates adds a extra layer to keep the system safe, but you should also frequently watch if anyone got in. This will also helps to ensure that your server stays free of any program that aims at disrupting its normal operation.
The tools presented in this article are created for these security scans and they are able to identity Virus, Malwares, Rootkits, and Malicious behaviors. You can use these tools make regularly system scans e.g. every night and mail reports to your email address.
1. Lynis – Security Auditing and Rootkit Scanner
Lynis is a free, open source, powerful and popular security auditing and scanning tool for Unix/Linux like operating systems. It is a malware scanning and vulnerability detecting tool that scans systems for security information and issues, file integrity, configuration errors; performs firewall auditing, checks installed software, file/directory permissions and so much more.
Importantly, it doesn’t automatically perform any system hardening, however, it simply offers suggestions that enable you to harden your server.
We will install latest version of Lynis (i.e. 2.6.6) from the sources, using following commands.
# cd /opt/ # wget https://downloads.cisofy.com/lynis/lynis-2.6.6.tar.gz # tar xvzf lynis-2.6.6.tar.gz # mv lynis /usr/local/ # ln -s /usr/local/lynis/lynis /usr/local/bin/lynis
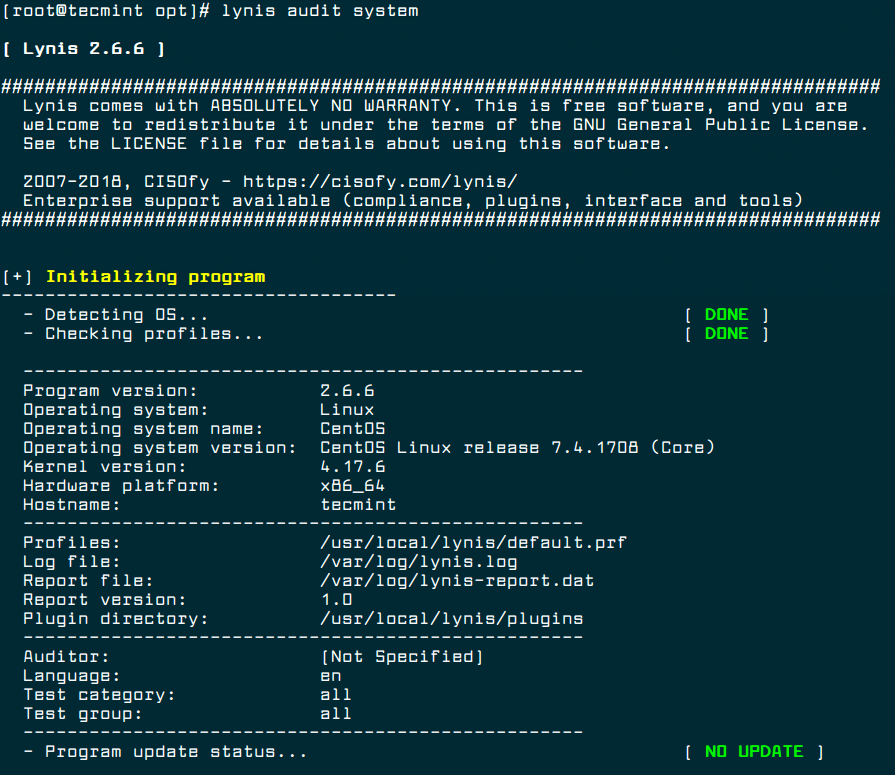
Now you can perform your system scanning with the command below.
To make run Lynis automatically at every night, add the following cron entry, which will run at 3am night and send reports to your email address.
2. Chkrootkit – A Linux Rootkit Scanners
Chkrootkit is also another free, open source rootkit detector that locally checks for signs of a rootkit on a Unix-like systems. It helps to detect hidden security holes. The chkrootkit package consists of a shell script that checks system binaries for rootkit modification and a number of programs that check various security issues.
The chkrootkit tool can be installed using following command on Debian-based systems.
$ sudo apt install chkrootkit
On CentOS-based systems, you need to install it from sources using following commands.
# yum update # yum install wget gcc-c++ glibc-static # wget -c ftp://ftp.pangeia.com.br/pub/seg/pac/chkrootkit.tar.gz # tar –xzf chkrootkit.tar.gz # mkdir /usr/local/chkrootkit # mv chkrootkit-0.52/* /usr/local/chkrootkit # cd /usr/local/chkrootkit # make sense
To check your server with Chkrootkit run the following command.
$ sudo chkrootkit OR # /usr/local/chkrootkit/chkrootkit
Once run, it will start checking your system for known Malwares and Rootkits and after the process is finished, you can see the summary of report.
To make run Chkrootkit automatically at every night, add the following cron entry, which will run at 3am night and send reports to your email address.
Rkhunter – A Linux Rootkit Scanners
RKH (RootKit Hunter) is a free, open source, powerful, simple to use and well known tool for scanning backdoors, rootkits and local exploits on POSIX compliant systems such as Linux. As the name implies, it is a rootkit hunter, security monitoring and analyzing tool that is thoroughly inspects a system to detect hidden security holes.
The rkhunter tool can be installed using following command on Ubuntu and CentOS based systems.
$ sudo apt install rkhunter # yum install epel-release # yum install rkhunter
To check your server with rkhunter run the following command.
To make run rkhunter automatically at every night, add the following cron entry, which will run at 3am night and send reports to your email address.
4. ClamAV – Antivirus Software Toolkit
ClamAV is an open source, versatile, popular and cross-platform antivirus engine to detect viruses, malware, trojans and other malicious programs on a computer. It is one of the best free anti-virus programs for Linux and the open source standard for mail gateway scanning software that supports almost all mail file formats.
It supports virus database updates on all systems and on-access scanning on Linux only. In addition, it can scan within archives and compressed files and supports formats such as Zip, Tar, 7Zip, Rar among others and more other features.
The ClamAV can be installed using following command on Debian-based systems.
$ sudo apt-get install clamav
The ClamAV can be installed using following command on CentOS-based systems.
# yum -y update # yum -y install clamav
Once installed, you can update the signatures and scan a directory with the following commands.
# freshclam # clamscan -r -i DIRECTORY
Where DIRECTORY is the location to scan. The options -r , means recursively scan and the -i means to only show infected files.
5. LMD – Linux Malware Detect
LMD (Linux Malware Detect) is an open source, powerful and fully-featured malware scanner for Linux specifically designed and targeted at shared hosted environments, but can be used to detect threats on any Linux system. It can be integrated with ClamAV scanner engine for better performance.
It provides a full reporting system to view current and previous scan results, supports e-mail alert reporting after every scan execution and many other useful features.
That’s all for now! In this article, we shared a list of 5 tools to scan a Linux server for malware and rootkits. Let us know of your thoughts in the comments section.