- Локальный веб-сервер под Linux, с автоматическим поднятием хостов и переключением версий PHP
- Цели
- Best Open Source Web Servers Linux
- Apache HTTP Server
- Installation of Apache HTTP Server in Ubuntu
- NGINX Server
- Installation of NGINX Server in Ubuntu
- Apache Tomcat Server
- Deployment of the Apache Tomcat Server in Ubuntu
- Conclusion
- About the author
- Omar Farooq
Локальный веб-сервер под Linux, с автоматическим поднятием хостов и переключением версий PHP
Скорее всего какие-то части этой статьи уже знакомы многим хаброжителям, но в связи с покупкой нового рабочего ноутбука я решил собрать все крупинки воедино и организовать удобное средство для разработки. Мне часто приходится работать со множеством маленьких проектов, с разными версиями PHP, часто переводить старые проекты на новые версии. В далёком прошлом, когда я был пользователем Windows то использовал OpenServer. Но с переходом на Linux мне нехватало той простоты создания хостов и переключений версий которые были в нём. Поэтому пришлось сделать еще более удобное решение на Linux =)
Цели
- Использовать текущий на момент написания статьи софт
- Чтоб разграничить локальные домены, будем использовать специальный домен .loc
- Переключения версий PHP реализуем через поддомен c помощью fast-cgi
- Автоматическое создание хоста с помощью vhost_alias и dnsmasq
будет запущен тот же файл но уже с версией PHP 7.2.7
Другие версии доставляются аналогичным описанным ниже способом.
Для создания еще одного сайта просто создаем в /var/www/ папку имеющую окончание .loc, внутри которой должна быть папка public_html являющаяся корнем сайта
Вот собственно и все. Как без дополнительных мучений, перезапусков, и редактирований конфигов имеем автоматическую систему для работы с сайтами.
Всё это я проверну на LinuxMint19, он на базе Ubuntu18.04, так что с ним все будет аналогично.
Для начала поставим необходимые пакеты
sudo apt update sudo apt install build-essential pkg-config libxml2-dev libfcgi-dev apache2 libapache2-mod-fcgid postfix Postfix ставим в качестве плюшки, как простое решение(в мастере установки, всё по умолчанию выбираем) для отправки почты с локальной машины.
Так как это локальная разработка и я единственный пользователь. То мне удобней перенести папку с проектами в мою домашнюю дерикторию. Она у меня маунтится отдельным диском и мигрирует при переустановке системы. Самый простой способ это создать ссылку, тогда не нужно менять пути в настройках да и путь привычный для всех.
Скопируем папку созданную апачем в домашний каталог, создадим на ее месте ссылку, не забыв поменять пользователя на себя и обменяться группами с апачем.
sudo mv /var/www/ ~/www sudo ln -s ~/www /var/www sudo chown $USER:$USER -R ~/www sudo usermod -a -G www-data $USER sudo usermod -a -G $USER www-data Создадим папку в которой будем собирать исходники PHP для разных версий
sudo mkdir /usr/local/src/php-build Также нам понадобится папки для CGI скриптов
И runtime папка для этих же скриптов, с правами
sudo mkdir /var/run/mod_fcgid sudo chmod 777 /var/run/mod_fcgid И так как каталог у нас находится в оперативной памяти, добавим его создание при старте системы, для этого добавим в /etc/tmpfiles.d/fcgid.conf
#Type Path Mode UID GID Age Argument d /var/run/mod_fcgid 0755 www-data www-data - - У меня dnsmasq-base идет с коробки, если нет то его всегда можно доставить.
sudo updatedb locate dnsmasq.conf Либо если он как и у меня является частью NetworkManager то создать новый файл конфигурации в /etc/NetworkManager/dnsmasq.d/local.conf
Добавим в него строчку для перенаправление нашего локального домена на локальную машину.
Также нужно включить необходимые модули апача
sudo a2enmod fcgid vhost_alias actions rewrite Предварительная подготовка завершена, приступаем к сборке различных локальных версий PHP. Для каждой версии PHP проделываем следующие 4 шага. На примере 5.6.36
1. Скачиваем исходники нужной версии и распаковываем их
cd /usr/local/src/php-build sudo wget http://pl1.php.net/get/php-5.6.36.tar.bz2/from/this/mirror -O php-5.6.36.tar.bz2 sudo tar jxf php-5.6.36.tar.bz2 2. Cобираем из исходников нужную версию PHP, и помещаем ее в /opt/php-5.6.36
sudo mkdir /opt/php-5.6.36 cd php-5.6.36 sudo ./configure --prefix=/opt/php-5.6.36 --with-config-file-path=/opt/php-5.6.36 --enable-cgi sudo make sudo make install sudo make clean 3. Создаем CGI для обработки этой версии в /var/www/cgi-bin/php-5.6.36.fcgi
#!/bin/bash PHPRC=/opt/php-5.6.36/php.ini PHP_CGI=/opt/php-5.6.36/bin/php-cgi PHP_FCGI_CHILDREN=8 PHP_FCGI_MAX_REQUESTS=3000 export PHPRC export PHP_FCGI_CHILDREN export PHP_FCGI_MAX_REQUESTS exec /opt/php-5.6.36/bin/php-cgi 4. Делаем файл исполняемым
sudo chmod +x /var/www/cgi-bin/php-5.6.36.fcgi 5. Добавляем экшен для обработки каждой версии в /etc/apache2/mods-available/fcgid.conf
AddHandler fcgid-script fcg fcgi fpl Action application/x-httpd-php-5.6.36 /cgi-bin/php-5.6.36.fcgi AddType application/x-httpd-php-5.6.36 .php #Action application/x-httpd-php-7.2.7 /cgi-bin/php-7.2.7.fcgi #AddType application/x-httpd-php-7.2.7 .php FcgidIPCDir /var/run/mod_fcgid FcgidProcessTableFile /var/run/mod_fcgid/fcgid_shm FcgidConnectTimeout 20 AddHandler fcgid-script .fcgi 6. Добавляем правило для обработки каждой версии в /etc/apache2/sites-available/000-default.conf
#Универсальный ServerNamе ServerAlias *.loc #Алиас для CGI скриптов ScriptAlias /cgi-bin /var/www/cgi-bin #Универсальный DocumentRoot VirtualDocumentRoot /var/www/%2+/public_html #Директория тоже должна быть универсальной Options +ExecCGI -Indexes AllowOverride All Order allow,deny Allow from all #Ниже все условия для каждой из версий =~ /56\..*?\.loc/"> SetHandler application/x-httpd-php-5.6.36 #По умолчанию, если версия не указанна, запускаем на последней SetHandler application/x-httpd-php-7.2.7 ErrorLog $/error.log CustomLog $/access.log combined Ну вот и всё. Осталось только перезапустить apache и dnsmasq и пользоваться
sudo service apache2 restart sudo service network-manager restart Best Open Source Web Servers Linux
![]()
Websites are hosted on web servers, which also provide information to target consumers if they are accessed via HTTP (Hypertext Transfer Protocol). Since so many Debian web servers are open source, it is not hard to locate several kinds of web servers in the market. Not all web servers, however, are created equal. Some servers are created to meet specific and unique requirements. Some web servers get constant updates, some web servers are specifically made for a specific technology, and some web servers are recommended for stability over frequent updates. This article aims to compile a list of the top Linux-based open-source web servers and the programs they support. The top three Linux web servers are listed below:
Apache HTTP Server
Since its initial launch in 1995, Apache has developed quickly to rank as the most extensively used and prominent web server, supporting more than 37% of all internet sites.
Because it has so many add-ons that increase the capabilities of the web server, Apache, a web server created in the C programming language, is extremely adaptable. In addition, they contain mod file cache for caching, mod FTP to offer FTP for files both uploads and downloads, and mod_SSL for handling SSL/TLS data encryption.
Furthermore, thanks to its extensive library of add-ons, Apache adds different compatibility including IPv4 and IPv6 compatibility as well as the widely used HTTP, HTTP/2, and HTTPS protocols.
Installation of Apache HTTP Server in Ubuntu
Step 01: To download its most recent edition of Apache2, we should first upgrade the server source index. Enter the run command after opening the Console by pressing Ctrl+Alt+T.
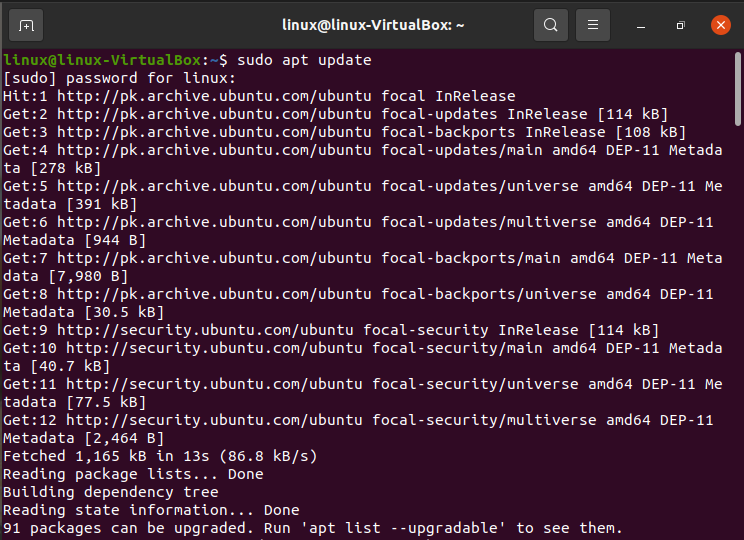
It should be noted that just a client with permissions can download, modify, or uninstall programs from a Linux machine.
Step 02: We will download the Apache2 proxy server next in this stage. Enter the following command in the terminal to do this:

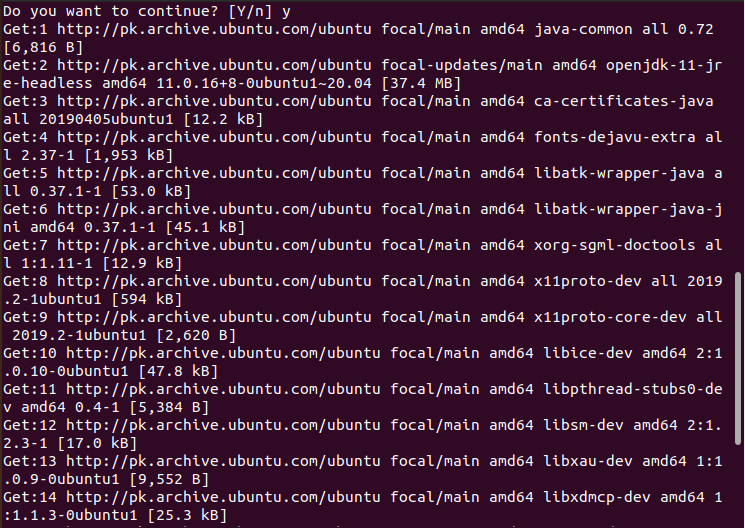
The system may request your permission by giving you a Y/n choice. To go further, press y. Then, press Enter. Following that, your machine will be configured to download the Apache2 web server and all of its prerequisites.
Step 03: After installation, do the following to check the Apache server version.

NGINX Server
Nginx, which would be called “Engine-X,” is an elevated, reliable open-source web server that also functions as a middleware, inverse proxy, IMAP/POP3 proxy server, and API connector. Nginx, which was created by Igor Sysoev in 2004 and has since gained notoriety to outpace competitors, has emerged to be one of the most dependable and secure web servers.
Nginx is well-known because of its ability and readiness, flexibility, and limited resource use. In contrast, Nginx can process up to 500,000 requests each second with minimal CPU usage when correctly tuned. Because of this, it outperforms Apache and is the best web server for serving busy websites.
Nginx relies heavily on settings, implementing adjustments simply. It shares many similarities with Apache, including the capability to support multiple protocols, SSL/TLS, basic HTTP identification, hosting services, bandwidth allocation, and URL modification, to name a few. Nginx currently controls 31% of the hosting industry for domains.
Installation of NGINX Server in Ubuntu
The guidance necessarily implies that the user has a valid SSH client installed on their computer. The following are the commands for the default software NGINX installation from a Linux Repository:
Step 01: The apt distribution system can be used to download Nginx from Ubuntu’s standard libraries because it is present there.
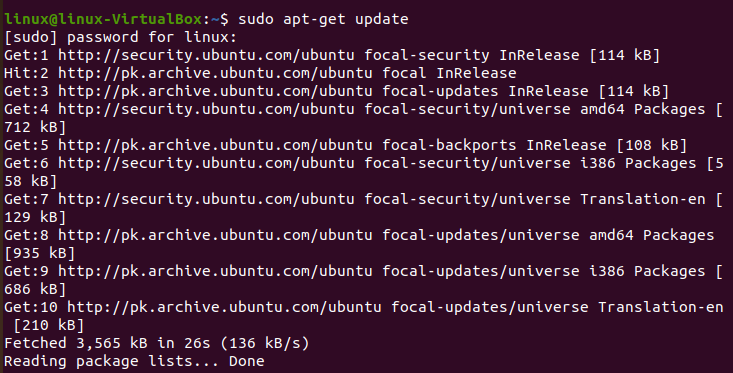
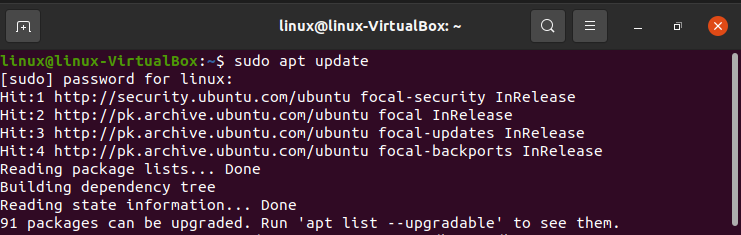
Step 02: To get access to the most up-to-date version descriptions since this is our first encounter with the apt encapsulation in this discussion, we will upgrade our local version index. Following that, we can install NGINX:

Apt will install Nginx and any other plugins to your server when you approve the operation.
Step 03: Check the edition of NGINX after installation.

Apache Tomcat Server
The Pure java processor, Java Expression Language, and Java Server web pages are all implemented using Apache Tomcat, which is free software. It appears to be the best choice for professionals who are creating and delivering Java-based apps.
Technically speaking, Tomcat differs from common web servers. It is a Java servlet that implements technical requirements like Java Server Pages (JSP) and Java Expression Language while also providing extra capabilities for communicating with Java servlets (Java EL).
The fact that Tomcat is designed particularly to serve Java-based content sets it distinct from other web servers. It was initially created to offer JSP features that the Apache HTTP server needs.
When developing plans that contain both PHP and Java content, Apache Tomcat can be launched in addition to the Apache HTTP server. As Tomcat manages the JSP capabilities, the Apache HTTP server can handle both static and dynamic content. However, Apache Tomcat is not a full-featured web server and is not as effective as more established web servers like Nginx and Apache when used alone.
Deployment of the Apache Tomcat Server in Ubuntu
Step 01: Launch the prompt on your Ubuntu computer by pressing “CTRL+ALT+T,” then enter the command listed underneath to upgrade the system directories.
Step 02: Java must be installed on your machine before you can begin installing Apache Tomcat Server. For this, use the command prompt to get “OpenJDK 11”.
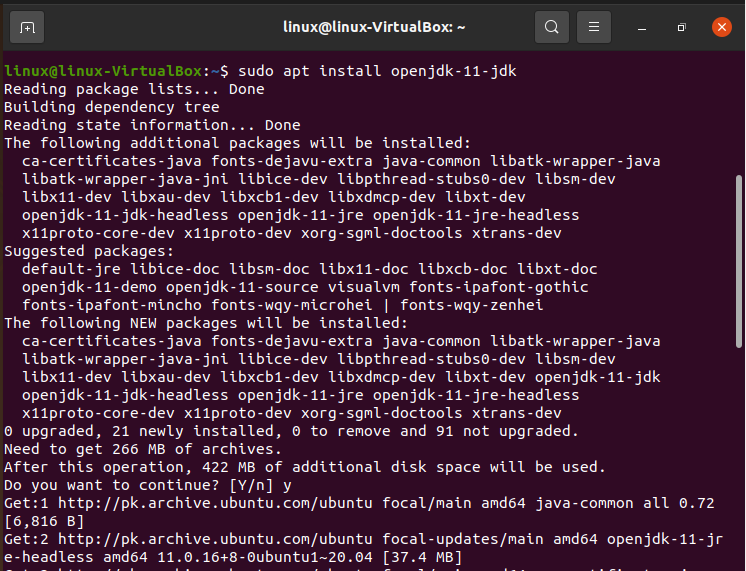
Step 03: Then, check the Java version that is currently installed.

Step 04: Ensure whether the Apache Tomcat package is present in the library after completing the steps. The major outcome is that the “tomcat9” module is available for downloading and says:

Step 05: Next, we will use the script provided below to build Apache Tomcat in Linux after locating the necessary package:

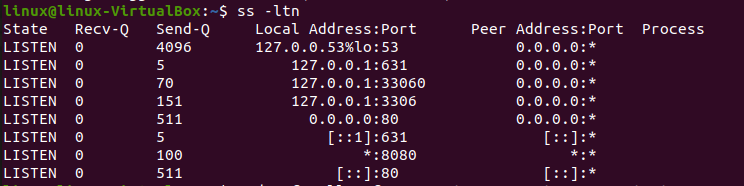
Step 06: System that would enable on Ubuntu, the Apache Tomcat Server launches immediately. You can employ the “ss” command to view the network power supply data to verify this activity:
Step 07: If your machine has the UFW barrier turned on, integrating peripherals could be problematic. So, enter the following “ufw” script to allow incoming traffic from any sort of source to port “8080”.

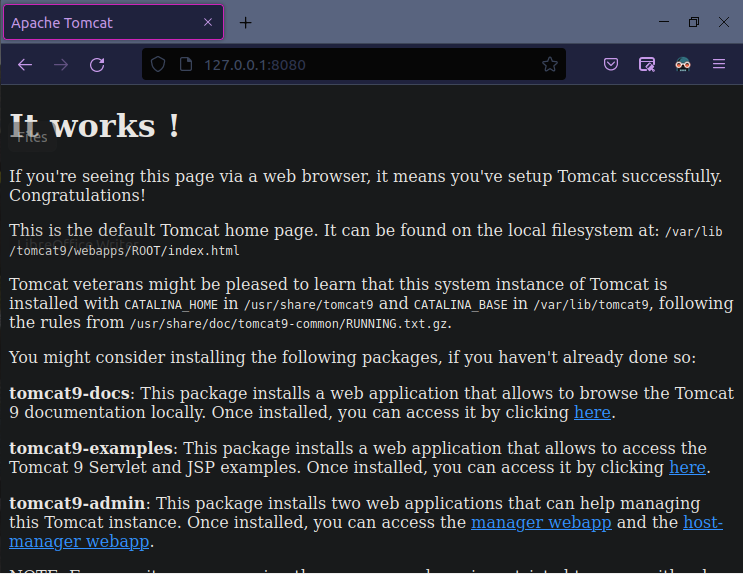
Step 08: Ubuntu’s Apache Tomcat Server is ought to be working. However at this stage, if you have strictly done all of the preceding instructions. Provide your platform’s loopback path and the Apache Tomcat Server port number to verify its operation:
Conclusion
The organization itself regularly releases upgrades and vulnerability solutions to keep the platform current. Recently, Apache, NGINX, and Apache Tomcat have grown in popularity and usage significantly. Over the past five years, Internet usage has undergone a significant transition. The number of individual internet users has been rising significantly every day. This article has all the details of the top 3 best Linux servers.
You must determine which web server to employ based on your needs, technological setup, and technical expertise. There isn’t a single web server that offers all the benefits and can be used in every circumstance.
About the author
Omar Farooq
Hello Readers, I am Omar and I have been writing technical articles from last decade. You can check out my writing pieces.