- How to uninstall manually installed Nvidia drivers?
- 2 Answers 2
- How do you remove Nvidia’s proprietary drivers? [duplicate]
- How to Clean Install NVIDIA Drivers on Debian 11
- Table of Contents:
- Completely Uninstalling Official NVIDIA Drivers from Debian 11
- Re-installing/Clean Installing Official NVIDIA Drivers on Debian 11
- Conclusion
- About the author
- Shahriar Shovon
- Как удалить драйвер Nvidia в Ubuntu
- Удаление драйвера Nvidia в Ubuntu
- Шаг 1. Переключение к консоль
- Шаг 2. Очистка конфигурации
- Шаг 3. Удаление драйвера
- Шаг 4. Переустановка nouveau
- Шаг 5. Обновление конфигурации
- Шаг 6. Готово
- Удаление драйвера, полученного из официального сайта
- Выводы
How to uninstall manually installed Nvidia drivers?
How do I uninstall manually installed Nvidia drivers 310.14 and revert to Noveau. I have Ubuntu 12.10.
Just for the sake of precision, the correct syntax is: sudo sh NVIDIA-Linux-x86-310.19.run -uninstall
This is not a duplicate of How can I uninstall a nvidia driver completely ? since that question is about drivers installed with the software centre or apt-get .
2 Answers 2
Yeap, was going to say what Karasu said. Just to add some information. If the driver you downloaded is called for example NVIDIA-Linux-x86-310.19.run then you would run:
sudo ./NVIDIA-Linux-x86-310.19.run --uninstall If you want to get the help for your Nvidia driver then do this:
NVIDIA-Linux-x86-310.19.run —help or a more extended version for it:
NVIDIA-Linux-x86-310.19.run -A which shows you the uninstallation option:
--uninstall Uninstall the currently installed NVIDIA driver. There are a couple of other nice options in case you want to use them like:
-a — Accept License
-s — Silent Mode
-q — no questions
-i — Driver information
—update — Check Nvidia site and update to the latest
For cases where you use the CUDA installer, in the documentation for it you can find more options on how to uninstall it, like this excerpt:
To uninstall the CUDA Toolkit, run the uninstallation script provided in the bin directory of the toolkit. By default, it is located in /usr/local/cuda-11.0/bin:
To uninstall the NVIDIA Driver, run nvidia-uninstall:
And others that can be seen when you run the —help parameter
How do you remove Nvidia’s proprietary drivers? [duplicate]
If you type that into the terminal, it will remove the propriatry drivers and go back to the stock drivers. I was having a similar issue and reformed the other day to figure out that the issues seem to be from the latest propriatary drivers. Once I uninstalled it and rebooted, everything was back to normal. Hope it helps!
to uninstall NVIDIA,then install Ubuntu Desktop
sudo apt-get remove --purge nvidia-* sudo apt-get install ubuntu-desktop sudo rm /etc/X11/xorg.conf echo 'nouveau' | sudo tee -a /etc/modules Thanks a bunch! NVidia drivers are crashing on Lenovo P50 and that causes login failure. I would suggest —reinstall for 2nd line and 3rd line is probably not required?
I recently installed the 310 drivers from NVidia and it also crashed my system. I found this link helpful:
The following is from the above link:
First solution Press the key combination Ctrl + Alt + F1 to enter the emergency terminal. Log in with your username and password and type:
sudo apt-get install linux-source sudo apt-get install linux-headers-3.5.0-17-generic Now uninstall the current driver:
sudo apt-get remove nvidia-current If it does not, try the command:
sudo apt-get remove nvidia-current-updates sudo apt-get remove nvidia-experimental-304 sudo apt-get remove nvidia-experimental-310 reinstall now (yes, it looks like a joke almost mockingly):
sudo apt-get install nvidia-current-updates If everything is successful, type:
And when you restart you should have solved!
In my Case I am on a Desktop and my NVIDIA graphics card failed permanently. So I bought an ATI graphics card and could not boot into Ubuntu. To get my machine able to boot into Ubuntu I had to go to the Recovery Console, Make it Read/Write and remove the NVIDIA drivers. You might have to hold Shift down while booting to get the GRUB option for Recovery Console. I used the following commands after Dropping to a Root Shell Prompt from the Recovery Console:
mount -n -o remount,rw / apt-get purge nvidia-current rm /etc/X11/xorg.conf reboot now In my case, this was not enough, since I installed ‘NVIDIA-Linux-x86-310.44’, previously. I believe it is the main reason why it breaks my unity-3d when the normal updated occur, something between the drivers and the compiled kernel was probably out of sync.
I did all the remove stuff:
Log on as my usual user, then do a ‘sudo -i’, this way I do not have to enter my password all the time and did :
apt-get remove nvidia-current-updates apt-get remove nvidia-current shutdown now -r Login directly from the console as my usual user, redo a ‘sudo -i’, went to the subdirectory where I downloaded ‘NVIDIA-Linux-x86-310.44.run’ file. And reinstalled using ‘sh NVIDIA-Linux-x86-310.44.run’, I answered to recompile. For sure I has numerous number of errors. But at the end it works and gave me back my unity-3d.
Good luck to others who had the same issues lately.
How to Clean Install NVIDIA Drivers on Debian 11
![]()
While installing the official NVIDIA drivers on Debian 11, things may go wrong in many ways. This may result in the official NVIDIA drivers not working on your computer/laptop. Or, in the worst-case scenario break the operating system and show you a black screen.
To solve this problem, you can try to uninstall the official NVIDIA drivers completely from your Debian 11 operating system and try to install the official NVIDIA drivers again.
In this article, I am going to show you how to uninstall the official NVIDIA drivers from Debian 11 completely so that you can clean install the official NVIDIA drivers on Debian 11.
Table of Contents:
Completely Uninstalling Official NVIDIA Drivers from Debian 11
First, open a Terminal app on Debian 11 from the Application menu.
Then, update the APT package repository cache with the following command:
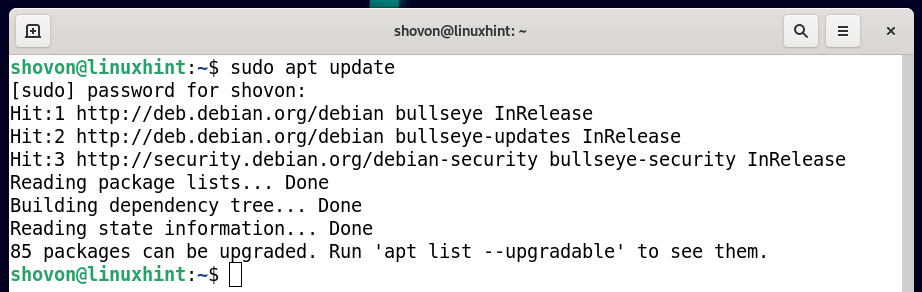
To remove the official NVIDIA drivers from Debian 11 completely, run the following command:

To confirm the uninstallation, press Y and then press .
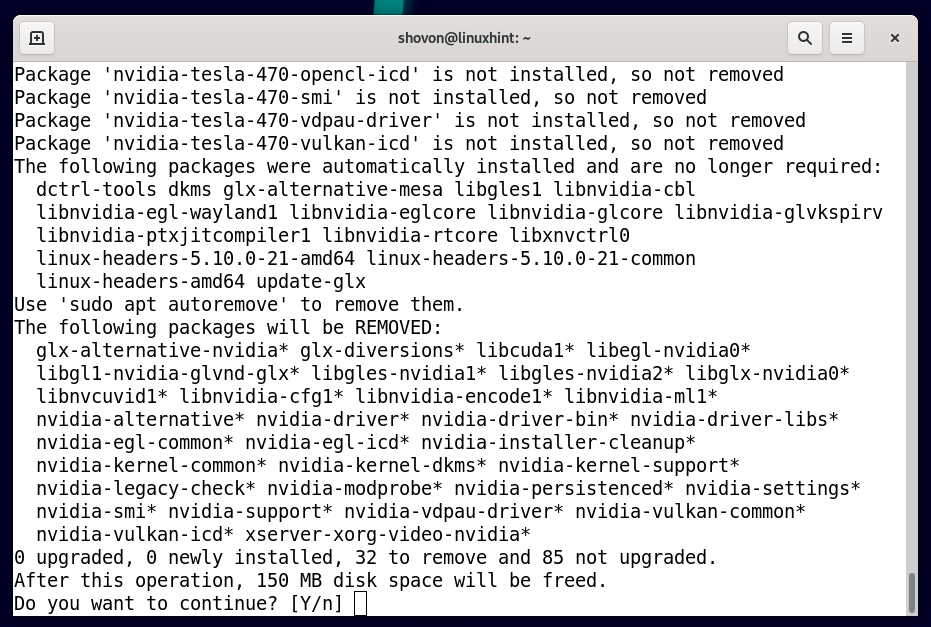
The official NVIDIA drivers are being uninstalled. It will take a while to complete.
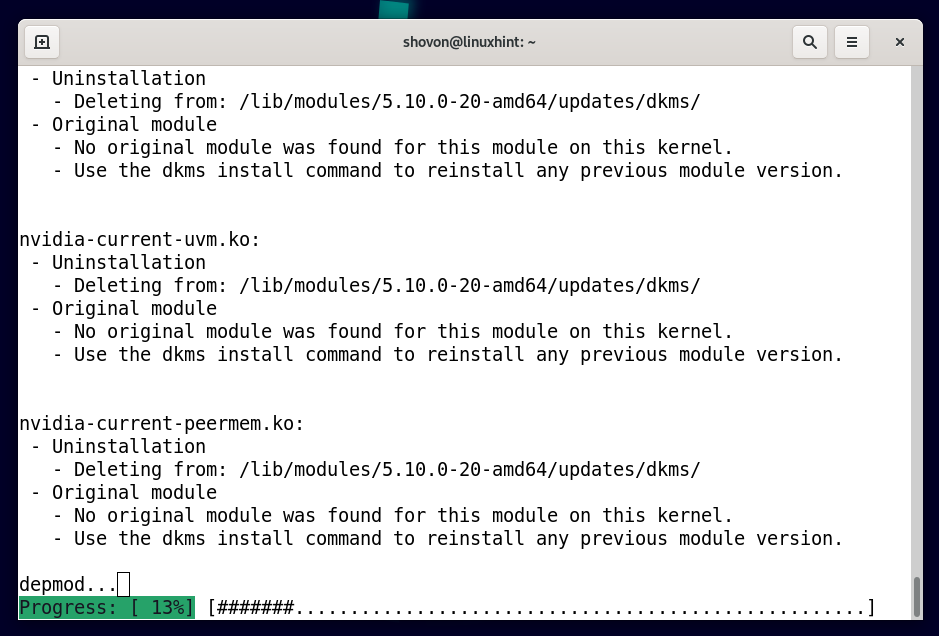
At this point, the official NVIDIA drivers should be uninstalled.
To remove the dependency packages of the official NVIDIA drivers as well, run the following command:

To confirm the action, press Y and then press .
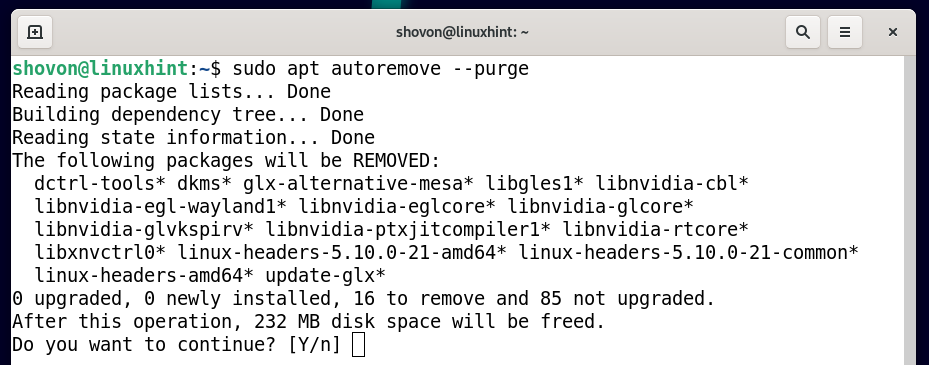
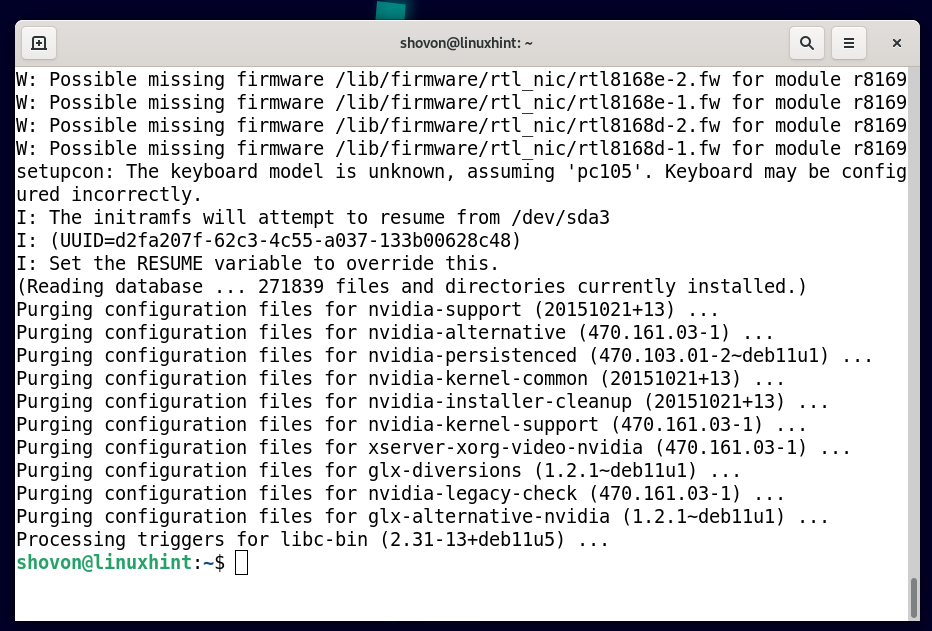
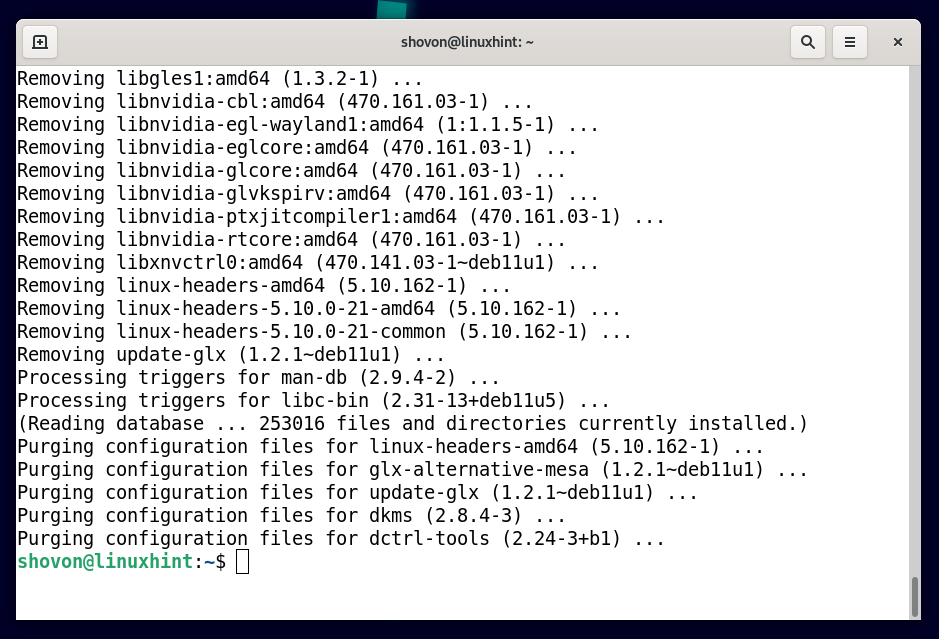
The dependency packages of the official NVIDIA drivers are being removed. It will take a while to complete.

At this point, all the dependency packages of the official NVIDIA drivers should be removed.
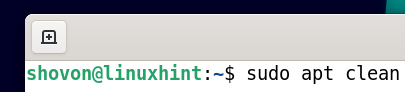
Run the following command to delete all the cached NVIDIA drivers packages along with the dependency packages to save disk space:
For the changes to take effect, run the following command to restart your computer/laptop:
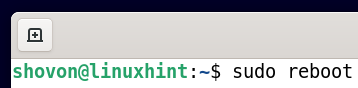
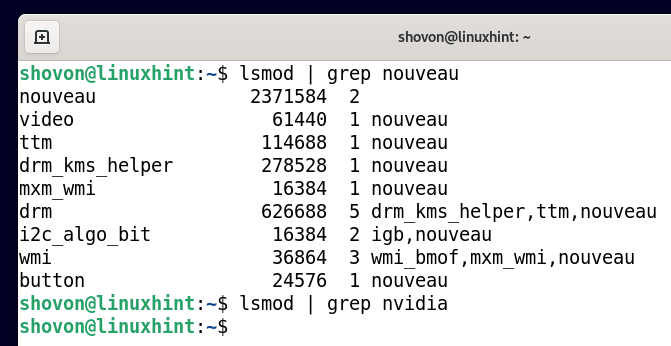
Once your computer/laptop starts, you should see that the nouveau kernel modules are used instead of the official nvidia kernel modules. So, the official NVIDIA drivers are uninstalled completely and Debian 11 successfully switched to the open-source Nouveau drivers.
Re-installing/Clean Installing Official NVIDIA Drivers on Debian 11
At this point, the official NVIDIA drivers should be uninstalled from Debian 11 completely. Now, you can try to install the official NVIDIA drivers on Debian 11 again and see if your problem is resolved. If you need any assistance in installing the official NVIDIA drivers on Debian 11, check the article Install NVIDIA Drivers on Debian 11.
Conclusion
I have shown you how to uninstall the official NVIDIA drivers from Debian 11 completely so that you can clean install the official NVIDIA drivers again on Debian 11 in case you have any problems getting the official NVIDIA drivers to work on Debian 11.
About the author
Shahriar Shovon
Freelancer & Linux System Administrator. Also loves Web API development with Node.js and JavaScript. I was born in Bangladesh. I am currently studying Electronics and Communication Engineering at Khulna University of Engineering & Technology (KUET), one of the demanding public engineering universities of Bangladesh.
Как удалить драйвер Nvidia в Ubuntu
Для видеокарты Nvidia в Linux выпускается два вида драйверов — открытые nouveau, с открытым исходным кодом, который разрабатывается сообществом и закрытый проприетарный драйвер Nvidia, от производителя.
Первый встроен в ядро и с ним никогда не возникает проблем, второй же устанавливается в систему ручным способом или с помощью пакетного менеджера. Он не всегда совместим с новыми версиями ядра, поэтому иногда после обновления драйвера или ядра до не поддерживаемой версии мы не сможем загрузиться в графический интерфейс во время следующей перезагрузки. Многие пользователи, которые еще не знают о такой особенности, часто сталкиваются с этой проблемой.
Чтобы исправить эту ошибку нужно просто использовать совместимую версию ядра или удалить проприетарный драйвер, так чтобы использовался nouveau. В этой инструкции мы рассмотрим как правильно выполняется удаление драйверов nvidia в Ubuntu.
Удаление драйвера Nvidia в Ubuntu
Удалить драйвер можно несколькими способами, все зависит от того каким образом выполнялась установка. Если вы устанавливали драйвер с помощью пакетного менеджера, то удалять его нужно тоже с его помощью. Для этого просто выполните все описанные ниже шаги.
Шаг 1. Переключение к консоль
Если вы видите перед собой черный экран, то сначала нужно переключиться в первую текстовую консоль TTY1, чтобы иметь возможность выполнять команды. Для этого нажмите одновременно Ctrl+Alt+F1, затем введите логин и пароль.
Шаг 2. Очистка конфигурации
С помощью утилиты nvidia-settings удалите из системы всю оставшуюся конфигурацию:
sudo nvidia-settings —uninstall
Шаг 3. Удаление драйвера
Дальше можно полностью удалить драйвер. Чтобы выполнить полное удаление драйверов видеокарты Nvidia, сначала найдите все её пакеты в системе:
Теперь удалите их все, кроме пакета nvidia-common. Просто перечислите их в этой команде, разделяя имена пакетов пробелами:
sudo apt remove —purge пакет1 пакет2
sudo apt remove —purge nvidia-current
Мы могли бы просто написать nvidia-*, но тогда будет удален пакет nvidia-common, а от него зависит ubuntu-desktop. Это значит, что вы снесете все программы окружения рабочего стола. Конечно, его можно потом установить, но это потеря времени.
Шаг 4. Переустановка nouveau
Затем переустановите пакеты nouveau:
sudo apt remove —purge xserver-xorg-video-nouveau xserver-xorg-video-nv
sudo apt-get install xserver-xorg-video-nouveau
sudo apt install —reinstall libgl1-mesa-glx libgl1-mesa-dri xserver-xorg-core
Шаг 5. Обновление конфигурации
Осталось обновить файлы настройки xorg, для этого выполните:
sudo dpkg-reconfigure xserver-xorg
Шаг 6. Готово
После выполнения всех этих действий, удаление драйвера Nvidia в Ubuntu будет завершено. Вы можете перезагрузить свой компьютер и полноценно использовать систему.
Удаление драйвера, полученного из официального сайта
Удалить драйвер Nvidia Ubuntu если драйвер был получен из официального сайта не так сложно, как в предыдущем варианте. Но тут вам нужен сам файл установщика. Перейдите в папку с файлом установщика и выполните его с опцией —uninstall, например:
Если сейчас у вас нет установщика, вы можете скачать его с помощью такой команды, для x86_64:
Затем нужно дать права на выполнение:
chmod u+x ./NVIDIA-Linux-x86_64-445.87.run
После выполнения первой команды удаление драйверов Nvidia в Ubuntu будет полностью завершено и вы сможете перезагрузить компьютер чтобы работать в вашей системе.
Выводы
Проблемы с драйверами могут возникнуть у всех и важно уметь их решать. Из этой статьи вы узнали как удалить драйвер Nvidia Ubuntu и я надеюсь, что это поможет вам в сложной ситуации.
Обнаружили ошибку в тексте? Сообщите мне об этом. Выделите текст с ошибкой и нажмите Ctrl+Enter.