- Install and Configure Samba
- What you’ll learn
- What you’ll need
- 2. Installing Samba
- 3. Setting up Samba
- What we’ve just added
- 4. Setting up User Accounts and Connecting to Share
- Connecting to Share
- If you’d like to take your configuration further…
- About This Guide
- Procedures
- Source
- Общая папка в Ubuntu: зачем нужна и как создать
- Устанавливаем сервер Samba
- Установка
- Настройки
- Создаем общую папку Samba, доступную для всех
- Редактируем настройки
- Перезапуск Samba
- Проверка правильности конфигурации Samba
- Защищенная папка Samba, доступная только по паролю
Install and Configure Samba
A Samba file server enables file sharing across different operating systems over a network. It lets you access your desktop files from a laptop and share files with Windows and macOS users.
This guide covers the installation and configuration of Samba on Ubuntu.
What you’ll learn
What you’ll need
If you have everything ready, let’s dive straight into the installation process on the next step!
Originally authored by Aden Padilla.
2. Installing Samba
sudo apt update sudo apt install samba We can check if the installation was successful by running:
The following should be its output:
samba: /usr/sbin/samba /usr/lib/samba /etc/samba /usr/share/samba /usr/share/man/man7/samba.7.gz /usr/share/man/man8/samba.8.gz 3. Setting up Samba
Now that Samba is installed, we need to create a directory for it to share:
The command above creates a new folder sambashare in our home directory which we will share later.
The configuration file for Samba is located at /etc/samba/smb.conf . To add the new directory as a share, we edit the file by running:
sudo nano /etc/samba/smb.conf At the bottom of the file, add the following lines:
[sambashare] comment = Samba on Ubuntu path = /home/username/sambashare read only = no browsable = yes Then press Ctrl-O to save and Ctrl-X to exit from the nano text editor.
What we’ve just added
Now that we have our new share configured, save it and restart Samba for it to take effect:
sudo service smbd restart Update the firewall rules to allow Samba traffic:
4. Setting up User Accounts and Connecting to Share
Since Samba doesn’t use the system account password, we need to set up a Samba password for our user account:
sudo smbpasswd -a username Note
Username used must belong to a system account, else it won’t save.
Connecting to Share

On Ubuntu: Open up the default file manager and click Connect to Server then enter:

On macOS: In the Finder menu, click Go > Connect to Server then enter:
On Windows, open up File Manager and edit the file path to:
Note: ip-address is the Samba server IP address and sambashare is the name of the share.

You’ll be prompted for your credentials. Enter them to connect!
If you’d like to take your configuration further…
About This Guide
In this text, I teach how to create a network share via Samba using the CLI (Command-line interface/Linux Terminal) in an uncomplicated, simple and brief way targeting Windows users.
Procedures
sudo apt-get update sudo apt-get install samba
Note: Samba uses a separate set of passwords than the standard Linux system accounts (stored in /etc/samba/smbpasswd), so you'll need to create a Samba password for yourself. This tutorial implies that you will use your own user and it does not cover situations involving other users passwords, groups, etc.
Tip1: Use the password for your own user to facilitate.
Tip2: Remember that your user must have permission to write and edit the folder you want to share. Eg.: sudo chown /var/opt/blah/blahblah sudo chown : /var/opt/blah/blahblah
Tip3: If you're using another user than your own, it needs to exist in your system beforehand, you can create it without a shell access using the following command : sudo useradd USERNAME --shell /bin/false You can also hide the user on the login screen by adjusting lightdm's configuration, in /etc/lightdm/users.conf add the newly created user to the line : hidden-users=
sudo nano /etc/samba/smb.conf
Once "smb.conf" has loaded, add this to the very end of the file: [] path = /home// valid users = read only = no
Tip: There Should be in the spaces between the lines, and note que also there should be a single space both before and after each of the equal signs.
sudo service smbd restart
sudo apt-get install smbclient # List all shares: smbclient -L /// -U # connect: smbclient /// -U
Note: The default user group of samba is "WORKGROUP".
Source
How to Create a Network Share Via Samba Via CLI (Command-line interface/Linux Terminal) — Uncomplicated, Simple and Brief Way! (последним исправлял пользователь 97e64b0f 2015-10-06 20:46:34)
The material on this wiki is available under a free license, see Copyright / License for details
You can contribute to this wiki, see Wiki Guide for details
Общая папка в Ubuntu: зачем нужна и как создать

Основная цель такой папки — возможность обмена файлами в локальной сети между Linux и Windows-машинами. Специфической привязки к 1С-направлению здесь нет, но такая папка поможет разработчикам хранить файлы конфигураций 1С, а также выгрузки документации по разработке и отчеты для обеспечения оперативного доступа при отсутствии ответственного сотрудника на месте.
В целом Ubuntu поставляется с общей папкой в домашнем каталоге. Она недоступна по умолчанию, но настраивается несколько различных типов обмена файлами в локальной сети компании. Изначальное предназначение папки — инструмент личного обмена файлами.
Главное стартовое условие — компьютеры, между которыми предполагается организовать обмен, должны быть локальной сети.
Устанавливаем сервер Samba
В качестве предпочтительного способа мы выбрали сервер Samba — есть и другие способы, но они требуют наличие Интернета. Samba — проверенное годами решение для ситуаций, когда файлы нужно хранить на сервере Linux.
Samba — Linux, Windows или Mac OS совместимый пакет программного обеспечения, позволяющий обмениваться файлами, документами и принтерами по сети.
Установка
apt install samba samba-common
Для тестирования настроек устанавливаем клиент Samba.
apt install samba-common-bin
Настройки
Скопируем шаблонный файл настроек на случай возврата в исходное состояние.
cp /etc/samba/smb.conf /etc/samba/smb.conf.backup
Удаляем все закомментированные строки из файла настроек.
bash -c ‘grep -v -E «^#|^;» /etc/samba/smb.conf.backup | grep . > /etc/samba/smb.conf’
Создаем отдельного системного пользователя
useradd -m -c «Name_User» -s /bin/bash usersamba
Создаем общую папку Samba, доступную для всех
Настраиваем права доступа к папке:
chown -R nobody:nogroup /home/usersamba/smb/
chmod ug+rwx /home/usersamba/smb/
chmod -R 0775 /home/usersamba/smb/
chown root:»пользователи домена» /home/usersamba/smb/
Редактируем настройки
sudo gedit /etc/samba/smb.conf
Добавляем в конец файла /etc/samba/smb.conf следующие строки: usersamba заменяем на имя пользователя компьютера с Samba.

Папка будет открыта для чтения и записи.
Перезапуск Samba
systemctl restart smbd.service
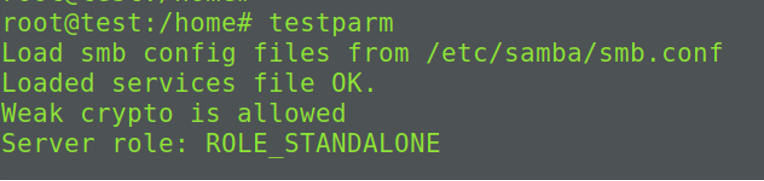
Проверка правильности конфигурации Samba
Защищенная папка Samba, доступная только по паролю
Для того, чтобы защитить открытую папку паролем, достаточно изменить параметр guest ok на no.
Чтобы скрыть в обзоре сети папку, можно изменить параметр browsable на no.