How to Send Mail via External SMTP server using mailx command in Linux?
By default, the mail command in Linux will make use of the local SMTP server running on port 25 for sending mails. But if you want to send mails using external SMTP server such as smtp.gmail.com or SMTP server of your organization, then you can use mailx command. Using mailx command is quite easy, all you need to do is install mailx package and pass few SMTP related arguments to the command
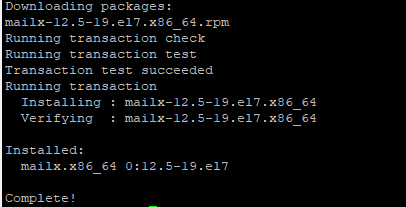
Install mailx on RHEL/CentOS:
Install mailx on Debian/Ubuntu:
Send mails with External SMTP server using mailx command:
# echo "The actual message goes here" | mailx -v -r "user@domain.com" -s "The actual subject line goes here" -S smtp="smtp.domain.com:587" -S smtp-use-starttls -S smtp-auth=login -S smtp-auth-user="user@domain.com" -S smtp-auth-password="password123" -S ssl-verify=ignore the_recipient_email@domain.com
Note: Make necessary changes in the above command – such as smtp server address, port, connection type, smtp username and password.
Was this article helpful?
About The Author

David Peter
Related Articles
- How to shrink a qcow2 Windows VM image on Linux
- [Linux]: How to Change Hostname on CentOS/RHEL – 7/8
- No such file or directory c++ Error [CentOS]
- How to configure Open vSwitch bridge for OpenStack
- Too many connections for neutron-db-manage [MySQL]
- How to manually install higher version of PIP for Python v2.7
Отправка почты из командной строки (консоли) Linux

21.04.2021

VyacheslavK

CentOS, Linux, Ubuntu

комментария 4
В данной статье мы рассмотрим основные утилиты для отправки электронных писем по SMTP из консоли Linux – mail/mailx/mutt. Данная инструкция применима ко всем современным дистрибутивам Linux.
Для отправки почты из командной строки Linux вам нужно установить Mail User Agent, которые умеет подключаться к smtp серверам для отправки и получения почты.
В первую очередь рассмотрим утилиту mail (mailx). Для ее установки, выполните:
Mailx содержит в себе несколько утилит для работы с почтой, мы же подробно остановимся на mail.
Обратите внимание, что на вашем хосте обязательно должен быть установлен какой-нибудь почтовый сервер. Например, postfix или sendmail:
Основные опции при отправке писем:
Чтобы отправить простое сообщение из консоли Linux, воспользуйтесь командой:
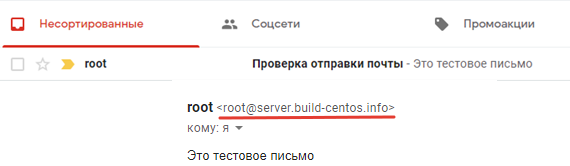
# echo «Это тестовое письмо» | mail -s «Проверка отправки почты» [email protected]
Проверьте, что письмо доставлено в ящик.
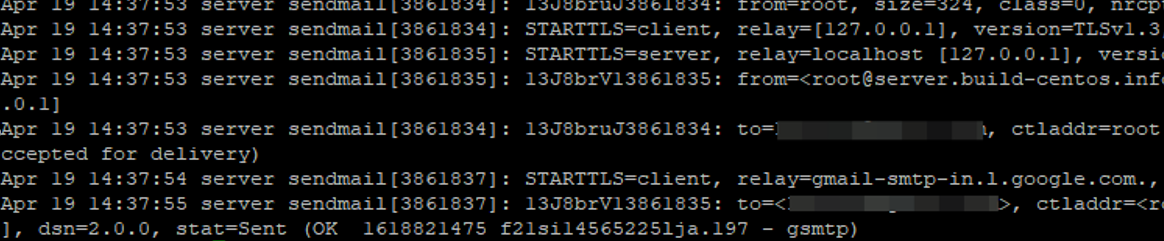
Если вам нужно посмотреть подробные логи отправки писем по SMTP, их можно посмотреть в файле:
Без указания дополнительных опций письмо отправляется с дефолтного почтового ящика и скорее всего будет помечено как спам в большинстве популярных почтовых сервисах.
Чтобы указать другого отправителя письма (mail from), используйте ключ -r:
# echo «Это тестовое письмо 2» | mail -s «Проверка отправки почты 2» -r [email protected] [email protected]
Если нужно отправить письмо нескольким получателям, перечислите их через запятую:
# echo «Это тестовое письмо 3» | mail -s «Проверка отправки почты 3» -r ad[email protected] [email protected], [email protected]

Как видите, письмо было отправлено двум получателям. А с помощью ключа -c вы можете отправить копию письма на указанный ящик:
# echo «Это тестовое письмо 4» | mail -s «Проверка отправки почты 4» -r [email protected] -c [email protected]
Если вам нужно прикрепить к письму файл, укажите путь к файлу в параметре –a.
# echo «Файл во вложении» | mail -s «Проверка вложения» -a /root/test.txt -r [email protected] [email protected]
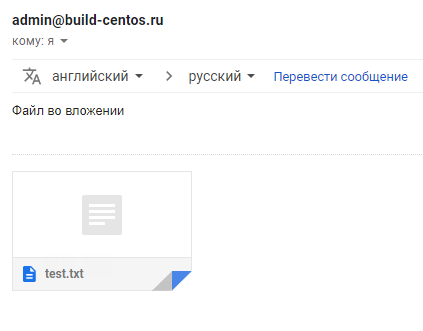
В указанных почтовый ящик должно прийти письмо с вложением. Если нужно отпрравить два или более файлов, добавьте каждый файл через собственный атрибут –a:
# echo «Вложены 2 файла » | mail -s «Вложение нескольких файлов » -a /root/test.txt -a /root/message.log -r [email protected] [email protected]
Вы можете отправить письмо через конкретный SMTP сервер. Его имя и порт подключения указываются в параметре -S smtp= :
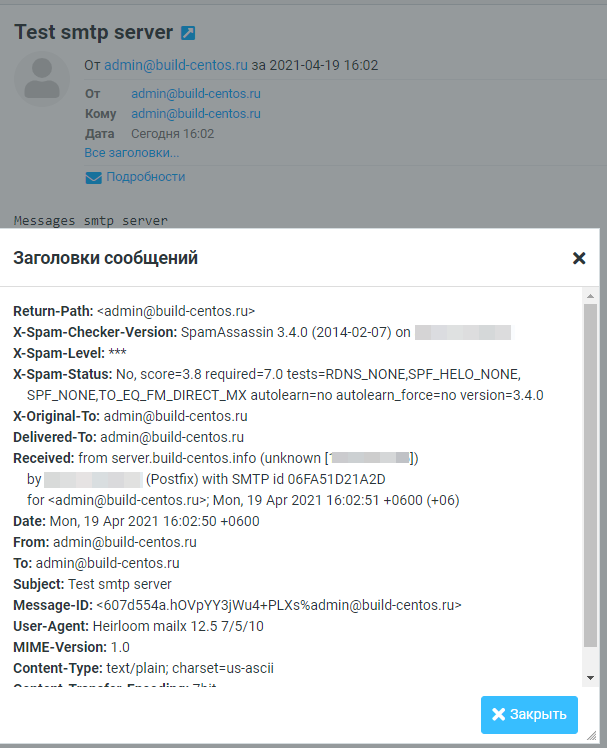
# echo «Messages smtp server» | mail -s «Test smtp server» -S smtp=»build-centos.ru:25″ -r [email protected] [email protected]
Если удаленный SMTP сервер требует авторизации перед отправкой, вы можете указать имя пользователя и пароль с помощью параметров -S smtp-auth-user и -S smtp-auth-password.
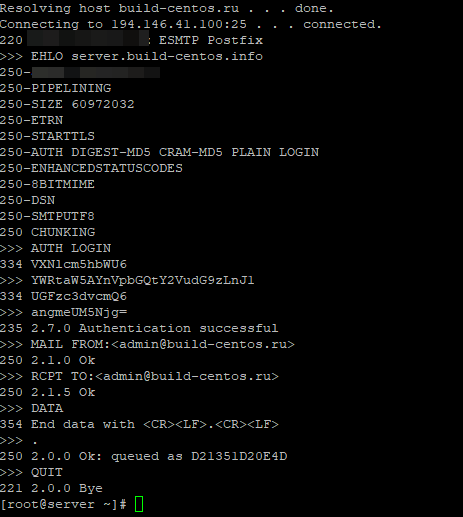
При запуске этой команды перед вами появятся список SMTP команд для подключения, авторизации и отправки почты.
Если для отправки нужно использовать TLS шифрование и игнорировать проверку подлинности сертификата сервера, добавьте параметры:
-S smtp-use-starttls
-S ssl-verify=ignore
Чтобы не задавать все параметры в командной строке, вы можете указать их в файле ~/.mailrc. Например, добавьте в этот файл такие строки:
set smtp-use-starttls set ssl-verify=ignore set smtp=smtp://smtp.gmail.com:587 set smtp-auth=login set smtp-auth-u[email protected] set smtp-auth-password=sdf#23ddsH3sq9- set from= [email protected]
Теперь для отправки письма через релей Gmail с аутентификацией достаточно выполнить команду:
$ echo «Test mail » | mail -v -s «Testing gmail auth» [email protected]
Вы можете использовать команду отправки почты для в своих bash скриптом. Например, создайте следующий скрипт, которые будет отправлять вам информацию по свободному месту на дисках:
Добавьте этот скрипт в планировщик cron и вы будете регулярно получать письма с информацией о свободном месте на вашем сервере.
0 0 * * * /home/root/freespace.sh
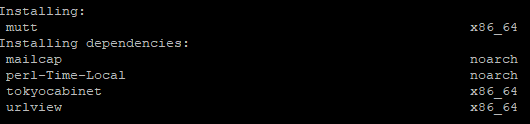
Еще одна популярная утилита для отправки почты в Linux это mutt:
# sudo apt-get install mutt — для Debian/Ubuntu
# yum install mutt -y — для CentOS/Redhat
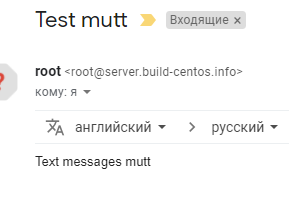
Синтаксис mutt такой же, как и у mail/ mailx:
# echo «Text messages mutt» | mutt -s «Test mutt» [email protected]
Если вам нужно просто проверить работу удаленного SMTP сервера, вы можете отправить письмо вручную через telnet.
Таким образом, вы можете легко отправлять письма из командной строки, встраивать отправку email оповещений в свои bash скрипты или ватчдоги (удобно для контроля их выполнения).
![]() Предыдущая статья Следующая статья
Предыдущая статья Следующая статья ![]()
Send mail from command line with external smtp server on Linux
The default mail command on the Linux terminal, uses the local smtp server (mta) on port 25 to send emails. However at times you need to specify an external smtp server to use for sending mails.
For example you have just setup an smtp server, like Postfix or Exim, then you would want to test it out to check if it is receiving and relaying emails properly or not.
Being able to send mails from command line using this external smtp server is quick rather than having to setup a mail client like Thunderbird on your local machine.
There are 2 command line utilites called mailx and swaks that can be used to send mails using external smtp server. These are quite useful when you need to send emails from a bash script in an automated manner.
1. mailx command
The mailx command is available from many different packages like mailutils, heirloom-mailx etc. First you need to use the aptitude command to search the mailx package available for your system. Here is an example
$ aptitude search mailx p bsd-mailx - simple mail user agent p bsd-mailx:i386 - simple mail user agent v mailx - v mailx:i386
To find out which mailx command your system is using, run the readlink command. Here is a sample output.
$ readlink -f /usr/bin/mailx /usr/bin/bsd-mailx $ readlink -f /usr/bin/mailx /usr/bin/mail.mailutils
Not all mailx variants can use external smtp servers to send mail. Only the one that comes from the s-nail package (pulled by heirloom-mailx) can do it.
We shall be using heirloom-mailx since it allows to specify smtp connection details in a single command and issue and email quickly.
$ sudo apt-get install heirloom-mailx
Now send an email with an external smtp server like this —
echo "This is the message body and contains the message" | mailx -v -r "[email protected]" -s "This is the subject" -S smtp="mail.example.com:587" -S smtp-use-starttls -S smtp-auth=login -S smtp-auth-user="[email protected]" -S smtp-auth-password="abc123" -S ssl-verify=ignore [email protected]
Here is a step by step version of the same command —
$ echo "This is the message body and contains the message" | mailx -v \ > -r "[email protected]" \ > -s "This is the subject" \ > -S smtp="mail.example.com:587" \ > -S smtp-use-starttls \ > -S smtp-auth=login \ > -S smtp-auth-user="[email protected]" \ > -S smtp-auth-password="abc123" \ > -S ssl-verify=ignore \ > [email protected]
Make sure to use the correct settings, like port number, authentication mechanism etc. The command would produce verbose output giving full details of the smtp communication that goes on behind, making it very easy to test and debug.
Note: The package heirloom-mailx was removed from Ubuntu version 18 onwards. Now you have to install the s-nail package.
$ sudo apt-get install s-nail
The s-nail command is the same as heirloom mailx command. Just the name is different. Run the same command above by replacing mailx with s-nail and it should work.
If you are using the latest version of s-nail (14.9.x) the syntax for specifying the smtp server details might be slightly different. Check the latest manual here
2. Swaks command
Swaks (Swiss army knife for SMTP) is a simple command line tool that can be used to test smtp servers to check if they are doing they job properly. It supports TLS as well.
Install swaks on Ubuntu/Debian with the following command
$ sudo apt-get install swaks
$ echo "This is the message body" | swaks --to [email protected] --from "[email protected]" --server mail.example.com --auth LOGIN --auth-user "[email protected]" --auth-password "abc123" -tls
All the options are pretty self explanatory. The «—server» option specifies the external SMTP server to use, «—auth» specifies the type of authentication. The «-tls» option tells swaks to use STARTTLS.
Check the man page for more options.
A Tech Enthusiast, Blogger, Linux Fan and a Software Developer. Writes about Computer hardware, Linux and Open Source software and coding in Python, Php and Javascript. He can be reached at [email protected] .
5 Comments
- Boris July 16, 2021 at 3:03 pm Telnet method : telnet your.smtp.server 25
HELO your.ip
MAIL FROM:
RCPT TO:
DATA
Subject: YOUR SUBJECT
Your message then end with a point
.
(then disconnect)