- How to start a graphical interface application on remote Linux server from Mac OS via SSH and X11 forwarding? A 5 minutes tutorial
- SSH: the easy way
- X11 forwarding
- Setting up on Mac OS and give it a try
- Installing a fast Linux server on an M1-based Mac
- How to access Linux server using SSH in Windows, Linux and Mac OS.
- Part 2: Access Linux server using SSH in Linux Ubuntu
- Part 2: Access Linux server using SSH in Mac OS
- SSH Connect to Linux Server from a Mac using SOCKS5 Proxy
- Installation
- Useful Commands
- Set SOCKS5 Password
- SSH session
- Port Forwarding
- Copy files via SSH
- Conclusion
How to start a graphical interface application on remote Linux server from Mac OS via SSH and X11 forwarding? A 5 minutes tutorial
Today I want to share how to run a graphical interface application on remote Linux server from Mac OS. In my daily work, it happens that we often need to use SSH to connect to a remote server.
SSH: the easy way
In case you don’t know how that works, it’s as simple as it can be. On Mac OS, open terminal and type:
That’s all you need. This post assumes you already know why you are connecting to a remote server and you have a remote server running which you can ssh to. SSH comes in quite handy for me in daily work. For example, I have a few Linux VMs running headless on my Mac OS host, and I use ssh to connect to them and do stuffs. I also use SSH to connect to my Raspberry Pi server. If you want to know how to set up SSH server, check out my previous post.
X11 forwarding
Our question here is how do we start a GUI program on the remote machine, and we want to see the interface locally. Sometimes it is just more convenient.
For example, when I want to quickly inspect packet logs using wireshark, or just quickly log in to an account using FireFox on the remote machine. What we need to enable this scenario is called “X11 forwarding”. It is a way to allow us to start a remote applications, and forward the display to our local machine.
Setting up on Mac OS and give it a try
On Mac OS, this just needs a little bit of work.
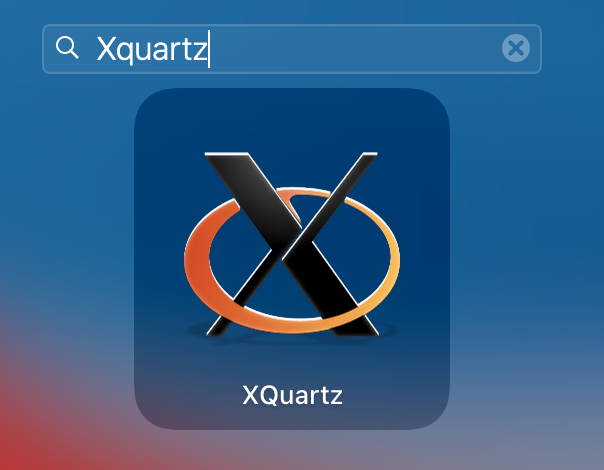
- We first need to install XQuartz. It’s an X server software on Mac OS. X11 forwarding forwards the display to the X server.
- Once installed, start XQuartz from Applications.
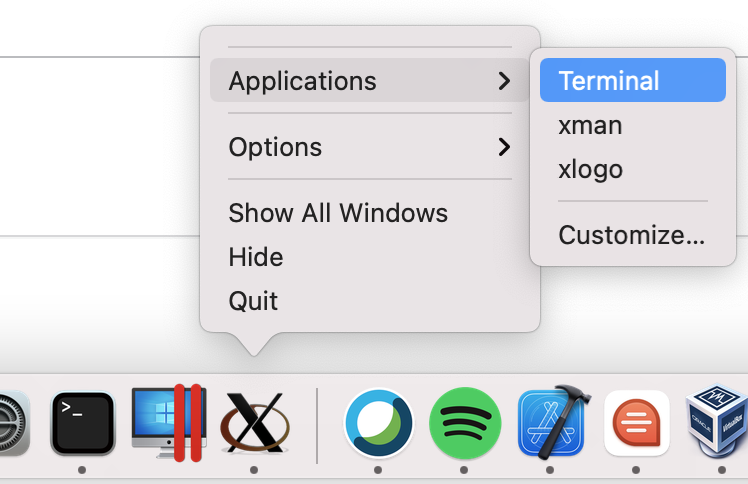
3. We should now see XQuartz appears on the dock. We can right-click on it and bring a xterm terminal. Or, alternatively, just start the Mac OS terminal.
4. We can then connect to our remote server with X11 forwarding. This requires the -X option.
5. You are now logged in to your remote server. Try to start a GUI from command line. My remote machine is a Ubuntu 18.04 machine and it has Firefox installed. So I would use FireFox:
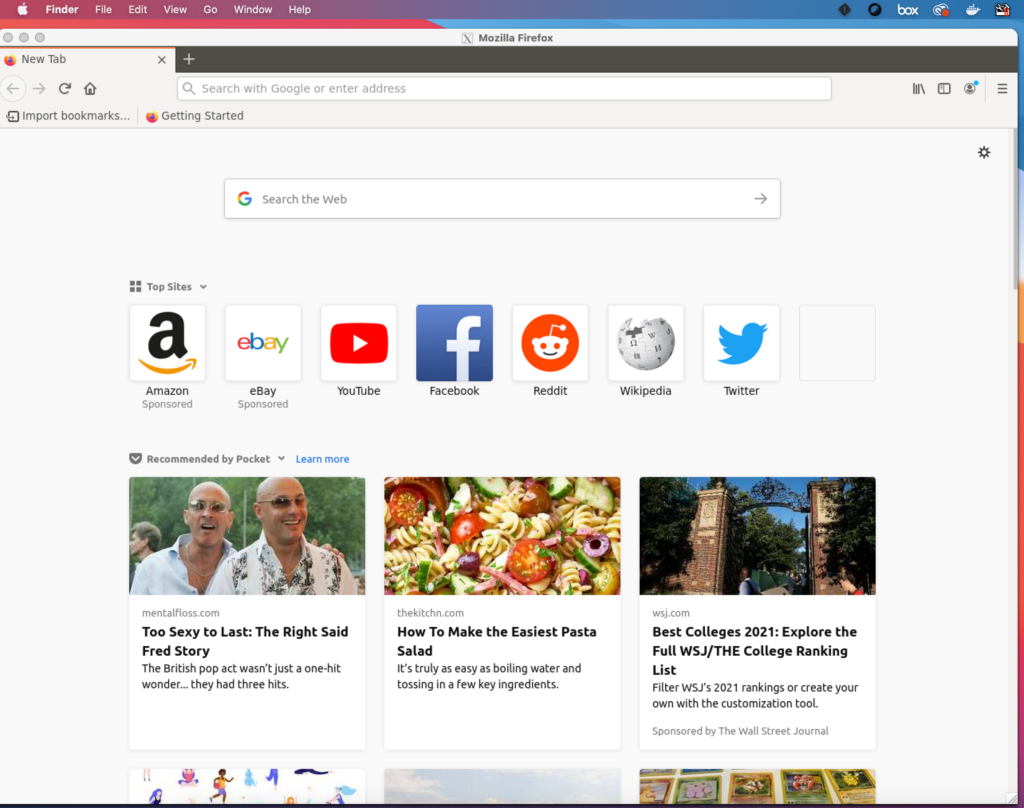
Done! We have an Ubuntu FireFox window showing up on Mac OS.
Installing a fast Linux server on an M1-based Mac
One of the biggest worries that IT users have regarding Apple’s new ARM-based M1 platform is the ability to run virtual machines (VMs) of other operating systems using hypervisor software. And while it’s possible to run virtual machines of both Windows and Linux operating systems made for the Intel platform on the M1, the performance cost of translating Intel instructions to ARM is high (even with the optimizations Apple has within their M1 CPU). Luckily, the most common VM that an IT systems administrator or developer will install is Linux, and ARM versions of Linux have been mainstream for well over a decade now.
Instead of buying an expensive Parallels or VMWare Fusion license to run a VM of Linux (slowly) on the M1, you can use the free UTM app. UTM leverages the native hypervisor framework in macOS alongside the open source Qemu framework that is used for virtualizing operating systems on Linux. If you run an Intel version of Linux in UTM, Qemu will translate the Intel instructions to run on the M1 and there will be a noticable performance cost. However, if you run an ARM version of Linux in UTM, Qemu will run it directly on the M1 at near native speed. Better yet, the VirtIO storage bus used by Qemu and the Linux kernel can access the underlying storage in the Mac at near native speed. In short, UTM allows you to run ARM-based Linux VMs very very fast on the M1 platform for free.
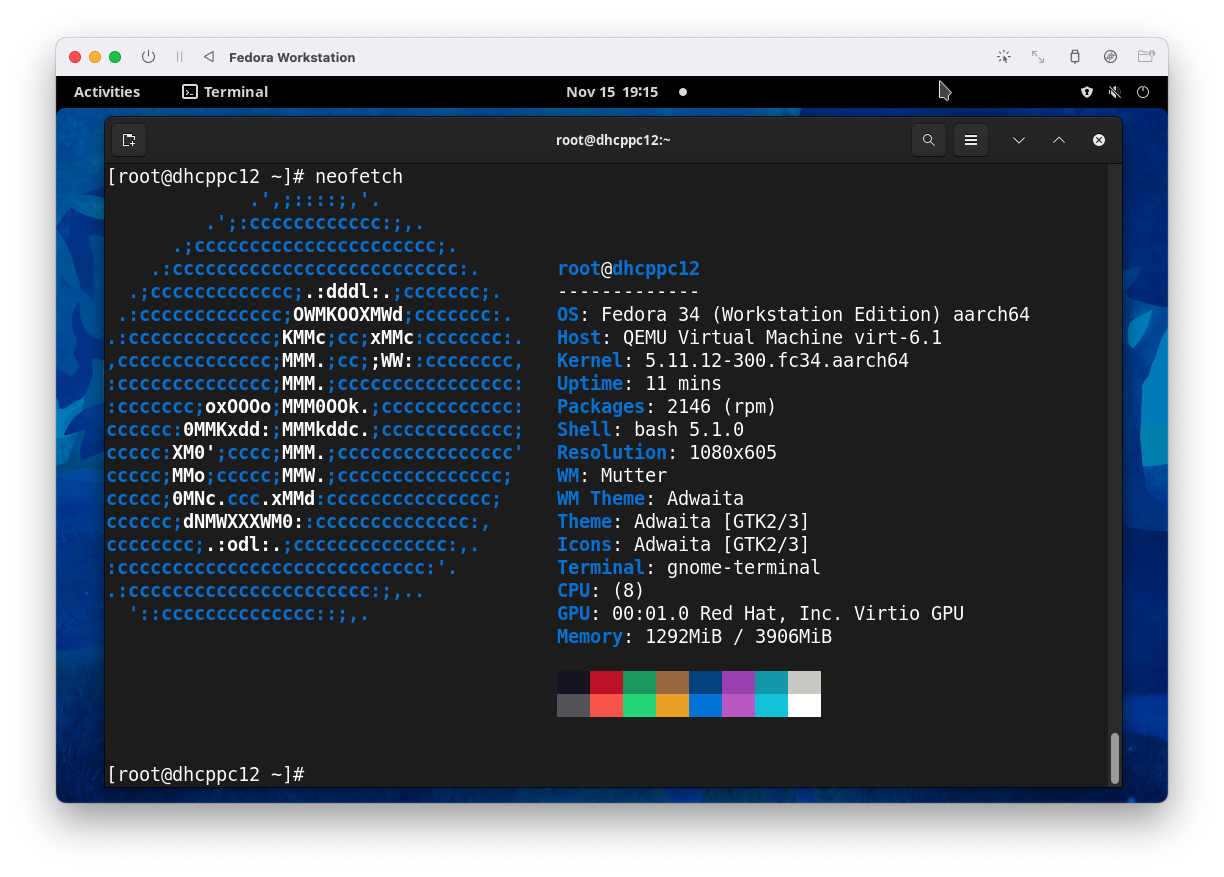
To get started, you should first download an ARM-based Linux distribution. If you need a graphical desktop, I recommend the latest version of Fedora Workstation (shown below in UTM). If you just want to host a server (no graphical desktop), I recommend Ubuntu Server as it will likely be the same one hosting your services and Web apps in the cloud. You can visit https://getfedora.org/en/workstation/download/ to download the DVD ISO image for the latest Fedora Workstation (aarch64) or https://ubuntu.com/download/server to download the DVD ISO image for the latest Ubuntu Server (ARM).
Next, you can perform the following steps to create a Linux server VM using UTM:
- Download the free version of UTM from https://mac.getutm.app and copy it to your Applications folder.
- Open UTM and click + to create a new VM and click Virtualize , and Linux .
- On the Linux page, deselect Use Apple Virtualization (this ensures you are also using Qemu — not just the native hypervisor framework in macOS). Click Browse , select the DVD ISO image you downloaded and click Next .
- On the Hardware page, specify the amount of memory you’d like to give your VM and click Next . For Linux with a graphical desktop (e.g. Fedora Workstation), specify 4096 MB to give your VM 4GB of memory. For a Linux server without a graphical desktop (e.g. Ubuntu Server), specify 1024 MB to give your VM 1GB of memory.
- On the Storage page, specify the size of the dynamically-expanding virtual hard disk file that will be created and click Next . The default value is 64 GB , but you can increase this value to accomodate the software you plan on installing on your Linux VM.
- On the Shared Directory page, optionally click Browse and select a folder on your system that you’d like to be made available to your VM for easy file transfer. Click Next when finished.
- On Summary page, specify a name for your VM and click Save .
- Click the Play icon next to your new VM to boot it from the virtual DVD ISO image. Some distributions validate the checksum of the DVD first. If you see a black window with the UTM logo in it for a few minutes, be patient — your Linux installer will start after the checksum is verified.
- Install your Linux distribution as you normally would. The virtual hard disk file show up as /dev/vda instead of /dev/sda because we’re using the very fast VirtIO interface instead of emulating a SCSI, SATA or NVMe interface.
During the Linux installation, you’ll be prompted to create a regular user account (e.g. jason). While this first user account is automatically added to the wheel or sudo group on your Linux distribution to allow it to run administrative commands as the root user, you should set the root user password following installation using the sudo passwd root command.
If you are a developer that needs a local Linux server for testing your Web apps, you’ll need to install additional software packages. For example, to install the Apache Web server, Very Secure FTP daemon (for uploading files), MySQL/MariaDB database server, and PHP (including the most useful plugins) on an Ubuntu Server, you could switch to the root user ( su — ) and run the following commands:
apt update apt upgrade apt install apache2 vsftpd mysql-server mysql_secure_installation #Configure your MySQL settings and password apt install php libapache2-mod-php php-mysql phpmyadmin php-mbstring php-zip php-gd php-json php-curl vi /etc/apache2/mods-enabled/dir.conf #Add index.php to the DirectoryIndex line systemctl restart apache2 How to access Linux server using SSH in Windows, Linux and Mac OS.

1. Download PuTTY or another PuTTY download source from URL https://the.earth.li/~sgtatham/putty/latest/w64/putty.exe . The file called «putty.exe» is perfect for simple SSH.
2. Save and download software in your Windows system.
3. To launch the application, double-click the putty.exe file.

4. Enter the settings of your connection

- Enter the server ip address or hostname .
- Port: 22 ( leave as default if SSH port is default)
- Connection Type: SSH (leave as default)
5. Click Open to start the SSH session.
6. If this is the first time you are connecting to the server on this computer, you will see the following output. Please accept the connection by clicking Yes .

7. Once the SSH Connection has been opened, you should see the terminal prompt asking for your username :

8. Next, please enter your password . Please note that you will NOT see your cursor moving or any typed characters (such as * * * * * *) when you type your password. This is a standard security feature of the PUTTY. Hit get in.
9. You are logged in to your SSH server now. You will see output like this.
[email protected]’s password:
Last failed login: Sat Apr 25 17:03:02 IST 2020 from IP on ssh:notty
There were 2 failed login attempts since the last successful login.
Last login: Sat Apr 25 16:57:08 2020 from IP
[[email protected] ~]
Part 2: Access Linux server using SSH in Linux Ubuntu
1. If you have ubuntu desktop. Go to Search bar and type «Terminal».

2. Now terminal will open and you need to enter the following command on terminal.

3. You need to enter the password of SSH user of your server.
4. Now you have connected your linux server on your ubuntu desktop using terminal and you will get outpout like this:
Part 2: Access Linux server using SSH in Mac OS
1. If you have Mac OS. Go to Search bar and type «Terminal».

2. Now terminal will open and you need to enter following command on terminal.

3. You need to enter the password of SSH user of your server.
4. Now you have connected your linux server on your Mac OS using terminal and you will get outpout like this:
SSH Connect to Linux Server from a Mac using SOCKS5 Proxy

I’ve been spending a lot of time lately in setting up on-premises Linux Servers. There are a lot of reasons why you would like to SSH to a Linux server such as checking configuration files, copying files, or even port forwarding.
Just open your MacOS terminal and the command to ssh to a Linux Server is as simple as:
ssh user@host or ssh michael@192.0.0.1
However, where it gets tricky is when you need to use a proxy such as SOCKS5 in order to access that Linux server from your MacOS machine.
Installation
I ended up using ssh-connect which can easily be installed using Homebrew.
Useful Commands
Set SOCKS5 Password
Now in order to use a proxy such as SOCKS5, it’s best to export the password prior to the SSH command, otherwise you will end up typing this password repeatedly.
SSH session
Now to start an SSH session to that Linux server, use the following command:
ssh -o ‘ProxyCommand=/usr/local/bin/connect -S michael-px@sshproxydomain:1080 %h %p’ michael-vm@192.0.0.1
michael-px is my user under the SOCKS5 proxy. The password was set from above “SOCKS5_PASSWORD”. 1080 is the port used by the SOCKS5 proxy.
michael-vm is my user inside the Linux VM. 192.0.0.1 is the IP address of the VM.
Port Forwarding
To port forward from the Linux server to your localhost (MacOS), use the following command:
ssh -o ‘ProxyCommand=/usr/local/bin/connect -S michael-px@sshproxydomain:1080 %h %p’ michael-vm@192.0.0.1 -L 8888:localhost:80
It’s very similar to the SSH session command but added with -L 8888 to point that it’s the “localhost:8888” of the server and it forwards the traffic to the MacOS’ localhost:80 or 127.0.0.1:80.
This is very useful whenever you are debugging or testing a deployed service or website inside that Linux VM.
Copy files via SSH
To copy files from your MacOS machine to the Linux server, use the following command:
scp -o ‘ProxyCommand=/usr/local/bin/connect -S michael-px@sshproxydomain:1080 %h %p’ FROM_FILE_DIRECTORY michael-vm@192.0.0.1:~/TO_FILE_DIRECTORY
Instead of using ssh, this time you are using the scp command. the FROM_FILE_DIRECTORY can be something like ./myfile.zip and the TO_FILE_DIRECTORY can be /mnt/hdd1/file-drops
Note that it could also work the other way around (from Linux Server to MacOS local machine).
Conclusion
The world of Linux and command lines are wonderful and very flexible. There are more things you can do once you’re inside the server. Happy SSH-ing!